Home>Production & Technology>Soundproofing>What Is The Best Soundproofing Panels For Home?
Soundproofing
What Is The Best Soundproofing Panels For Home?
Published: January 27, 2024
Discover the best soundproofing panels for your home to reduce noise and create a peaceful environment. Achieve maximum sound insulation with these top-rated soundproofing solutions.
(Many of the links in this article redirect to a specific reviewed product. Your purchase of these products through affiliate links helps to generate commission for AudioLover.com, at no extra cost. Learn more)
Table of Contents
- Introduction
- Types of Soundproofing Panels
- Acoustic Foam Panels
- Fabric-wrapped Panels
- Wooden Soundproofing Panels
- Soundproofing Wallpaper
- Soundproofing Curtains
- Soundproofing Tiles
- Factors to Consider when Choosing Soundproofing Panels
- Noise Reduction Coefficient (NRC)
- Installation Method
- Aesthetics
- Budget
- Installation Process for Soundproofing Panels
- Prepare the Surface
- Measure and Cut Panels
- Apply Adhesive or Mounting Hardware
- Install Panels
- Maintenance and Care Tips for Soundproofing Panels
- Conclusion
Introduction
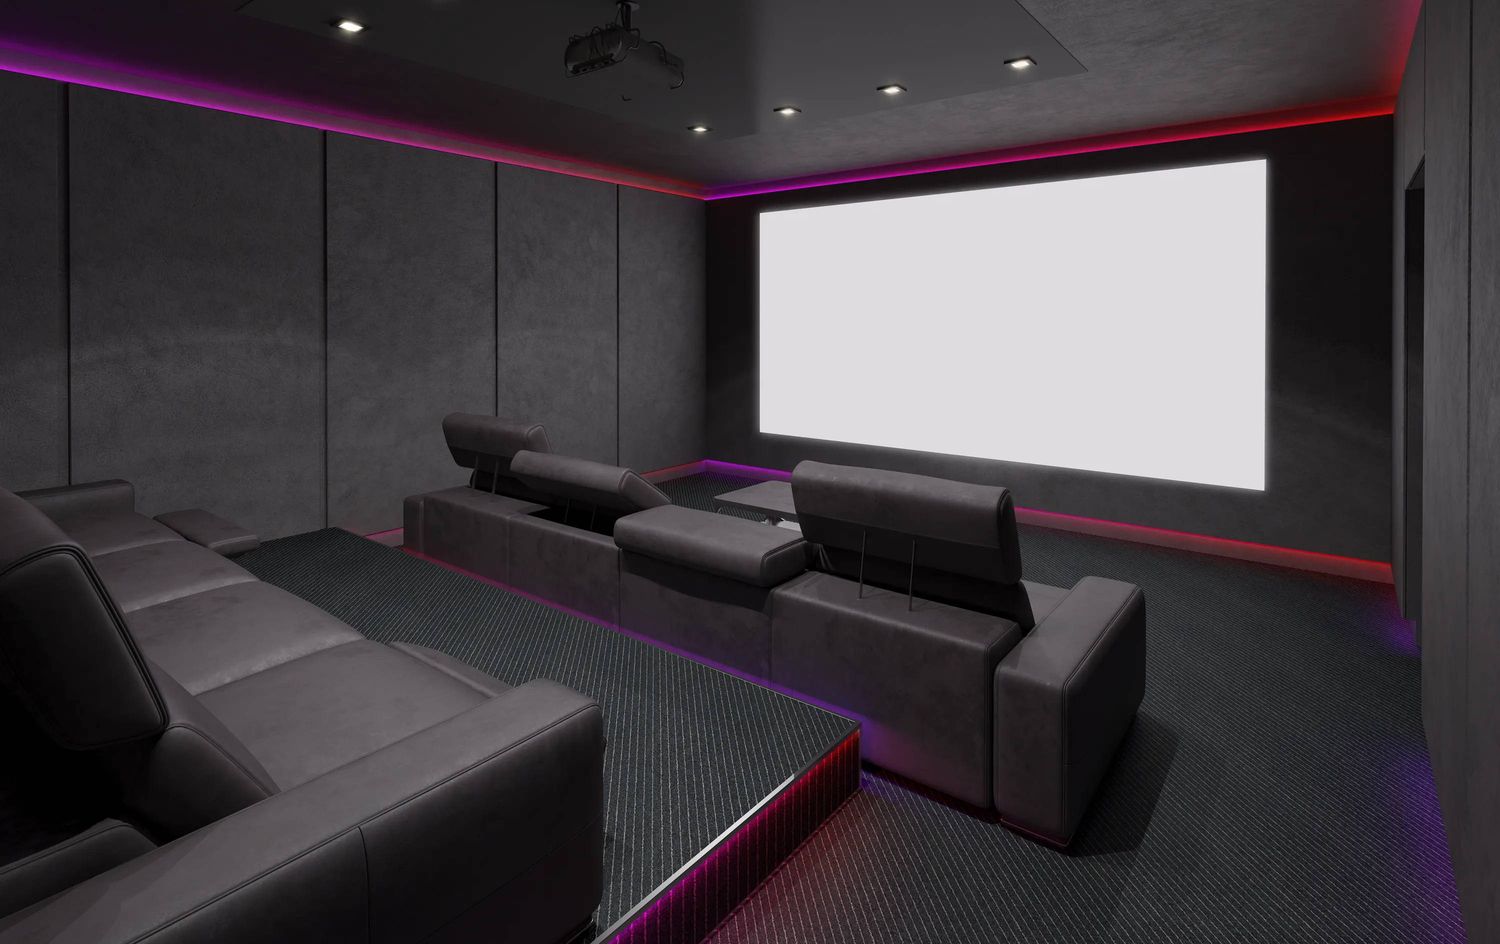
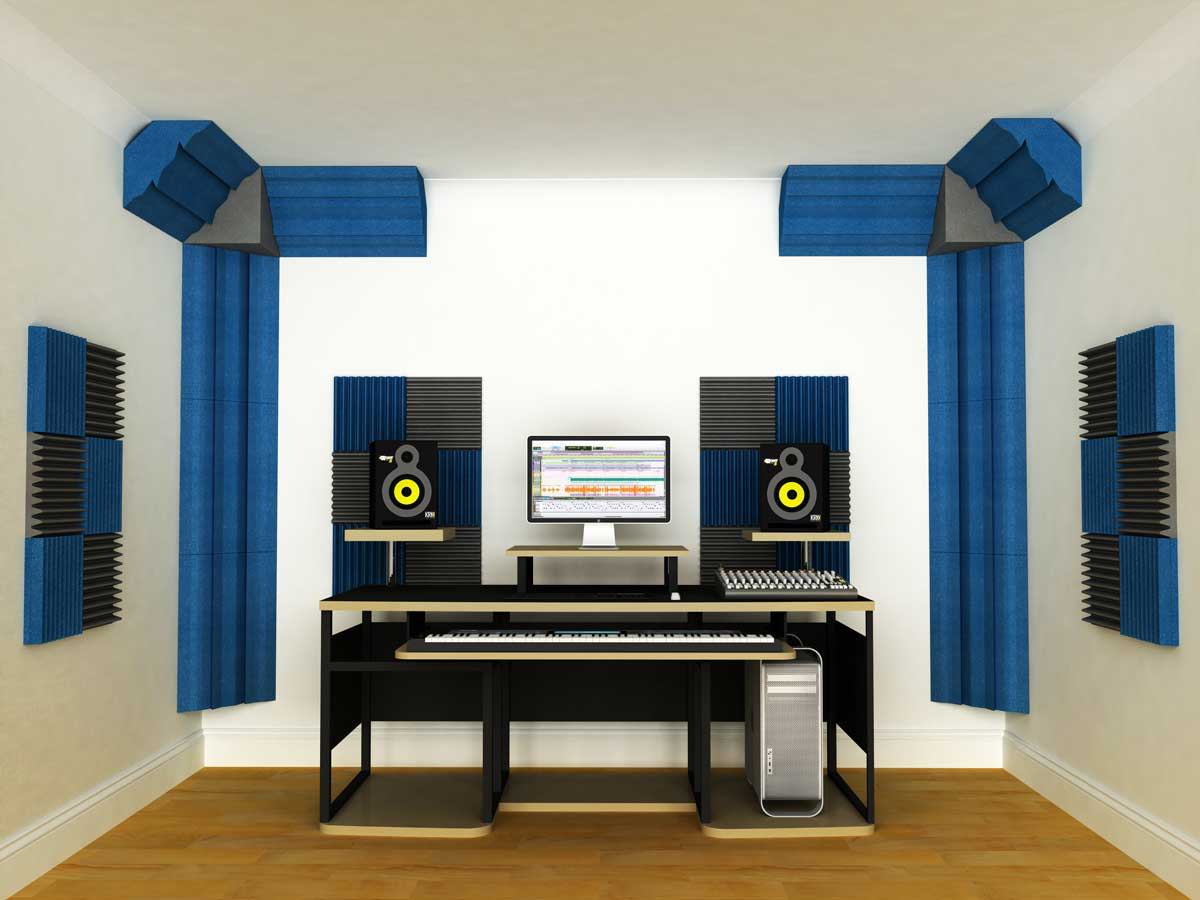
When it comes to creating a peaceful and quiet environment in your home, soundproofing panels can be a game-changer. Whether you live in a noisy neighborhood, have thin walls, or want to soundproof a home theater or recording studio, these panels are designed to minimize and absorb noise, providing you with the tranquility you deserve.
Soundproofing panels are specialized materials that are designed to reduce and control sound vibrations. They can be installed on walls, ceilings, doors, or windows to block and absorb sound waves, helping to create a quieter and more comfortable living space. These panels are available in a variety of types and materials, each with its own unique set of features and benefits.
In this article, we will delve into the different types of soundproofing panels available on the market and discuss their characteristics, advantages, and disadvantages. We will also provide you with some key factors to consider when choosing the best soundproofing panels for your home and guide you through the installation process. By the end, you’ll have all the knowledge you need to make an informed decision and create a peaceful oasis in your home.
Types of Soundproofing Panels
When it comes to soundproofing panels, there are several different types available on the market. Each type is designed to address specific soundproofing needs and offers its own set of benefits. Here are some of the most common types of soundproofing panels:
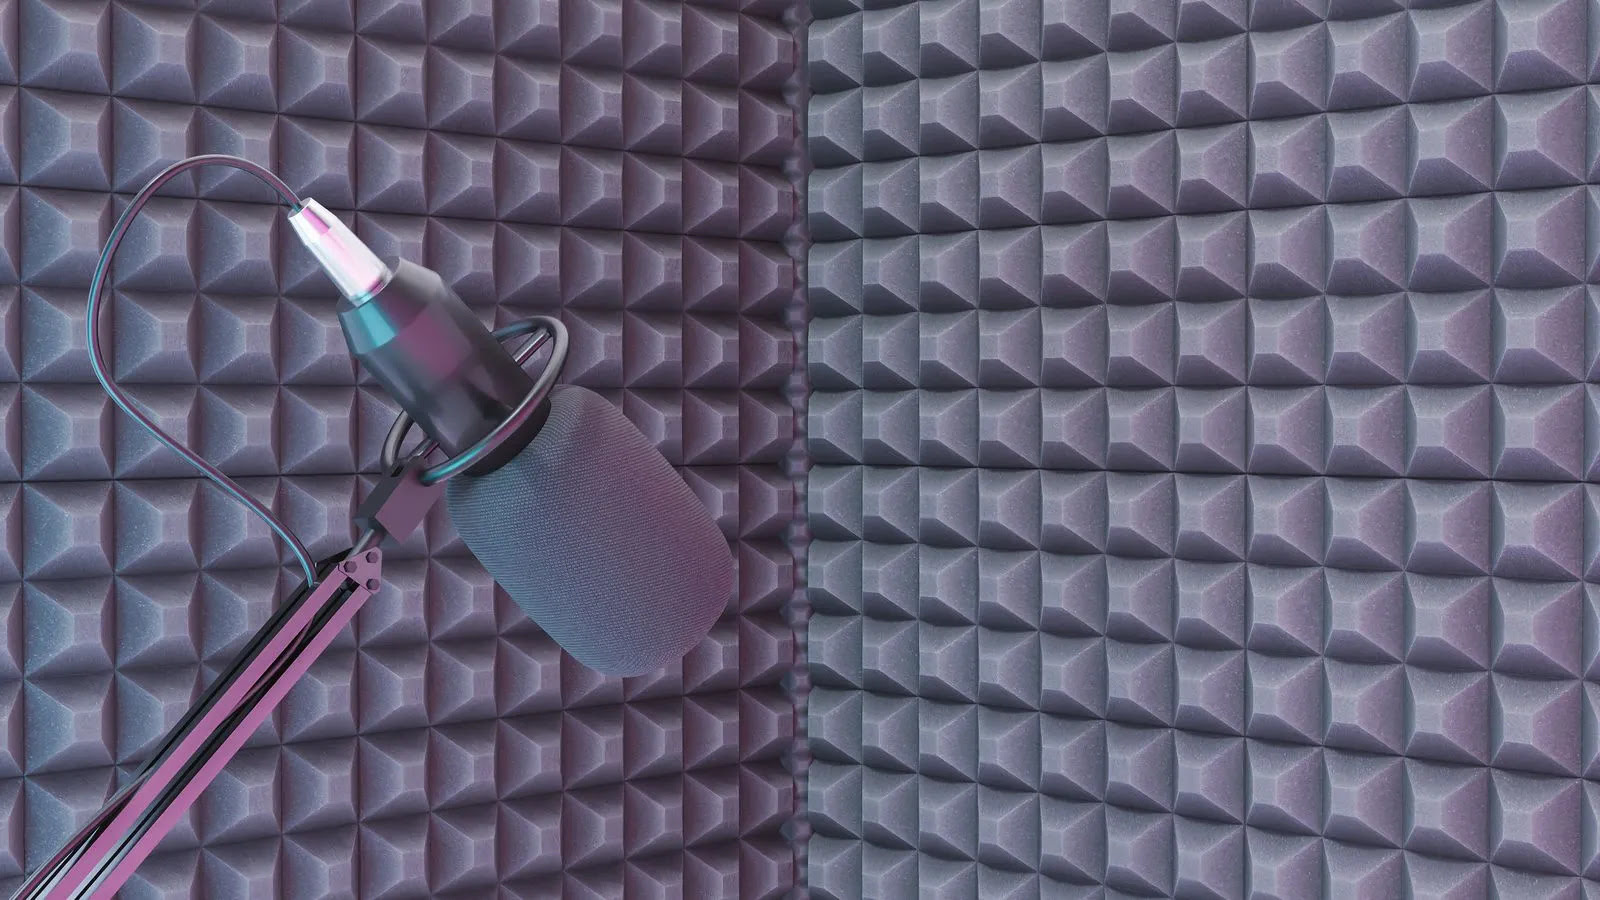
- Acoustic Foam Panels: Acoustic foam panels are lightweight and flexible panels made from open-cell foam. They are designed to absorb sound waves by converting them into heat energy. These panels are often used in recording studios, home theaters, and offices to reduce echo, reverberation, and noise reflections. Acoustic foam panels are available in various sizes, shapes, and thicknesses to cater to different soundproofing needs.
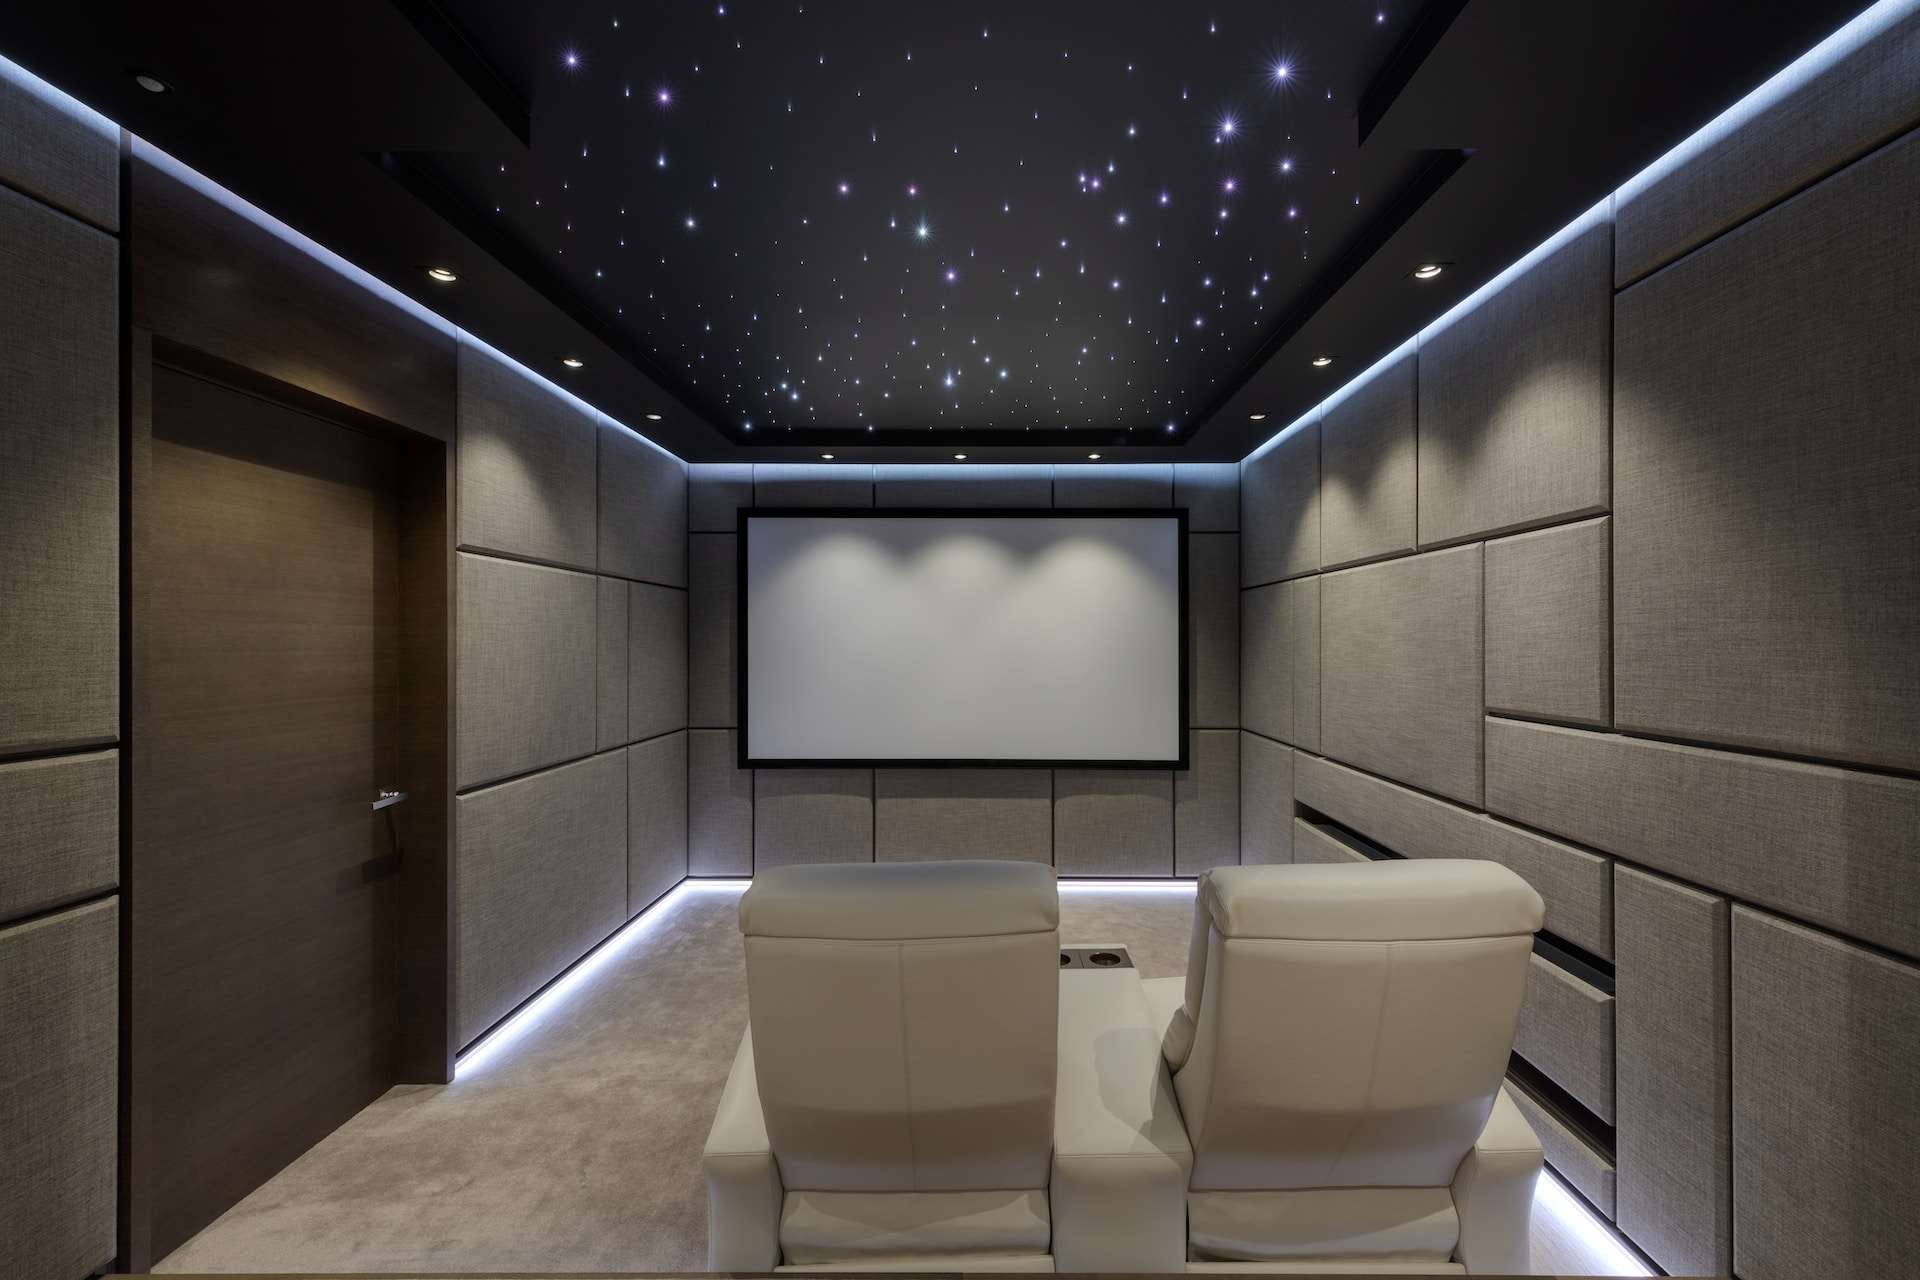
- Fabric-wrapped Panels: Fabric-wrapped panels, also known as fabric-covered panels, consist of a rigid core material, such as fiberglass or rockwool, wrapped in an acoustically transparent fabric. They are excellent at absorbing sound and are commonly used in home theaters and music rooms. These panels not only provide effective soundproofing but also add a touch of elegance to any room, as they can be customized with different fabric colors and patterns.
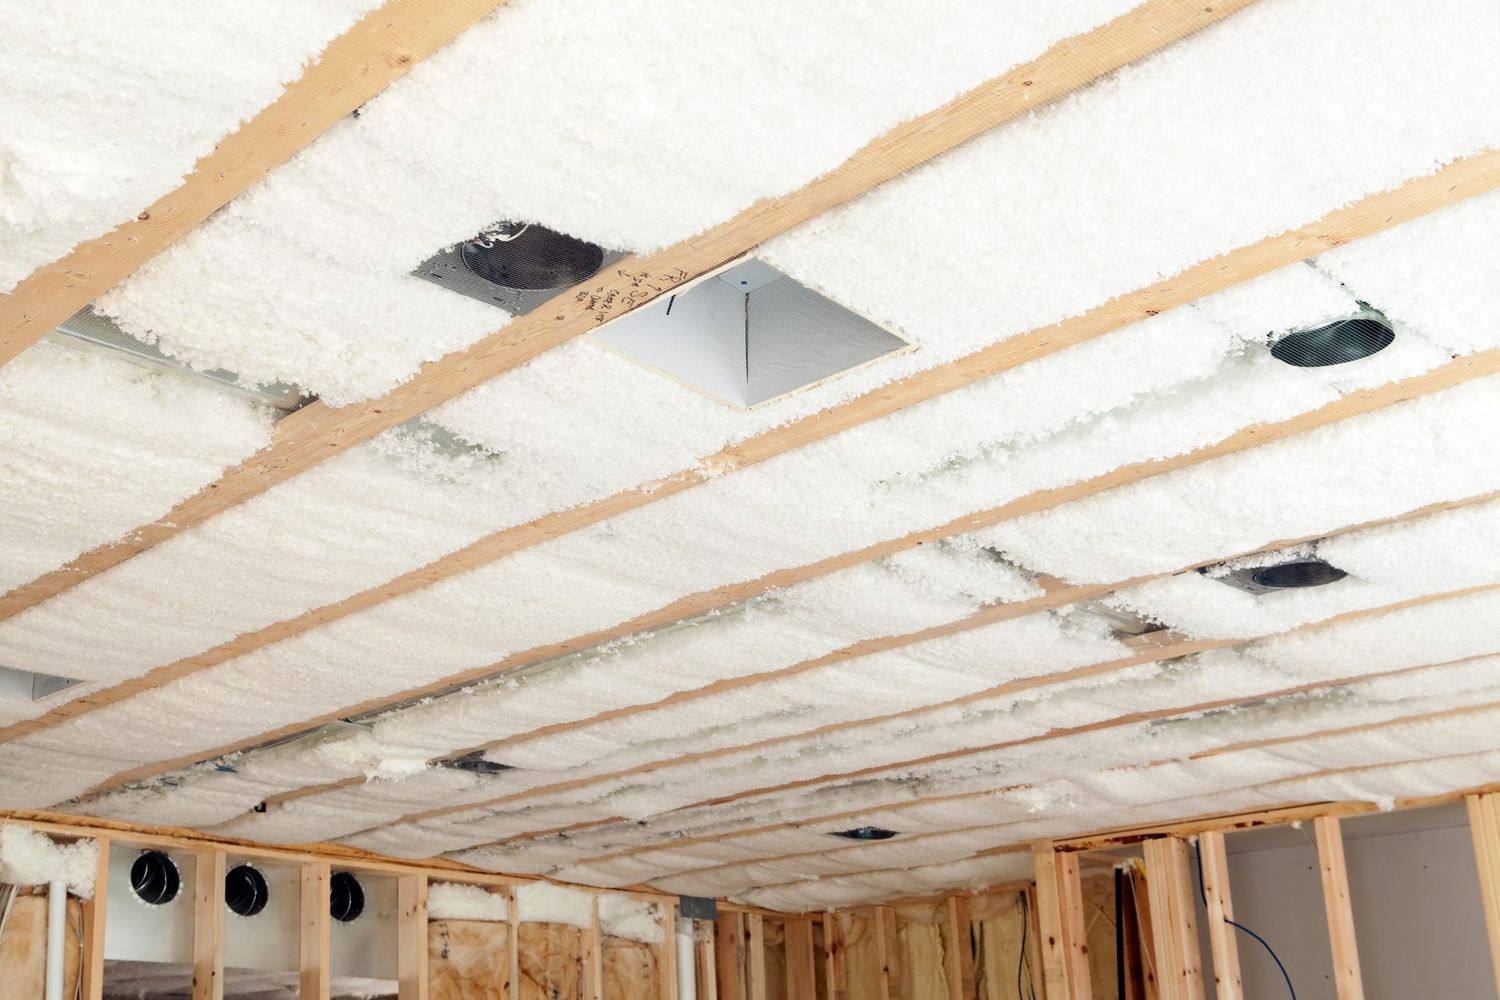
- Wooden Soundproofing Panels: Wooden soundproofing panels are made from dense wood materials, such as medium-density fiberboard (MDF) or plywood, which are excellent at blocking airborne sound transmission. These panels are often used in soundproofing walls, ceilings, and floors to reduce noise leakage. They can be painted or stained to match the existing décor of a room, making them a popular choice for both residential and commercial applications.
- Soundproofing Wallpaper: Soundproofing wallpaper, also known as acoustic wallpaper, is a thin layer of specially designed wallpaper that contains sound-absorbing materials. It is an easy and cost-effective solution for reducing noise in residential and commercial spaces. Soundproofing wallpaper can be applied directly to walls and helps to dampen sound vibrations, resulting in a quieter and more comfortable environment.
- Soundproofing Curtains: Soundproofing curtains are heavy and dense curtains that are specifically designed to block and absorb sound. They are typically made with multiple layers of thick fabric, including a layer of mass-loaded vinyl (MLV) or fiberglass. Soundproofing curtains not only help to reduce noise but also provide thermal insulation and light control.
- Soundproofing Tiles: Soundproofing tiles, also known as acoustic ceiling tiles, are designed to reduce noise reflections and improve sound absorption in rooms with high ceilings. These tiles are made from lightweight materials, such as mineral wool or foam, and are installed on ceiling surfaces. They are commonly used in offices, conference rooms, and educational facilities to create a quieter and more productive environment.
Each type of soundproofing panel has its own advantages and is suitable for different soundproofing needs. Consider your specific requirements, budget, and aesthetic preferences when choosing the best soundproofing panels for your home.
Acoustic Foam Panels
Acoustic foam panels are a popular choice for soundproofing applications, especially in recording studios, home theaters, and offices. These lightweight and flexible panels are made from open-cell foam, which is designed to effectively absorb sound waves.
The primary function of acoustic foam panels is to reduce echo, reverberation, and noise reflections in a room. When sound waves hit the foam panels, they penetrate into the open-cell structure, where they get trapped and converted into heat energy. This absorption of sound helps to create a more acoustically balanced and controlled environment.
One of the key advantages of acoustic foam panels is their versatility. They come in various sizes, shapes, and thicknesses, allowing for customization and flexibility in installation. Whether you want to cover an entire wall or just a specific area, acoustic foam panels can be easily cut and shaped to fit your needs.
Additionally, acoustic foam panels are relatively easy to install. They can be adhered directly to walls or ceilings using specialized acoustic adhesive or mounting hardware. Some panels even come with self-adhesive backing for hassle-free installation. This makes them a convenient option for DIY enthusiasts.
It is important to note that acoustic foam panels are primarily designed for sound absorption, which means they may not provide significant sound blocking capabilities. If your goal is to block sound from entering or leaving a room, you may need to consider other types of soundproofing panels that offer better soundproofing properties.
When choosing acoustic foam panels, consider the thickness and density of the foam. Thicker panels generally offer better sound absorption, especially for lower frequencies, while denser foam panels provide improved noise reduction.
In terms of aesthetics, acoustic foam panels are available in different colors and designs, allowing you to integrate them seamlessly into your room décor. Whether you prefer a subtle and discreet look or want to make a bold statement, there are plenty of options to choose from.
Overall, acoustic foam panels are an effective and cost-efficient solution for soundproofing rooms that require sound absorption. They provide excellent acoustical control, helping to create a more pleasant and immersive audio experience.
Fabric-wrapped Panels
Fabric-wrapped panels, also known as fabric-covered panels, are a popular choice for soundproofing applications in home theaters, music rooms, and conference spaces. These panels consist of a rigid core material, such as fiberglass or rockwool, that is wrapped in an acoustically transparent fabric.
The main function of fabric-wrapped panels is to absorb sound waves and reduce echo and reverberation in a room. The rigid core material acts as a sound absorber, while the fabric covering provides a clean and aesthetically pleasing finish.
One of the key advantages of fabric-wrapped panels is their superior sound absorption capabilities. The combination of the dense core material and the fabric covering helps to effectively trap and dampen sound waves, resulting in a more controlled and acoustically balanced environment.
Another benefit of fabric-wrapped panels is their versatility in design. They are available in various shapes, sizes, and designs, allowing for customization and integration into any interior decor. Whether you prefer a sleek and modern look or something more colorful and vibrant, there are fabric options to suit every taste.
Installation of fabric-wrapped panels is relatively straightforward. They can be easily mounted on walls using screws or adhesive, or hung from the ceiling using appropriate hardware. Some panels even come with built-in mounting systems for hassle-free installation.
One aspect to consider when choosing fabric-wrapped panels is the fabric type. Opt for acoustically transparent fabrics that allow sound waves to pass through easily without hindering their absorption. Additionally, select fabrics that are durable and easy to clean, as they may be subject to regular wear and tear.
It’s worth noting that fabric-wrapped panels primarily focus on absorbing sound and improving acoustics in a room, rather than blocking external noise. If your main goal is to block sound transmission, you may need to combine fabric-wrapped panels with other soundproofing solutions, such as thick curtains or acoustic doors.
In summary, fabric-wrapped panels offer excellent sound absorption capabilities while adding a touch of elegance to any space. They provide a versatile and customizable solution for achieving optimal acoustics in home theaters, music rooms, and other sound-sensitive areas.
Wooden Soundproofing Panels
Wooden soundproofing panels are a popular choice for individuals looking to block and reduce airborne sound transmission in their homes or workplaces. These panels are typically constructed using dense wood materials, such as medium-density fiberboard (MDF) or plywood, which are effective at blocking sound waves.
The main advantage of wooden soundproofing panels is their ability to significantly reduce noise leakage. When properly installed, these panels act as a barrier, preventing sound from entering or leaving a room. This makes them an ideal choice for spaces where privacy and noise control are paramount, such as bedrooms, offices, or conference rooms.
Wooden soundproofing panels can be painted or stained to match the existing decor of a room, providing a seamless integration into the overall design. They offer a natural and timeless aesthetic that can complement a variety of interior styles, from modern to traditional.
Installation of wooden soundproofing panels typically involves attaching them to walls, ceilings, or floors using screws, nails, or adhesive. It is important to ensure a tight and secure fit to maximize their soundproofing effectiveness.
One consideration when using wooden soundproofing panels is their thickness. Thicker panels tend to offer better sound blocking capabilities, especially for low-frequency noise. However, keep in mind that larger thicknesses may require additional space and can potentially impact the overall room dimensions.
While wooden soundproofing panels are effective at blocking sound, they are less suited for sound absorption. As a result, they may contribute to a more reflective acoustic environment. To achieve the ideal balance between sound absorption and sound blocking, it is common to combine wooden panels with other soundproofing materials, such as acoustic foam or fabric-wrapped panels.
Overall, wooden soundproofing panels provide a sturdy and visually appealing solution for reducing noise transmission. By effectively blocking sound, they help create a more peaceful and private atmosphere in your home or workspace.
Soundproofing Wallpaper
Soundproofing wallpaper, also known as acoustic wallpaper, is a thin layer of specially designed wallpaper that contains sound-absorbing materials. It is an innovative solution for reducing noise in residential and commercial spaces.
The primary function of soundproofing wallpaper is to dampen sound vibrations, resulting in a quieter and more comfortable environment. The wallpaper is typically made using a combination of materials, including foam or fiber-based layers that absorb and dissipate sound waves.
One of the key advantages of soundproofing wallpaper is its ease of installation. It can be applied directly to walls, just like traditional wallpaper, using standard wallpaper adhesive. This makes it a convenient option for both DIY enthusiasts and professionals.
Soundproofing wallpaper offers a versatile solution for soundproofing various areas in your home, such as bedrooms, living rooms, or home offices. It effectively reduces noise transmission through walls, helping to create a more peaceful and serene living space.
In addition to soundproofing benefits, this type of wallpaper also provides thermal insulation properties. It can help regulate room temperature, leading to energy savings and increased comfort.
When selecting soundproofing wallpaper, it is important to consider the sound reduction capabilities of the specific product. Look for wallpaper with a higher Sound Transmission Class (STC) or Noise Reduction Coefficient (NRC) rating, as they indicate better soundproofing performance.
It’s worth noting that while soundproofing wallpaper can help reduce noise, it may not provide the same level of soundproofing as other methods, such as wall insulation or soundproofing panels. For optimal results, it may be beneficial to combine soundproofing wallpaper with additional soundproofing techniques for better noise reduction.
Soundproofing wallpaper is available in a range of designs and textures, allowing you to enhance the aesthetic appeal of your space. Whether you prefer a subtle and neutral look or a bold and vibrant pattern, you can find a design that matches your personal style.
In summary, soundproofing wallpaper is a convenient and cost-effective solution for reducing noise in residential and commercial spaces. With its easy installation and sound-damping properties, it can significantly improve the overall acoustic quality of a room while adding a touch of style.
Soundproofing Curtains
Soundproofing curtains are heavyweight and dense curtains designed to block and absorb sound waves, making them an excellent choice for noise reduction in various spaces. These curtains are made with multiple layers of thick fabric, often incorporating a layer of mass-loaded vinyl (MLV) or fiberglass.
The primary function of soundproofing curtains is to create a barrier that blocks external noise from entering a room or prevents sound from escaping. The dense layers of fabric act as sound absorbers, capturing and dampening sound waves, resulting in a quieter and more peaceful environment.
One of the key advantages of soundproofing curtains is their versatility. They can be easily installed in any room using standard curtain rods or tracks, making them a practical and accessible solution for soundproofing. They are especially beneficial in spaces such as bedrooms, home theaters, or offices where privacy and noise control are important.
In addition to soundproofing, these curtains offer other benefits as well. They provide thermal insulation, helping to regulate the temperature of a room and reduce energy costs. Furthermore, soundproofing curtains can also block light, creating a darker and more conducive environment for sleep or media viewing.
When choosing soundproofing curtains, it is important to consider the thickness and density of the fabric. Thicker and heavier curtains generally provide better soundproofing properties. Opting for curtains with multiple layers or those specifically designed for soundproofing can further enhance their effectiveness.
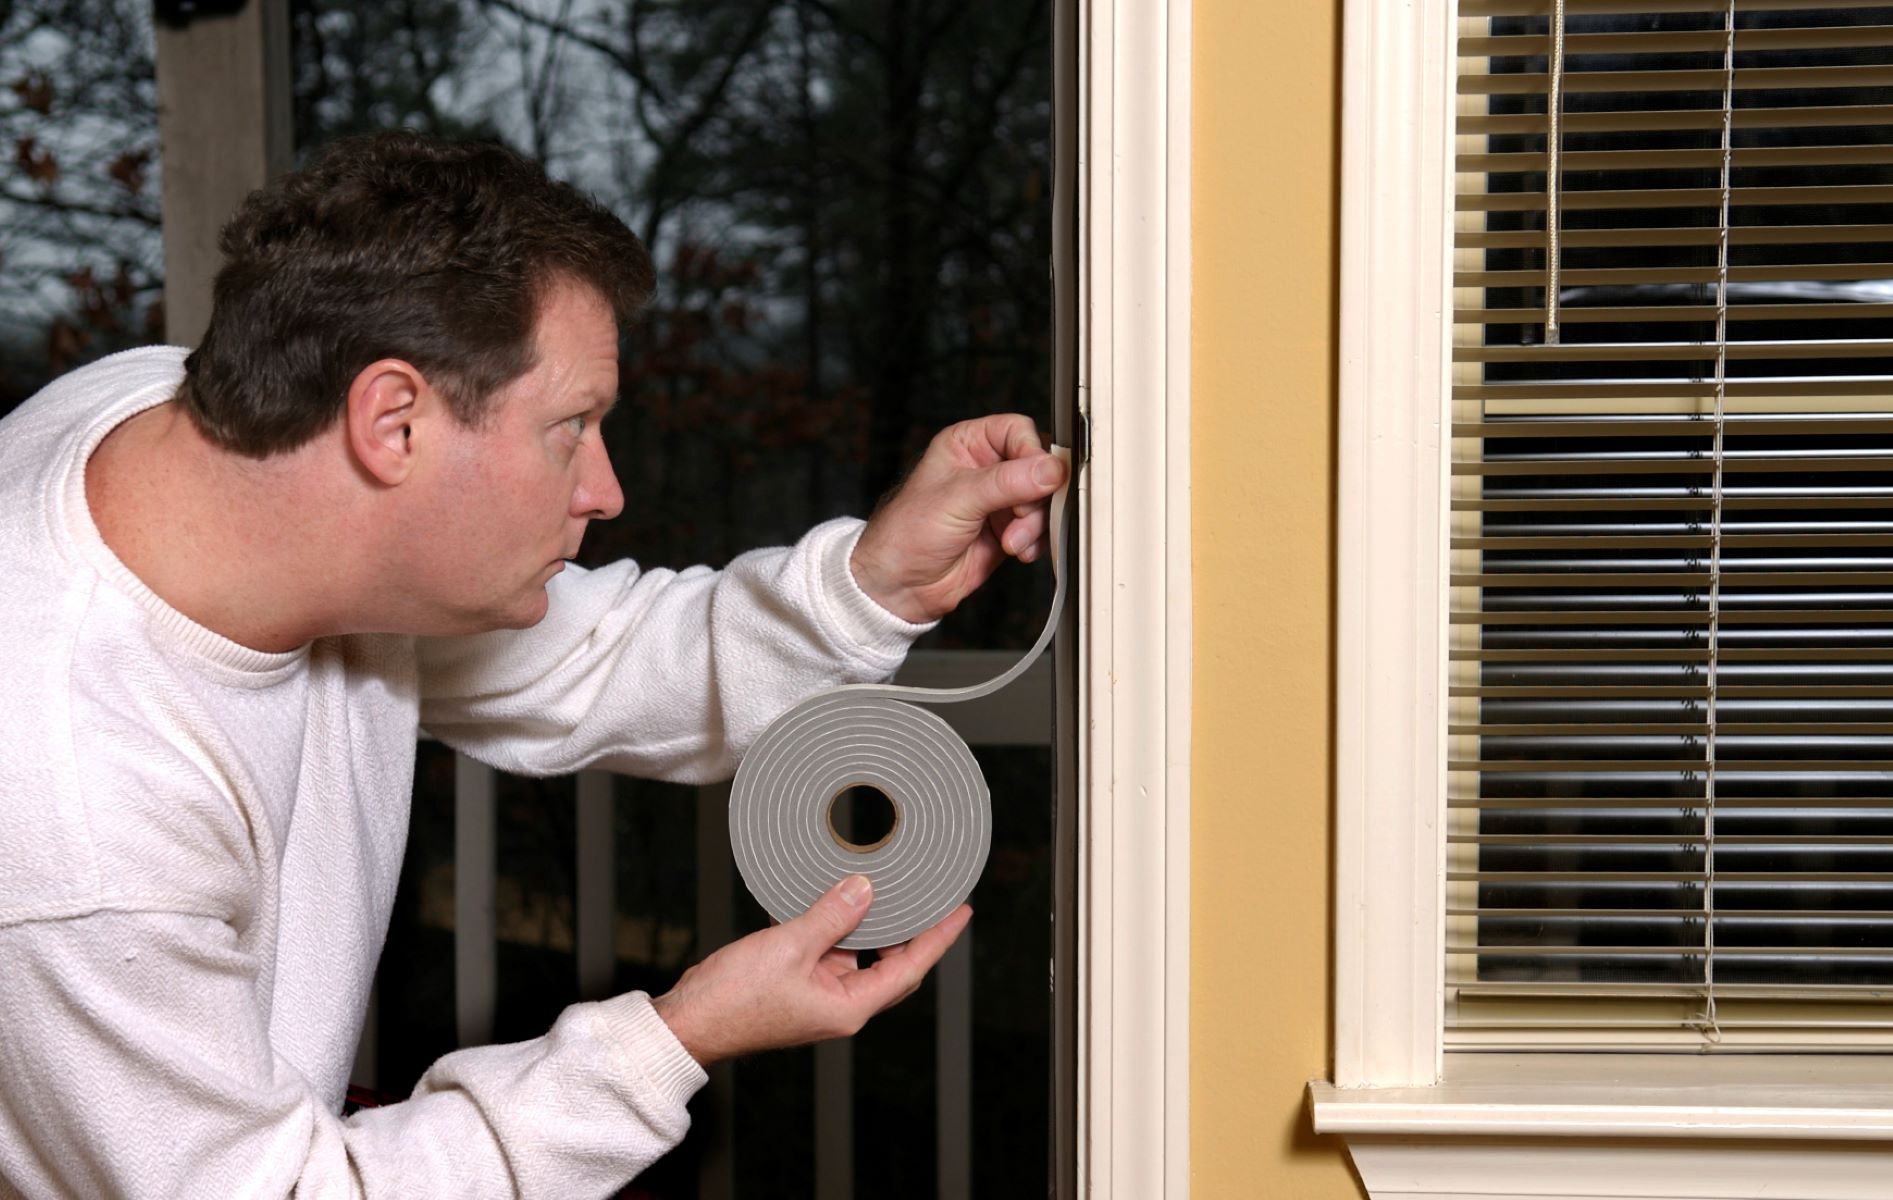
While soundproofing curtains are effective at reducing noise, it is essential to keep in mind that they work best in conjunction with other soundproofing methods. Combining them with other solutions, such as acoustic panels or sealing gaps and cracks in walls, can maximize their effectiveness in blocking sound transmission.
Soundproofing curtains are available in a variety of styles, colors, and designs, allowing for customization to suit different interior aesthetics. You can choose curtains that seamlessly blend with your existing decor or make a bold statement with vibrant patterns or textures.
In summary, soundproofing curtains offer a practical and versatile solution for reducing noise in residential and commercial spaces. With their easy installation and ability to block sound, they provide an effective way to create a more peaceful and comfortable environment while enhancing the overall decor of a room.
Soundproofing Tiles
Soundproofing tiles, also known as acoustic ceiling tiles, are designed to improve sound absorption and reduce noise reflections in rooms with high ceilings. These tiles are typically made from lightweight materials, such as mineral wool or foam, and are installed on the ceiling surface.
The primary function of soundproofing tiles is to enhance acoustics by reducing sound reflections and reverberations. When sound waves hit the tiles, they are absorbed and dampened within the porous structure of the material, resulting in a more balanced and controlled sound environment.
Soundproofing tiles are commonly used in offices, conference rooms, educational facilities, and commercial spaces to create a quieter and more productive environment. They can help improve speech intelligibility, reduce echo, and enhance overall sound quality in these areas.
One of the key advantages of soundproofing tiles is their ease of installation. They are designed to fit into standard suspended ceiling grids, making them a convenient option for both new construction and retrofit projects. The installation process involves simply dropping the tiles into the framework, allowing for quick and hassle-free setup.
Soundproofing tiles are available in various sizes, patterns, and finishes to suit different design preferences and acoustic requirements. Some tiles even come with decorative surface options, allowing for aesthetic customization while maintaining sound absorption properties.
It’s important to note that while soundproofing tiles are effective in improving sound absorption within a room, they may have limited sound blocking capabilities. If your goal is to block sound transmission between rooms or floors, additional soundproofing methods such as wall insulation or door seals may be necessary.
An advantage of soundproofing tiles is their low maintenance requirements. They are resistant to moisture, mold, and mildew, ensuring longevity and durability. Furthermore, they can be easily cleaned with regular dusting or by using a soft brush attachment on a vacuum cleaner.
In summary, soundproofing tiles offer a practical and efficient solution for enhancing acoustics in rooms with high ceilings. They can help reduce echo, control sound reflections, and create a more comfortable and productive environment in offices, schools, and various commercial spaces.
Factors to Consider when Choosing Soundproofing Panels
When selecting soundproofing panels for your specific needs, there are several important factors to consider. These factors will help guide you towards choosing the right panels that meet your requirements and deliver optimal soundproofing results. Here are some key factors to keep in mind:
- Noise Reduction Coefficient (NRC): The NRC rating measures the sound absorption capabilities of a material. Look for panels with a higher NRC rating, as they will be more effective at absorbing and reducing sound.
- Installation Method: Consider how the panels will be installed. Some panels can be easily adhered to the wall using adhesive, while others may require mounting hardware or a specific installation technique. Choose panels that align with your installation skills and preferences.
- Aesthetics: Soundproofing panels come in a variety of designs, colors, and materials. Consider the aesthetic impact of the panels on your space and choose options that blend well with your existing decor or can be customized to suit your style.
- Budget: Determine your budget for soundproofing and choose panels that fall within your price range. Keep in mind that different materials and brands may vary in cost, so be sure to compare prices and consider the longevity and effectiveness of the panels.
- Soundproofing Needs: Assess the specific soundproofing needs of your space. Are you primarily concerned with reducing external noise or controlling sound reflections within the room? Different types of panels have varying abilities in sound absorption, sound blocking, or both.
- Room Function: Consider the function and purpose of the room. For example, if you are creating a home theater, you may want to prioritize sound absorption for better acoustics. On the other hand, a home office may require sound-blocking capabilities to minimize distractions.
- Fire Safety: Check if the soundproofing panels meet fire safety regulations, especially if you are installing them in commercial or public spaces. Look for panels that are fire-resistant or have fire-rated certifications.
By carefully considering these factors, you can select soundproofing panels that align with your specific needs, budget, and aesthetic preferences. Remember, there is no one-size-fits-all solution, so it’s important to find the right balance between functionality, performance, and design to achieve an optimal soundproofing outcome.
Noise Reduction Coefficient (NRC)
When choosing soundproofing panels, one of the most important factors to consider is the Noise Reduction Coefficient (NRC) rating. The NRC rating measures the effectiveness of a material in absorbing sound waves and reducing noise levels within a given space.
The NRC rating ranges from 0 to 1, with higher values indicating better sound absorption capabilities. For example, a material with an NRC rating of 0.8 will absorb 80% of the sound that strikes its surface, while only reflecting or transmitting 20% of the sound.
The NRC rating takes into account the sound absorption properties of a material across different frequencies. It is determined through laboratory testing and evaluation based on the ASTM C423 standard. This standard measures how much sound energy is absorbed by a material in a controlled acoustic environment.
When choosing soundproofing panels, look for panels with a higher NRC rating, as they will provide better sound absorption and help create a quieter and more acoustically balanced environment. However, it is important to note that the NRC rating alone does not indicate the panel’s ability to block or isolate sound. It primarily measures the panel’s effectiveness in absorbing sound within a space.
It is also important to consider the specific sound frequencies that need to be addressed in your space. Different panel materials and designs have varying abilities to absorb different frequency ranges. For example, some panels may be more effective at absorbing high-frequency sounds like voices and instruments, while others may be better suited to absorbing low-frequency sounds like rumbling bass.
Keep in mind that soundproofing panels with a high NRC rating may not always be suitable for every application. For instance, if you are looking to block sound transmission through walls or create a soundproof barrier, you may need to consider other factors like sound transmission class (STC) rating or the panel’s ability to attenuate sound.
In summary, the NRC rating is an important consideration when selecting soundproofing panels. It indicates the material’s ability to absorb sound within a space, contributing to better acoustics and reduced noise levels. However, it is just one factor to consider alongside other criteria such as STC rating and specific soundproofing needs to achieve the desired level of sound control and isolation.
Installation Method
When choosing soundproofing panels, it is essential to consider the installation method. The installation process not only affects the ease and convenience of the setup but also determines the effectiveness and durability of the soundproofing solution. Here are some key points to consider regarding the installation method:
Adhesive Installation: Many soundproofing panels can be installed using adhesive. This method involves applying a specialized adhesive directly to the back of the panel and then firmly pressing it against the desired surface. Adhesive installation provides a strong and permanent bond, ensuring that the panels stay securely in place. It is a popular choice for DIY projects as it is relatively simple and does not require extensive tools or equipment.
Mounting Hardware: Some soundproofing panels come with built-in mounting hardware or brackets. This installation method involves attaching the mounting brackets to the wall or ceiling and then affixing the panels onto the brackets. Mounting hardware offers a secure and adjustable installation, allowing for easy removal and repositioning of the panels if needed. It is particularly useful for panels that may require occasional access behind them, such as in acoustic treatment for home theaters or recording studios.
Hanging: In certain cases, soundproofing panels can be hung from a ceiling or suspended using cables or hooks. This installation method is commonly seen with fabric-wrapped panels or acoustic baffles. Hanging panels provide flexibility in terms of adjusting the height and position, making them suitable for spaces where customization is desired, such as open offices or multi-purpose rooms.
Combined Installation: It is worth noting that some soundproofing projects may require a combination of installation methods. For example, large or heavy panels may need to be mounted using hardware, while smaller panels or corner pieces can be adhered with adhesive. This flexibility allows for optimal installation based on the specific requirements of the space and the panels being used.
During the installation process, it is crucial to follow the manufacturer’s guidelines and recommendations. Ensure that the chosen installation method is compatible with both the panel material and the surface you are applying the panels to. Pay attention to any specific preparation steps, such as cleaning the surface or allowing adhesive to cure properly before mounting.
Additionally, proper installation plays a significant role in the long-term effectiveness and durability of the soundproofing panels. Take care to properly align and secure the panels, minimizing any gaps or spaces that could allow sound to leak through. This attention to detail will ensure that the panels perform optimally in reducing noise and enhancing the acoustics of the space.
In summary, selecting the appropriate installation method for soundproofing panels is essential for the overall success of your project. Consider the level of convenience, adjustability, and compatibility with the panel and surface material. By choosing the right installation method and following proper installation techniques, you can effectively soundproof your space and create a quieter and more comfortable environment.
Aesthetics
When choosing soundproofing panels, it is important to consider the aesthetics of the panels and how they will blend into your overall interior design. While the primary function of soundproofing panels is to reduce noise, they can also contribute to the visual appeal of a space. Here are some key points to consider regarding aesthetics when selecting soundproofing panels:
Design and Style: Soundproofing panels come in a variety of designs, styles, and materials. From sleek and modern to textured or patterned, there are various options to match different interior aesthetics. Consider the existing decor of your space and choose panels that seamlessly integrate or make a statement, depending on your desired look and feel.
Color: Soundproofing panels are available in a wide range of colors, allowing you to select panels that complement or contrast with your wall color and other furnishings. Whether you prefer neutral tones that blend discreetly or vibrant shades that add a pop of color, there are options to suit every preference.
Customization: Some soundproofing panels offer customization options, allowing you to personalize the appearance of the panels. This can include choosing a specific fabric for fabric-wrapped panels or even printing custom designs or artwork on the panels. Customization adds a unique touch to your soundproofing solution, making it a statement piece in your space.
Integration: Consider how the soundproofing panels will integrate into the overall layout of the room. Evaluate the placement of the panels to ensure that they do not disrupt the functionality of the space. For example, in a home theater, you might need to position panels without obstructing speaker placement or creating visual distractions.
Size and Thickness: The size and thickness of the panels can also affect the aesthetics. Thin and sleek panels may provide a more minimalistic appearance, while thicker panels can add depth and texture to the walls. Carefully consider the visual impact of different panel sizes and thicknesses in relation to the overall design of the room.
Remember, while aesthetics are important, they should not overshadow the primary purpose of the soundproofing panels, which is to reduce noise. Striking a balance between functionality and visual appeal will help you create a space that is both acoustically comfortable and visually pleasing.
In summary, aesthetics are an integral part of the soundproofing panel selection process. Consider the design, color, customization options, and integration of the panels to ensure they align with your overall interior design concept. By carefully selecting panels that complement your style and preferences, you can achieve a harmonious blend of functionality and aesthetics in your space.
Budget
When considering soundproofing panels for your space, it is important to establish a budget that aligns with your financial constraints. The cost of soundproofing panels can vary depending on factors such as the type of panel, the materials used, and the brand. Here are some key points to consider when budgeting for soundproofing panels:
Research: Begin by researching the different types of soundproofing panels available on the market and their associated costs. Compare prices from various suppliers or manufacturers to get an idea of the price range for different panel options.
Quality vs. Cost: Assess the quality and performance of the panels in relation to their price. While it’s tempting to opt for the least expensive option, it may not always provide the desired soundproofing capabilities or durability. Balancing quality with cost is essential to ensure you get panels that deliver effective noise reduction without sacrificing performance.
Consider Long-Term Value: While budgeting, also consider the long-term value of the soundproofing panels. Investing in higher-quality panels may initially incur a higher cost, but they can provide long-lasting results and greater durability, potentially saving you money on replacements or repairs in the future.
DIY vs. Professional Installation: Consider whether you will be installing the panels yourself or hiring a professional. DIY installation can potentially save you money on installation costs, but it may require more time and effort on your part. If you opt for professional installation, be sure to include the associated costs in your budget.
Quantity and Coverage: Determine the number of panels you will need based on the size of the area you want to soundproof. Calculate the square footage and consider the panel size and coverage area to estimate the quantity required. Be mindful of any additional costs such as edge trims, adhesives, or mounting hardware that may be necessary for proper installation.
Comparison Shopping: Take the time to compare prices and offerings from different suppliers or manufacturers. Look for any ongoing promotions, discounts, or bundle deals that may help you save money without compromising on quality.
Additional Costs: Consider any additional costs that may arise during the soundproofing process, such as removing existing wall coverings, repairing surfaces, or addressing any structural issues that affect soundproofing effectiveness. These costs should be factored into your budget to avoid any surprises or setbacks.
While it is important to establish a budget, prioritize finding a balance between quality and cost. Allocating a sufficient budget for soundproofing panels will help ensure that you get panels that effectively reduce noise while providing durability and long-term value.
In summary, before embarking on your soundproofing project, set a realistic budget based on your financial capabilities and needs. Evaluate the value, performance, and longevity of the panels against their costs to make an informed decision. By carefully considering your budget, you can achieve a soundproofing solution that fits your financial goals and delivers effective noise reduction benefits.
Installation Process for Soundproofing Panels
Installing soundproofing panels is a straightforward process that can be done by following a few simple steps. While the specific installation method may vary depending on the type of panel and the surface it will be applied to, here is a general overview of the installation process:
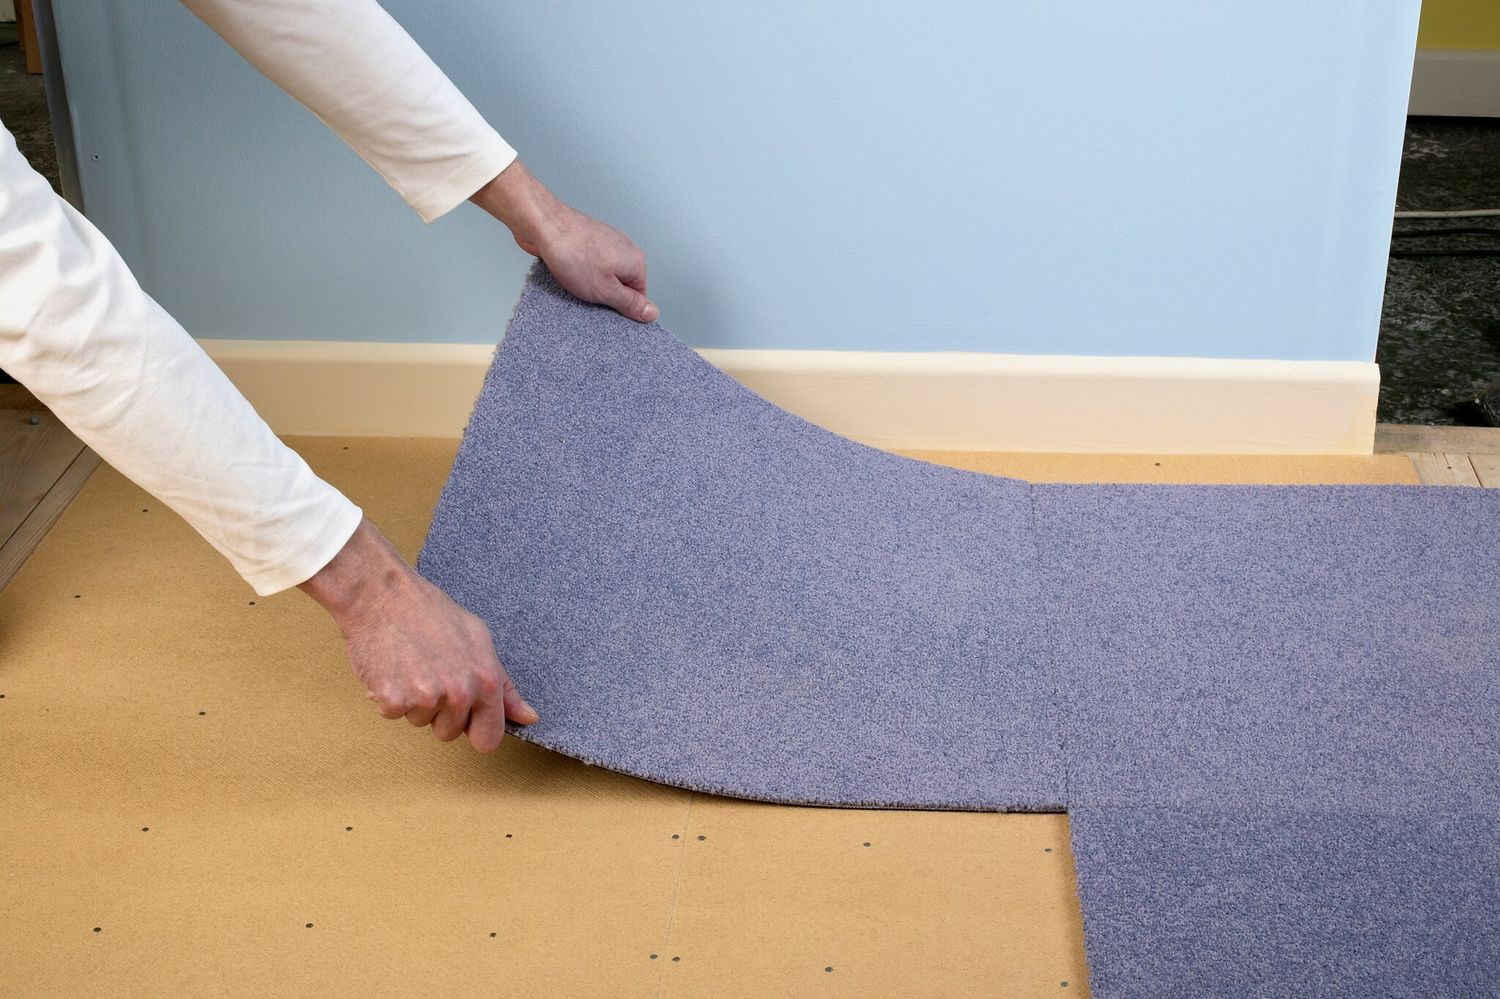
- Prepare the Surface: Start by preparing the surface where the soundproofing panels will be installed. Ensure that the surface is clean, dry, and free from any dust, dirt, or debris. If needed, repair any cracks or imperfections in the wall or ceiling to ensure a smooth and even surface for the panels.
- Measure and Cut Panels: Take accurate measurements of the area where the panels will be installed. Use a measuring tape or ruler to determine the dimensions needed for each panel. Transfer these measurements onto the panels and mark them with a pencil or marker. Use a suitable tool, such as a circular saw, jigsaw, or utility knife, to cut the panels to the desired size and shape.
- Apply Adhesive or Mounting Hardware: Depending on the installation method, apply an appropriate adhesive to the back of the panel or install the necessary mounting hardware onto the wall or ceiling. Follow the manufacturer’s instructions for the specific adhesive or mounting system being used. Ensure that the adhesive or hardware is evenly and properly applied to achieve a secure bond or attachment.
- Install Panels: Carefully place the soundproofing panels onto the prepared surface, aligning them with the marked measurements or mounting hardware. Press the panels firmly against the surface, ensuring good contact and adhesion. If using mounting hardware, secure the panels onto the hardware as instructed. Repeat the process for each panel, ensuring they are properly aligned and spaced for a consistent and visually pleasing installation.
It is important to note that specific instructions may vary depending on the type of soundproofing panel being installed. Some panels may require additional steps, such as applying a sealant or trim for a finished look. Always refer to the manufacturer’s installation guidelines and follow them carefully to ensure proper installation and optimal performance.
Additionally, if you are unsure about the installation process or dealing with a complex installation, it is recommended to consult with a professional or seek assistance from an experienced individual to ensure the panels are installed correctly and effectively.
Following these general steps will help you successfully install your soundproofing panels and create a quieter and more comfortable environment.
Prepare the Surface
Before installing soundproofing panels, it is crucial to properly prepare the surface where the panels will be mounted. This step ensures that the panels adhere securely and maximize their soundproofing capabilities. Here are some important considerations when preparing the surface:
Clean the Surface: Begin by thoroughly cleaning the surface where the panels will be installed. Use a mild detergent or cleaner suitable for the specific surface material. Remove any dirt, dust, grease, or other debris that could hinder proper adhesion.
Repair Imperfections: Inspect the surface for any cracks, holes, or uneven areas. Repair any imperfections to ensure a smooth and even surface for the panels. Fill cracks or holes with appropriate fillers, such as spackle or putty, and use sandpaper to level any rough spots.
Remove Obstacles: Clear the area of any obstacles or objects that may hinder the installation process or prevent the panels from laying flat against the surface. Consider removing pictures, wall decorations, or electrical fixtures temporarily if necessary.
Consider Surface Compatibility: Take into account the compatibility of the surface with the adhesives or mounting hardware you plan to use. Certain surfaces may require specialized adhesives or anchors to ensure a secure bond. Consult the manufacturer’s instructions or seek expert advice to ensure that the chosen installation method is suitable for the surface material.
Maintain Dryness: Ensure that the surface is completely dry before applying adhesives or installing the panels. Moisture can interfere with the adhesion and durability of the panels. If necessary, allow the surface to dry fully before proceeding with the installation.
By properly preparing the surface, you create an ideal foundation for the soundproofing panels. A clean and smooth surface enhances the adhesion of the panels, helping them stay in place and perform optimally in reducing noise transmission.
Before moving forward with the installation, always refer to the specific instructions provided by the manufacturer of the soundproofing panels. Different panels may have unique requirements regarding surface preparation, adhesives, or additional steps to be taken. Following these instructions ensures that you achieve the best results with your soundproofing project.
In summary, preparing the surface is a critical step in the installation process of soundproofing panels. By cleaning, repairing, and ensuring surface compatibility, you create an optimal foundation for the panels, maximizing their effectiveness in reducing noise and improving the acoustic environment of your space.
Measure and Cut Panels
Accurate measurements and precise cutting are crucial when installing soundproofing panels to ensure a proper fit and a professional-looking finish. Here are some important steps to follow when measuring and cutting the panels:
Measure the Installation Area: Begin by measuring the installation area where the soundproofing panels will be placed. Use a tape measure or ruler to determine the dimensions needed for each panel. Measure the height, width, and any other relevant dimensions to ensure the panels fit properly.
Mark the Panels: Transfer the measurements onto the panels using a pencil or marker. Make clear and visible marks on the panels to indicate where they need to be cut. Take into account any additional considerations, such as windows, outlets, or other obstacles, that may require special cuts or adjustments.
Choose the Right Tools: Depending on the material and thickness of the soundproofing panels, choose the appropriate cutting tools. Common tools for cutting panels include a circular saw, jigsaw, or utility knife. Ensure the tools are sharp and in good condition to achieve clean and precise cuts.
Safety Precautions: Prioritize safety when cutting the panels. Wear appropriate safety gear, such as protective eyewear and gloves. Follow the manufacturer’s instructions for the specific tools you are using and take caution when handling sharp objects.
Make Controlled Cuts: Carefully cut the panels along the marked lines, following a steady and controlled cutting motion. When using a circular saw or jigsaw, move the tool smoothly and evenly along the marked line. If using a utility knife, score the panel along the line and then make multiple passes to cut through the material.
Double-Check Measurements: After cutting each panel, double-check the dimensions and compare them to the initial measurements. Ensure that the panels fit properly within the installation area and make any necessary adjustments if needed.
Remember to measure multiple times and cut once to avoid any costly mistakes or inaccuracies. It is better to take the time to measure carefully and make precise cuts to ensure a professional-looking installation and achieve the desired soundproofing results.
Finally, follow the manufacturer’s guidelines and recommendations regarding cutting techniques for the specific type of soundproofing panels you are using. Some materials may require specific cutting methods or tools, and the manufacturer’s instructions will provide valuable guidance to achieve the best results.
In summary, accurately measuring and cutting the soundproofing panels is a critical step in the installation process. By following proper measurement techniques and using the appropriate cutting tools, you can ensure the panels fit precisely and seamlessly within the installation area, enhancing the overall effectiveness and appearance of your soundproofing project.
Apply Adhesive or Mounting Hardware
Once you have measured and cut the soundproofing panels, the next step is to apply the appropriate adhesive or mounting hardware to securely attach the panels to the surface. The method you choose will depend on the type of panels and the surface material. Here are some important steps to follow when applying adhesive or mounting hardware:
Read the Manufacturer’s Instructions: Start by carefully reading and understanding the manufacturer’s instructions that come with the soundproofing panels. These instructions will provide specific guidance on the recommended adhesive or mounting method for your particular panels.
Choose the Right Adhesive: If you are using adhesive to attach the panels, ensure that you select the correct type of adhesive for the specific panel material and the surface to which they will be applied. Consult the manufacturer’s recommendations or seek assistance from a professional to determine the most suitable adhesive for your project.
Prepare the Adhesive: If using adhesive, carefully follow the instructions for preparing the adhesive. This may involve mixing multiple components or applying a specific adhesive activator. Adhere to the recommended ratios and mixing instructions to maintain the adhesive’s effectiveness.
Apply the Adhesive: Using a trowel or a recommended application tool, apply an even layer of adhesive to the back of the soundproofing panel. Spread the adhesive uniformly, ensuring full coverage to maximize the bonding area. Be mindful of any specified drying or curing time indicated by the manufacturer.
Mounting Hardware: If your panels require mounting hardware, such as brackets or hooks, carefully position and attach the hardware to the surface as instructed. Use appropriate screws, nails, or anchors that are suitable for the surface material. Ensure that the hardware is securely attached and can support the weight of the panels.
Follow the Recommended Placement: Position the soundproofing panels onto the surface, aligning them with the intended placement. Press the panels firmly against the surface to ensure good contact with the adhesive or mounting hardware. Use a level or measuring tools to ensure the panels are properly aligned and straight, if necessary.
Allow Adequate Drying or Curing Time: Depending on the adhesive or mounting method used, allow sufficient time for the adhesive to dry or the mounting hardware to set. Follow the manufacturer’s instructions for the recommended drying or curing time before applying any pressure or additional weight to the panels.
It is crucial to carefully follow the manufacturer’s instructions when applying adhesive or mounting hardware to ensure a strong and secure bond. Deviating from the recommended methods can compromise the panel’s adhesion, leading to potential issues or failure in the long run.
If you are unsure about the adhesive application or mounting process, consult the manufacturer’s guidelines or seek help from a professional. Their expertise and knowledge can ensure the proper application method for your specific soundproofing panels and surface.
By applying the adhesive or mounting hardware correctly, you can ensure the panels are securely attached to the surface, allowing them to effectively reduce noise and enhance the acoustics of your space.
Install Panels
Once you have prepared the surface and applied the adhesive or mounting hardware, it is time to install the soundproofing panels. Proper installation ensures the panels are securely and evenly placed, maximizing their effectiveness in reducing noise transmission. Here are the key steps to follow when installing the panels:
Positioning: Begin by positioning the soundproofing panels in the desired location, aligning them with the markings or mounting hardware. Take care to ensure the panels are oriented correctly, especially if they have a specific pattern or direction.
Firm Pressing: Press the panels firmly against the surface to create a strong bond. Apply even pressure across the entire panel to ensure proper adhesion. Use your hands, a clean cloth, or a roller to ensure good contact between the panel and the surface, helping to eliminate air bubbles or gaps.
Alignment: Pay attention to the alignment of the panels as you install them. Use a level or measuring tools to ensure they are straight and even. Adjust the positioning if necessary to maintain consistent alignment throughout the installation area.
Panel-to-Panel Connections: If installing multiple panels, be mindful of achieving a seamless connection between each panel. Align the edges of the panels, ensuring a tight fit and minimal visible gaps. Follow any specific instructions provided by the manufacturer to properly connect or secure adjacent panels together.
Trimming: If needed, trim the panels to fit around obstacles such as windows, doors, or corners. Use appropriate tools to make accurate and clean cuts, ensuring a neat and professional finish. Take precise measurements and mark the panels before making any cuts to avoid errors.
Allow Adequate Setting Time: If using adhesive, allow sufficient time for the adhesive to set and cure as specified by the manufacturer. Avoid applying excessive pressure or weight to the panels until the adhesive is fully cured. This will ensure the panels remain securely attached to the surface over time.
Final Inspection: After installation, inspect the panels and the surrounding area for any visible gaps, unevenness, or imperfections. Make any necessary adjustments or corrections to ensure a clean and polished appearance.
As with any installation process, it is crucial to follow the manufacturer’s instructions for the specific soundproofing panels being installed. Different panels may have unique requirements or installation techniques that need to be followed to achieve the best results.
Remember to take your time during the installation process to ensure accuracy and a professional finish. Properly installed soundproofing panels will enhance the acoustics of your space, reducing noise transmission and creating a more peaceful environment.
If you are unsure about any aspect of the installation, seek guidance from the manufacturer or consult with a professional to ensure successful installation and optimal soundproofing performance.
Maintenance and Care Tips for Soundproofing Panels
Proper maintenance and care of your soundproofing panels are essential to ensure their longevity and continued effectiveness in reducing noise. While maintenance requirements may vary depending on the type of panels and materials used, here are some general tips to help you maintain and care for your soundproofing panels:
Regular Cleaning: Dust and debris can accumulate on the surface of the panels over time, potentially affecting their sound absorption capabilities. Regularly clean the panels using a soft brush attachment on a vacuum cleaner or a lint-free cloth to remove any dust or dirt. For fabric-wrapped panels, check the manufacturer’s recommendations for specific cleaning instructions.
Avoid Moisture Exposure: Soundproofing panels are generally not designed to withstand moisture or water damage. Keep the panels away from areas with high humidity or moisture, such as bathrooms or kitchens. Moisture can affect the structural integrity of the panels and compromise their soundproofing properties.
Check for Damage: Periodically inspect the panels to ensure they are not damaged or worn. Look for any signs of cracks, tears, or loose edges. If you notice any damages, repair or replace the affected panels promptly to maintain optimal soundproofing performance.
Address Stains or Spills: In the case of fabric-wrapped or upholstered panels, promptly address any stains or spills to prevent permanent damage. Blot the affected area gently with a clean cloth or sponge, using a mild detergent or cleaner suitable for the fabric. Avoid rubbing or scrubbing, as it may cause further staining or damage to the fabric.
Avoid Harsh Cleaning Products: When cleaning soundproofing panels, avoid using harsh cleaning agents, abrasive materials, or strong chemicals. These can damage the surface or degrade the sound-absorbing properties of the panels. Stick to gentle cleaning methods and products recommended by the manufacturer.
Protection from Physical Damage: Take precautions to prevent physical damage to the panels. Avoid bumping or scratching them when moving objects around the room. If necessary, use protective barriers or padding to shield the panels from potential impacts or contact with sharp objects.
Regular Inspection: Regularly inspect the panels and surrounding areas for signs of deterioration, mold, or pests. Promptly address any issues that may compromise the panels’ functionality or pose health risks to your environment.
Follow Manufacturer’s Instructions: Always follow the manufacturer’s instructions and guidelines for the specific soundproofing panels you have installed. They may provide specific care instructions tailored to the panel material and design. Adhering to these recommendations will help you maintain the panels and prolong their lifespan.
By following these maintenance and care tips, you can extend the lifespan and optimize the performance of your soundproofing panels. By ensuring their continued functionality, you can enjoy a quieter and more peaceful living or working environment.
Remember, if you have any specific concerns or questions about the maintenance and care of your soundproofing panels, consult the manufacturer or seek professional advice for personalized recommendations.
Conclusion
Soundproofing panels are a valuable solution for reducing noise and creating a peaceful environment in your home or workspace. Whether you choose acoustic foam panels, fabric-wrapped panels, wooden panels, soundproofing wallpaper, soundproofing curtains, or soundproofing tiles, each type offers unique benefits and features to suit your specific needs.
When selecting soundproofing panels, consider factors such as the Noise Reduction Coefficient (NRC) rating, installation method, aesthetics, budget, and your specific soundproofing requirements. This will help you make an informed decision and choose panels that deliver optimal sound absorption and noise reduction.
Installing soundproofing panels requires careful preparation of the surface, accurate measurements, proper application of adhesive or mounting hardware, and secure panel placement. Following the manufacturer’s instructions and guidelines will ensure a successful installation with maximum soundproofing effectiveness.
To maintain and care for your soundproofing panels, regular cleaning, avoiding moisture exposure, addressing any damage promptly, and following the manufacturer’s instructions for maintenance and cleaning are crucial. These steps will help ensure the panels continue to perform effectively and last for years to come.
In conclusion, soundproofing panels offer a versatile and effective solution for reducing noise and enhancing the acoustics of your space. By selecting the right panels, installing them correctly, and maintaining them properly, you can create a peaceful and comfortable environment where unwanted noise is minimized, providing you with the tranquility you desire.