Home>Devices & Equipment>Music Box>How Do I Unwind An Overwound Music Box
Music Box
How Do I Unwind An Overwound Music Box
Modified: January 22, 2024
Looking to unwind an overwound music box? Discover step-by-step guides and tips for fixing your beloved music box, ensuring it plays harmoniously again.
(Many of the links in this article redirect to a specific reviewed product. Your purchase of these products through affiliate links helps to generate commission for AudioLover.com, at no extra cost. Learn more)
Table of Contents
- Introduction
- Understanding the Mechanism of a Music Box
- Signs of an Overwound Music Box
- Steps to Unwind an Overwound Music Box
- Method 1: Manual Unwinding
- Method 2: Using a Toothpick
- Method 3: Using a Flathead Screwdriver
- Method 4: Seeking Professional Help
- Precautions to Take while Unwinding a Music Box
- Conclusion
Introduction
Music boxes have been enchanting people with their delightful melodies for centuries. These intricate and delicate creations are a testament to the craftsmanship of artisans who can turn a simple box into a symphony. However, like any mechanical device, music boxes can sometimes experience issues that require attention. One such problem is an overwound music box.
An overwound music box occurs when the spring inside the mechanism has been tightly wound beyond its capacity. This can happen accidentally when someone continues to wind the box even after it has reached its limit. When a music box is overwound, it can lead to a range of issues, from a distorted or garbled melody to a complete stop in playing. But fear not, there are steps you can take to unwind an overwound music box and bring it back to its harmonious state.
In this article, we will explore the mechanism of a music box, signs of an overwound music box, and various methods to unwind it. We will also discuss precautions to take while handling a music box to ensure its longevity and proper functioning. So, if you find yourself with an overwound music box, read on to discover how to resolve the issue and enjoy its beautiful melodies once again.
Understanding the Mechanism of a Music Box
Before we delve into the process of unwinding an overwound music box, it’s essential to understand the basic mechanism behind its enchanting melodies. A music box consists of several key components that work together to produce musical sounds.
At the heart of a music box is a metal spring, typically made of steel or brass, which stores potential energy when wound. As the spring unwinds, this energy is gradually released and transferred to a series of gears and pins that control the movement of the music box’s cylinder or disc.
The cylinder or disc contains tiny metal prongs or teeth that pluck the tuned metal or glass plates called “tines” or “laminas.” These tines are responsible for producing the musical notes and melodies. The length and position of each tine determine the pitch, and when they are plucked in the correct sequence, they create beautiful and harmonious melodies.
Connecting the gears and pins to the cylinder or disc is a mechanism called the governor. The governor maintains a steady speed of rotation for the cylinder or disc, ensuring that the music plays at a consistent tempo. The governor consists of two weighted arms that rotate as the spring unwinds, controlling the speed of the music box.
Lastly, there is a mechanism for controlling the start, stop, and repeat functions of the music box. This mechanism typically involves a lever or a button that engages or disengages the gears, allowing the music to play or cease at the desired moments.
Now that you have a basic understanding of how a music box works, you can better appreciate the complexities involved in unwinding an overwound music box. So, let’s proceed to the next section, where we will explore the signs that indicate a music box has been overwound.
Signs of an Overwound Music Box
An overwound music box can exhibit various signs that indicate its current state. It’s crucial to recognize these signs to prevent further damage and properly diagnose the issue. Here are a few common indications that a music box has been overwound:
- Difficulty in winding: When a music box is overwound, you may experience increased resistance or a complete inability to wind the spring. The mechanism may feel jammed or stuck, indicating that the spring has been wound beyond its capacity.
- Distorted or garbled melodies: Overwinding can cause the musical notes to become distorted or out of tune. Instead of the usual clear and harmonious melodies, you may hear a garbled or inconsistent sound. This is a clear sign that there is an issue with the winding of the music box.
- Complete stoppage in playing: In severe cases, an overwound music box may simply stop playing altogether. The spring inside the mechanism may have become so tightly wound that it prevents any movement or rotation of the gears, resulting in a complete cessation of music.
- Unusual noises or grinding sounds: When attempting to play an overwound music box, you might hear unusual noises like grinding or clicking sounds. These sounds indicate that the gears and other components are under stress due to the excessive tension caused by overwinding.
- Limited or inconsistent winding duration: Overwinding can also impact the duration for which the music box can play once it is wound. You may notice that the music box plays for a significantly shorter time than usual or that it stops abruptly after a few seconds or minutes.
If you encounter any of these signs with your music box, it is highly likely that it has been overwound. The next section will guide you through the steps to unwind an overwound music box, enabling you to restore its functionality and enjoy its melodies once again.
Steps to Unwind an Overwound Music Box
Unwinding an overwound music box requires a gentle touch and careful steps to ensure the safety of the delicate mechanism. Here are the recommended steps to effectively unwind an overwound music box:
- Stop winding: The first and most important step is to stop winding the music box immediately. Continuing to wind it when it is already overwound can cause further damage to the mechanism.
- Locate the winding key or button: Identify the winding key or button on your music box. This will serve as a reference point to determine the direction of unwinding.
- Turn the key or button in the opposite direction: Gently turn the key or press the button in the opposite direction of winding. This will help release the tension on the spring and allow it to unwind gradually.
- Listen for clicks or subtle movements: As you turn the key or press the button, listen carefully for any clicks or subtle movements in the music box’s mechanism. These indications suggest that the spring is gradually unwinding.
- Pause if excessive resistance is encountered: If you encounter significant resistance while attempting to unwind the music box, stop and do not force it. Excessive resistance may indicate a more severe issue that requires professional attention.
- Continue the unwinding process: Once the tension starts to release, continue turning the key or pressing the button, maintaining a slow and gentle pace. Take breaks periodically to avoid overheating the mechanism.
- Observe the movement of the governor: Keep an eye on the governor during the unwinding process. As the spring unwinds, the governor should start rotating, indicating that the tension is being released correctly.
- Test the music box: After the spring has unwound sufficiently, test the music box by winding it a little to see if it plays properly. If the issue persists, consider trying alternative methods or seeking professional assistance.
Keep in mind that unwinding an overwound music box requires patience and gentle handling. If you are unsure or uncomfortable with the process, it is always recommended to seek assistance from a professional who specializes in music box repair.
In the following sections, we will explore different methods of unwinding an overwound music box in case the manual method does not yield the desired results.
Method 1: Manual Unwinding
If you prefer a hands-on approach, manual unwinding is an effective method to unwind an overwound music box. Here’s how you can do it:
- Locate the spring: Open the music box carefully to expose the internal mechanism. Locate the tightly wound spring inside.
- Use your fingers: Using your fingers, gently press on the spring to release the tension. Apply slight pressure and rotate your fingers in the opposite direction of winding to gradually unwind the spring.
- Take breaks if needed: If you encounter resistance or the spring feels particularly tight, pause for a moment to prevent any damage. Allow the mechanism to rest before continuing the process.
- Monitor the movement: Watch for any movement in the governor or gears as the spring unwinds. This indicates that the tension is being released and the music box is returning to its normal state.
- Test the music box: Once you believe the spring has unwound sufficiently, test the music box by winding it a little to see if it plays properly. If it does, then congratulations, you have successfully unwound the music box manually!
If the manual method does not provide the desired results or if you feel uncomfortable handling the delicate mechanism, you can try alternative methods outlined in the following sections. Remember, patience and gentle handling are key to avoid further damage to the music box.
Method 2: Using a Toothpick
If manual unwinding is not producing the desired results, another method you can try is using a toothpick. Here’s how you can unwind an overwound music box using a toothpick:
- Prepare a toothpick: Choose a small and sturdy toothpick that can reach the spring inside the music box without causing damage. Ensure that the toothpick is clean and free from any rough edges that could scratch or harm the mechanism.
- Locate the spring: Open the music box carefully to expose the internal mechanism. Identify the tightly wound spring that needs to be unwound.
- Insert the toothpick: Insert one end of the toothpick into the gap between the coils of the spring. Apply gentle pressure to release the tension and rotate the toothpick in the opposite direction of winding to unwind the spring.
- Monitor the movement: As you unwind the spring using the toothpick, keep an eye on the movement of the governor or gears. Look for any signs that the tension is being released and the music box is returning to its normal state.
- Take breaks if needed: If you encounter resistance or the spring feels overly tight, take breaks to avoid causing damage. Allow the mechanism to rest before continuing the process.
- Test the music box: After unwinding the spring to a sufficient extent, test the music box by winding it a little to check if it plays properly. If it does, then you have successfully unwound the music box using a toothpick!
If the toothpick method does not resolve the issue, you may consider trying alternative methods or seeking assistance from a professional music box repair technician.
Method 3: Using a Flathead Screwdriver
If manual unwinding and the toothpick method do not yield the desired results, you can try using a flathead screwdriver to unwind an overwound music box. Here’s how:
- Gather the necessary tools: Prepare a small flathead screwdriver that can fit into the music box mechanism without causing damage. Additionally, ensure that the screwdriver is clean and free from any sharp or rough edges.
- Open the music box: Carefully open the music box to expose the internal mechanism. Take note of the tightly wound spring that needs to be unwound.
- Identify the winding mechanism: Look for the part of the music box that is responsible for winding the spring. This is usually a small gear or lever that engages with the spring.
- Engage the screwdriver: Gently insert the flathead screwdriver into the winding mechanism, making sure to position it securely. Apply slight pressure and rotate the screwdriver in the opposite direction of winding to release the tension from the spring.
- Monitor the movement: Keep a close eye on the movement of the gears and the governor as you use the screwdriver to unwind the spring. Look for signs that the tension is being released and the music box is returning to its normal state.
- Take breaks if needed: If you encounter resistance or the spring feels too tight, take breaks to prevent any potential damage. Allow the mechanism to rest and cool down before continuing with the unwinding process.
- Test the music box: After unwinding the spring to an appropriate level, test the music box by winding it slightly to see if it plays properly. If the music box functions as expected, then you have successfully unwound it using a flathead screwdriver.
If the above methods are still unsuccessful in unwinding the overwound music box, it is highly recommended to seek the assistance of a professional who specializes in music box repair to prevent any further damage to the delicate mechanism.
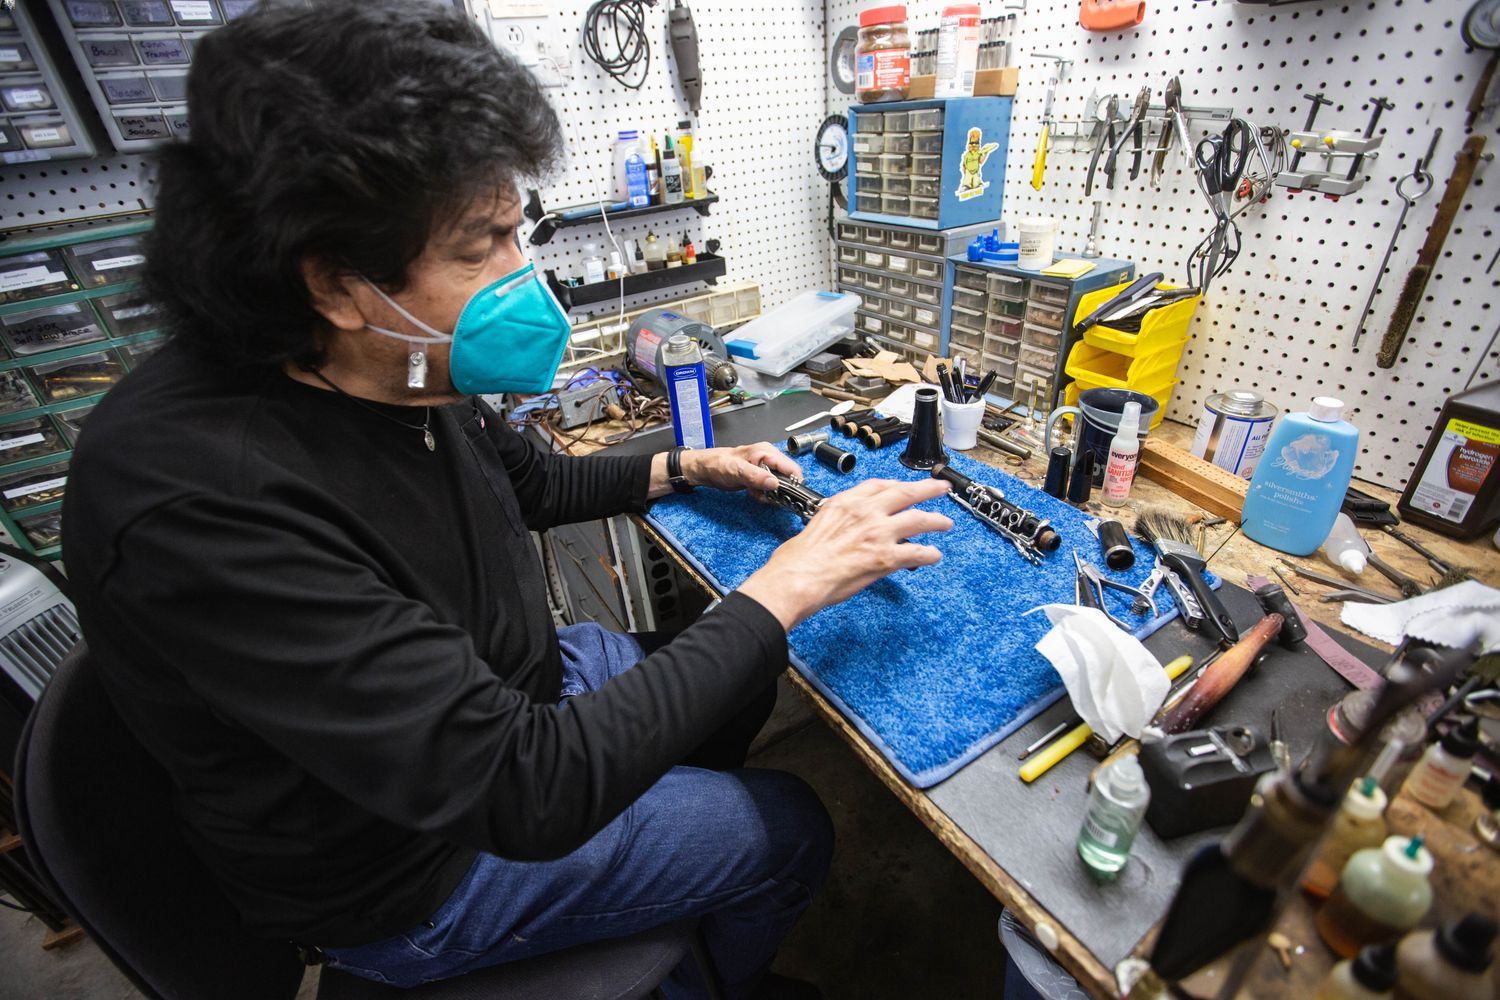
Method 4: Seeking Professional Help
If manual unwinding or the previous methods do not resolve the issue with your overwound music box, it may be time to seek the expertise of a professional music box repair technician. Professional help ensures that the delicate mechanism of the music box is handled with care and precision. Here’s how you can go about seeking professional assistance:
- Research and find a reputable professional: Look for experienced professionals or repair shops that specialize in music box repairs. Check their credentials, customer reviews, and reputation to ensure they have the necessary expertise in handling music boxes.
- Contact the repair technician or shop: Reach out to the chosen repair technician or shop and provide them with details about the issue you are facing with your music box. They may ask for additional information or request to examine the box in person for a proper assessment.
- Arrange for inspection and repair: Schedule an appointment or arrange a suitable time to have your music box inspected by the repair technician. They will carefully examine the mechanism and determine the best course of action to resolve the issue.
- Follow the technician’s recommendations: The repair technician will provide you with their professional assessment and recommendations for repairing the overwound music box. They may suggest specific repairs, parts replacements, or other necessary adjustments to restore the functionality of the music box.
- Agree on the cost and timeline: Discuss and agree upon the cost of repair and the expected timeline for the completion of the work. Get a clear understanding of any warranties or guarantees provided by the repair technician or shop.
- Leave the music box in professional hands: Once you have agreed upon the terms, leave your music box in the capable hands of the repair technician. They will work diligently to unwind the spring and resolve any other issues, ensuring the proper functioning of the music box.
- Collect your repaired music box: Once the repairs are complete, you can collect your music box from the repair technician or shop. They may provide you with additional instructions or recommendations for future maintenance to keep your music box in optimal condition.
Seeking professional help ensures that your music box is handled with the necessary expertise and care. While it may involve additional cost and time, it is often the best option for intricate or valuable music boxes to prevent further damage and ensure a proper restoration of its functionality.
Remember, music boxes are delicate and intricate pieces, so it’s essential to handle them with care and seek professional assistance when needed to maintain their beauty and functionality in the long run.
Precautions to Take while Unwinding a Music Box
Unwinding an overwound music box requires careful handling to ensure the safety of the delicate mechanism. It’s important to take the following precautions to prevent any further damage to the music box:
- Handle the music box with care: Music boxes are delicate and sensitive to rough handling. Always hold the music box gently, avoiding any sudden movements or impacts that could damage the internal mechanism.
- Work in a clean and stable environment: Choose a clean and clutter-free workspace to unwind the music box. This helps to prevent dust, dirt, or small particles from entering the mechanism during the unwinding process.
- Wash and dry your hands: Before handling the music box, wash your hands thoroughly to remove any dirt, oils, or residues. Dry your hands completely to avoid any moisture that could cause damage to the mechanism.
- Use gentle and gradual force: When unwinding the music box, apply gentle and gradual force. Avoid using excessive force or twisting the components forcefully, as this can cause additional damage to the delicate mechanism.
- Take breaks if necessary: If you encounter significant resistance or the mechanism feels excessively tight when unwinding, take breaks to allow the music box to rest. This prevents overheating and potential damage to the spring or other components.
- Monitor the movement of the governor: As you unwind the music box, keep an eye on the movement of the governor and other gears. Ensure that they are rotating smoothly, as this indicates that the tension is being appropriately released.
- Avoid using sharp or rough tools: When employing alternative methods like toothpicks or screwdrivers, ensure that they are clean and do not have any sharp or rough edges. This prevents scratches or damage to the delicate components of the music box.
- Do not force the mechanism: If you encounter excessive resistance or the spring feels extremely tight, do not force the mechanism. Forcing can lead to irreversible damage. Instead, seek professional assistance from a music box repair technician.
- Test the music box periodically: Throughout the unwinding process, test the music box periodically to check its functionality. Winding it a little at a time and observing its performance helps ensure that the unwinding is progressing correctly.
Following these precautions when unwinding a music box can help preserve its delicate mechanism and increase the chances of successful resolution. Remember, if you are unsure or uncomfortable with the process, it is always advisable to seek assistance from a professional music box repair technician to prevent any further damage or mishandling.
Conclusion
Unwinding an overwound music box can seem like a daunting task, but with the right knowledge and approach, you can restore its harmonious melodies. Understanding the mechanism of a music box and recognizing the signs of overwinding are crucial first steps. From there, you can explore various methods to unwind the music box gently and effectively.
In this article, we discussed manual unwinding, using a toothpick, employing a flathead screwdriver, and the option of seeking professional help. Each method offers a unique approach to unraveling the tension within the spring and restoring the music box to its rightful state.
Regardless of the method you choose, it’s important to handle the music box with care, work in a clean environment, and be patient throughout the process. Taking precautions and following the recommended steps will help preserve the delicate mechanism of the music box and avoid further damage.
If your attempts to unwind the music box are unsuccessful or if you feel uncomfortable handling the mechanism, it is advisable to seek professional assistance. A music box repair technician has the expertise and experience to address the issue and ensure a proper restoration of your cherished music box.
Remember, the enchanting melodies produced by a music box are a source of joy and nostalgia. By taking the necessary steps to unwind an overwound music box, you can once again enjoy its beautiful tunes and appreciate the craftsmanship that has made music boxes a beloved form of artistic expression for centuries.