Home>Devices & Equipment>Turntable>Why Does My Turntable Sound Bad
Turntable
Why Does My Turntable Sound Bad
Published: January 18, 2024
Discover the reasons why your turntable might be producing poor sound quality and find effective solutions to optimize your turntable's performance.
(Many of the links in this article redirect to a specific reviewed product. Your purchase of these products through affiliate links helps to generate commission for AudioLover.com, at no extra cost. Learn more)
Table of Contents
- Introduction
- Understanding the Components of a Turntable
- Common Issues That Can Result in Bad Sound
- Adjusting the Tracking Force
- Checking and Replacing the Cartridge
- Examining the Tonearm
- Cleaning the Vinyl Record and Turntable Components
- Evaluating the Phono Preamp
- Avoiding Grounding and Interference Issues
- Conclusion
Introduction
Welcome to the world of turntables, where the soothing crackle of vinyl records transports you back in time and offers a unique listening experience. However, as a vinyl enthusiast, you may have encountered moments when your turntable didn’t live up to your expectations. The sound might have been distorted, muffled, or just downright bad, leaving you frustrated and wondering what went wrong. Fear not, as we are here to guide you through the process of troubleshooting and improving the sound quality of your turntable.
Before we delve into the potential issues that can cause your turntable to sound bad, let’s take a moment to understand the various components that make up this classic music player. A turntable consists of several essential parts, including the plinth, platter, tonearm, cartridge, and stylus. Each component plays a vital role in the overall sound reproduction, and any deviation or damage can have a direct impact on the audio quality.
There are several common issues that can result in a bad sound from your turntable. These include improper tracking force, worn-out or damaged cartridge, misaligned tonearm, dirty records, and faulty phono preamp. Understanding these potential problems is crucial in identifying and resolving the issues that may be affecting your turntable’s sound.
This article will provide you with step-by-step instructions on how to troubleshoot and improve the sound quality of your turntable. We will cover adjusting the tracking force, checking and replacing the cartridge, examining the tonearm for misalignment, cleaning the vinyl records and turntable components, evaluating the phono preamp, and avoiding grounding and interference issues. By following these guidelines, you’ll be able to optimize your turntable’s performance and enjoy the true magic of vinyl playback.
So, if you’re ready to enhance your vinyl listening experience and banish bad sound from your turntable, let’s get started on this journey of troubleshooting and improvement.
Understanding the Components of a Turntable
Before we begin troubleshooting the sound quality of your turntable, it’s essential to have a clear understanding of its various components and how they contribute to the overall audio reproduction. Let’s take a closer look at these key elements:
- Plinth: The plinth is the base or foundation of the turntable. It provides stability and helps to reduce vibrations that can affect sound quality.
- Platter: The platter is the rotating platform on which you place the vinyl record. It typically consists of a heavy material like aluminum or acrylic to provide stability and minimize vibrations that could lead to distorted sound.
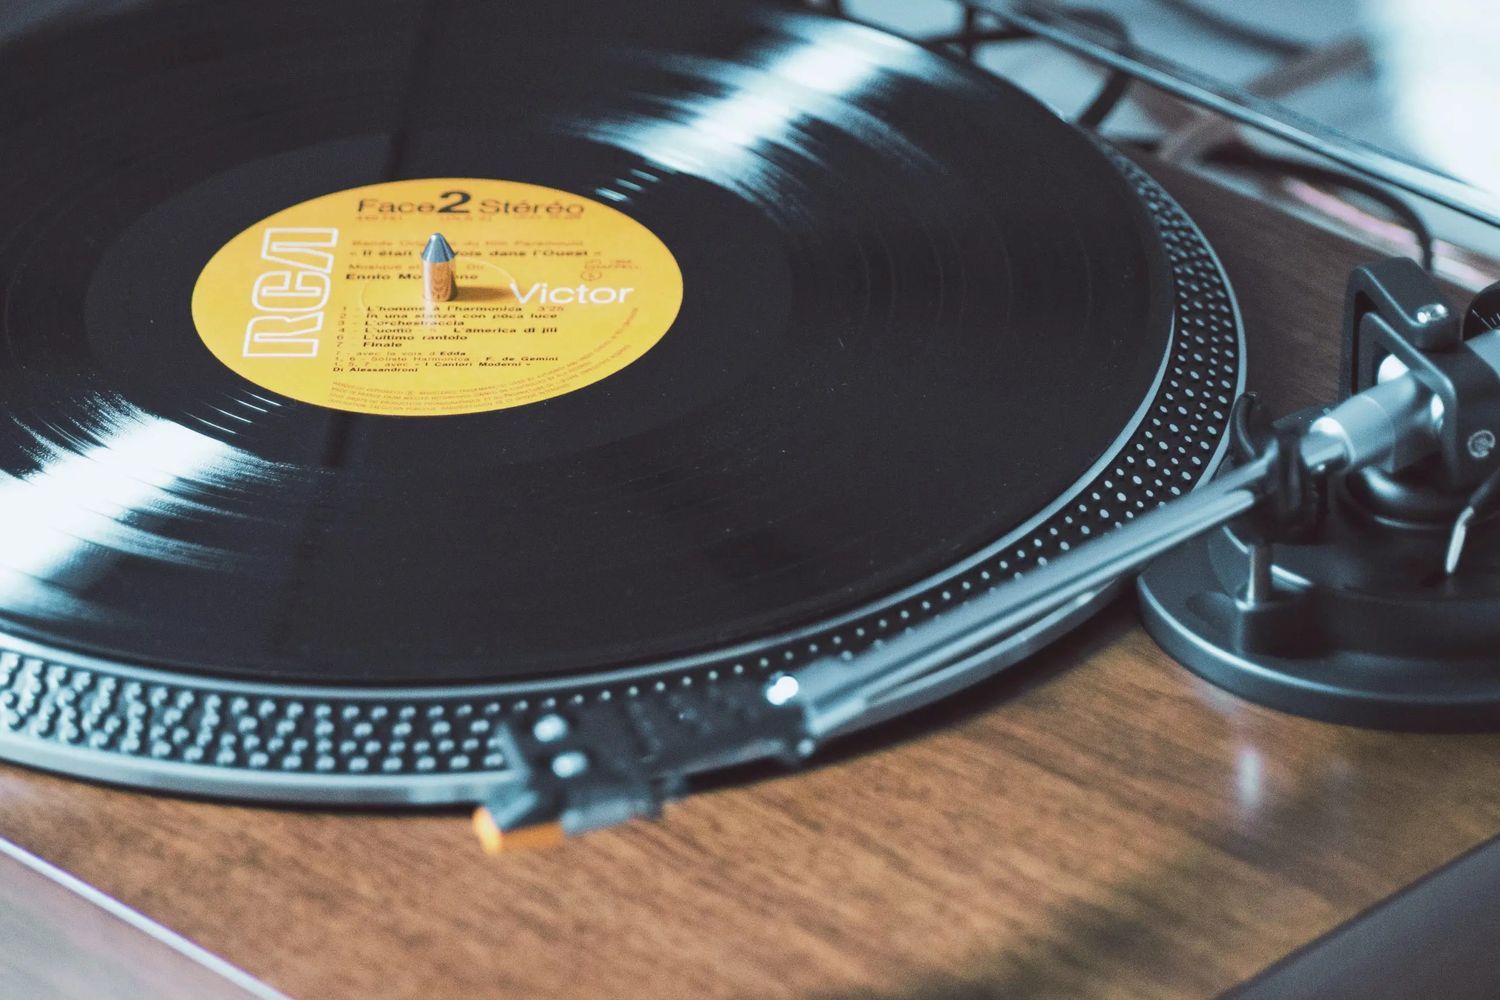
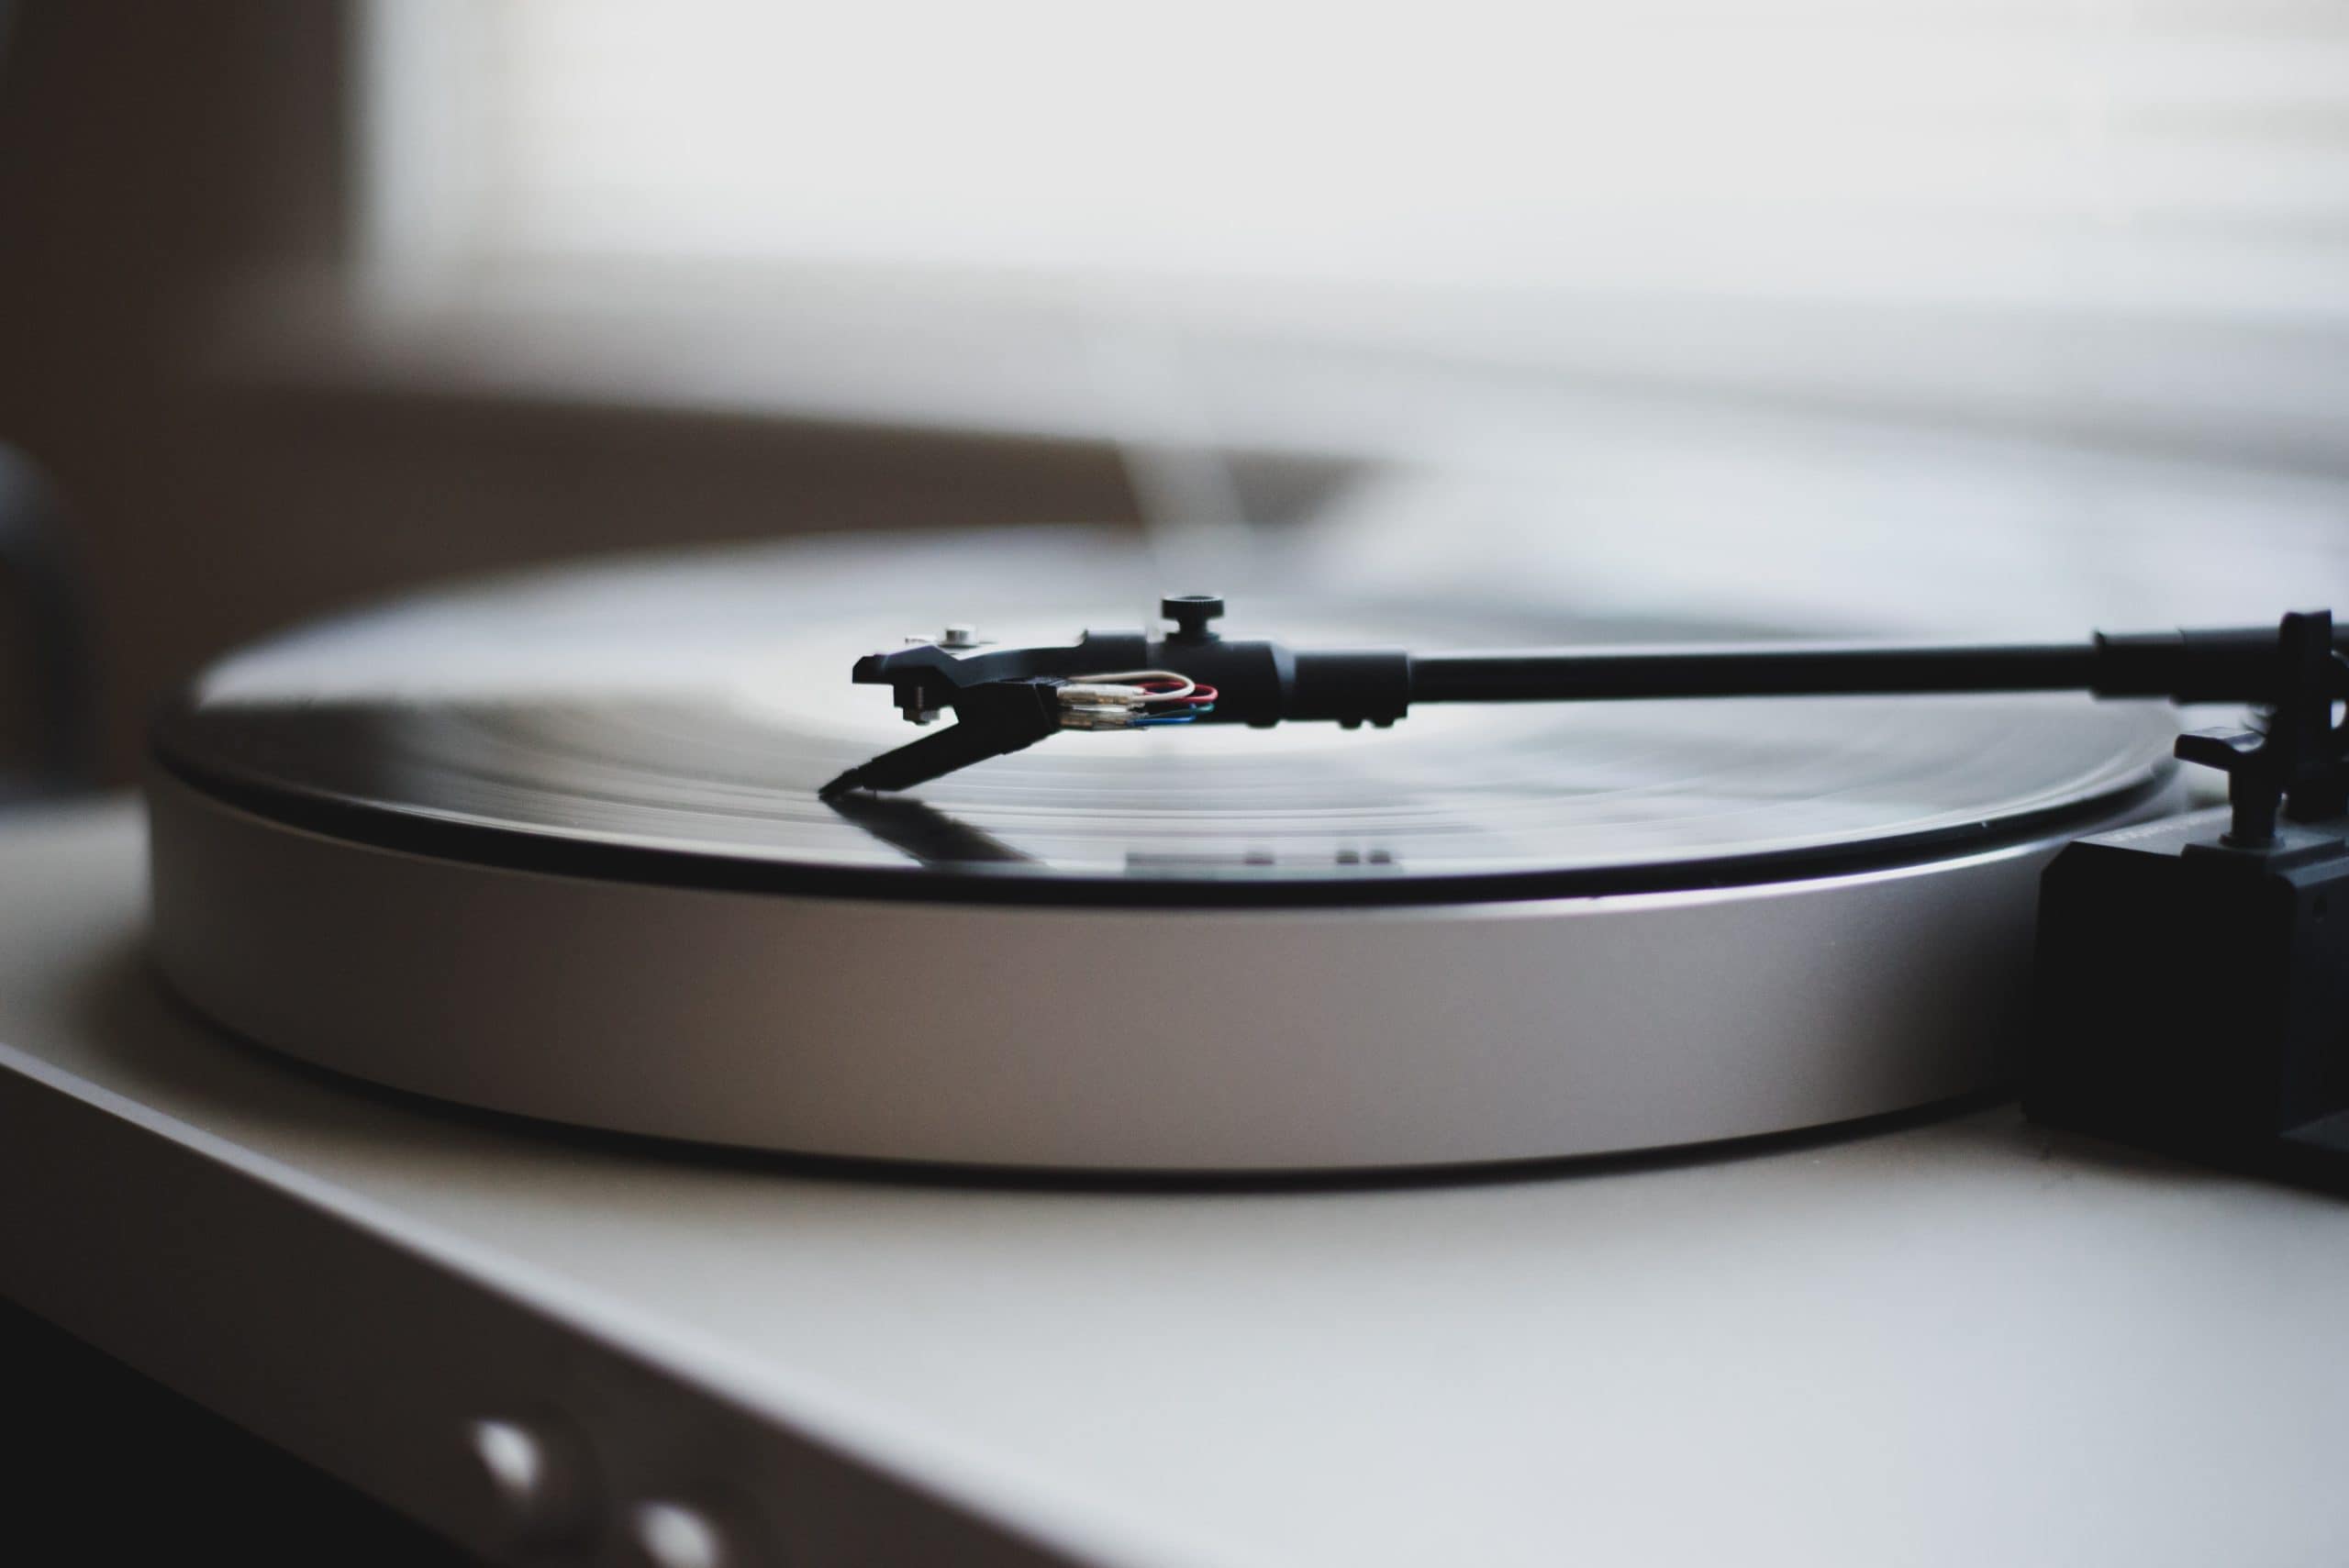
- Tonearm: The tonearm is responsible for holding the cartridge and stylus and guiding them across the record’s grooves. It needs to be properly balanced and aligned to ensure accurate tracking and reduce unwanted resonance.
- Cartridge: The cartridge is a small device that houses the stylus or needle. It converts the mechanical vibrations picked up by the stylus into electrical signals, which are then amplified and produced as sound.
- Stylus: The stylus, often referred to as the needle, is the part of the cartridge that comes into contact with the record’s grooves. It reads the intricacies of the groove and translates them into audio signals.
- Phono Preamp: The phono preamp, also known as a phono stage or phono EQ, is an important component for connecting your turntable to an audio system. Its purpose is to boost and equalize the low-level signal from the cartridge to a line-level signal that can be properly amplified.
Each of these components plays a crucial role in the audio reproduction process, and any issues or imbalances can significantly impact the sound quality. Understanding how they work together allows us to identify potential problems and make the necessary adjustments to improve the overall audio performance of your turntable.
Now that we have a solid grasp of the key components, we can move on to troubleshooting specific issues that can cause your turntable to sound bad. By addressing these potential problems, you’ll be well on your way to enjoying optimal sound quality from your vinyl collection.
Common Issues That Can Result in Bad Sound
When it comes to turntable sound quality, there are several common issues that can impact the overall audio performance. Understanding and addressing these problems are crucial for improving the sound output of your turntable. Let’s take a closer look at some of the most prevalent issues:
- Improper Tracking Force: Tracking force refers to the amount of pressure exerted by the stylus on the record’s grooves. If the tracking force is too light or too heavy, it can lead to skipping, distortion, or excessive wear on the stylus and records.
- Worn-out or Damaged Cartridge: Over time, the cartridge and stylus can wear out, affecting their ability to accurately track the record’s grooves. Damage to the cartridge, such as a bent stylus or loose connections, can also result in poor sound quality.
- Misaligned Tonearm: A misaligned tonearm can cause uneven tracking across the record’s grooves, leading to distorted sound or channel imbalance. Proper alignment ensures optimal contact between the stylus and the record.
- Dirty Records: Dust, fingerprints, and other debris on your vinyl records can cause pops, crackles, and overall degradation in sound quality. Regular cleaning of your records is essential to maintain optimal playback.
- Dirty Turntable Components: Dust and dirt can accumulate on the turntable components, including the stylus, platter, and tonearm. This buildup can negatively impact sound quality and should be regularly cleaned.
- Faulty Phono Preamp: A malfunctioning or low-quality phono preamp can introduce noise, distortion, or imbalances in the audio signal. Ensuring you have a reliable and properly functioning phono preamp is crucial for optimal sound reproduction.
- Grounding and Interference Issues: Grounding and electromagnetic interference (EMI) can introduce unwanted noise, hum, or buzzing into the audio signal. Proper grounding and minimizing interference from other electronic devices can help eliminate these issues.
By identifying and addressing these common issues, you can significantly improve the sound quality of your turntable. In the following sections, we will delve into each problem in more detail and guide you through the necessary steps to resolve them. With proper troubleshooting and maintenance, you’ll be able to enjoy the full richness and clarity of your vinyl collection.
Adjusting the Tracking Force
One of the key factors that can affect the sound quality of your turntable is the tracking force, which refers to the downward pressure exerted by the stylus on the record’s grooves. If the tracking force is set too light or too heavy, it can lead to various issues, including skipping, distortion, and excessive wear on the stylus and records. Adjusting the tracking force to the optimal level is crucial for accurate tracking and optimal sound reproduction.
The tracking force adjustment is typically done by adjusting a counterweight located at the back of the tonearm. Here are the steps to adjust the tracking force:
- Start by referring to the manufacturer’s instructions or specifications for the recommended tracking force range for your specific cartridge. This information is important as different cartridges have different tracking force requirements.
- Locate the counterweight at the back of the tonearm. It is usually a small knob or weight that can be rotated or moved along a calibrated scale.
- Set the tonearm in its resting position or use the tonearm lift if your turntable has one to avoid damaging the stylus or record during the adjustment process.
- Rotate the counterweight until the stylus is perfectly balanced and floats freely above the record surface. Some tonearms may have an anti-skate control, which should also be set to zero during this step.
- Referencing the recommended tracking force range, adjust the counterweight to achieve the desired tracking force. The counterweight may have a numeric scale or markings to guide you. Make small adjustments and check the stylus tracking force each time until you reach the desired setting.
- Once the tracking force is set, you may need to re-establish the anti-skate control to match the tracking force value. This control helps to prevent the stylus from being pulled or dragged towards the center of the record.
- Test the playback of a record and listen for any improvements in sound quality. If necessary, make minor adjustments to fine-tune the tracking force until you achieve optimal sound reproduction.
Remember to handle the delicate stylus with care during the adjustment process and avoid touching it with your bare hands. By ensuring the tracking force is set correctly, you’ll minimize wear on your records, reduce distortion, and enjoy improved sound quality from your turntable.
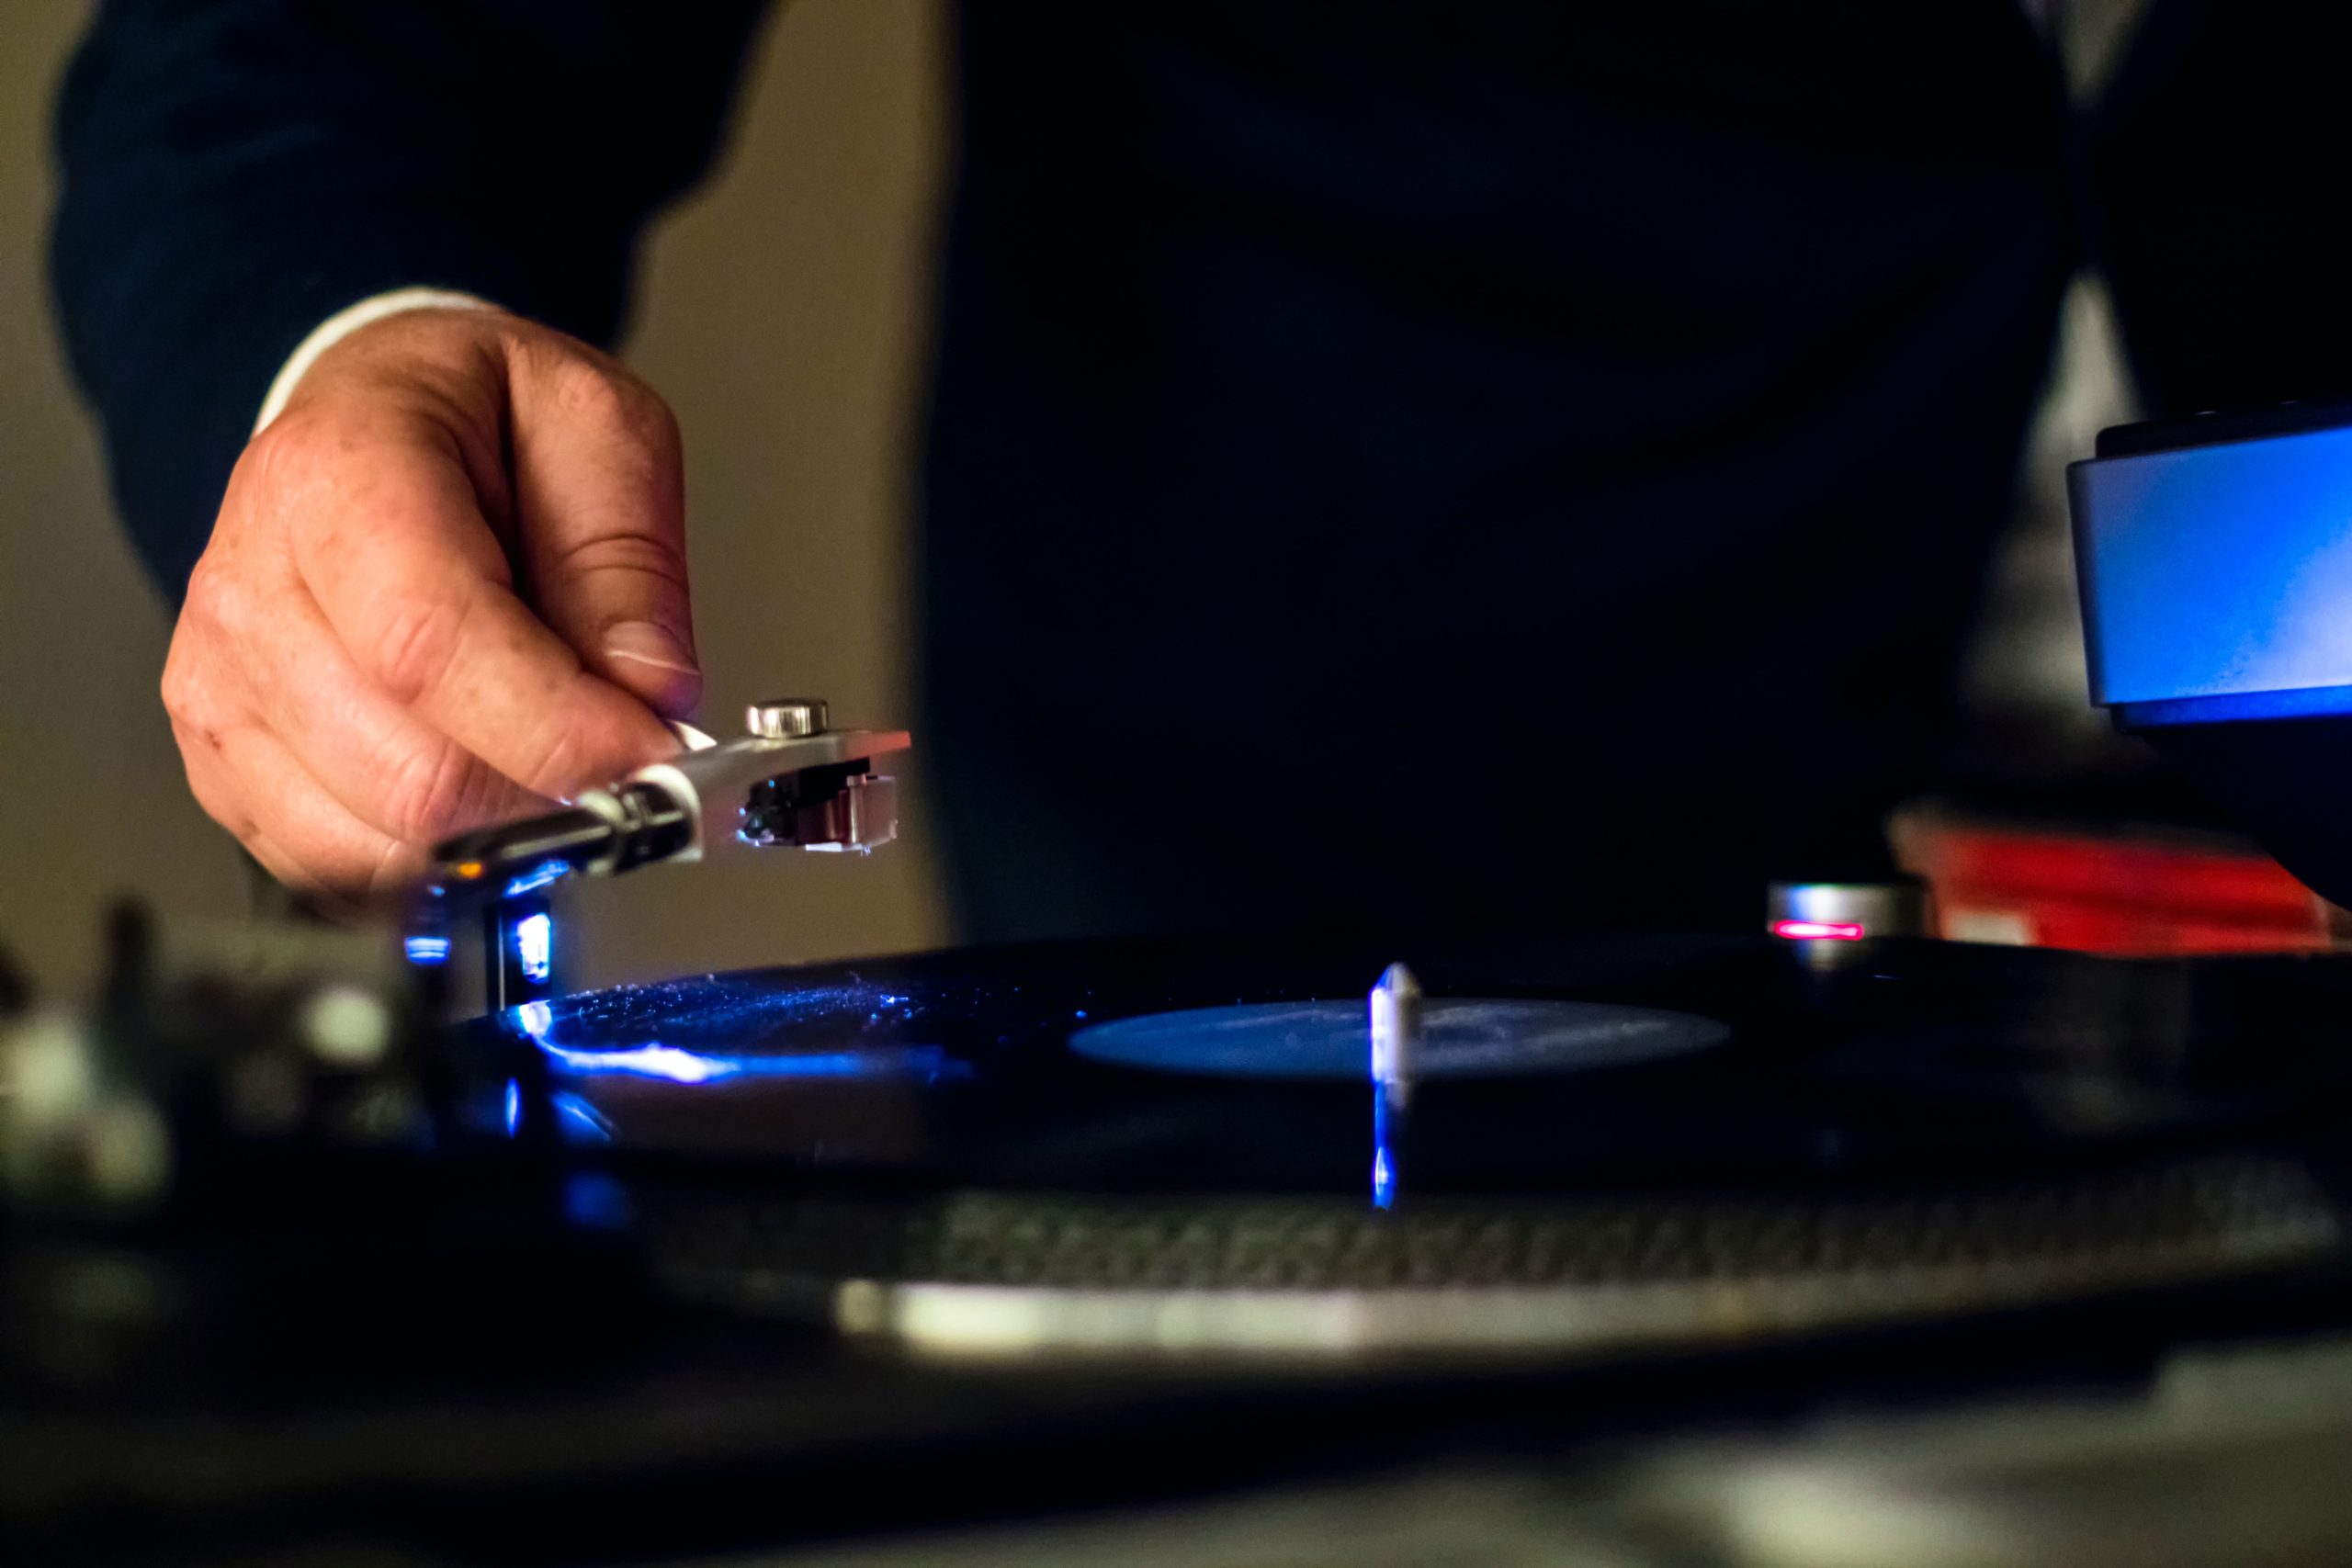
Checking and Replacing the Cartridge
The cartridge is a critical component of your turntable that houses the stylus or needle and converts the mechanical vibrations of the record grooves into electrical signals. Over time, cartridges can wear out or become damaged, resulting in poor sound quality and tracking issues. Checking and, if necessary, replacing the cartridge is an important step in maintaining optimal sound reproduction on your turntable.
Here are the steps to check and replace the cartridge:
- First, disconnect the power supply to your turntable and ensure that the tonearm is secured in its resting position. This will help prevent any accidental damage to the stylus or record during the process.
- Inspect the cartridge visually for any visible signs of damage or wear, such as a bent stylus or loose connections. Pay attention to the wiring and ensure that everything is securely connected.
- Listen for any unusual noises or distortion during playback. If you notice any significant degradation in sound quality, such as distortion, sibilance, or channel imbalance, it may indicate a problem with the cartridge.
- If you suspect a cartridge issue, it’s recommended to consult the manufacturer’s instructions or specifications for guidance on how to properly remove and replace the cartridge. Some cartridges may have screws or mounting clips that need to be released or loosened to remove it from the tonearm.
- Before replacing the cartridge, examine the tonearm for any misalignment or damage. A misaligned tonearm can lead to poor tracking and damage to the new cartridge. If necessary, adjust the tonearm alignment according to the manufacturer’s instructions.
- Once the old cartridge is removed, carefully install the new cartridge by following the manufacturer’s instructions. Take note of the cartridge alignment and ensure it is properly aligned with the tonearm.
- Connect the wiring of the new cartridge to the designated terminals on the tonearm. Double-check the connections to ensure they are secure and properly attached.
- Reconnect the power supply, and test the playback of a record. Pay attention to any improvements in sound quality and tracking performance with the new cartridge installed.
Replacing the cartridge can significantly impact the sound quality of your turntable, especially if the previous cartridge was worn out or damaged. Ensure you choose a compatible cartridge for your turntable and consider seeking expert advice if you’re unsure about the compatibility or installation process.
By regularly checking and, if necessary, replacing the cartridge, you can maintain optimal sound reproduction and enjoy your vinyl collection to the fullest.
Examining the Tonearm
The tonearm is a crucial component of your turntable that holds the cartridge and stylus and guides them across the record grooves. It plays a significant role in accurately tracking the record and ensuring optimal sound reproduction. If the tonearm is misaligned or damaged, it can result in poor tracking, distorted sound, or even damage to your records. Examining the tonearm is an essential step in troubleshooting and improving the sound quality of your turntable.
Here are the steps to examine the tonearm:
- Start by disconnecting the power supply to your turntable and ensuring that the tonearm is secured in its resting position. This will protect the stylus, cartridge, and record during the examination process.
- Visually inspect the tonearm for any visible signs of misalignment or damage. Look for any bent or crooked parts, loose components, or signs of wear.
- Ensure that the tonearm is balanced and floating freely. It should not be tilted to one side or pressing too heavily on the record surface.
- Refer to the manufacturer’s instructions or specifications to understand the proper alignment procedure for your specific turntable and tonearm.
- Use a tonearm alignment protractor to verify that the tonearm is aligned correctly. These alignment tools provide a visual guide to ensure the tonearm is set up accurately.
- If you notice any misalignment, consult the manufacturer’s instructions or seek professional assistance to make the necessary adjustments. Proper alignment of the tonearm will help ensure that the stylus tracks the record grooves accurately, minimizing distortion and excessive wear on your records.
- If you suspect any damage or issues with the tonearm that require repair, it’s recommended to consult a professional technician or service center specializing in turntable repairs. They will have the expertise to diagnose and address any problems with the tonearm.
By carefully examining the tonearm and ensuring it is properly aligned and functioning correctly, you can improve the tracking accuracy and overall sound quality of your turntable. A well-maintained tonearm is essential for preserving your records and ensuring an enjoyable listening experience.
Cleaning the Vinyl Record and Turntable Components
Regular cleaning of your vinyl records and turntable components is essential for maintaining optimal sound quality and prolonging the life of your equipment. Dust, dirt, and debris can accumulate on both the record surface and the various parts of your turntable, leading to pops, crackles, and overall degradation in sound reproduction. By incorporating cleaning into your routine maintenance, you can ensure that every play is accompanied by pristine audio. Here’s how to clean your vinyl records and turntable components:
- Cleaning Vinyl Records:
- Start by using an anti-static record brush or a carbon fiber brush to remove loose dust and debris from the record’s surface. Gently guide the brush along the grooves in a circular motion.
- If there are visible stains or fingerprints on the record, consider using a record cleaning solution. Apply a small amount of the solution to a soft, lint-free cloth and gently wipe the record’s surface in a circular motion. Avoid excessive pressure to prevent damage.
- For a deeper clean, you can invest in a record cleaning machine or use a record cleaning kit that includes a cleaning solution, microfiber brush, and drying rack. Follow the instructions provided with the kit or machine for the best results.
- Allow the record to dry completely before playing it again. Ensure there is no moisture left on the surface to prevent damage to your turntable and stylus.
- Cleaning Turntable Components:
- Start by disconnecting the power supply to your turntable to avoid any accidents or damage during the cleaning process.
- Use a soft, lint-free cloth or a microfiber cloth to gently wipe the turntable platter, tonearm, and dust cover. Remove any dust, dirt, or fingerprints from the surfaces.
- Clean the stylus using a stylus brush or a stylus cleaning solution. Gently brush or dab the stylus from back to front to remove any dirt or debris.
- If there is excessive buildup or stubborn dirt on the stylus or other components, consider using a specialized cleaning solution or seek professional help to avoid damage.
- After cleaning, ensure that all components are dry before reconnecting the power supply and playing any records.
By incorporating regular cleaning into your turntable maintenance routine, you can enjoy a cleaner sound reproduction and preserve the lifespan of your vinyl records and equipment. Remember to handle vinyl records with care and always use gentle cleaning techniques to avoid damaging the delicate grooves and sensitive components of your turntable.
Evaluating the Phono Preamp
The phono preamp, also known as a phono stage or phono EQ, is a crucial component for connecting your turntable to an audio system. Its primary function is to boost and equalize the low-level signal produced by the cartridge into a line-level signal that can be properly amplified by your audio system. A well-functioning phono preamp is essential for accurate sound reproduction and maximizing the potential of your turntable. Here’s how to evaluate the performance of your phono preamp:
- Review the Specifications: Start by examining the specifications and technical details of your phono preamp. Look for information such as the gain level, input impedance, and output voltage. Ensure that these specifications align with the requirements of your turntable and audio system.
- Listen for Noise and Distortion: Connect your turntable to the phono preamp and then to your audio system. Play a record and carefully listen for any unwanted noise, hisses, hums, or distortion during quiet passages or between tracks. These issues may indicate a problem with the phono preamp or improper setup.
- Check for Proper Channel Balance: Pay attention to the balance between the left and right channels. Uneven channel balance can result in an imbalanced stereo soundstage or one channel overpowering the other. Verify that the phono preamp is providing equal amplification to both channels.
- Assess the Frequency Response: Listen for any abnormalities in the frequency response of the phono preamp. A well-designed phono preamp should accurately reproduce a wide range of frequencies without significant coloration or distortion.
- Consider Upgrading: If you find that your current phono preamp is significantly limiting the sound quality, it may be worth considering an upgrade to a higher-quality preamp. Look for reputable brands and models known for their exceptional performance and compatibility with your turntable.
If you experience issues with your phono preamp or are unsure about its performance, consult the manufacturer’s manual or seek advice from audio professionals or enthusiasts. They can provide insights and expertise to help you evaluate and improve the performance of your phono preamp.
Remember, the phono preamp is a critical component in achieving optimal sound quality from your turntable. By evaluating and ensuring its proper functioning, you can enhance the overall audio experience and immerse yourself in the rich, warm sound of vinyl records.
Avoiding Grounding and Interference Issues
Grounding and electromagnetic interference (EMI) can introduce unwanted noise, hum, or buzzing into the audio signal from your turntable. These issues can significantly degrade the sound quality and disrupt your listening experience. Proper grounding and minimizing interference are crucial steps to ensure clean, distortion-free playback. Here’s how to avoid grounding and interference issues:
- Grounding:
- Make sure your turntable is properly grounded to prevent ground loop noise. This can be accomplished by connecting the grounding wire from the turntable to a grounding terminal on your amplifier or receiver.
- If your turntable does not have a separate grounding wire, ensure that the RCA cables are properly connected and secure. Loose or damaged connections can lead to grounding issues.
- Consider a ground loop isolator if you continue to experience ground loop noise. This device can help eliminate the hum caused by ground loops by breaking the electrical connection between the turntable and the audio system.
- Interference:
- Keep your turntable away from sources of electromagnetic interference, such as speakers, televisions, computer screens, or other electronic devices. These devices can emit electromagnetic fields that can interfere with the delicate signals from your turntable.
- Ensure that the cables connecting your turntable to your audio system are of high quality and shielded to minimize interference. Avoid running these cables parallel to power cables or other sources of electrical noise.
- Consider using a power conditioner or surge protector to help filter out electrical noise and surges that can affect the performance of your turntable.
- If you are using a wireless network router near your turntable, try repositioning it or using shielded Ethernet cables to minimize potential Wi-Fi interference.
By addressing grounding and interference issues, you can eliminate unwanted noise and noise distortion, allowing your turntable to deliver clean and high-quality audio playback. If you continue to experience problems, consult with audio professionals or enthusiasts who can provide additional guidance and expertise.
Remember, a well-grounded and interference-free setup is essential for extracting the full potential of your turntable and enjoying the purest sound from your vinyl records.
Conclusion
In conclusion, troubleshooting and improving the sound quality of your turntable requires a comprehensive understanding of its components and potential issues. By addressing common problems and undertaking necessary maintenance, you can enhance your listening experience and fully enjoy the magic of vinyl playback.
Start by understanding the various components of your turntable, including the plinth, platter, tonearm, cartridge, and stylus. Each plays a crucial role in the sound reproduction process and requires proper care to maintain optimal performance.
Identifying common issues that can result in bad sound is the next step. Adjusting the tracking force, checking and replacing the cartridge, examining the tonearm, cleaning the vinyl records and turntable components, and evaluating the phono preamp are all essential aspects of troubleshooting. By following the guidelines outlined, you can address these issues and improve the overall sound quality of your turntable.
Additionally, it’s important to pay attention to grounding and interference issues. Proper grounding and minimizing electromagnetic interference can eliminate unwanted noise, hum, and buzzing from your audio signal, ensuring a pristine playback experience.
To summarize, maintaining a well-functioning turntable requires regular maintenance, careful handling of records, and periodic checks to ensure all components are clean, aligned, and operating optimally. By taking the time to address these aspects, you can enjoy the rich, warm sound of vinyl and immerse yourself in the nostalgia and beauty of your record collection.
So, don’t let bad sound from your turntable discourage you. Embrace these troubleshooting steps and take pride in the process of enhancing your vinyl listening experience. With a little effort and care, your turntable can bring you years of joy and musical delight.