Home>Production & Technology>Sheet Music>How To Create Sheet Music Online

Sheet Music
How To Create Sheet Music Online
Modified: February 22, 2024
Learn how to create sheet music online and bring your musical compositions to life. Enhance your skills and explore various tools for sheet music creation.
(Many of the links in this article redirect to a specific reviewed product. Your purchase of these products through affiliate links helps to generate commission for AudioLover.com, at no extra cost. Learn more)
Table of Contents
- Introduction
- Step 1: Choosing the Right Sheet Music Creation Software
- Step 2: Setting up the Sheet Music Document
- Step 3: Adding Musical Notation
- Step 4: Editing and Formatting the Sheet Music
- Step 5: Adding Lyrics and Text
- Step 6: Adjusting Layout and Page Setup
- Step 7: Adding Instrumentation and Arrangement
- Step 8: Proofreading and Finalizing the Sheet Music
- Conclusion
Introduction
Sheet music is the written form of musical notation that allows musicians to interpret and perform a piece of music. Whether you’re a professional musician, a music teacher, or an aspiring composer, creating your own sheet music can be a rewarding and essential skill. Fortunately, with the advancement of technology, it has become easier than ever to create sheet music online.
In this article, we will guide you through the process of creating sheet music online, from choosing the right software to finalizing your masterpiece. We will provide step-by-step instructions, expert tips, and useful techniques to help you produce high-quality sheet music that accurately reflects your musical ideas.
Creating sheet music online offers several advantages over traditional methods. It allows for easy collaboration between musicians, enables quick edits and revisions, and provides a digital platform for sharing your compositions with a wider audience. Additionally, online sheet music creation software often provides a range of tools and features to enhance your music notation, such as automatic transposition, playback options, and various notation styles.
Whether you’re composing a symphony, arranging a popular song, or writing down a simple melody, learning how to create sheet music online will open up new possibilities for your musical endeavors. So let’s dive in and explore the steps to take in order to bring your musical visions to life!
Step 1: Choosing the Right Sheet Music Creation Software
Before you start creating your sheet music online, it’s crucial to choose the right software that fits your needs and preferences. There are several options available, ranging from free programs to professional-grade software. Here are some factors to consider when selecting the software:
- Features: Look for software that offers a wide range of features, such as notation editing, MIDI input, audio playback, and transposition capabilities. Consider whether you need advanced notation options like chord symbols, guitar tablature, or drum notation.
- User-Friendliness: Choose software with an intuitive interface that makes it easy to navigate and use. Look for drag-and-drop functionality, keyboard shortcuts, and the ability to customize your workspace.
- Compatibility: Ensure that the software is compatible with your operating system (Windows, Mac, or Linux) and supports the file formats you plan to work with, such as MusicXML or PDF.
- Integration: If you use other music production software or digital audio workstations, consider software that integrates well with those tools. This will allow for seamless workflow and easier sharing of your compositions.
- Community and Support: Look for software that has an active user community, online forums, tutorials, and customer support. This will be beneficial when you encounter any challenges or need assistance with using the software.
Some popular sheet music creation software options include:
- Sibelius: Sibelius is a professional-grade software that offers a wide range of advanced features and notation options. It is known for its industry-standard notation capabilities and is widely used by composers, arrangers, and publishers.
- Finale: Finale is another professional-level software that provides powerful notation tools and customization options. It offers a comprehensive set of features and is highly regarded in the music notation community.
- Musescore: Musescore is a free and open-source software that is suitable for beginners and intermediate users. It has a user-friendly interface, a wide range of notation features, and a supportive online community.
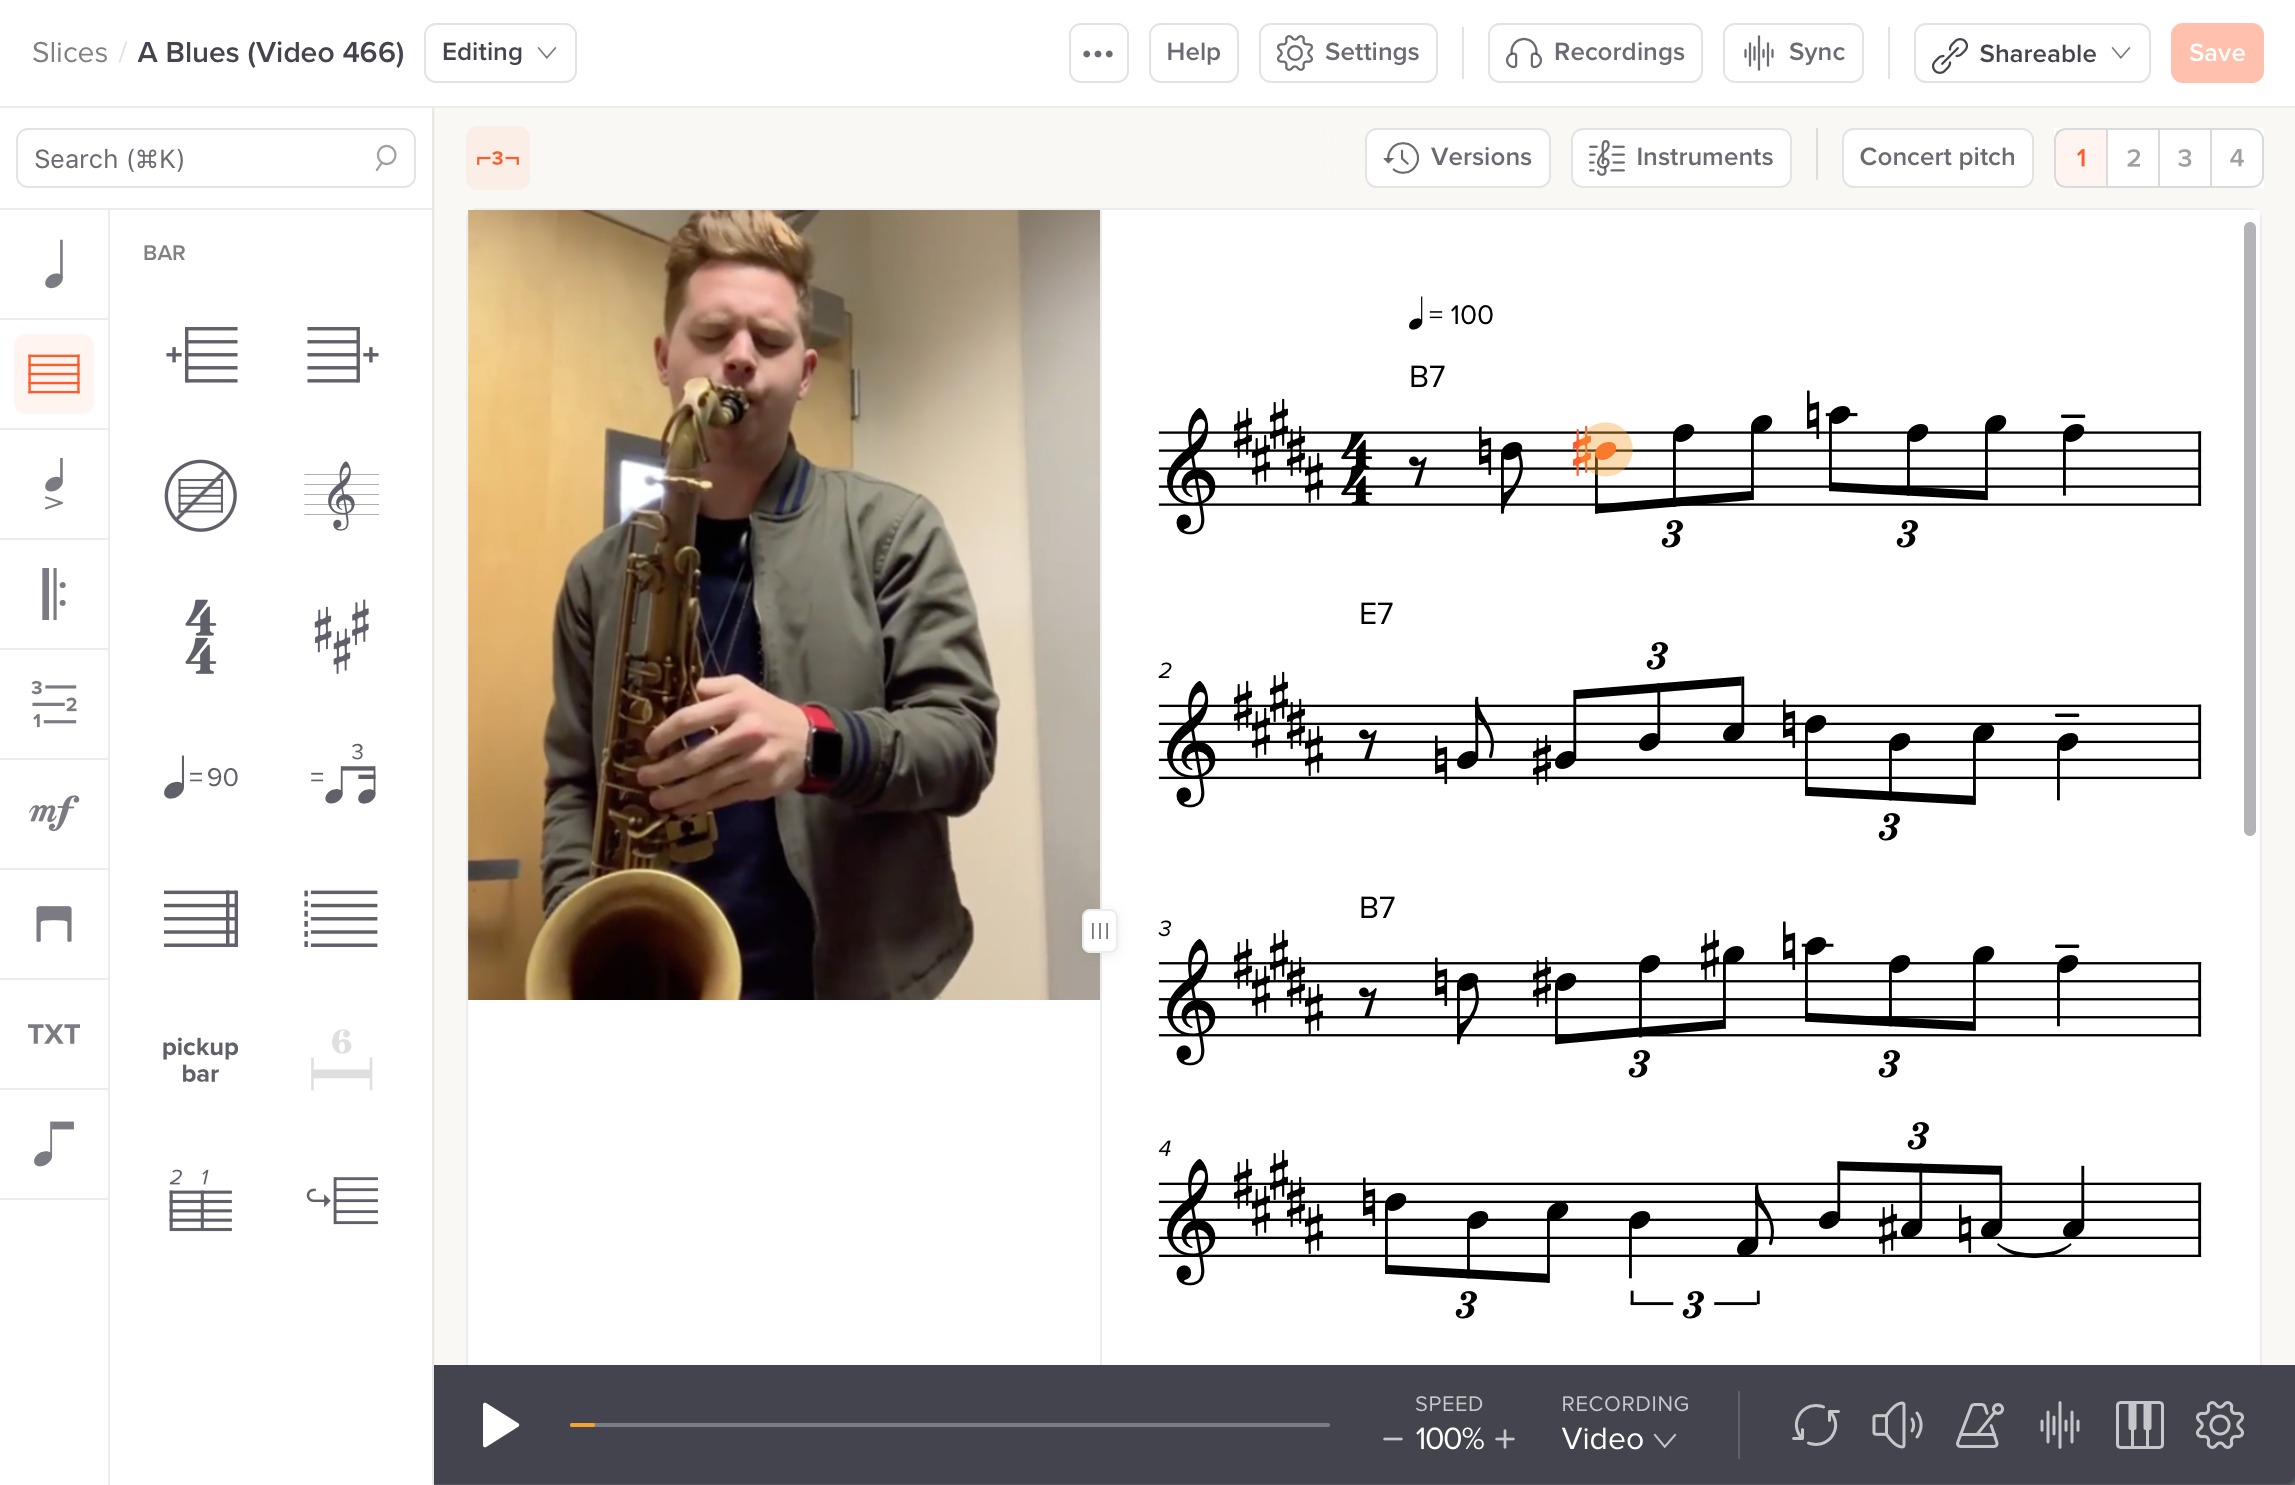
- Noteflight: Noteflight is a web-based software that allows for easy collaboration and sharing of sheet music. It offers both free and premium versions, with the premium version providing advanced features and expanded storage.
Keep in mind that the software mentioned above are just a few examples, and there are many other options available. Take the time to research and try out different software to find the one that best suits your needs and aligns with your budget.
Once you’ve chosen the right sheet music creation software, you’re ready to move on to the next step: setting up the sheet music document.
Step 2: Setting up the Sheet Music Document
After selecting the appropriate sheet music creation software, the next step is to set up the sheet music document. This involves configuring the page size, layout, and other settings to ensure that your sheet music looks professional and is easy to read. Here’s how to go about it:
- Page Size: Start by choosing the appropriate page size for your sheet music. The most common options are A4 and Letter size. Consider the complexity and length of your composition when selecting the page size, as you want to ensure that all the musical elements fit comfortably on the page.
- Orientation: Decide whether you want your sheet music to have a portrait (vertical) or landscape (horizontal) orientation. Portrait orientation is typically used for vocal and instrumental scores, while landscape orientation may be preferred for orchestral or ensemble compositions.
- Margins: Set the margins of your sheet music document. It’s important to leave adequate space on all sides to allow for binding, hole-punching, or other notations. The general recommendation is to set margins between 0.5 to 1 inch (1.27 to 2.54 cm) on all sides.
- Header and Footer: Consider whether you want to include a header or footer on your sheet music. This can include information such as the title of the composition, composer’s name, copyright information, page numbers, or any other relevant details. Ensure that the font size and style are clear and legible.
- Staff Size: Adjust the size of the musical staff to ensure readability. If your sheet music includes intricate rhythms or small note values, you may need to increase the staff size. On the other hand, if the music is relatively simple, a smaller staff size can save space without compromising clarity.
- Number of Systems per Page: Determine how many musical systems (staves) you want to display on each page. This will depend on the complexity of your composition and the level of detail you want to convey. For solo pieces, one or two systems per page are generally sufficient, while orchestral scores may require multiple systems.
Take some time to experiment with the settings in your chosen software and preview how the sheet music looks. Make adjustments as needed until you achieve a layout and design that enhances the readability and aesthetic appeal of your music.
Once the sheet music document is properly set up, you’re ready to move on to the next step: adding musical notation.
Step 3: Adding Musical Notation
Now that you have your sheet music document set up, it’s time to add the musical notation. This step involves translating your musical ideas into written music notation using the tools provided by your chosen sheet music creation software. Here are some key considerations when adding musical notation:
- Note Entry: Familiarize yourself with the note entry method in your software. This may involve selecting the duration of the note (quarter note, half note, etc.) and then placing it on the staff by clicking or using keyboard shortcuts. Some software also allows for MIDI input, where you can play the notes on a MIDI keyboard or other MIDI instrument to input them directly.
- Pitch and Clefs: Indicate the pitch of the notes by placing them on the appropriate line or space of the staff. Use clefs (such as treble clef, bass clef, or alto clef) to indicate the range of the notes. Remember to consider the instrument or voice type for which you are writing and ensure that the pitch range is suitable.
- Articulations and Dynamics: Enhance the expressiveness of your music by adding articulations (such as staccato, legato, or accents) and dynamics (such as piano, forte, or crescendo). These markings provide important instructions to the performers on how to interpret the music.
- Rests and Time Signatures: Include rests to indicate pauses in the music. Use time signatures to specify the rhythmic structure of the piece, indicating the number of beats per measure and the note value that receives one beat.
- Key Signatures and Accidentals: Indicate the key signature of your composition, which dictates the sharps or flats in the music. Use accidentals (sharp, flat, or natural symbols) to modify the pitch of individual notes when necessary.
Take advantage of the features offered by your software, such as automatic note spacing, automatic beam grouping, and transposition. These features can save you time and ensure that your notation is clear and accurate.
Remember to proofread and review your notation periodically as you work. Double-check for errors, inconsistencies, or missing elements in your notation. It’s also helpful to play back the music using the playback feature in your software to verify that the notation accurately represents the intended sound.
Once you have added the musical notation, it’s time to move on to the next step: editing and formatting the sheet music.
Step 4: Editing and Formatting the Sheet Music
After adding the musical notation to your sheet music, it’s important to spend time editing and formatting the document to ensure its clarity and readability. This step involves refining the visual elements of the sheet music and making any necessary adjustments. Here are some key aspects to consider when editing and formatting your sheet music:
- Alignment and Spacing: Check the alignment of your musical elements, such as notes, rests, and lyrics. Ensure that they are properly aligned with the staff lines and evenly spaced. Use the software’s alignment and spacing tools to adjust the positioning as needed.
- Barlines and Measures: Verify that the barlines are correctly placed to separate the measures. Ensure that the measures are evenly divided and that all the musical elements fit within each measure. Adjust as necessary to maintain proper rhythmic flow.
- Beaming and Ties: Pay attention to the beaming of the notes to reflect the intended phrasing. Use ties to connect notes that extend across measures or beats. Make sure that the beaming and ties are clear and accurately represent the musical phrases.
- Lyrics: If your composition includes lyrics, make sure they are aligned correctly with the corresponding notes. Adjust the font size, style, and spacing of the lyrics to enhance their legibility. Ensure that the syllabic placement matches the rhythm of the music.
- Repeats and Codas: If your composition includes repeat signs or codas, ensure that they are properly marked and formatted. Double-check that they navigate the performer correctly through the sections of the music.
- Instrumentation: If your sheet music includes multiple instruments or voices, ensure that each part is properly labeled and formatted. Use different colors or fonts to distinguish between different instruments or voices for clarity.
- Tempo and Metronome Marks: If you want to indicate the tempo of your composition, consider adding tempo and metronome marks. These markings provide guidance to performers on the desired speed and rhythm of the music.
Take the time to review your sheet music from a visual perspective. Pay attention to details such as font size, style, and notation placement. Ensure that the sheet music is legible and easy to navigate for performers.
Finally, proofread your sheet music for any errors, missing elements, or inconsistencies. Fix any mistakes you spot and make any necessary adjustments to improve the overall presentation of your sheet music.
Once you have edited and formatted your sheet music to your satisfaction, it’s time to move on to the next step: adding lyrics and text (if applicable).
Step 5: Adding Lyrics and Text
If your composition includes vocals or requires additional textual information, such as annotations or performance instructions, it’s important to add lyrics and text to your sheet music. This step allows you to provide valuable context and guidance to performers. Here’s how to effectively incorporate lyrics and text into your sheet music:
- Lyrics Entry: Use the lyrics entry feature in your sheet music software to input the lyrics for your composition. Ensure that the lyrics are aligned with the corresponding notes and follow the appropriate syllabic placement. Adjust the spacing and font style to enhance readability.
- Text Annotations: Consider including text annotations to provide performance instructions or express musical intentions. These annotations can indicate dynamics, articulations, tempo changes, or any other relevant information. Use text boxes or symbols to clearly denote these annotations.
- Performance Notes: If there are specific instructions or performance notes that you want to communicate to the performer, add them to the sheet music. These notes could include suggestions for interpretation, style, or specific techniques to be used. Ensure that the performance notes are placed prominently and clearly distinguishable from the musical notation.
- Text Formatting: Pay attention to the formatting of the text. Adjust the font size, style, and spacing to ensure legibility and harmony with the rest of the sheet music. Align the text consistently and consider using different font colors or styles to differentiate between various types of text.
- Translations: If your composition includes lyrics in different languages or requires translations, provide the translations alongside the original lyrics. This allows performers and listeners to understand the meaning of the words and connect with the music on a deeper level.
- Rehearsal Letters and Measure Numbers: Include rehearsal letters or measure numbers to facilitate communication and navigation during rehearsals. These identifiers help performers easily locate specific sections of the music and aid in discussions and rehearsal planning.
Adding lyrics and text to your sheet music enhances the communicative power of your composition. It provides performers with valuable information, allowing them to interpret and deliver your music accurately. Review your sheet music to ensure that the lyrics and text are correctly placed, clearly visible, and harmonize with the overall visual presentation.
With the lyrics and text added, you’re ready to move on to the next step: adjusting layout and page setup for your sheet music.
Step 6: Adjusting Layout and Page Setup
Once you have added the musical notation, lyrics, and text to your sheet music, it’s time to fine-tune the layout and page setup. This step ensures that your sheet music is visually appealing and easy to read. Here’s how to adjust the layout and page setup:
- Page Breaks: Check the page breaks in your sheet music to ensure that they occur at logical and convenient points. Avoid breaking musical phrases or lyrics in the middle of a page whenever possible. Adjust the page breaks as needed to maintain a natural flow.
- System Breaks: Determine where to break the systems (staves) within each page. Aim for consistent vertical spacing between systems to maintain a balanced appearance. Adjust the system breaks to avoid overcrowding or excessive white space.
- Page Turns: Consider the practicality of page turns for performers. Anticipate where page turns may occur and ensure that they happen at suitable spots, such as at the end of a phrase or a musical section. Aim for page turns that allow performers to smoothly transition to the next page without interrupting their playing or singing.
- System Formatting: Adjust the spacing between the systems to create an optimal balance. Avoid excessive white space between systems, as it can make the sheet music look cluttered. On the other hand, ensure that there is enough space for performers to comfortably read their parts.
- Page Numbers: Add page numbers to your sheet music to facilitate organization and reference. Place the page numbers consistently, usually in the footer or header area. Adjust the font size and style to ensure visibility without overshadowing the musical content.
- Headers and Footers: Consider including headers and footers that provide additional information, such as the title of the composition, composer’s name, copyright information, or rehearsal marks. Ensure that the headers and footers are clearly distinguishable from the main content and align consistently across all pages.
- Font and Formatting: Review the font style, size, and formatting throughout the sheet music to ensure consistency. Use clear and legible fonts that are appropriate for music notation. Consider different font styles for musical symbols, lyrics, and performance instructions to make them visually distinct.
Take the time to proofread your sheet music and verify that all layout adjustments have been made accurately. Make sure that the sheet music is visually balanced and aesthetically pleasing.
Once you have adjusted the layout and page setup, you’re ready to move on to the next step: adding instrumentation and arrangement details (if applicable).
Step 7: Adding Instrumentation and Arrangement
If your sheet music involves multiple instruments or requires specific arrangements, it’s essential to add instrumentation and arrangement details to ensure accurate performance. This step focuses on providing information about the instruments involved and any specific arrangement instructions. Here’s how to add instrumentation and arrangement details to your sheet music:
- Instrument Names: Clearly label each instrument in your sheet music by adding instrument names above or beneath the staves to indicate which instrument plays each part. Ensure that the instrument names are positioned correctly and that they align consistently throughout the entire composition.
- Transposing Instruments: If your composition involves transposing instruments like B♭ or E♭ instruments, make sure to indicate the transposition correctly. This helps performers read and interpret their parts accurately. Include the necessary key signatures and transposition instructions if needed.
- Divisi Parts: If a section of the composition requires divisi parts (splitting a section into multiple voices or instruments), clearly indicate the divisi instructions on the sheet music. Use brackets and labels to differentiate between the different parts.
- Orchestration Details: If your composition includes orchestral instrumentation, specify the details of each section, such as strings, woodwinds, brass, and percussion. Provide information on the number of players for each instrument and any specific techniques or effects required.
- Arrangement Instructions: If you have made specific arrangements or modifications to the original composition, such as adding an intro, modulating keys, or changing the structure, include instructions to guide performers in executing the arrangement. Describe these changes using clear and concise notation or text annotations.
- Dynamic and Articulation Markings: Adjust the dynamic and articulation markings based on the instrumentation and arrangement. Consider the capabilities and characteristics of each instrument and adapt the markings accordingly. Ensure that the markings accurately reflect the desired musical interpretation.
- Expression and Style Markings: Include markings that indicate the desired expression and style for each instrument or section. Use performance instructions such as legato, staccato, vibrato, and timbre descriptors to guide performers in achieving the desired musical expression.
Adding instrumentation and arrangement details helps performers understand how their specific parts contribute to the overall composition. Review your sheet music to ensure that the instrumentation and arrangement instructions are accurately represented and clearly communicated.
With the instrumentation and arrangement details added, you’re ready to move on to the final step: proofreading and finalizing your sheet music.
Step 8: Proofreading and Finalizing the Sheet Music
The final step in creating sheet music online is to proofread and finalize your composition. This crucial step ensures the accuracy, clarity, and professionalism of your sheet music. Here’s how to effectively proofread and finalize your sheet music:
- Note Accuracy: Double-check the accuracy of the notes, rhythms, and rests in your sheet music. Ensure that all musical elements are correctly notated and aligned with the appropriate beats and measures. Correct any mistakes or discrepancies you find.
- Lyric Alignment: Verify that the lyrics align correctly with the corresponding notes and syllabic placement. Make sure that the lyrics are clear, legible, and properly spaced. Adjust as needed to enhance readability.
- Spelling and Grammar: Check for any spelling or grammatical errors in the text and annotations within your sheet music. Correct any mistakes to ensure that the sheet music is professional and free of distractions.
- Consistency: Review your sheet music for consistency in notation style, font usage, alignment, and spacing. Maintain uniformity throughout the entire composition to provide a polished and cohesive appearance.
- Performance Considerations: Consider the practicality and playability of your sheet music. Put yourself in the shoes of the performers and assess if the notation, markings, and arrangement instructions are clear and manageable. Make any necessary adjustments to enhance the performance experience.
- Instructions and Markings: Evaluate the clarity and effectiveness of any instructions, dynamics, articulations, or expression markings. Ensure that these markings accurately convey your intended musical interpretation and enhance the overall performance quality.
- Layout and Formatting: Review the layout, formatting, and overall appearance of your sheet music. Check for proper spacing, alignment, and legibility of all musical elements. Ensure that the sheet music is visually organized and appealing.
- Collaboration and Feedback: Seek feedback from trusted colleagues, musicians, or music educators. They can provide valuable insights and suggestions for improving your sheet music. Consider their feedback and make any necessary revisions based on their input.
Once you have thoroughly proofread and finalized your sheet music, save it in the appropriate file format, such as PDF or MusicXML, to ensure compatibility and easy sharing. It’s a good practice to keep an organized and properly labeled folder for your sheet music files.
Congratulations! You have successfully created your sheet music online. Your composition is now ready to be practiced, performed, and shared with musicians and music enthusiasts.
Remember, creating sheet music is an ongoing process. As you gain more experience and receive feedback, you can continue refining and improving your compositions. Embrace creativity, expressiveness, and musicality in your sheet music to truly make it come alive.
Conclusion
Creating sheet music online is a valuable skill that enables musicians, composers, and music educators to bring their musical ideas to life. With the wide range of sheet music creation software available today, the process has become more accessible and efficient than ever before. By following the steps outlined in this guide, you can create professional-looking sheet music that accurately represents your musical compositions.
Choosing the right software is an important first step in the sheet music creation process. Consider features, user-friendliness, compatibility, integration, and community support when making your selection. Once you have the software set up, take the time to adjust the sheet music document according to your preferred page size, orientation, margins, and other layout settings.
Adding musical notation involves accurately representing pitch, rhythm, dynamics, and other musical elements. Use the tools provided by your software to input notes, rests, articulations, and other symbols. Pay attention to correct pitch placement, clear rhythms, and consistent notation style.
Next, edit and format your sheet music to ensure readability and visual appeal. Adjust alignment, spacing, and formatting to create a balanced layout. Proofread your work to eliminate errors and ensure consistency throughout the sheet music.
If your composition includes vocals or textual information, incorporate lyrics and text into your sheet music. Align lyrics with corresponding notes, include performance instructions or annotations, and format the text for legibility.
Consider the instrumentation and arrangement of your composition and provide clear instructions for performers. Label instruments, indicate transposition for certain instruments, and specify any divisi or orchestration details. Use expressive markings to guide performers in interpreting your composition.
Finally, thoroughly proofread and finalize your sheet music. Double-check note accuracy, spelling, and grammar. Ensure consistency, clarity of instructions, and a well-organized layout. Seek feedback from trusted colleagues or musicians to further refine your composition.
Creating sheet music online is an ongoing process that allows for continuous improvement and artistic expression. Be open to new ideas, experiment with different techniques, and explore the capabilities of your chosen software. With practice and dedication, you can develop your skills and create sheet music that truly captures the essence of your musical vision.
Now, armed with this knowledge, it’s time to unleash your creativity, compose your masterpieces, and share your music with the world!

