Home>Production & Technology>Remix>How To Remix Your Project On Scratch


Remix
How To Remix Your Project On Scratch
Modified: January 22, 2024
Learn how to remix your project on Scratch with our easy-to-follow tutorial. Get creative and add your own unique twist to your projects using the remix feature.
(Many of the links in this article redirect to a specific reviewed product. Your purchase of these products through affiliate links helps to generate commission for AudioLover.com, at no extra cost. Learn more)
Table of Contents
Introduction
Scratch is a popular online platform that allows users to create and share interactive stories, animations, and games. One of the standout features of Scratch is the ability to remix projects created by other users. Remixing is not only a great way to learn by example, but it also encourages collaboration and creativity within the Scratch community.
In this article, we will explore the ins and outs of remixing projects on Scratch. Whether you’re a beginner or an experienced user, remixing can open up a whole new world of possibilities for your own projects. We’ll cover everything from finding and opening projects to modifying them and adding your own unique ideas. So let’s dive in and discover how to unleash your creativity through remixing on Scratch!
Note: Before we proceed, it’s important to understand that remixing is all about building upon the work of others while giving credit where it’s due. Always respect and follow the guidelines set by the Scratch community when remixing someone else’s project.
Understanding the Remix Feature on Scratch
The remix feature on Scratch allows you to take an existing project and make it your own by adding, modifying, or improving upon it. This feature promotes collaboration and creativity within the Scratch community, allowing users to learn from each other and build upon the work of others.
When you remix a project, you create your own version of it while still acknowledging the original creator. This means that the project’s original code, sprites, and backgrounds remain intact, but you have the freedom to make changes and additions to suit your creative vision.
Remixing is not only a way to learn from other Scratch users, but it also serves as a starting point for your own projects. By remixing, you can leverage existing ideas and code, saving time and effort in the process.
It’s important to note that while remixing allows you to build upon the work of others, it’s always essential to respect the original creator’s work. Give credit where it’s due by mentioning the original project and creator in the credits section of your remix.
Additionally, when you remix a project, it’s essential to adhere to the Scratch community guidelines. These guidelines ensure a safe and positive environment for all users, and they specify what is acceptable and encouraged when remixing projects. Familiarize yourself with these guidelines to ensure that your remixes are appropriate and respectful.
Now that we have a solid understanding of the remix feature on Scratch and its importance in fostering collaboration and creativity, let’s explore how to find projects to remix and how to open them in the Scratch editor.
Finding a Project to Remix
When it comes to remixing on Scratch, there are multiple ways to find projects that you can build upon and make your own. Here are some effective methods to discover projects to remix:
- Browsing the Scratch Website: The Scratch website itself is a treasure trove of projects waiting to be remixed. Navigate to the Explore section on the Scratch website, where you can explore projects by category, popularity, or recent uploads. Browse through the projects and keep an eye out for ones that catch your interest.
- Searching by Tags: Tags are keywords or labels that users add to their projects to make them more discoverable. You can search for projects by entering relevant tags into the search bar on the Scratch website. For example, if you’re interested in remixing a platform game, you can search for tags like “platformer” or “game.”
- Collaborating with Other Scratch Users: Engaging with the Scratch community is a great way to discover projects for remixing. Participate in discussions on the Scratch forums or join Scratch studios where users collaborate on specific themes or types of projects. This way, you can find projects that align with your interests and collaborate with other Scratch users.
Once you’ve found a project that you want to remix, take the time to explore it thoroughly. Understand the project’s structure, observe its coding techniques, and evaluate its overall design. This will give you insight into the creator’s vision and help you brainstorm ideas for modifications and improvements.
Remember, the purpose of remixing is to build upon the existing project and add your own creativity. While you can take inspiration from other projects, strive to make your remix unique and add your personal touch to it.
In the next section, we will dive into the process of opening a project in the Scratch editor, where you can begin remixing and unleashing your creativity.
Opening a Project in the Scratch Editor
Once you have found a project that you want to remix on Scratch, the next step is to open it in the Scratch editor. The Scratch editor is where you can view and modify the project’s code, sprites, backgrounds, and other elements.
To open a project in the Scratch editor, follow these steps:
- Click on the project thumbnail: On the project’s page, you will see a thumbnail image representing the project. Click on this thumbnail to open the project.
- Select the “See Inside” option: Once you have opened the project, you will see various options on the project page. Look for the “See Inside” button and click on it. This will take you to the Scratch editor, where you can view and modify the project.
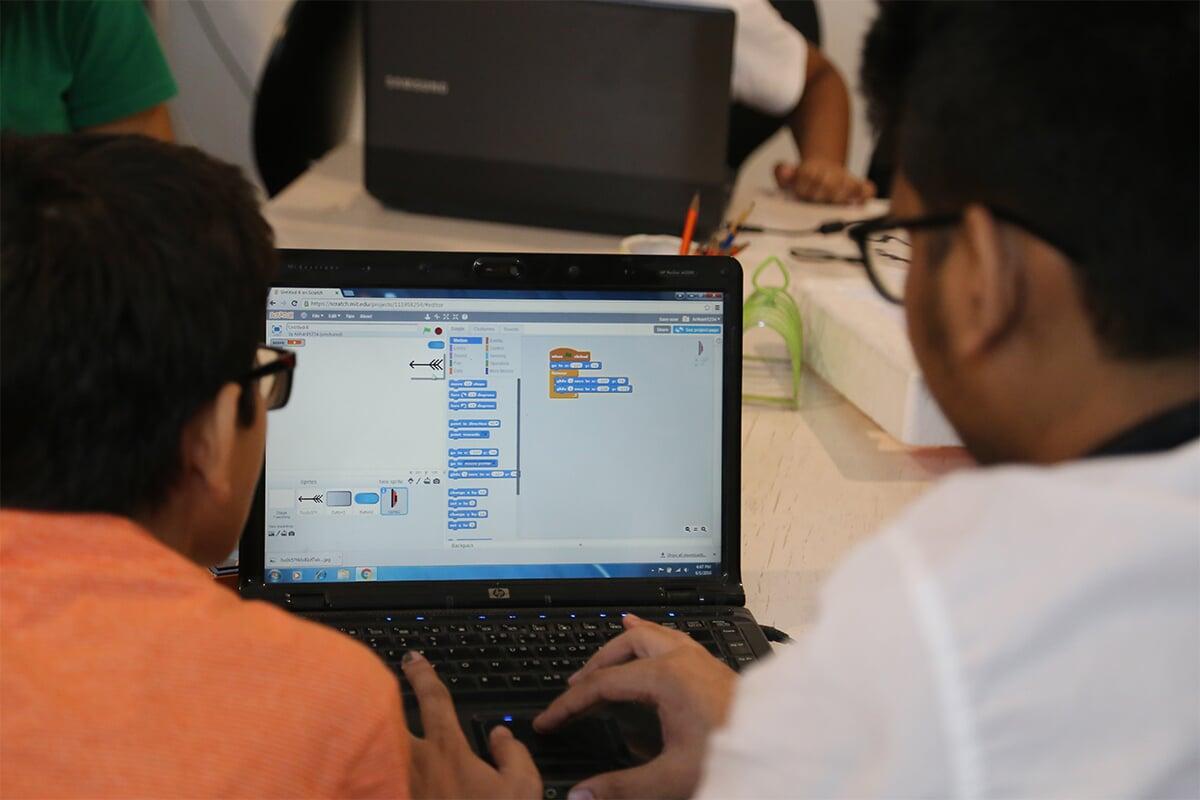
Once you are in the Scratch editor, take some time to familiarize yourself with its layout and features. The editor consists of different sections, including the stage area, the sprite list, and the blocks palette.
The stage area is where the project is displayed and where you can see the sprites and backgrounds in action. The sprite list displays all the different sprites present in the project, and the blocks palette contains the various blocks that represent different coding commands and actions.
Now that you have the project open in the Scratch editor, you can start exploring its code and making modifications. Take a closer look at the code blocks and try to understand how they work together to create the project’s behavior and interactivity.
If you come across any coding blocks that you don’t understand or want to modify, you can refer to the Scratch documentation for explanations and examples. The Scratch community is also a valuable resource, where you can ask questions and seek guidance from experienced users.
Once you feel comfortable navigating the Scratch editor and understanding the project’s code, you are ready to begin remixing the project and infusing your own ideas into it. In the next section, we will explore how to modify the project and add your unique touch.
Modifying the Project
When remixing a project on Scratch, the beauty lies in the ability to modify and customize it to suit your creative vision. By making changes to the project, you can add your own flair and innovate upon the original concept.
Here are some ways you can modify a project:
- Changing Sprites and Backgrounds: If you want to give the project a fresh look, you can replace the existing sprites and backgrounds with your own. You can upload your own images or create new sprites using the Scratch editor’s drawing tools. This allows you to put your unique stamp on the project’s visuals.
- Editing Existing Code: Explore the project’s code and make changes to customize its functionality. Add new blocks, modify existing ones, or rearrange the sequencing to alter the project’s behavior. This is where you can showcase your programming skills and bring your own creative ideas to life.
- Adding Sound Effects and Music: Enhance the project’s audio experience by adding sound effects and background music. Scratch provides a library of sounds and music that you can use, or you can upload your own audio files. Experiment with different sounds to create the right mood and atmosphere.
- Implementing New Features: Take the project to new heights by introducing new features and interactions. Is there a game mechanic you want to incorporate? Do you have an innovative idea to make the project more engaging? Let your imagination run wild and add your own unique twist to the project.
- Refining Visual Layout and Design: Pay attention to the project’s user interface and consider refining its visual layout and design. Improve the placement of sprites, enhance the color scheme, and ensure that the overall aesthetics of the project align with your vision. This can make a significant difference in the overall user experience.
As you modify the project, remember that the goal is to build upon the original work while making it your own. Respect the original creator’s ideas and give credit where it’s due. Additionally, keep in mind the Scratch community guidelines to ensure that your modifications are appropriate and respectful.
Once you have made the desired modifications to the project, it’s time to infuse your own ideas and take the project in a new direction. In the next section, we will explore how to add your unique touch to the remix by incorporating your own ideas.
Adding Your Own Ideas
When remixing a project on Scratch, it’s important to add your own unique ideas to make your remix stand out. This is your opportunity to showcase your creativity and bring your personal touch to the project. Here are some ways you can incorporate your own ideas:
- Create New Levels or Challenges: If you’re remixing a game project, consider adding new levels or challenges to make the gameplay more engaging. Think about unique obstacles, power-ups, or puzzles that you can introduce to enhance the player’s experience.
- Add Special Effects or Animations: Spice up the project by adding special effects or animations to make it visually appealing. This can include particle effects, transition animations, or character animations that bring the project to life.
- Introduce a Unique Storyline: If the original project lacks a narrative, you can create your own storyline to give it depth and context. Write dialogues, create character arcs, and develop an engaging plot that keeps users invested in the project.
- Experiment with Different Control Schemes: Modify the project’s control scheme to offer users a fresh and unique interaction experience. You can try using keyboard inputs, mouse gestures, or even touch controls if you’re remixing for a touchscreen device.
- Enhance User Feedback: Consider adding visual and audio cues to provide users with better feedback as they interact with the project. This can include score displays, health bars, sound effects on certain actions, or even a progress tracker.
- Implement Multiplayer Functionality: If you’re feeling ambitious, you can take the project to the next level by adding multiplayer functionality. This can enable users to play together, compete, or collaborate within your remix.
Remember, remixing is a creative process that allows you to build upon existing work while adding your own ideas and innovations. Don’t be afraid to take risks and think outside the box. Experiment with different ideas and see what resonates with you and your audience.
Once you have added your own ideas, continue to playtest your remix, gather feedback, and iterate on it. This will help you refine your project and make it even better.
In the next section, we will explore how you can remix with code and delve deeper into the coding aspect of your project.
Remixing with Code
Remixing on Scratch involves more than just modifying the visual elements of a project – it also allows you to remix with code. The coding aspect is where you can truly make the project your own by adding new functionalities, tweaking existing logic, and exploring different programming techniques.
Here are some ways you can remix with code:
- Add New Custom Blocks: Create your own custom blocks to encapsulate a set of actions or behaviors. This can make your code more organized and easier to understand, especially if you find yourself reusing the same set of commands frequently.
- Modify Existing Code Blocks: Dive into the existing code blocks and modify them to suit your needs. Experiment with different parameters, conditions, and event triggers to alter the behavior of sprites, create new interactions, or customize game mechanics.
- Explore Advanced Coding Concepts: As you remix the project, challenge yourself to explore more advanced coding concepts. This could include working with variables, lists, loops, or conditionals to add complexity and depth to the project’s interactivity.
- Integrate External APIs: If you’re feeling adventurous, consider integrating external APIs into your remix. This could involve fetching data from the web, incorporating real-time weather information, or integrating social media functionality. This opens up endless possibilities for expanding the project’s capabilities.
- Optimize Performance and Efficiency: Analyze the project’s code and optimize it for better performance and efficiency. Look for areas where you can streamline the code, eliminate unnecessary repetitions, or improve the project’s responsiveness.
- Experiment with Different Algorithms: Remixing with code is an opportunity for you to experiment with different algorithms and problem-solving techniques. Explore different ways to solve challenges, optimize calculations, or create unique patterns and effects.
As you remix with code, remember to keep the original creator’s intent in mind and respect their work. Stay true to the essence of the project while adding your own creative twists and enhancements.
Don’t be afraid to explore the Scratch community for inspiration and guidance in your coding endeavors. Collaborating with others and learning from their projects can help you expand your coding skills and take your remix to new heights.
In the next section, we will discuss the importance of following the Scratch community guidelines when remixing projects.
Remix Community Guidelines
When remixing projects on Scratch, it is essential to adhere to the community guidelines set by Scratch. These guidelines ensure a safe, respectful, and positive environment for all users. By following the guidelines, you contribute to the overall well-being of the Scratch community and help maintain a supportive atmosphere for creativity and collaboration.
Here are some key points to keep in mind regarding the Scratch community guidelines:
- Respect Original Creators: When remixing a project, always give credit to the original creator. Acknowledge their contribution and include a clear mention of their name and project in the credits section of your remix. Show respect for their work and creativity throughout the remixing process.
- Be Mindful of Licensing: Check the licensing terms of the original project before remixing. Some projects may have specific licensing requirements or restrictions placed by the original creator. Ensure that you understand and comply with these terms when sharing or distributing your remix.
- Promote Positivity and Kindness: Interact with other Scratch users in a positive and respectful manner. Provide constructive feedback, support fellow creators, and avoid engaging in any form of bullying, harassment, or negativity. The Scratch community values inclusivity and encourages a supportive environment for all.
- Respect Copyright and Intellectual Property: When remixing, be mindful of copyright laws and intellectual property rights. Do not use copyrighted materials without permission, and ensure that your remix does not infringe upon anyone’s intellectual property. Be original in your contributions and avoid plagiarizing or copying content without proper attribution.
- Report Inappropriate Content: If you come across any projects or interactions on Scratch that violate the community guidelines or contain inappropriate content, make sure to report them to the Scratch moderation team. This helps maintain the integrity and safety of the platform.
- Encourage Collaboration: Remixing is all about collaboration and learning from others. Be open to collaborating with other Scratch users, share your remixes, and provide feedback and support to fellow creators. Collaboration fosters creativity and growth within the Scratch community.
By following these guidelines, you contribute to a positive and thriving community of creators on Scratch. It’s important to remember that the Scratch community is built on respect, inclusivity, and creativity.
In the next section, we will discuss the final steps of saving and sharing your remix, allowing others to enjoy and be inspired by your work.
Saving and Sharing Your Remix
Once you have completed your remix on Scratch, it’s time to save and share your work with the wider community. Sharing your remix allows others to see and appreciate your creativity, and it also encourages collaboration and inspiration among Scratch users.
Here are the steps to save and share your remix:
- Saving Your Remix: To save your remix, click on the “File” menu in the Scratch editor and select “Save now.” This will ensure that your remix is saved with all the modifications and additions you have made. Give your remix a descriptive and unique name to make it easily identifiable.
- Add Proper Attribution: As part of the remix community guidelines, it’s crucial to give proper attribution to the original project and its creator. Include a clear and prominent mention of the original creator’s name and project in the credits section of your remix. This shows respect for their work and acknowledges their contribution to your remix.
- Write a Description: Provide a short description or explanation of your remix, highlighting the changes you made and the unique aspects you added. This helps others understand your creative vision and the inspiration behind your remix.
- Upload Your Remix: After saving your remix, you can upload it to the Scratch website by clicking on the “Share” button within the Scratch editor. Follow the prompts to upload your remix and make it available for others to view and remix further.
- Share on Social Media or Scratch Forums: Spread the word about your remix by sharing it on social media platforms or within the Scratch community forums. This allows fellow Scratch users to discover and appreciate your work, and it also provides an opportunity for collaboration and feedback.
- Encourage Remixing and Attribution: When sharing your remix, encourage others to remix it as well. Emphasize the importance of giving proper attribution and respecting the work of creators within the Scratch community. By encouraging remixing and proper attribution, you foster a culture of collaboration and mutual respect.
Remember that sharing your remix is an exciting way to showcase your creativity and inspire others. Be open to feedback and collaboration, and continue to explore and learn from other projects within the Scratch community.
With your remix saved, shared, and attributed, you have successfully completed the process of remixing on Scratch. Congratulations on your creative journey! In the next section, we will conclude our article with some final thoughts.
Conclusion
Remixing on Scratch is a powerful way to learn, collaborate, and showcase your creativity. By leveraging the remix feature, you can build upon existing projects, add your own unique ideas, and contribute to the vibrant Scratch community.
Throughout this article, we have explored the various aspects of remixing on Scratch, from finding projects to remix and opening them in the Scratch editor, to modifying them and adding your own creative flair. We’ve also discussed the importance of following community guidelines, saving and sharing your remix, and encouraging collaboration among fellow Scratch users.
As you embark on your remixing journey, remember to respect and give credit to the original creators whose work you are remixing. Honor their contributions by acknowledging them in your remix and adhering to any licensing requirements they may have set.
Remixing is not just about modifying code and visuals; it’s about building upon the ideas of others, fostering creativity, and inspiring fellow Scratch users. It’s a chance to learn from one another, experiment with new concepts, and push the boundaries of what is possible in the Scratch world.
So, go ahead and dive into the Scratch community. Discover projects to remix, explore different coding techniques, and add your unique touch to create something truly remarkable. Embrace collaboration, share your work, and encourage others to remix and build upon your creations.
Remember, remixing is a journey of continuous improvement and innovation. As you create and remix projects on Scratch, you contribute to a thriving community of creators and inspire others to push their own creative boundaries.
Now, armed with your newfound knowledge of remixing, go forth and unleash your creativity on Scratch. Happy remixing!


