Home>Production & Technology>Sound Effects>How To Add Sound Effects On Hitfilm 4
Sound Effects
How To Add Sound Effects On Hitfilm 4
Published: November 9, 2023
Learn how to easily add sound effects to your Hitfilm 4 videos and enhance your creations with realistic audio. Improve the overall quality and impact of your projects with the help of Sound Effects.
(Many of the links in this article redirect to a specific reviewed product. Your purchase of these products through affiliate links helps to generate commission for AudioLover.com, at no extra cost. Learn more)
Table of Contents
Introduction
Sound effects play a crucial role in enhancing the overall experience and production value of videos and films. They add depth, realism, and emotion to scenes, helping to engage viewers on a deeper level. Whether you’re creating a short film, a promotional video, or a YouTube vlog, incorporating sound effects can make a significant difference in the final product.
In this article, we will explore how to add sound effects using Hitfilm 4, a powerful video editing software. Hitfilm 4 provides a user-friendly interface and a wide range of tools and features that make it easy to enhance your videos with immersive and impactful audio.
Whether you want to add a thunderstorm to a dramatic scene, include the sound of footsteps in a suspenseful moment, or incorporate the roar of an engine in an action sequence, Hitfilm 4 allows you to achieve professional-quality sound effects that will captivate your audience.
Throughout this tutorial, we will guide you through the step-by-step process of adding sound effects to your video project in Hitfilm 4. We will cover everything from importing your footage, selecting sound effects, and adjusting sound levels, to applying transitions and effects to the sound effects. By the end of this tutorial, you will be able to enhance your videos with impactful sound effects that will bring your vision to life.
So, let’s dive in and discover how you can add immersive sound effects to your videos using Hitfilm 4!
Step 1: Importing Your Footage
The first step in adding sound effects to your video project in Hitfilm 4 is to import your footage. Hitfilm 4 supports a wide range of video formats, so you can easily bring in your existing footage or capture new footage using your camera or smartphone.
To import your footage, follow these simple steps:
- Launch Hitfilm 4 and create a new project or open an existing one.
- Click on the “Media” tab located at the top-left corner of the interface.
- Click on the “Import” button and browse for the video file you want to add sound effects to. Select the file and click “Open” to import it into your project.
- Your imported footage will appear in the media panel of Hitfilm 4. You can preview your footage by double-clicking on it.
It’s worth noting that Hitfilm 4 also supports importing audio files, so if you have separate sound effects that you want to add to your video, you can import them in the same way as your video footage.
By importing your footage into Hitfilm 4, you have now laid the foundation for adding sound effects. You can proceed to the next step to select the perfect sound effects to enhance your video.
Step 2: Selecting Your Sound Effects
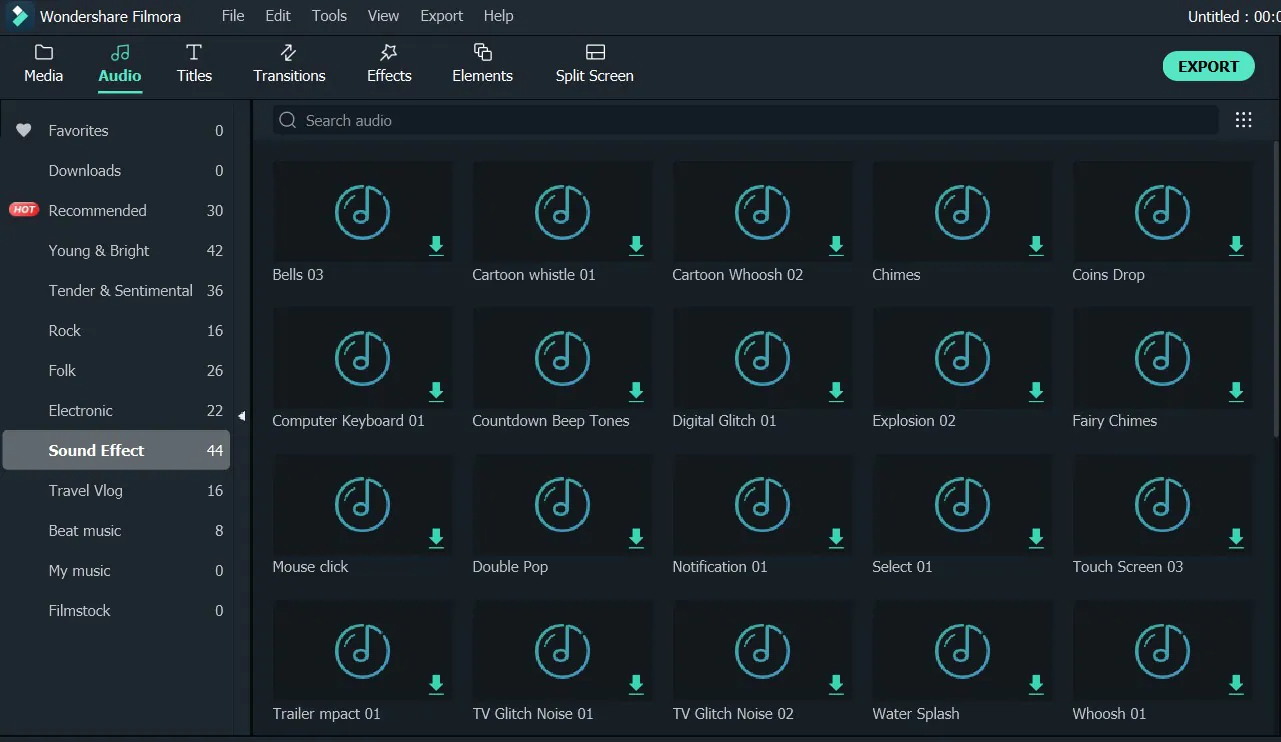
Once you have imported your footage into Hitfilm 4, the next step is to select the sound effects that will enhance your video. Hitfilm 4 provides a built-in library of sound effects, but you can also import your own audio files if you have specific sound effects in mind.
Here’s how you can select your sound effects:
- Click on the “Effects” tab located at the top-left corner of the interface.
- Expand the “Audio” category and browse through the available sound effects.
- Preview a sound effect by clicking on it. Hitfilm 4 allows you to listen to the sound effect before adding it to your project.
- Once you have found the perfect sound effect, drag and drop it onto the timeline, aligning it with the corresponding scene in your footage.
If you have your own sound effects that you want to use, you can import them into Hitfilm 4 by following these steps:
- Click on the “Media” tab located at the top-left corner of the interface.
- Click on the “Import” button and browse for the audio file you want to use as a sound effect. Select the file and click “Open” to import it into your project.
- Your imported sound effect will appear in the media panel of Hitfilm 4. You can drag and drop it onto the timeline like any other sound effect.
By selecting the right sound effects, you can elevate the mood, atmosphere, and emotional impact of your video. Take your time to explore the library of sound effects in Hitfilm 4 or unleash your creativity by using your own custom-made sound effects.
Now that you have chosen your sound effects, you can move on to the next step of adding them to your timeline.
Step 3: Adding Sound Effects to Your Timeline
With your footage imported and your sound effects selected, it’s time to add the sound effects to your timeline in Hitfilm 4. The timeline is where you arrange and edit your video clips, audio tracks, and effects to create your final video composition.
Follow these steps to add sound effects to your timeline:
- Locate the sound effect you want to add in the media panel.
- Drag and drop the sound effect onto the audio track in the timeline.
- Position the sound effect on the timeline to align it with the desired scene or action in your video.
- Repeat the process for any additional sound effects you want to include.
Hitfilm 4 also allows you to trim and adjust the duration of the sound effects in the timeline. To do this, simply click and drag the edges of the sound effect clip to shorten or lengthen it as needed.
By adding sound effects to your timeline, you are seamlessly integrating them into your video project. These sound effects will accompany and enhance your visuals, creating a more immersive and engaging experience for your viewers.
Now that you have added your sound effects to the timeline, continue to the next step to learn how to adjust their sound levels.
Step 4: Adjusting Sound Levels
Once you’ve added sound effects to your timeline in Hitfilm 4, you may need to adjust their sound levels to ensure they blend well with your footage and other audio elements. Sound levels refer to the volume of the sound effects relative to the other audio tracks in your video.
To adjust the sound levels of your sound effects, follow these steps:
- Locate the sound effect clip in the timeline.
- Click on the clip to select it.
- Adjust the volume slider or numerical value in the audio properties panel to increase or decrease the sound level of the selected sound effect.
- Preview the video with sound effects to ensure the sound levels are balanced and appropriate for your project.
It’s important to find the right balance between the sound effects and other audio elements in your video. You want the sound effects to be audible and impactful, but not overpowering or overshadowing other important sounds like dialogue or background music.
If you have multiple sound effects in your video, you can adjust the sound levels individually for each clip. This allows you to fine-tune the prominence of each sound effect and create a cohesive and harmonious audio mix.
By adjusting the sound levels of your sound effects in Hitfilm 4, you can ensure that they seamlessly integrate with your footage and enhance the overall audio experience of your video.
Now that you have adjusted the sound levels of your sound effects, let’s move on to the next step and explore how to apply transitions and effects to enhance their impact.
Step 5: Applying Transitions and Effects to Sound Effects
Hitfilm 4 offers a variety of transitions and effects that you can apply to your sound effects to further enhance their impact and create a seamless audio experience. These transitions and effects can add depth, realism, and creativity to your sound effects, making them more engaging and immersive for your viewers.
Follow these steps to apply transitions and effects to your sound effects in Hitfilm 4:
- Select the sound effect clip in the timeline.
- Click on the “Effects” tab located at the top-left corner of the interface.
- Browse through the available transitions and effects under the “Audio” category.
- Select a transition or effect that you want to apply to the sound effect clip.
- Drag and drop the selected transition or effect onto the sound effect clip in the timeline.
- Adjust the settings of the transition or effect as desired using the effect controls panel.
Transitions and effects like fade in/out, reverb, echo, and equalization can add a professional touch to your sound effects. They can help to smooth the audio transitions, create unique soundscapes, and add character and depth to the overall audio mix of your video.
Experiment with different transitions and effects to find the ones that best complement your sound effects and suit the style and tone of your video project. Remember to preview your video with sound effects and effects applied to ensure they enhance the desired impact without overpowering the audio or distracting from the visuals.
By applying transitions and effects to your sound effects in Hitfilm 4, you can elevate the overall audio experience of your video and captivate your audience on a deeper level.
Now that you have applied transitions and effects to your sound effects, let’s move on to the final step: previewing and exporting your video with sound effects.
Step 6: Previewing and Exporting Your Video with Sound Effects
Once you have added sound effects, adjusted their levels, and applied transitions and effects in Hitfilm 4, it’s time to preview and export your video with the enhanced audio.
Follow these steps to preview and export your video with sound effects:
- Click on the “Play” button in the preview window to preview your video with the sound effects.
- Adjust the volume levels and effects settings as needed after previewing to fine-tune the audio mix.
- Once you are satisfied with the preview, click on the “Export” button in Hitfilm 4 to open the export settings.
- Select the desired video format, resolution, and quality settings for your exported video.
- Choose the destination folder where you want to save the exported video.
- Click on the “Export” or “Render” button to begin the export process.
- Wait for Hitfilm 4 to render and export your video with the sound effects applied.
After the export is complete, you can play the exported video file to experience the full impact of your sound effects on any device or platform.
It’s important to note that Hitfilm 4 provides various export options, allowing you to optimize your video for different platforms like YouTube, Vimeo, or social media. You can also choose to export the audio separately if you prefer to use it in other editing software.
By previewing and exporting your video with sound effects in Hitfilm 4, you can share your creative vision with the world and deliver a captivating audiovisual experience to your audience.
Congratulations! You have successfully learned how to add sound effects to your video using Hitfilm 4. Now you can explore endless possibilities and bring your videos to life with immersive and impactful audio.
So go ahead and unleash your creativity, experiment with different sound effects, and elevate your video projects to new heights with the power of sound!
Conclusion
Adding sound effects to your videos using Hitfilm 4 can significantly enhance the overall quality and impact of your projects. By following the step-by-step process outlined in this tutorial, you can seamlessly integrate sound effects, adjust their levels, apply transitions and effects, and export your final video with immersive and engaging audio.
Sound effects play a vital role in capturing the attention of your viewers, creating a more immersive experience, and conveying emotions and atmosphere in your videos. Whether you’re creating a film, a promotional video, a vlog, or any other type of video content, incorporating sound effects can make a world of difference.
Hitfilm 4 provides a user-friendly platform with a wide range of tools and features to empower you in your creative journey. From importing your footage and selecting sound effects to adjusting their levels, applying transitions and effects, and exporting your final video, Hitfilm 4 allows you to achieve professional-quality results with ease.
Remember to take your time in selecting the right sound effects for your project, ensuring the sound levels are balanced, and experimenting with different transitions and effects to create the desired impact. Preview your video with sound effects before exporting to ensure everything is in harmony.
So go ahead and unleash your creativity with Hitfilm 4. Explore the vast library of sound effects, or create your own custom audio elements to add that extra layer of immersion and professionalism to your videos. With the right sound effects, your videos will stand out and captivate your audience like never before.
Now that you have the knowledge and tools, don’t hesitate to dive in and discover the incredible possibilities that sound effects can bring to your video projects. Start adding sound effects to your videos today and elevate your storytelling to new heights!