Home>Devices & Equipment>Turntable>How Does The Switch On A Turntable Work
Turntable
How Does The Switch On A Turntable Work
Modified: January 22, 2024
Discover how the switch on a turntable works and explore the mechanics of this essential component. Experience the seamless operation of a turntable for a captivating audio experience.
(Many of the links in this article redirect to a specific reviewed product. Your purchase of these products through affiliate links helps to generate commission for AudioLover.com, at no extra cost. Learn more)
Table of Contents
- Introduction
- The Basic Components of a Turntable
- Working Principle of the Turntable Switch
- Different Types of Switches Used in Turntables
- Manual Switches
- Automatic Switches
- How the Switch on a Turntable Works
- Step-by-Step Process of Switch Operation
- Troubleshooting and Maintenance of Turntable Switches
- Conclusion
Introduction
Welcome to the world of turntables! These fascinating devices have been a staple in the music industry for decades, providing the perfect platform for enjoying vinyl records. While many people are familiar with the concept of a turntable, not everyone is aware of the intricate mechanisms that make them function.
One key component of a turntable is the switch, which plays a vital role in the operation of the device. The switch allows users to control various functions, such as power on/off, changing the speed of rotation, and even switching between different sources of audio input.
In this article, we will explore in-depth how the switch on a turntable works. We will delve into the different types of switches used in turntables, their working principles, and the step-by-step process of switch operation. Whether you are a turntable enthusiast looking to enhance your knowledge or simply curious about the mechanics behind these fascinating devices, read on to discover the inner workings of turntable switches.
The Basic Components of a Turntable
Before diving into the workings of a turntable switch, it’s important to understand the basic components that make up a turntable. Every turntable consists of several key elements that work together to produce high-quality sound reproduction.
1. Platter: The platter is the spinning surface where the vinyl record is placed. It is typically made of heavy material, such as metal or acrylic, to ensure stability and minimize vibration.
2. Motor: The motor is responsible for rotating the platter at a consistent speed. There are two main types of motors used in turntables:
- Belt-Drive Motor: In a belt-drive turntable, the motor is located away from the platter and is connected to it via a belt. This design reduces motor noise and vibrations, resulting in improved sound quality.
- Direct-Drive Motor: In a direct-drive turntable, the motor is directly connected to the center of the platter. This design offers better torque and speed stability, making it popular among DJs and audiophiles.
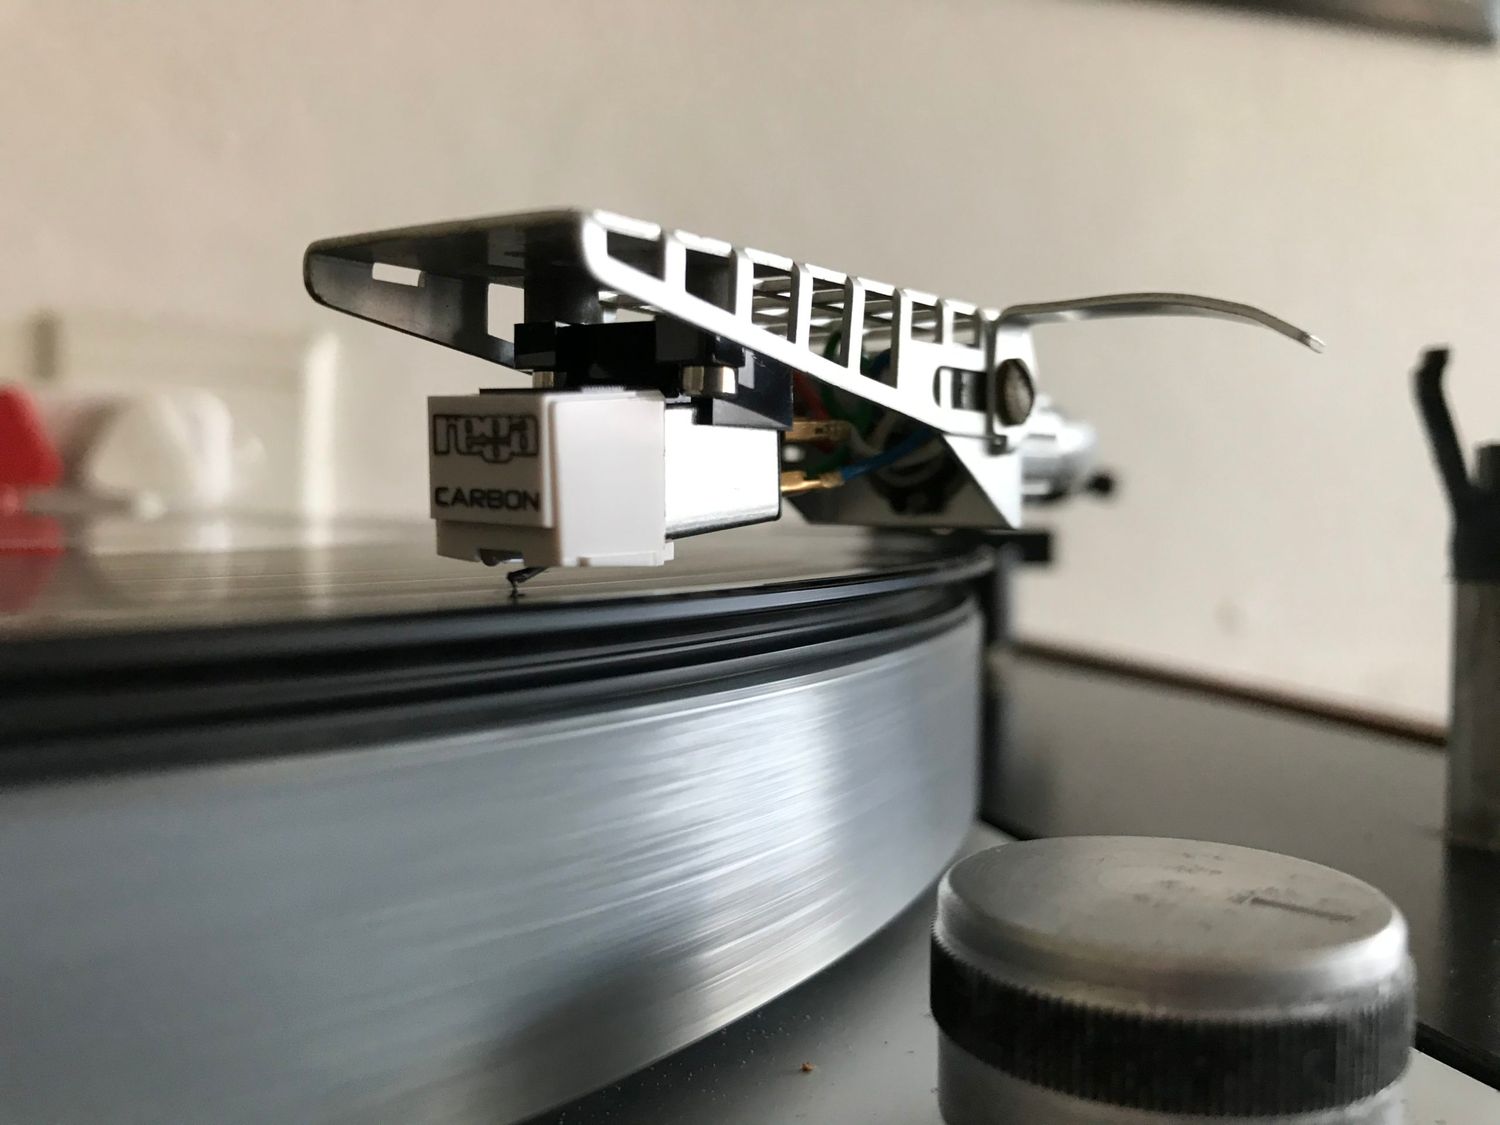
3. Tonearm: The tonearm is responsible for holding the stylus (needle) and tracing the grooves of the vinyl record. It is equipped with a counterweight to balance the tracking force and an adjustable cartridge to ensure optimal audio performance.
4. Cartridge: The cartridge is the component that houses the stylus and converts the mechanical vibrations from the record grooves into electrical signals. There are two main types of cartridges used in turntables:
- Moving Magnet (MM) Cartridge: The most common type, the MM cartridge produces a warm and detailed sound, making it suitable for various music genres.
- Moving Coil (MC) Cartridge: The MC cartridge offers superior sound quality and accuracy but is more expensive. It is preferred by audiophiles and professionals who demand the highest level of audio performance.
5. Phono Preamp: The phono preamp, also known as a phono stage, is responsible for amplifying the delicate signals produced by the cartridge. Since the output of a turntable is much lower than other audio sources, a phono preamp is necessary to bring the signal to line level.
These are the fundamental components that you will find in most turntables. Now that we have a basic understanding of the key elements, let’s explore the workings of the turntable switch and how it fits into the overall operation of a turntable.
Working Principle of the Turntable Switch
The turntable switch is an essential part of the control system that allows users to operate and manipulate various functions of the turntable. It acts as a central command, enabling users to power on/off the device, adjust the speed of rotation, and select the audio input source.
The working principle of the turntable switch revolves around electrical signals and circuitry. When a user engages the switch, it initiates a series of actions, ultimately affecting the operation of the turntable. Although the precise mechanism may vary depending on the type of switch used, the fundamental principles remain the same.
At its core, the turntable switch is a mechanical or electronic device that controls the flow of electricity within the turntable. When the switch is in the “off” position, it interrupts the electrical circuit, effectively cutting off the power to the motor and other components. Conversely, when the switch is in the “on” position, it completes the circuit, allowing electricity to flow and power the turntable.
In addition to controlling the power supply, the switch also regulates the speed of rotation. Turntables typically offer different speed settings, such as 33 1/3 RPM (revolutions per minute) for LP records and 45 RPM for singles. The switch enables users to select the desired speed, adjusting the motor accordingly to achieve the correct rotational speed.
Furthermore, the turntable switch allows users to choose the audio input source. Modern turntables often feature multiple connectivity options, such as built-in phono preamps, USB ports for digitizing records, and auxiliary inputs. The switch determines which input source is active, ensuring that the appropriate audio signal is being processed and sent to the amplifier or speakers.
In summary, the working principle of the turntable switch involves controlling the flow of electricity, adjusting the speed of rotation, and selecting the audio input source. By understanding how the switch functions, users can effectively operate their turntables and enjoy their vinyl records with ease.
Different Types of Switches Used in Turntables
Turntables utilize different types of switches to allow users to control various functions and settings. The type of switch used often depends on the design and features of the turntable. Let’s explore some of the common types of switches found in turntables:
- Toggle Switch: A toggle switch is a common type of switch that features a lever or handle that can be flipped up or down to turn the power on or off. This type of switch is often used for the main power control of the turntable.
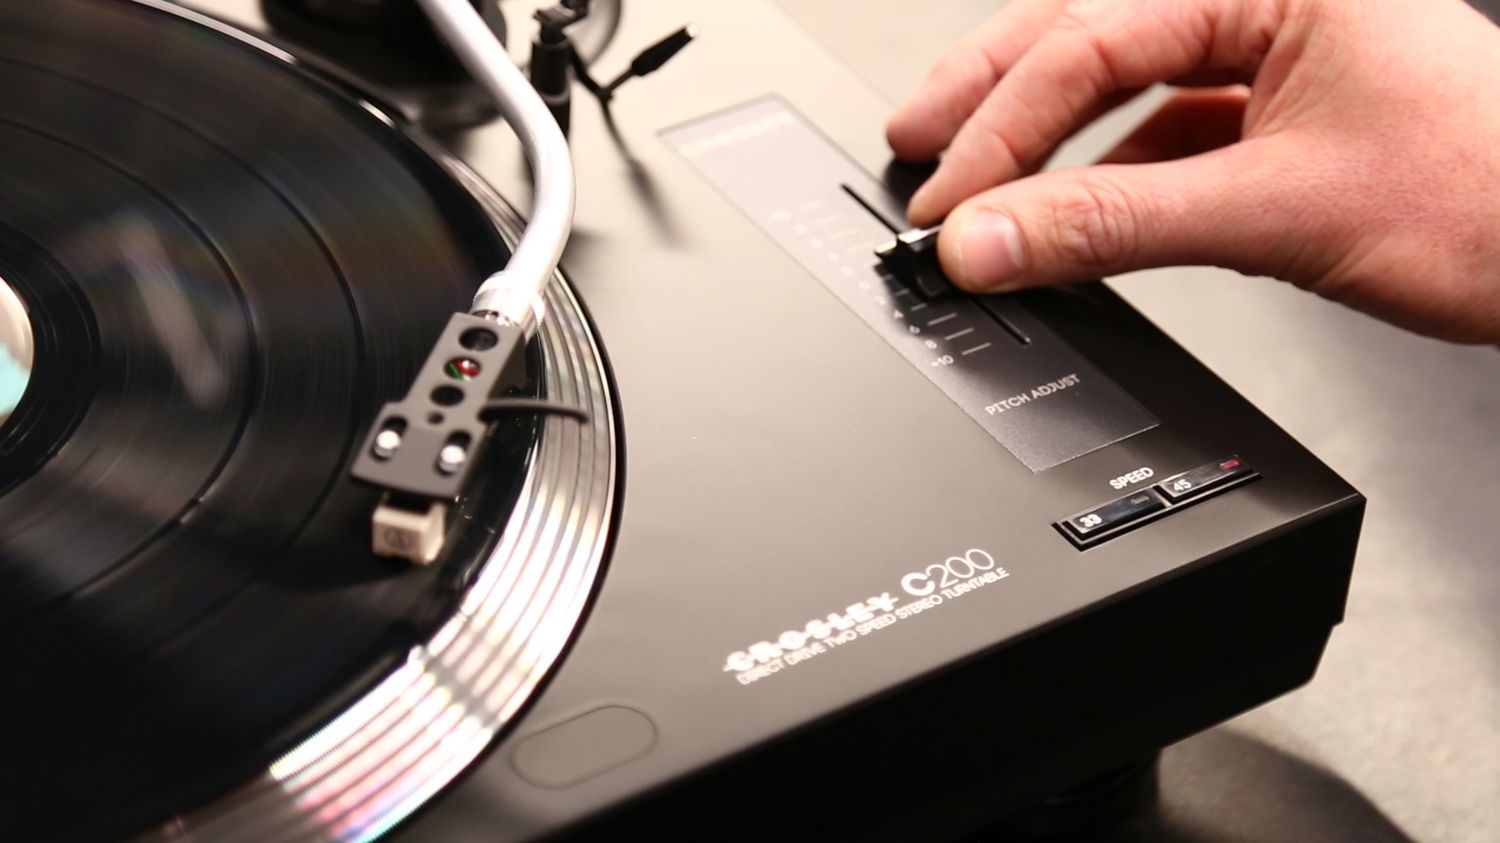
- Rotary Switch: A rotary switch functions by rotating a knob or dial to select different options or settings. In turntables, a rotary switch may be used to adjust the speed of rotation, allowing users to switch between 33 1/3 RPM and 45 RPM, for example.
- Push Button Switch: A push button switch is designed to be pressed to make or break the electrical connection. It is commonly used for functions like start/stop or cue control on turntables. Pressing the button initiates the action, such as starting or stopping the rotation of the platter or engaging the tonearm lift mechanism.
- Slide Switch: A slide switch consists of a small lever or button that slides horizontally or vertically to change options. In turntables, a slide switch may be used to select the audio input source, allowing users to choose between the built-in phono preamp, USB output, or auxiliary input.
- Touch-sensitive Switch: Some modern turntables incorporate touch-sensitive switches, which are activated by a user’s touch or proximity. These switches often have a sleek, minimalist design and provide a seamless user experience. They can be used for various functions, such as power control or speed adjustment.
- Magnetic Sensor Switch: A magnetic sensor switch utilizes the power of magnets to control the functions of the turntable. It operates by detecting the presence or absence of a magnetic field, allowing users to activate or deactivate specific features or settings.
These are just a few examples of the different types of switches used in turntables. The type of switch chosen for a turntable depends on factors such as functionality, user experience, and design preferences. Each type of switch has its own advantages and characteristics, catering to different user needs and preferences.
Manual Switches
Manual switches are a type of switch found in turntables that require direct user intervention to operate. These switches are typically mechanical in nature and offer tactile feedback, allowing users to physically engage and disengage the switch. Manual switches provide a hands-on control experience and are commonly found in traditional and vintage turntables. Let’s explore some of the manual switches commonly used in turntables:
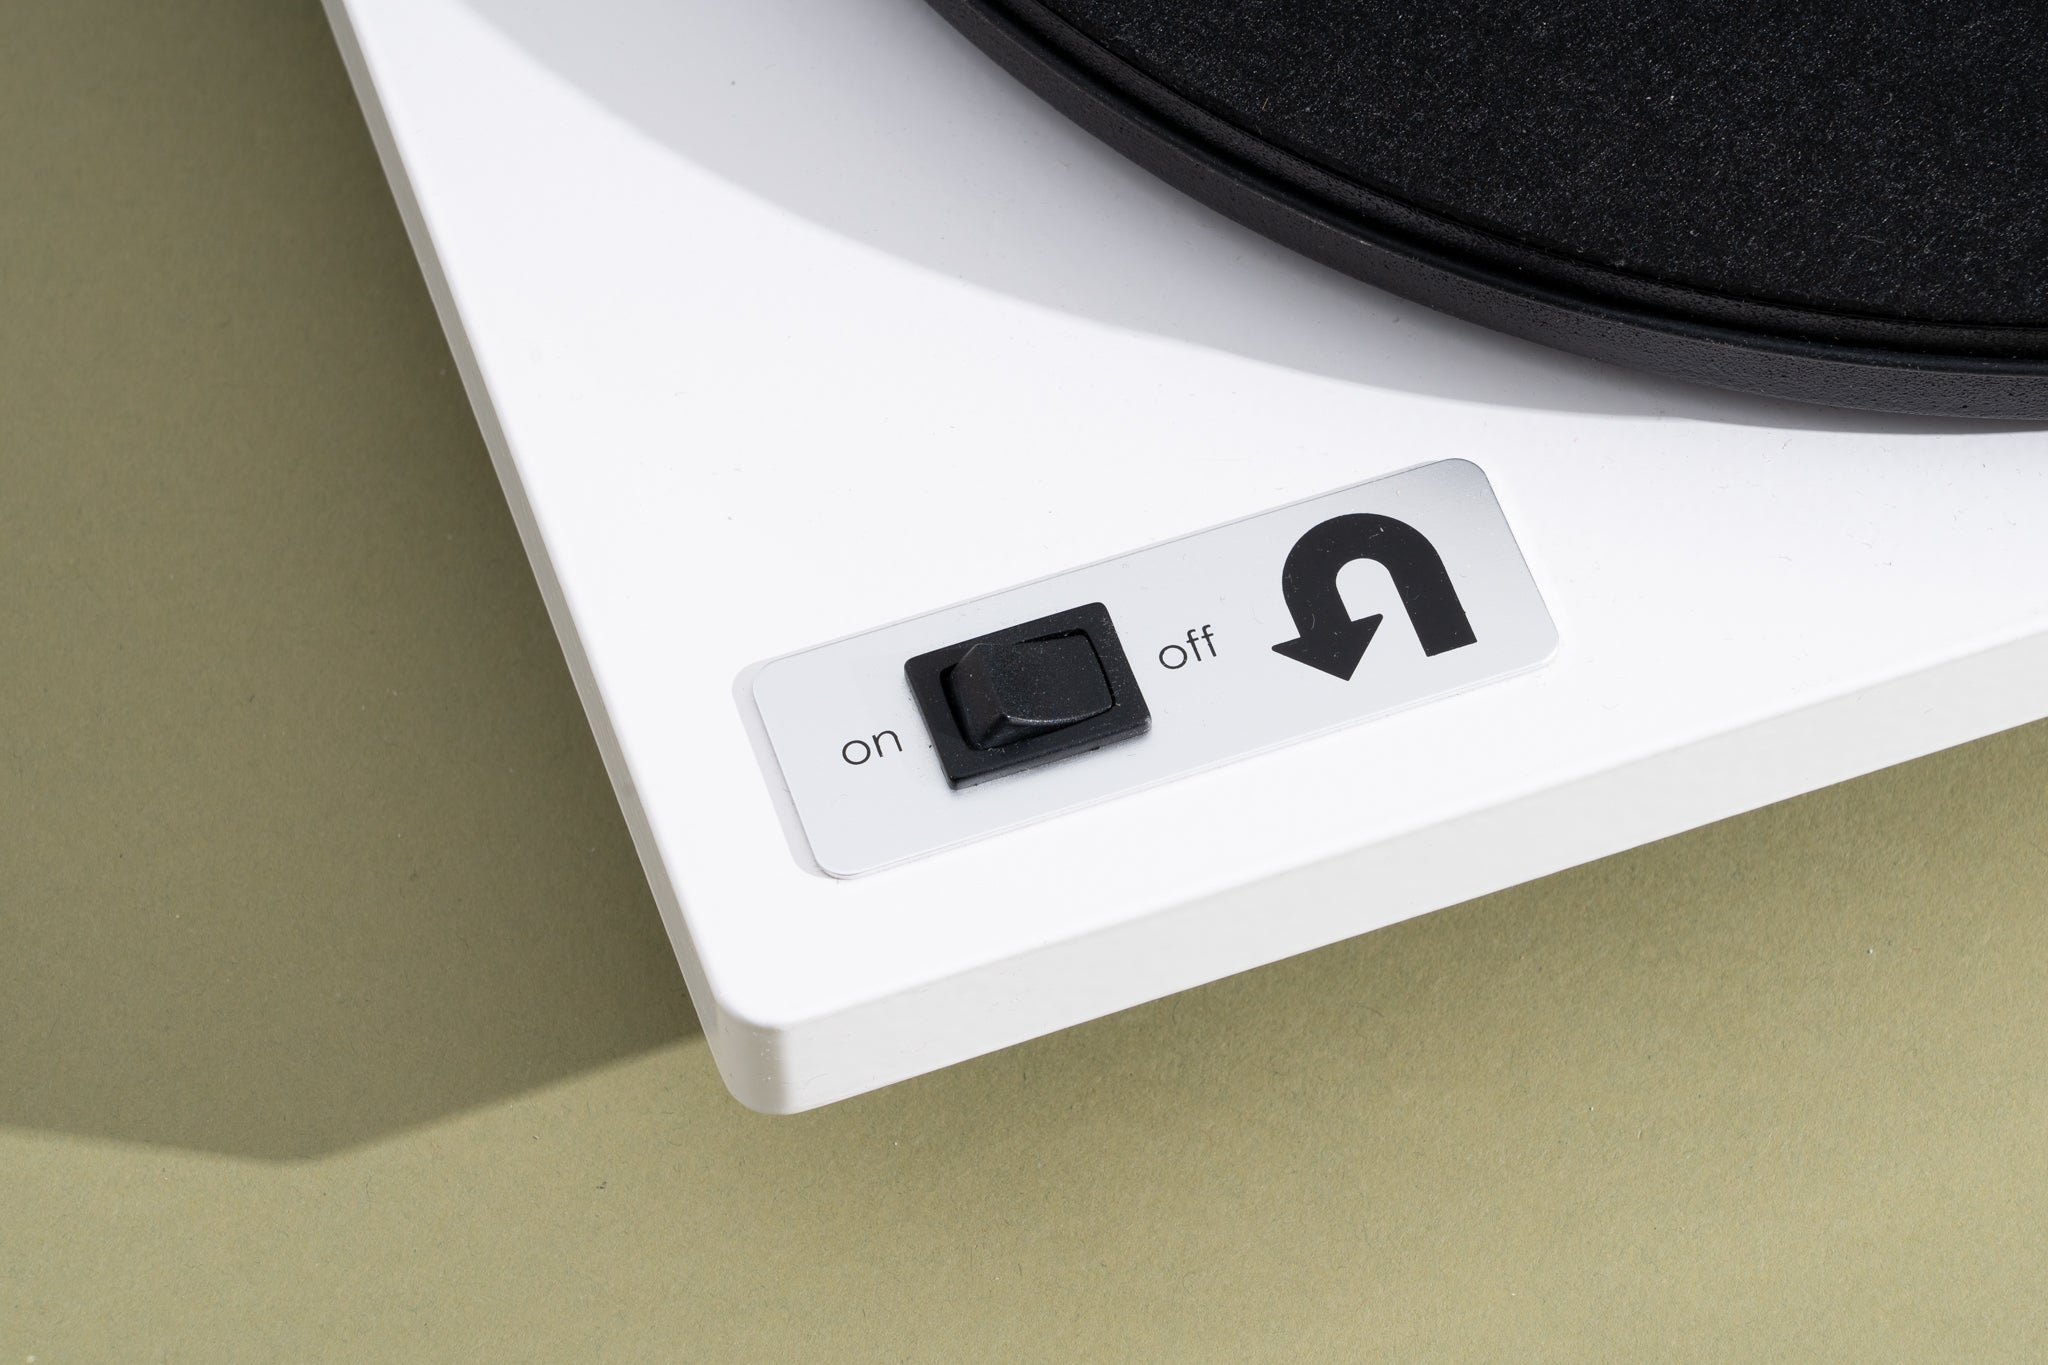
- Power On/Off Switch: The power on/off switch is perhaps the most common manual switch found in turntables. It allows users to control the power supply to the turntable, turning it on or off as desired. This switch is often located on the front or back panel of the turntable and is easily accessible for user convenience.
- Start/Stop Switch: The start/stop switch is responsible for initiating or stopping the rotation of the turntable platter. When the switch is engaged, the platter begins to rotate, allowing the stylus to engage with the grooves of the vinyl record. Conversely, disengaging the switch halts the rotation of the platter. This switch is commonly found on the front or side of the turntable, often near the tonearm assembly.
- Speed Selection Switch: Manual turntables often offer multiple speed options, such as 33 1/3 RPM and 45 RPM, to accommodate different record formats. A speed selection switch is used to switch between these options, allowing users to set the appropriate speed for the specific record being played. This switch is typically located near the platter or on the front panel of the turntable.
- Cue Lever/Switch: The cue lever or switch is commonly found in professional turntables or DJ-oriented models. It enables users to quickly raise or lower the tonearm onto the desired part of the record. When engaged, the cue lever gently lifts the tonearm, allowing the user to manually place it on the record groove. Disengaging the cue lever lowers the tonearm back onto the record surface.
- Tonearm Height Adjustment Switch: Some manual turntables offer a tonearm height adjustment switch that allows users to fine-tune the position of the tonearm. This switch controls the mechanism that raises or lowers the tonearm, ensuring proper alignment and tracking force for optimal sound performance. It is commonly located near the base of the tonearm assembly.
Manual switches provide users with hands-on control over the key functions of the turntable. They offer a tactile and intuitive user interface, allowing for precise operation and customization. While manual switches require user intervention, they provide a more interactive and engaging experience, particularly for vintage turntable enthusiasts and those who appreciate the nostalgic charm of physical controls.
Automatic Switches
Automatic switches are a type of switch found in turntables that offer convenience and automation in operation. Unlike manual switches, automatic switches do not require direct user intervention, as they are designed to perform certain functions automatically. These switches utilize various mechanisms and sensors to automate tasks such as starting, stopping, and even changing the record play mode. Let’s explore some of the automatic switches commonly used in turntables:
- Auto Start/Stop Switch: An auto start/stop switch automatically begins playback when the tonearm is moved into position and lifts the tonearm and stops playback when the tonearm is returned to its resting position. This switch eliminates the need for manual cueing and ensures a seamless music listening experience.
- Auto-Return Switch: An auto-return switch is typically found in fully automatic turntables. This switch automatically lifts the tonearm and returns it to its resting position at the end of a record. It eliminates the need for manually lifting the tonearm and prevents damage to the stylus and record by automatically moving the tonearm away from the record surface.
- Record Size Detection Switch: Some automatic turntables feature a record size detection switch that senses the diameter of the record being placed on the platter. This switch automatically adjusts the speed of rotation based on the record size, ensuring that the correct speed is set for the specific record format (such as 7-inch, 10-inch, or 12-inch records).
- Repeat Mode Switch: A repeat mode switch allows users to set the turntable to automatically repeat a specific track or side of a record. This switch ensures continuous playback of the selected content without the need for manual intervention. It is particularly useful for background music or extended listening sessions.
- Automatic Speed Control Switch: Some advanced turntables incorporate automatic speed control switches that use sensors to monitor and adjust the rotational speed of the platter. These switches ensure accurate and stable speed recovery, compensating for any fluctuations caused by external factors or mechanical inconsistencies.
Automatic switches provide users with the convenience of hands-free operation and automation. They simplify the process of playing records and offer a user-friendly experience, especially for casual listeners or those who prefer a more effortless approach to turntable use. Automatic switches can enhance the overall usability of a turntable and make it more accessible to a wider range of users.
How the Switch on a Turntable Works
The switch on a turntable functions as the control center for various operations and features. It allows users to power on/off the turntable, adjust the speed of rotation, and select the audio input source. Understanding how the switch works is essential for effectively operating a turntable. Let’s explore the step-by-step process of switch operation:
- Power On/Off: When the power switch is turned on, it completes the electrical circuit, allowing electricity to flow through the turntable’s components. This supplies power to the motor, control circuitry, and other internal electronics. Conversely, turning the switch off interrupts the circuit, cutting off the power supply and effectively shutting down the turntable.
- Speed Selection: To adjust the speed of rotation, users can typically find a speed selector switch. This switch controls the motor’s speed and allows users to choose between different options, such as 33 1/3 RPM for LP records or 45 RPM for singles. Engaging the switch adjusts the motor’s mechanics and electrical circuits to achieve the desired rotational speed.
- Audio Input Selection: Modern turntables often offer multiple audio input sources, such as a built-in phono preamp, USB connection, or auxiliary input. The audio input selection switch allows users to choose the desired input source. Engaging the switch directs the audio signal from the selected source to the appropriate circuitry for processing and amplification.
- Additional Controls: Some turntables may feature additional switches for specific functions. These can include cueing switches for lifting and lowering the tonearm onto the record, repeat mode switches for continuous playback, or tonearm height adjustment switches for fine-tuning the position of the tonearm. Each switch performs a specific task related to the operation or customization of the turntable.
The switch on a turntable operates through a combination of mechanical and electrical components. When the user engages the switch, it triggers a series of actions that activate the necessary circuits, adjust the motor speed, and control the audio input source. These actions ensure that the turntable functions according to the user’s preferences and allows for an optimal listening experience.
It’s worth noting that the exact workings and mechanisms of the switch can vary depending on the specific turntable model and design. However, the general principles and functionality remain consistent across different types of switches.
Step-by-Step Process of Switch Operation
Operating the switch on a turntable involves a step-by-step process that allows users to control various functions and settings. While the specific steps may vary depending on the turntable model, here is a general guide to the switch operation:
- Power On/Off: Locate the power switch, typically located on the front or back panel of the turntable. Flip the switch to the “on” position to supply power to the turntable’s components. To turn off the turntable, flip the switch to the “off” position to interrupt the electrical circuit and cut off the power supply.
- Speed Selection: If your turntable offers different speed options, locate the speed selector switch. It is commonly found near the platter or on the front panel. Adjust the switch to the desired speed, such as 33 1/3 RPM for LP records or 45 RPM for singles. This switch determines the motor’s speed and ensures that the turntable rotates at the appropriate speed for the record being played.
- Audio Input Selection: If your turntable has multiple audio input sources, such as a built-in phono preamp, USB connection, or auxiliary input, locate the audio input selection switch. This switch allows you to choose the desired input source. Activate the switch corresponding to the desired input, directing the audio signal from that particular source into the turntable’s circuitry for amplification and playback.
- Additional Controls: Depending on your turntable’s features, you may have additional switches for specific functions. For example, a cueing switch allows you to gently lift or lower the tonearm onto the record’s surface. A repeat mode switch enables continuous playback of a specific track or side. Tonearm height adjustment switches allow you to fine-tune the position of the tonearm for optimal tracking and sound performance. Familiarize yourself with these additional controls and activate them as needed.
- Operate the Switches: With the desired settings adjusted, operate the switches according to your specific needs. For example, to start playback, engage the start/stop switch or cue the tonearm onto the record’s surface using the cue lever. To stop playback, disengage the start/stop switch or return the tonearm to its resting position using the cue lever. Follow the manufacturer’s instructions and recommended techniques for operating the switches effectively and safely.
Remember, the exact process and placement of switches may vary depending on the turntable model and design. It’s important to refer to the user manual provided by the manufacturer for detailed instructions specific to your turntable.
By following these step-by-step instructions, you can effectively operate the switches on your turntable and customize its settings to create an enjoyable listening experience.
Troubleshooting and Maintenance of Turntable Switches
Like any electrical component, turntable switches may encounter issues or require maintenance over time. Here are some troubleshooting tips and maintenance practices to keep your turntable switches in optimal condition:
Troubleshooting:
- Check power supply: If the turntable switch is not responding or the turntable is not powering on, ensure that the power supply is properly connected and functioning. Check the power cord, outlet, and any power switches or fuses associated with the turntable.
- Inspect switch connections: Check the switch connections for any loose or damaged wires. Make sure the switch is securely connected to the appropriate circuits and components. Clean any debris or dirt around the switch contacts that may hinder proper operation.
- Verify switch functionality: Test the switch by engaging and disengaging it while observing the desired action. If the switch is not responding or producing the expected results, it may require cleaning or replacement. Consult the turntable’s user manual or contact the manufacturer for further guidance.
- Address speed control issues: If the turntable is experiencing speed control problems, such as inconsistent speed or irregular rotation, it may indicate an issue with the speed selector switch or motor. Inspect the switch for any physical damage or obstruction. If the problem persists, it is recommended to seek professional assistance to diagnose and repair the speed control mechanism.
Maintenance:
- Clean the switches: Dust, dirt, and debris can accumulate on the surface of switches, affecting their performance. Regularly clean the switches using a soft, lint-free cloth and a mild cleaning solution if needed. Ensure the switch is completely dry before operating the turntable again.
- Apply contact cleaner: For switches that exhibit intermittent operation or contact issues, applying a small amount of specialized contact cleaner can help improve electrical conductivity. Follow the manufacturer’s instructions and use contact cleaner specifically designed for electronic switches.
- Handle switches carefully: When operating manual switches, handle them with care to avoid excessive force or rough movements. This helps prevent wear and tear, ensuring the switches maintain their functionality and durability over time.
- Follow manufacturer’s instructions: Always refer to the turntable’s user manual for specific maintenance recommendations and best practices. Each turntable model may have unique requirements, and following the manufacturer’s guidelines will help preserve the performance and longevity of the turntable switches.
Regular maintenance and prompt troubleshooting can help address common issues with turntable switches and ensure smooth operation. By taking care of your turntable and its switches, you can enjoy high-quality sound reproduction and prolong the life of your device.
Conclusion
The switch on a turntable is a crucial component that allows users to control various functions and settings, such as power on/off, speed adjustment, and audio input selection. Understanding how the switch works and how to operate it is essential for enjoying the optimal performance of your turntable. Whether you have a manual or automatic switch, the step-by-step process of switch operation allows for seamless control of your turntable’s features.
Additionally, troubleshooting and maintenance are important to ensure the longevity and reliability of the turntable switches. By following troubleshooting tips and performing regular maintenance practices, such as cleaning and handling switches carefully, you can address common issues and prevent potential problems from arising.
Remember, each turntable model may have specific switch designs and maintenance requirements, so it’s essential to consult the manufacturer’s instructions and recommendations. Taking proper care of your turntable switches will not only enhance your listening experience but also contribute to the longevity and optimal performance of your beloved vinyl playback device.
Now that you have a better understanding of turntable switches, you can confidently operate and maintain your turntable, immersing yourself in the wonderful world of vinyl music.