Home>Instruments>Guitar>How To Play An E Chord On Guitar
Guitar
How To Play An E Chord On Guitar
Published: February 13, 2024
Learn how to play an E chord on guitar with our step-by-step guide. Master the basics and start strumming your favorite tunes today.
(Many of the links in this article redirect to a specific reviewed product. Your purchase of these products through affiliate links helps to generate commission for AudioLover.com, at no extra cost. Learn more)
Table of Contents
Introduction
Welcome to the wonderful world of guitar playing! Whether you’re a beginner or an experienced musician, mastering the E chord is a fundamental skill that will open the doors to countless songs and musical possibilities. The E chord is a staple in various genres, including rock, pop, blues, and country, making it a vital chord for any aspiring guitarist to learn.
In this comprehensive guide, we will delve into the intricacies of playing the E chord on the guitar. From understanding its structure to perfecting your finger placement and strumming technique, we’ll cover all the essential aspects to help you become proficient in playing this foundational chord.
By the end of this article, you’ll not only have a solid grasp of how to play the E chord, but you’ll also be equipped with valuable tips to overcome common challenges and accelerate your progress. So, grab your guitar, tune those strings, and let’s embark on this exciting journey to master the art of playing the E chord!
Understanding the E Chord
Before diving into the physical aspect of playing the E chord, it’s essential to understand its musical composition. The E chord is classified as a major chord and is comprised of three notes: E, G#, and B. These notes create a harmonious blend that forms the foundation of the chord’s rich and vibrant sound. When strummed, the E chord resonates with a sense of warmth and brightness, making it a popular choice for uplifting and energetic musical compositions.
On the guitar, the E chord is commonly played in open position, utilizing open strings to enhance its full-bodied resonance. This open position allows for a seamless transition between the E chord and other chords, making it a versatile and indispensable component of a guitarist’s repertoire.
Understanding the musical theory behind the E chord can significantly aid in your mastery of this fundamental shape. By familiarizing yourself with the intervals and notes that constitute the E chord, you’ll develop a deeper appreciation for its sonic characteristics and gain insight into how it complements other chords within a musical piece.
Furthermore, recognizing the role of the E chord within different keys and progressions will enable you to incorporate it fluidly into your playing, expanding your musical expression and creativity. Whether you’re strumming along to a classic rock anthem or composing your own melodies, the E chord’s versatility and resonance make it an indispensable asset in your musical journey.
Finger Placement
Mastering the correct finger placement is crucial for playing the E chord with precision and clarity. To form the E chord, follow these steps:
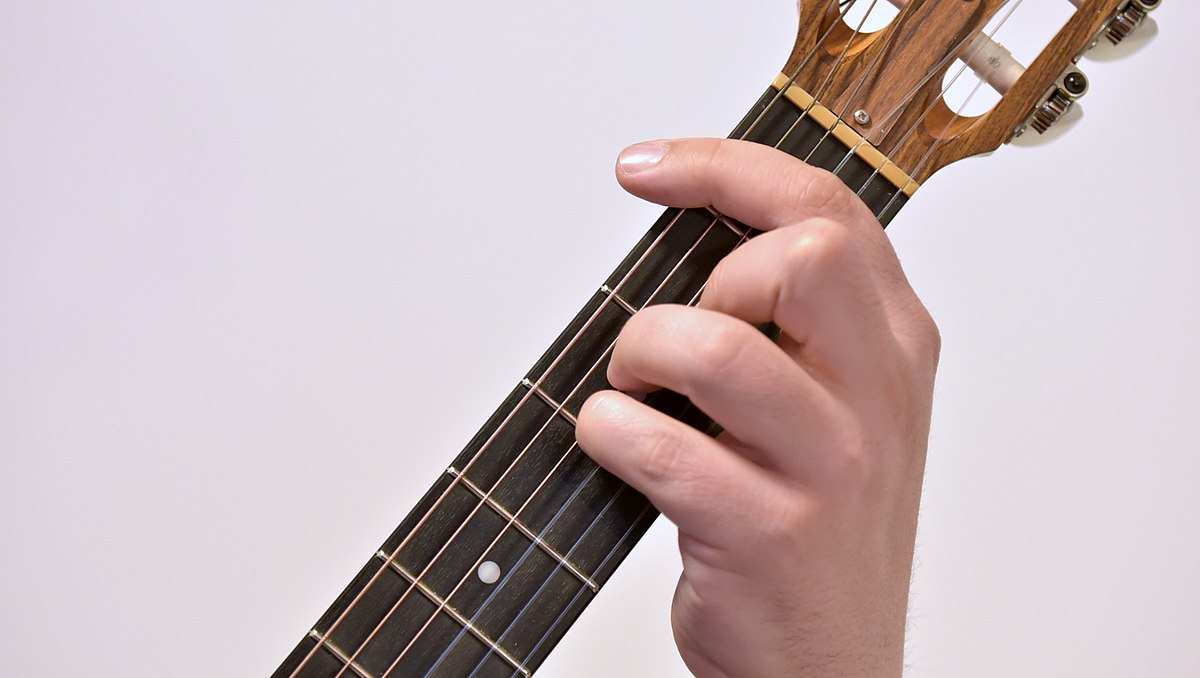
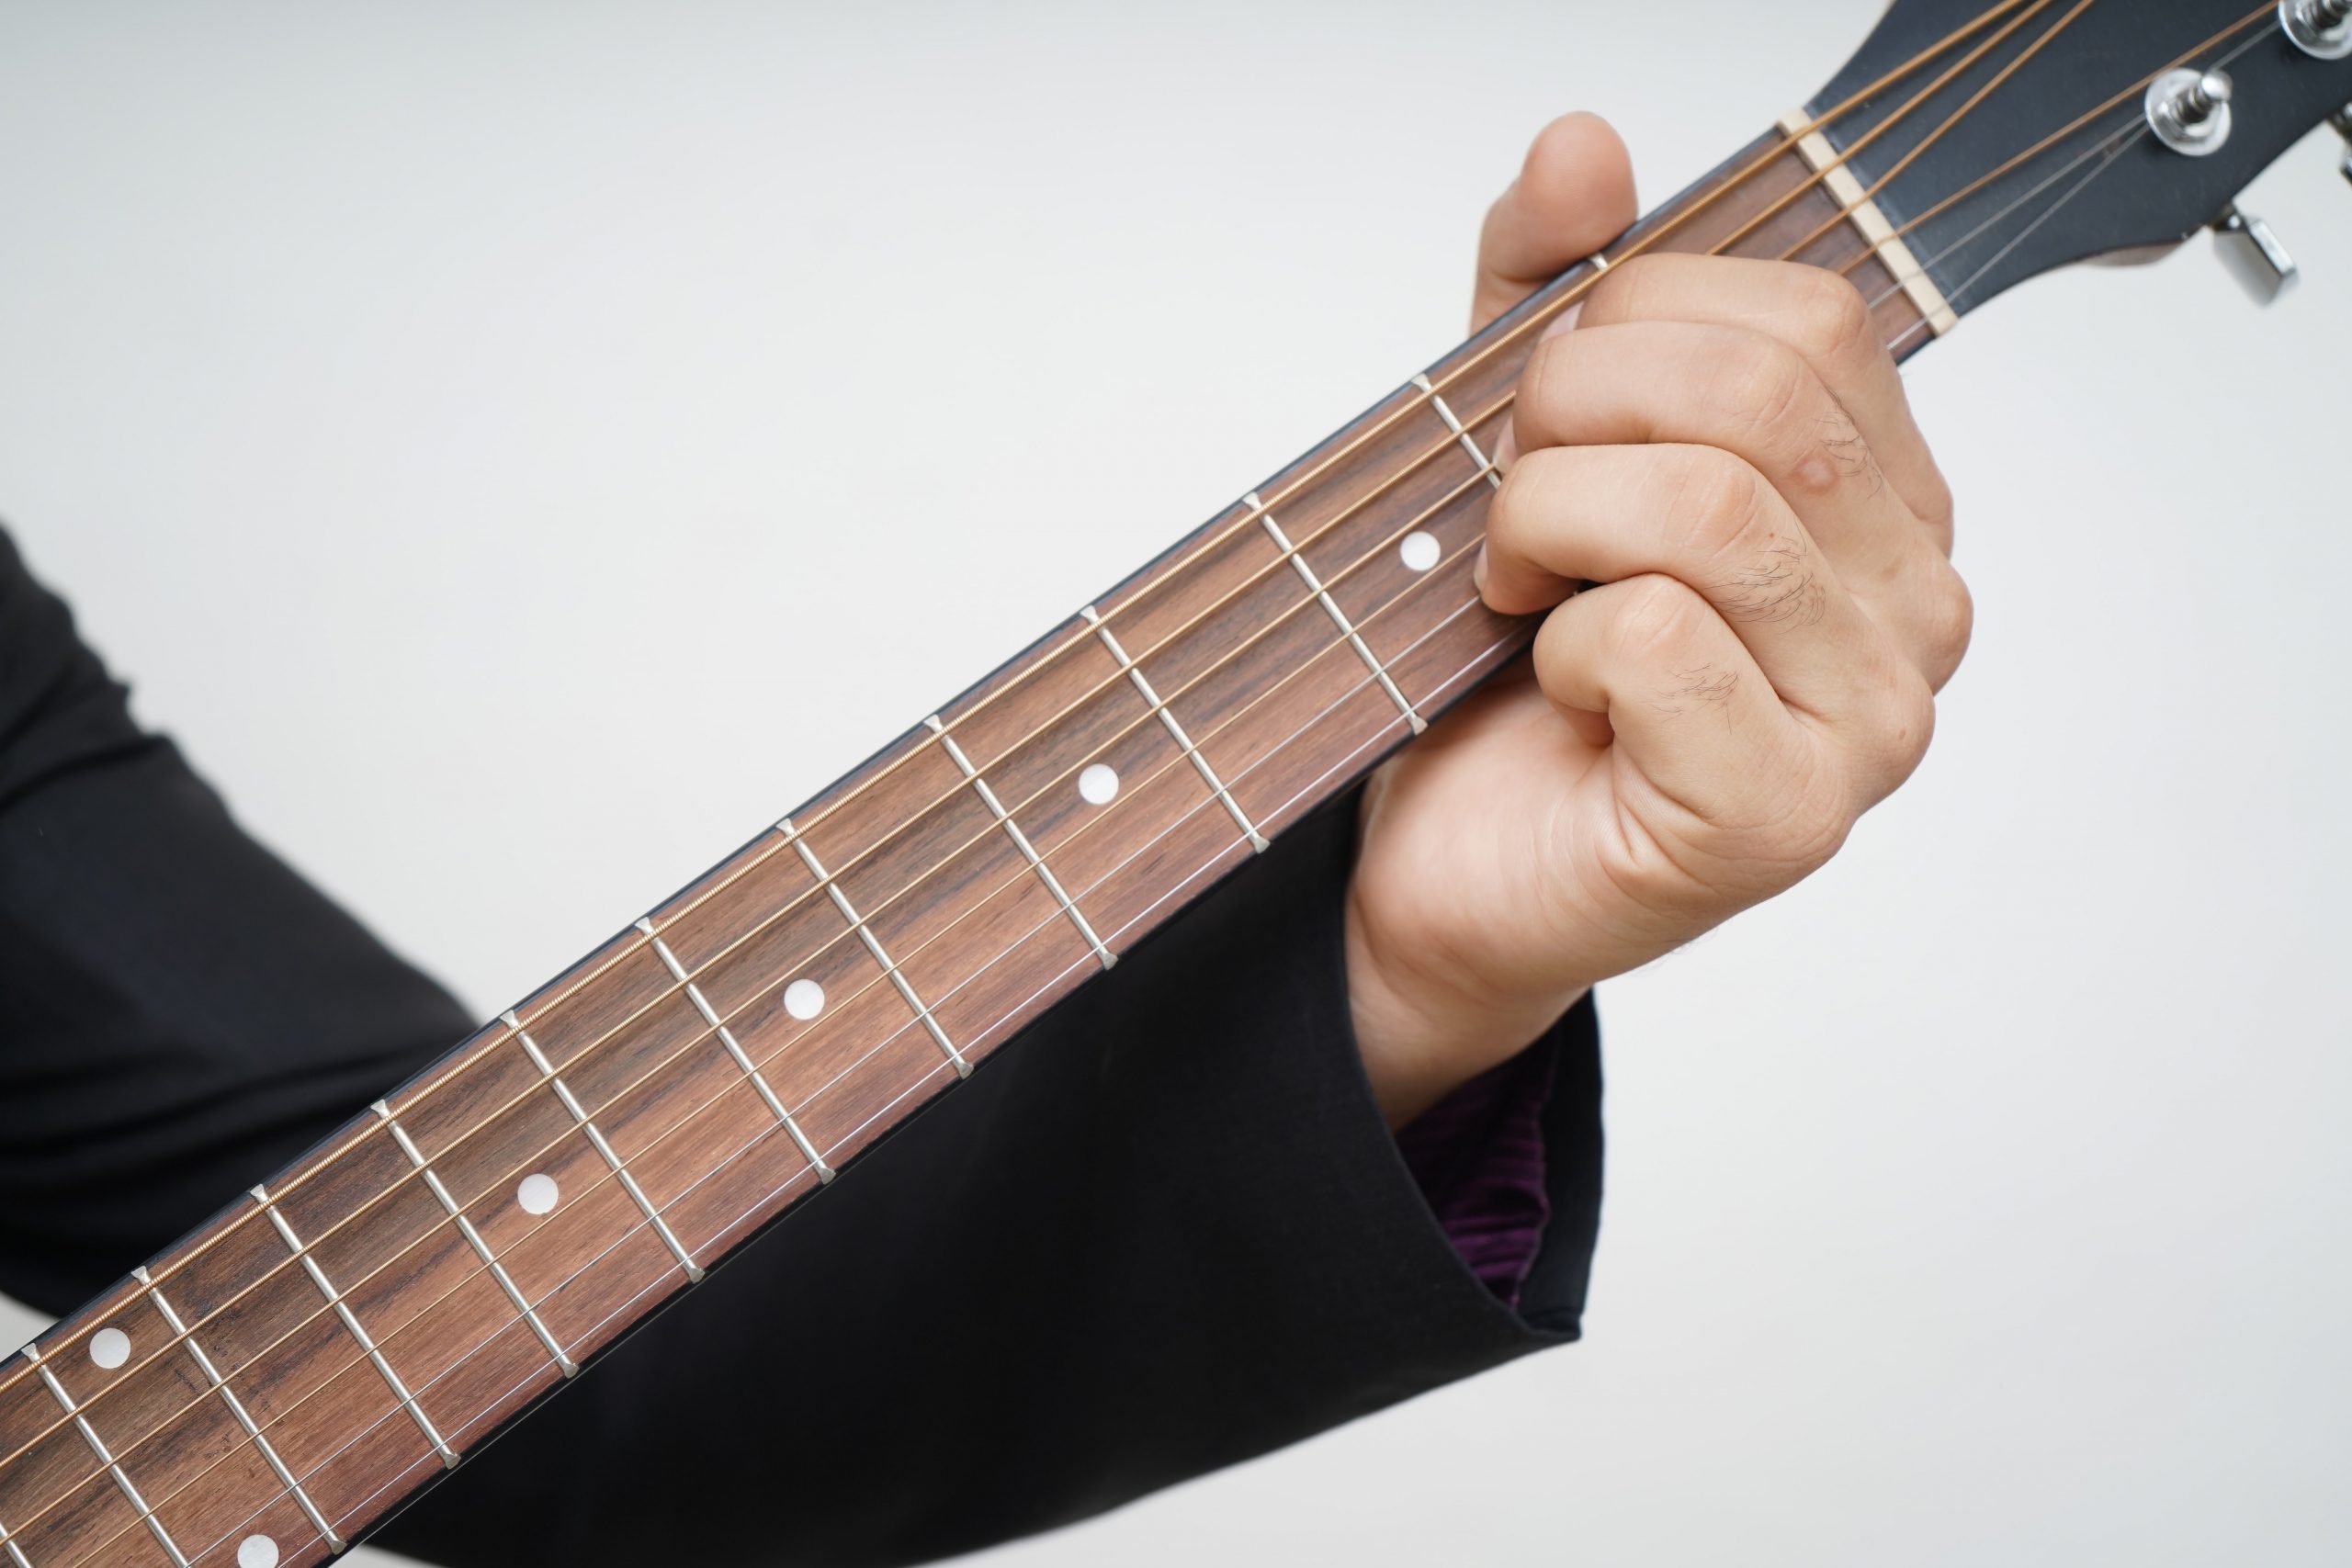
- Position Your Fingers: Begin by placing your fretting hand in a comfortable position, with your thumb resting on the back of the guitar neck for support. Ensure that your fingers are arched and positioned on the appropriate frets to facilitate clear and unhindered string contact.
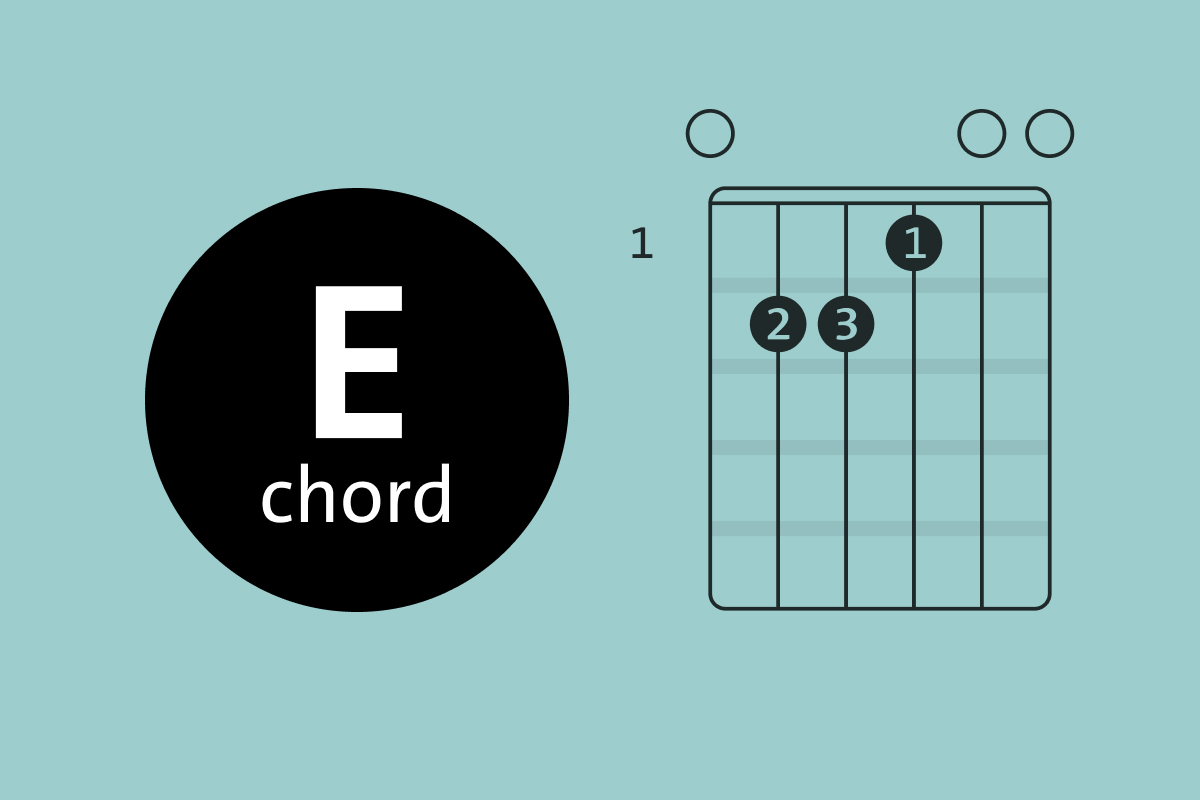
- Index Finger: Place your index finger on the first fret of the G string (3rd string) while maintaining a firm and precise contact with the fretboard. This finger serves as the anchor for the rest of the chord formation.
- Middle Finger: Next, position your middle finger on the second fret of the A string (5th string), directly below your index finger. Maintain a slight arch in your finger to prevent it from muting adjacent strings.
- Ring Finger: Complete the E chord formation by placing your ring finger on the second fret of the D string (4th string), adjacent to your middle finger. Ensure that each finger is positioned close to the fret without obstructing neighboring strings.
Once your fingers are in position, strum the strings one by one to ensure that each note rings out clearly without any muffled or muted sounds. If you encounter any inconsistencies in sound, adjust the positioning of your fingers and apply the necessary pressure to achieve optimal string resonance.
Consistent and diligent practice is key to refining your finger placement and developing muscle memory for the E chord formation. Over time, you’ll notice a natural fluidity in transitioning to and from the E chord, allowing you to seamlessly integrate it into your playing repertoire.
Remember, precision and patience are paramount when honing your finger placement. By maintaining a relaxed yet deliberate approach, you’ll gradually internalize the nuances of the E chord formation, paving the way for confident and expressive performances on the guitar.
Strumming the E Chord
Once you’ve established the correct finger placement for the E chord, the next step is to focus on refining your strumming technique to bring out the chord’s full resonance and character. Effective strumming not only enhances the tonal quality of the E chord but also contributes to the rhythmic drive and emotive impact of your playing.
When strumming the E chord, consider the following guidelines to optimize your technique:
- Strumming Direction: Begin by positioning your strumming hand comfortably above the soundhole of the guitar. Whether you prefer using a pick or strumming with your fingers, ensure that your strumming motion flows smoothly and evenly across the strings. For the E chord, initiate your strumming from the open low E string (6th string) and progress upward, aiming for a consistent and balanced strumming motion.
- Rhythmic Consistency: Maintain a steady rhythm as you strum the E chord, synchronizing your strumming hand with the designated beats of the music. Whether you’re playing in 4/4 time or exploring alternative time signatures, strive for rhythmic precision to accentuate the musical flow and cohesion.
- String Emphasis: Emphasize the lower strings of the E chord, particularly the open low E string and the A string, to underscore the chord’s robust foundation. By accentuating these strings in your strumming pattern, you’ll enrich the chord’s sonic depth and create a compelling tonal presence.
- Dynamic Expression: Explore varying degrees of strumming dynamics to imbue the E chord with expressive nuances. Experiment with gentle, subdued strumming for intimate passages, and contrast this with more vigorous strumming to infuse energy and drive into your playing. Dynamic control adds depth and emotion to your rendition of the E chord, elevating its impact within a musical context.
As you refine your strumming technique, pay close attention to the clarity and resonance of each strummed note within the E chord. Aim for a balanced and articulate sound, ensuring that no strings are inadvertently muted or overpowered during your strumming sequences.
By honing your strumming technique in conjunction with precise finger placement, you’ll unlock the full sonic potential of the E chord, empowering you to deliver captivating and expressive performances that resonate with your audience.
Common Mistakes to Avoid
While learning to play the E chord, it’s common to encounter challenges that can impede your progress. By recognizing and addressing these common pitfalls, you can refine your technique and enhance your overall proficiency. Here are some prevalent mistakes to avoid when mastering the E chord:
- Fretting Hand Tension: One of the most common errors is applying excessive tension in your fretting hand while forming the E chord. This can lead to strained fingers, hindered dexterity, and a lack of clarity in the chord’s resonance. Focus on maintaining a relaxed and natural hand position, allowing your fingers to exert just enough pressure to produce clear notes without unnecessary strain.
- Muted Strings: Inaccurate finger placement or insufficient pressure on the fretboard can result in muted or buzzing strings within the E chord. Carefully position your fingers close to the frets and apply consistent pressure to ensure that each string rings out clearly when strummed.
- Unintentional String Bends: When forming the E chord, be mindful of unintentional string bends caused by finger placement or excessive pressure. String bends can alter the pitch of the notes, leading to a dissonant sound. Practice precise finger positioning to mitigate inadvertent string bends and maintain the chord’s integrity.
- Inconsistent Strumming: Strumming too forcefully or unevenly across the strings can result in an imbalanced and muddled sound. Strive for consistent strumming dynamics and direction, ensuring that each strummed note within the E chord resonates with clarity and cohesion.
- Lack of Finger Independence: Developing finger independence is essential for executing the E chord seamlessly. Avoid allowing one finger to inadvertently mute adjacent strings or interfere with the resonance of other notes within the chord. Practice individual finger exercises to enhance finger dexterity and control.
By recognizing these common mistakes and actively addressing them through focused practice and mindful awareness, you can overcome obstacles and refine your technique, ultimately elevating your proficiency in playing the E chord. Embrace a patient and attentive approach, and celebrate the incremental improvements that arise from diligent practice and self-correction.
Tips for Mastery
Mastering the E chord involves a combination of focused practice, attentive technique, and a willingness to embrace the learning process. Here are valuable tips to enhance your proficiency and mastery of the E chord:
- Consistent Practice: Dedicate regular practice sessions to reinforce your muscle memory and familiarity with the E chord shape. Consistency is key to solidifying your technique and achieving fluency in transitioning to and from the E chord.
- Relaxed Hand Position: Maintain a relaxed and natural hand position while forming the E chord, allowing for optimal finger mobility and unhindered string contact. Avoid tensing your fingers, and prioritize a comfortable yet precise approach to fretting the chord.
- Utilize Visual References: Visual aids, such as chord diagrams and instructional videos, can provide valuable visual references for refining your finger placement and strumming technique. Leverage these resources to gain a clear understanding of the E chord’s structure and execution.
- Gradual Tempo Progression: Begin practicing the E chord at a comfortable tempo, gradually increasing the speed as your proficiency improves. This incremental approach allows for steady skill development and promotes a sense of accomplishment as you expand your playing capabilities.
- Ear Training: Cultivate your ear for discerning the resonance and tonal quality of the E chord. Actively listen to the chord’s sound as you play, and make adjustments to your finger placement and strumming technique based on the clarity and resonance of the notes.
- Explore Song Application: Integrate the E chord into songs and musical pieces that resonate with your musical preferences. Applying the E chord within a musical context enhances your connection to the chord and fosters a practical understanding of its versatility.
- Seek Feedback: Solicit constructive feedback from experienced guitarists or instructors to gain valuable insights into refining your E chord proficiency. External input can offer nuanced perspectives and actionable suggestions for improvement.
- Patient Persistence: Embrace a patient and persistent mindset as you strive for mastery of the E chord. Celebrate your progress, no matter how incremental, and maintain a positive outlook as you navigate the learning curve.
By integrating these tips into your practice regimen and approaching the mastery of the E chord with enthusiasm and perseverance, you’ll cultivate a strong foundation in guitar playing and expand your musical capabilities with confidence.
Conclusion
Congratulations on embarking on the enriching journey of mastering the E chord on the guitar. Through this comprehensive guide, you’ve gained valuable insights into the musical composition, finger placement, strumming technique, and common challenges associated with the E chord. By embracing the tips for mastery and approaching your practice with dedication and patience, you’re poised to elevate your proficiency and musical expression.
As you continue to hone your skills, remember that the mastery of the E chord is not solely about technical precision, but also about infusing your playing with emotion, creativity, and personal flair. Each strum of the E chord carries the potential to resonate with joy, passion, and the universal language of music.
Embrace the learning process as a fulfilling and rewarding endeavor, and celebrate the progress you make with each practice session. Whether you’re strumming along to your favorite songs or composing original melodies, the E chord serves as a steadfast companion in your musical odyssey, offering boundless opportunities for artistic expression and sonic exploration.
As you continue to expand your repertoire and delve into new musical horizons, the foundational skills and insights gleaned from mastering the E chord will serve as a springboard for your growth as a guitarist. Stay inspired, remain receptive to learning, and let the resonant tones of the E chord fuel your passion for creating and sharing music.
With dedication, perseverance, and a touch of musical ingenuity, the E chord will become an integral part of your musical identity, enriching your playing and captivating audiences with its timeless allure. Embrace the journey, savor each chord progression, and let the melodic resonance of the E chord propel you toward new heights of artistic fulfillment.