Home>Instruments>Guitar>How To Read A Guitar Chord Chart
Guitar
How To Read A Guitar Chord Chart
Published: February 14, 2024
Learn how to read a guitar chord chart and master the basics of playing guitar. Get step-by-step guidance and tips for understanding guitar chords.
(Many of the links in this article redirect to a specific reviewed product. Your purchase of these products through affiliate links helps to generate commission for AudioLover.com, at no extra cost. Learn more)
Table of Contents
Introduction
Understanding the Basics
Guitar chord charts are essential tools for any aspiring guitarist. Whether you’re a beginner or an experienced player, understanding how to read a guitar chord chart is crucial for mastering the instrument. A chord chart provides a visual representation of the guitar’s fretboard, indicating where to place your fingers to produce specific chords. By learning to interpret these charts, you can quickly grasp new chords, play a wide variety of songs, and even create your own music.
Reading a guitar chord chart may seem daunting at first, especially for those new to the instrument. However, with a bit of guidance and practice, it becomes an intuitive skill that significantly enhances your musical abilities. This article will walk you through the fundamentals of reading guitar chord charts, from understanding the fretboard layout to deciphering common symbols and notations. By the end, you'll feel confident in your ability to navigate chord charts and expand your guitar repertoire.
In the following sections, we'll delve into the intricacies of reading guitar chord charts, shedding light on the symbols, diagrams, and techniques that make up these valuable resources. Whether you're aiming to strum along to your favorite songs or compose your own melodies, the knowledge gained from this guide will undoubtedly elevate your guitar-playing journey. So, let's embark on this musical exploration and unravel the mysteries of guitar chord charts together.
Understanding the Basics
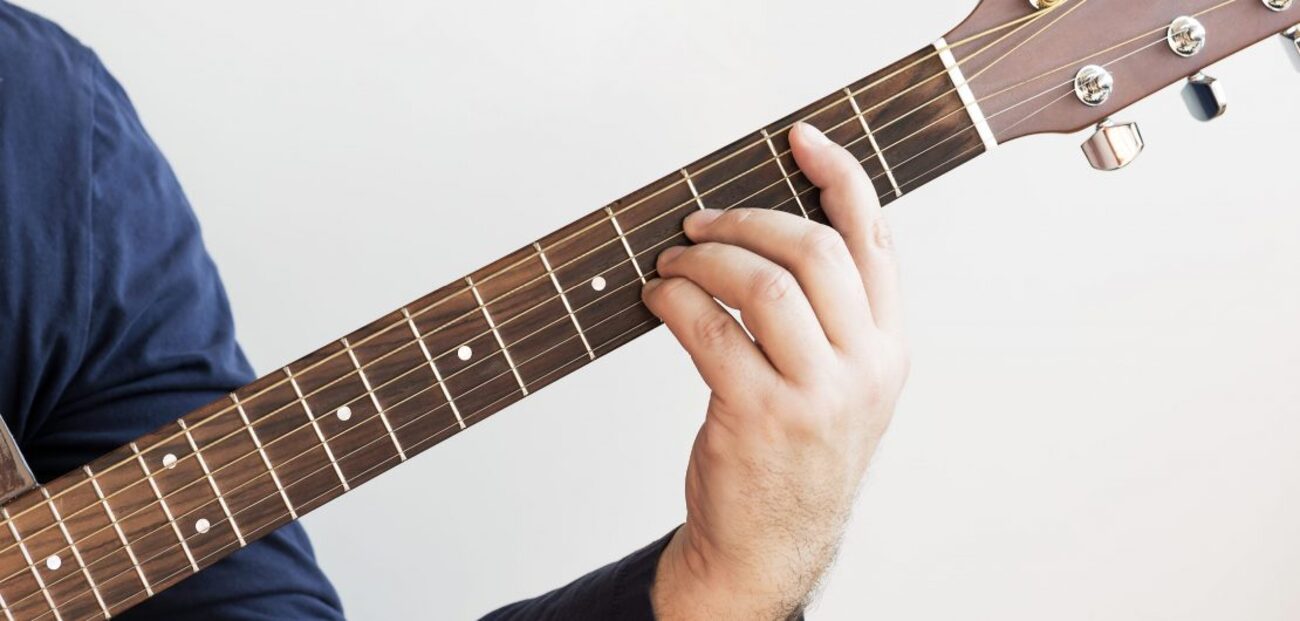
Before delving into the specifics of reading guitar chord charts, it’s essential to grasp the basic elements of the instrument and its fretboard. The guitar features six strings, each of which can be pressed down at various points along the frets to produce different notes. The frets are the metal strips that divide the fingerboard, with each fret representing a specific musical pitch.
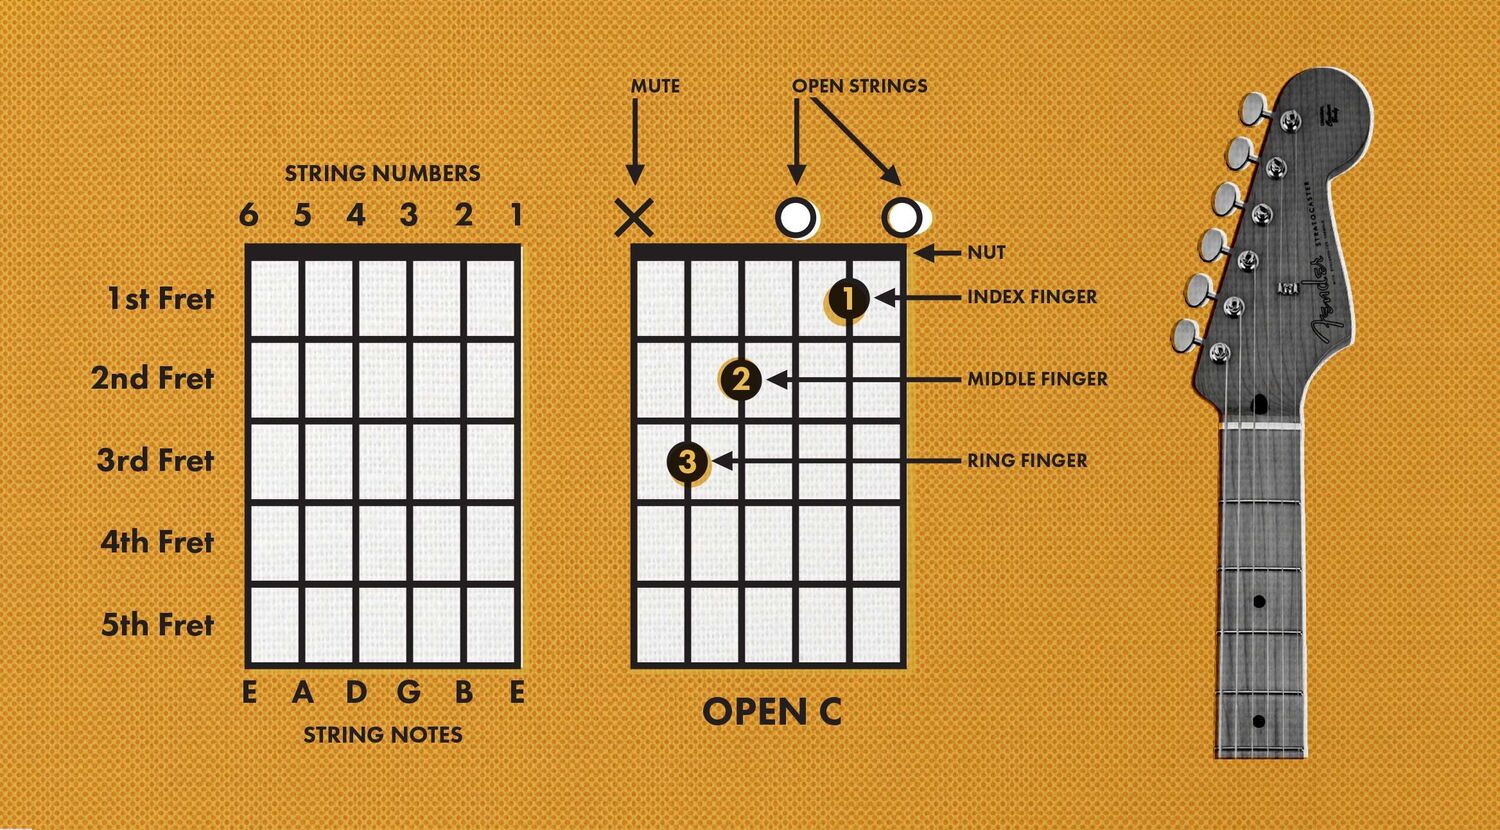
When looking at the fretboard from a player’s perspective, the horizontal lines represent the frets, while the vertical lines denote the strings. The thickest string, located at the top when holding the guitar, is the low E string, while the thinnest string is the high E string at the bottom. Understanding this layout is crucial for interpreting chord charts, as it directly correlates to the visual representation provided.
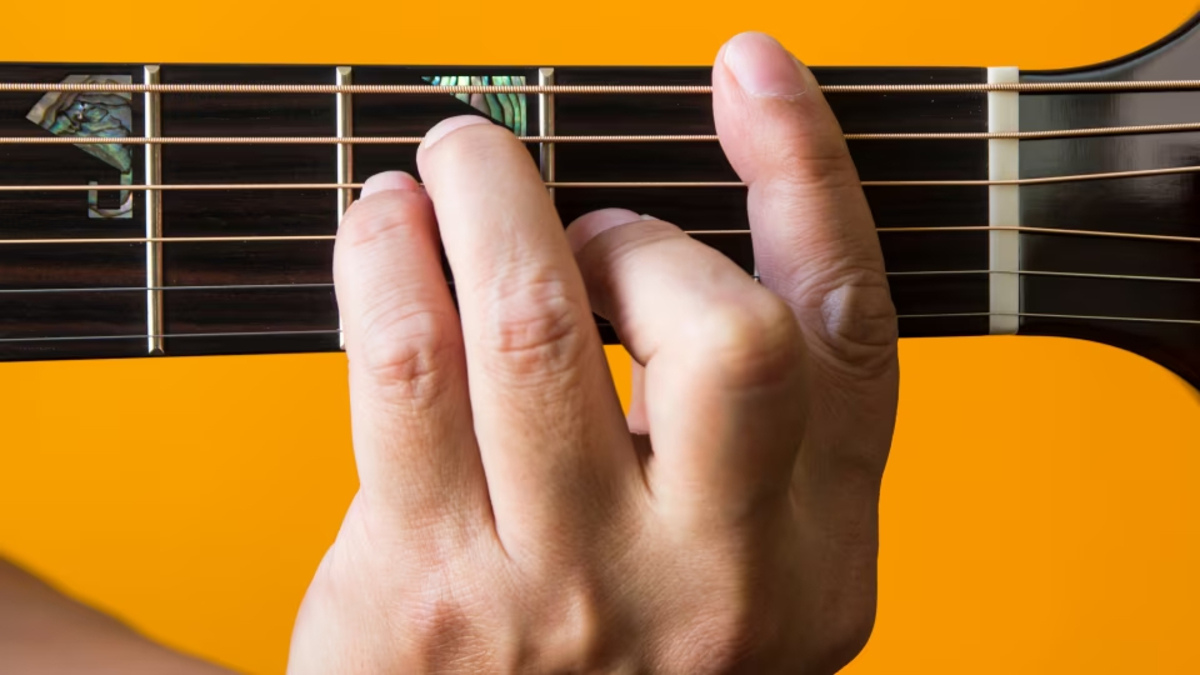
Furthermore, it’s important to familiarize yourself with finger numbering. In the context of guitar playing, the index finger is generally denoted as “1,” the middle finger as “2,” the ring finger as “3,” and the pinky as “4.” This numbering system is frequently used in chord charts to indicate which fingers should be positioned on specific frets.
As you progress in your guitar journey, developing a solid understanding of the instrument’s anatomy and finger numbering will greatly facilitate your ability to read and interpret chord charts. With these foundational concepts in place, you’re well-equipped to move forward and explore the intricacies of guitar chord chart reading.
Reading the Fretboard
When it comes to understanding and interpreting guitar chord charts, familiarity with the fretboard is paramount. As mentioned earlier, the fretboard is the long, narrow surface on the neck of the guitar, featuring metal frets that divide it into distinct sections. Each fret represents a semitone, allowing the player to produce different notes by pressing the strings against specific frets.
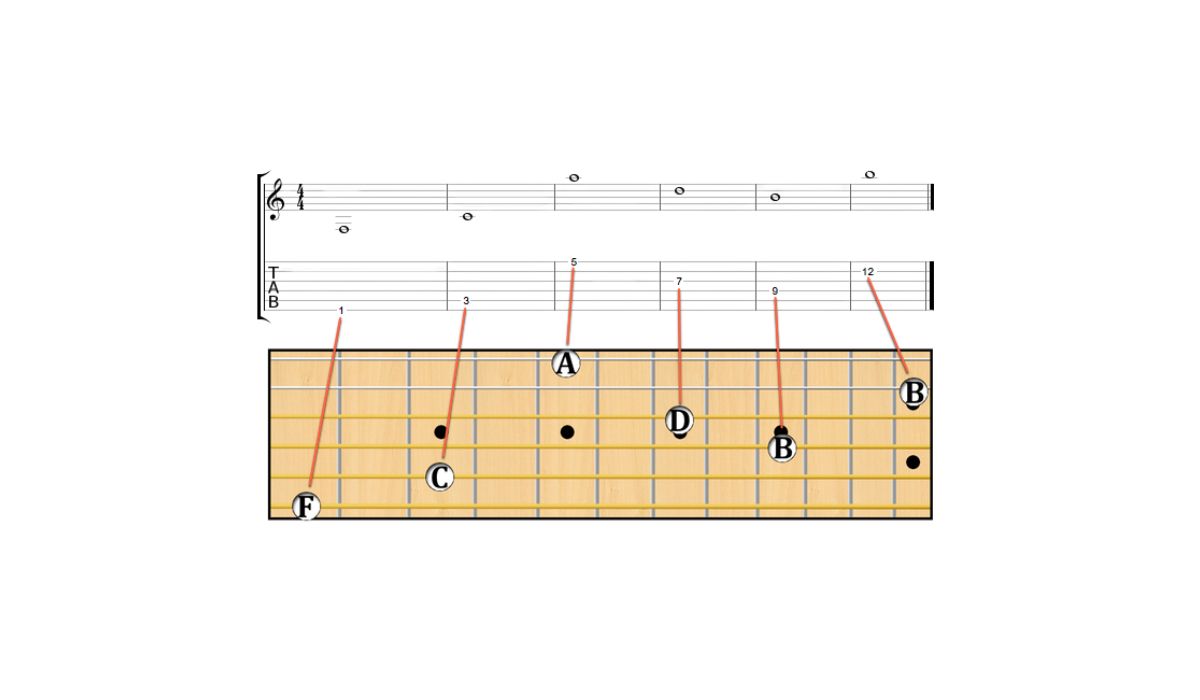
One fundamental aspect of reading the fretboard is recognizing the musical notes associated with each string and fret. The open strings of a standard-tuned guitar are tuned to the following notes, from the low E string to the high E string: E, A, D, G, B, and E. As you move up the fretboard, each fret represents a higher pitch, allowing for a diverse range of notes and chords to be played.
Additionally, understanding the concept of “fret numbers” is crucial. When reading a chord chart, you’ll often encounter numbers placed on the strings, indicating the fret at which a particular finger should be positioned. This information enables you to visualize where to place your fingers on the fretboard, ultimately forming the desired chord shape.
Furthermore, it’s beneficial to familiarize yourself with the concept of “fret markers,” which are visual indicators typically found on the fretboard’s surface. These markers serve as reference points, aiding in navigation and chord formation. Common fret markers appear at the 3rd, 5th, 7th, 9th, 12th, and sometimes 15th frets, providing visual cues that assist in locating specific positions on the fretboard.
By developing a solid understanding of the fretboard layout, note positions, fret numbers, and fret markers, you’ll gain the foundational knowledge necessary to effectively interpret guitar chord charts. This familiarity with the fretboard serves as the cornerstone for navigating chord diagrams and executing chords with precision and clarity.
Reading Guitar Chord Charts
Guitar chord charts, also known as chord diagrams or grids, offer a visual representation of the guitar’s fretboard, illustrating the finger placements required to play specific chords. Understanding how to interpret these charts is essential for expanding your chord vocabulary and mastering new songs.
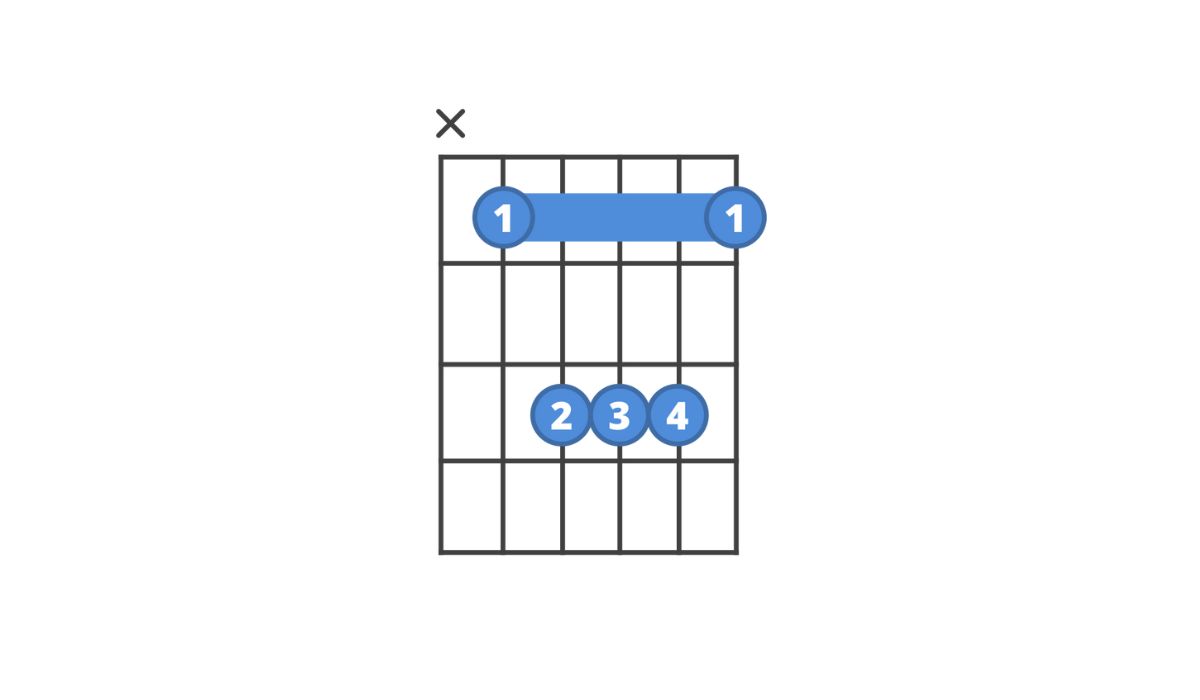
Each chord chart consists of vertical lines that represent the guitar strings, with the leftmost line depicting the low E string and the rightmost line representing the high E string. The horizontal lines indicate the frets on the guitar neck, with the top line depicting the nut (the point where the headstock meets the fretboard) and the bottom line representing the guitar’s body.
When reading a chord chart, it’s important to note that the vertical lines are often accompanied by fret numbers, indicating where to place your fingers on the corresponding strings. For instance, a “0” on the low E string signifies an open string, while a “3” on the A string denotes that the third fret should be pressed down at that position.
Finger placement is typically denoted by numbered circles within the grid, corresponding to the recommended fingers for each position. These circles are often labeled with numbers 1 through 4, representing the index, middle, ring, and pinky fingers, respectively. By following the finger placements indicated on the chord chart, you can form the necessary chord shape and produce the intended sound.
It’s important to understand that some chord charts may include additional symbols or notations to convey specific playing techniques or variations of the chord. For example, a small “x” above a string might indicate that the string should not be played, while an “o” signifies that the string should be played open. These symbols provide valuable insight into how the chord should be executed and can enhance your overall playing technique.
By familiarizing yourself with the layout, symbols, and finger placements depicted in guitar chord charts, you’ll develop the ability to quickly learn and execute a wide range of chords. This foundational skill is invaluable for any guitarist seeking to expand their repertoire and excel in playing various musical styles.
Common Symbols and Notations
When exploring guitar chord charts, it’s essential to familiarize yourself with the common symbols and notations that accompany these visual representations. Understanding these symbols will enable you to interpret chord charts accurately and execute chords with precision.
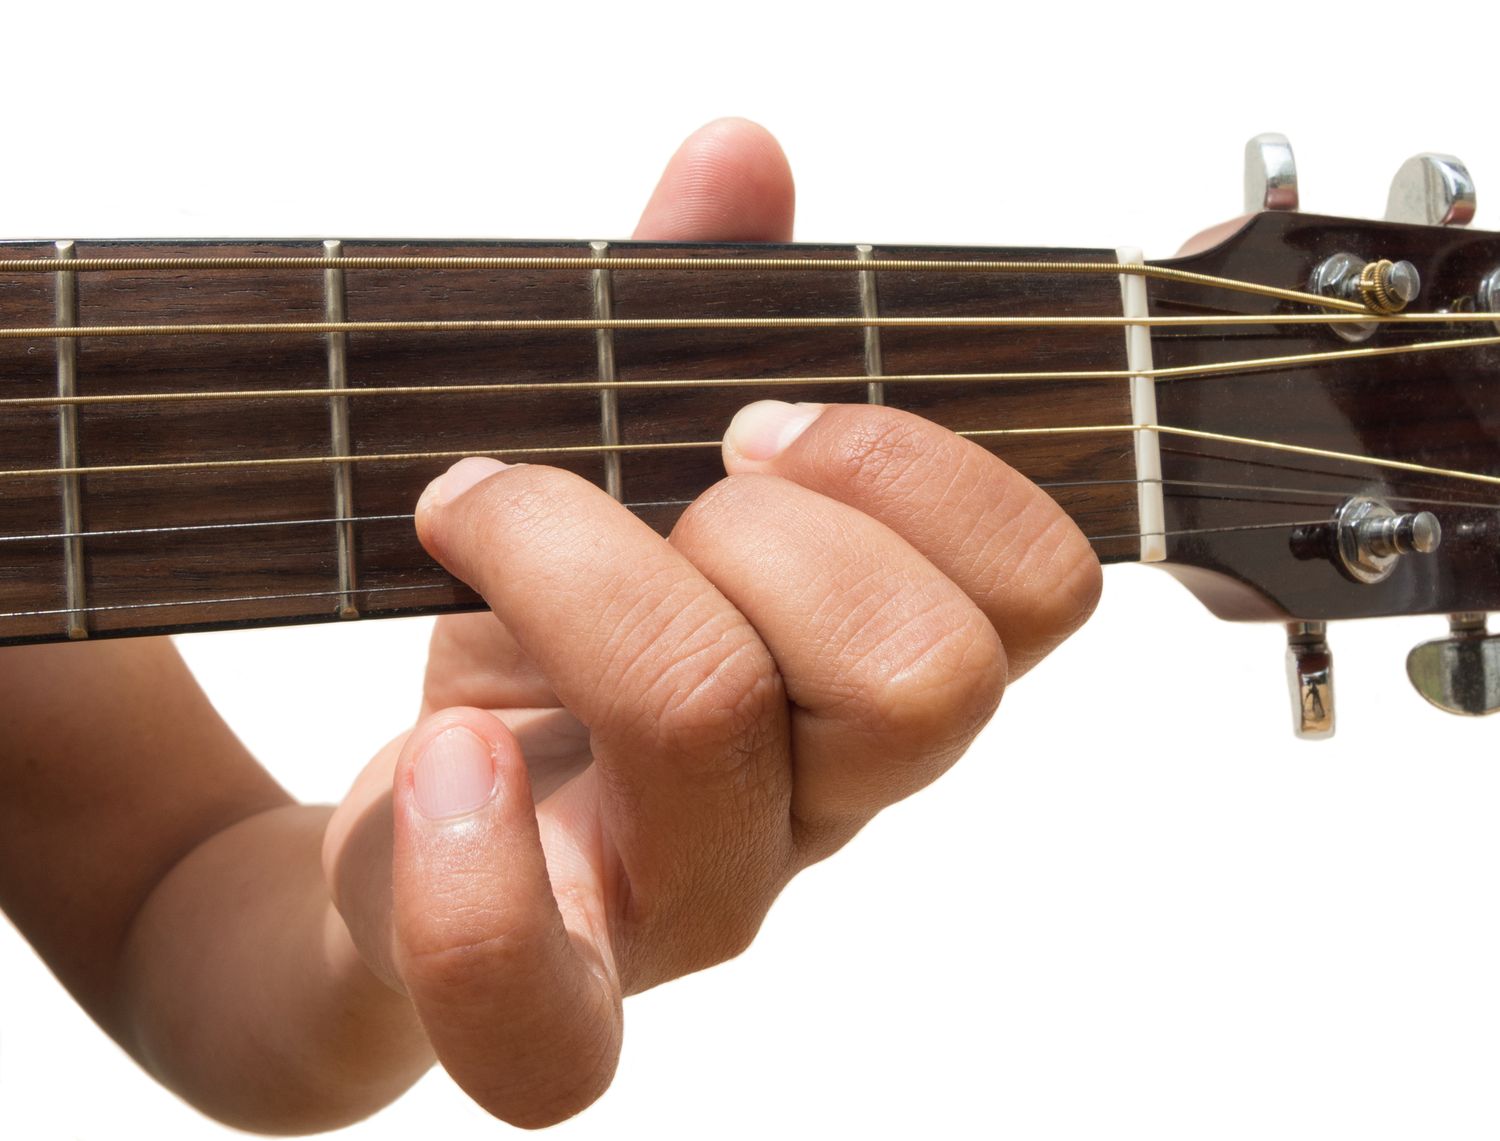
One prevalent symbol found in chord charts is the “X,” which indicates that a particular string should not be played or should be muted. This symbol is often placed above the string, alerting the player to avoid strumming or plucking that specific string when forming the chord shape. Muting a string involves lightly touching it with a fretting hand finger to dampen its sound, preventing it from ringing out when strummed.
Conversely, the letter “O” on a string denotes that the string should be played open, meaning it should be strummed without any fretting hand fingers pressing down on it. Open strings add depth and resonance to chord voicings, contributing to the overall richness of the sound.
Another important notation is the “barre chord” symbol, often represented by a curved line extending across multiple strings within the chord chart. This symbol indicates that a single finger should be used to fret multiple strings simultaneously, typically across an entire fret. Mastering barre chords opens up a wide array of chord possibilities and is a fundamental skill for advancing guitarists.
Furthermore, you may encounter numbers within circles on chord charts, representing the suggested fingerings for each position. These numbers correspond to the index (1), middle (2), ring (3), and pinky (4) fingers, guiding you on which fingers to use when forming the chord shape. Adhering to the recommended finger placements enhances the clarity and dexterity of your chord playing.
Additionally, chord charts may incorporate symbols such as “T” (for thumb) or “C” (for the use of the palm or thumb) to indicate alternative fingerings or playing techniques. These notations offer flexibility in chord execution, allowing you to explore different approaches to achieve the desired sound.
By familiarizing yourself with these common symbols and notations, you’ll develop a comprehensive understanding of how to interpret and implement the instructions provided in guitar chord charts. This knowledge empowers you to navigate the intricacies of chord diagrams with confidence and precision, ultimately enhancing your guitar-playing prowess.
Tips for Effective Reading
Mastering the art of reading guitar chord charts is a valuable skill that can greatly enhance your musical journey. To optimize your chord chart reading experience and expedite your learning process, consider the following tips:
- Start with Basic Chords: Begin by familiarizing yourself with fundamental open chords such as C, G, D, E, and A. These foundational chords are prevalent in numerous songs and serve as an excellent starting point for honing your chord chart reading skills.
- Practice Regularly: Dedicate consistent practice sessions to reading and interpreting chord charts. As with any skill, regular practice is essential for improvement and retention. Set aside time each day to work on new chords and reinforce your understanding of chord chart notation.
- Visualize the Fretboard: Mentally visualize the fretboard layout as you read chord charts. This visualization technique helps you quickly translate the diagram into physical finger placements on the guitar, fostering a deeper understanding of chord structures.
- Utilize Online Resources: Take advantage of online platforms and applications that offer interactive chord diagrams and tutorials. These resources often provide audio demonstrations and additional guidance, enhancing your comprehension of chord chart notation.
- Experiment with Transposition: Once you’ve mastered a chord in one position, experiment with transposing it to different frets on the fretboard. This exercise strengthens your overall understanding of chord construction and fosters adaptability in your playing.
- Seek Professional Guidance: Consider seeking guidance from a guitar instructor or experienced musician. A knowledgeable mentor can offer personalized tips, correct any misconceptions, and provide valuable insights to accelerate your chord chart reading proficiency.
- Stay Patient and Persistent: Learning to read guitar chord charts is a gradual process that requires patience and persistence. Embrace the learning curve, celebrate small victories, and remain committed to refining your skills over time.
By incorporating these tips into your practice routine and approaching chord chart reading with a proactive mindset, you’ll steadily enhance your ability to interpret, execute, and internalize a diverse range of guitar chords. This, in turn, will empower you to explore new musical horizons and express your creativity through the art of guitar playing.
Conclusion
Embarking on the journey of learning to read guitar chord charts opens a world of musical possibilities, enabling you to expand your repertoire, play your favorite songs, and express your creativity through the instrument. By understanding the basics of the fretboard, familiarizing yourself with chord chart notation, and embracing effective reading techniques, you’ve equipped yourself with a valuable skill set that will continue to enrich your guitar-playing experience.
As you delve into the realm of guitar chord chart reading, remember that patience, practice, and perseverance are key. Embrace the process of deciphering new chords, experimenting with different voicings, and honing your ability to interpret visual representations of musical concepts. Each chord chart you encounter presents an opportunity for growth and discovery, contributing to your development as a well-rounded guitarist.
Furthermore, don’t hesitate to explore online resources, seek guidance from experienced musicians, and immerse yourself in the vibrant community of guitar enthusiasts. Engaging with fellow players, sharing insights, and seeking inspiration from diverse musical styles can fuel your passion for the instrument and deepen your understanding of chord chart interpretation.
Ultimately, the ability to read guitar chord charts empowers you to connect with the language of music in a tangible and meaningful way. Whether you’re strumming along to a beloved song, composing your own melodies, or collaborating with fellow musicians, the proficiency you’ve gained in reading chord charts serves as a gateway to musical expression and creativity.
As you continue to hone your skills and expand your musical horizons, remember that the journey of learning is as enriching as the destination. Embrace the joy of discovery, savor the satisfaction of mastering new chords, and let your passion for music propel you forward on this harmonious adventure with the guitar.