Home>Production & Technology>Audio Cable>How To Use Virtual Audio Cable Focusrite

Audio Cable
How To Use Virtual Audio Cable Focusrite
Modified: January 22, 2024
Learn how to use Virtual Audio Cable with Focusrite audio interfaces. Connect and route audio between different applications seamlessly. Improve your audio workflow with this powerful audio cable.
(Many of the links in this article redirect to a specific reviewed product. Your purchase of these products through affiliate links helps to generate commission for AudioLover.com, at no extra cost. Learn more)
Table of Contents
Introduction
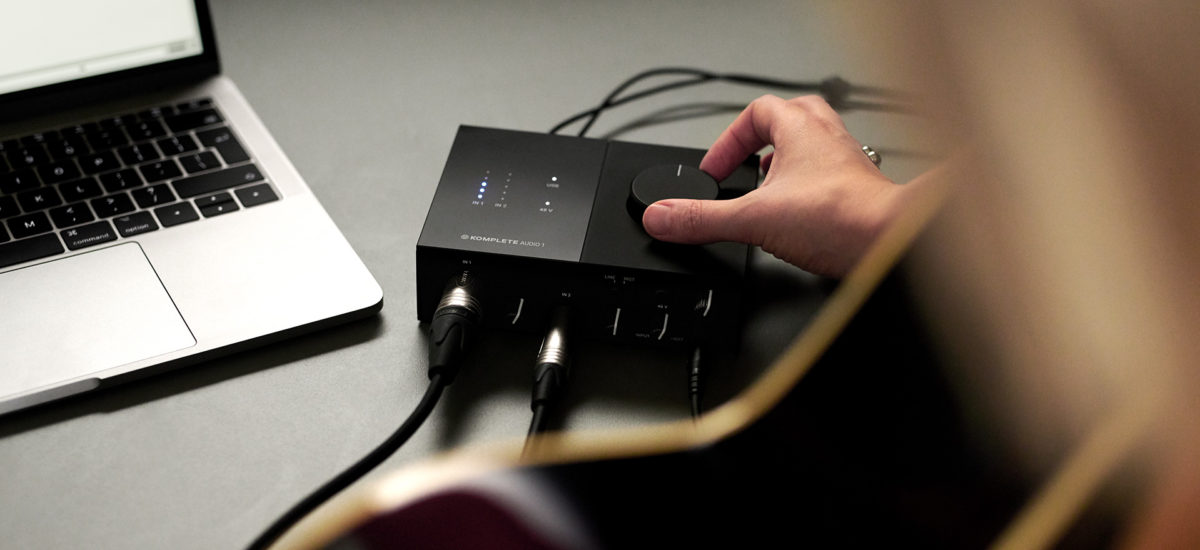
Audio cables are an essential part of any professional audio setup, but with the advancements in technology, there’s now an alternative solution called Virtual Audio Cable (VAC). VAC provides a virtual connection for audio signals, allowing you to route and manipulate audio streams within your computer. One popular use for VAC is integrating it with audio interfaces like the Focusrite Scarlett series, which provides high-quality audio recording and playback capabilities.
In this article, we will explore how to use Virtual Audio Cable with a Focusrite audio interface. We’ll guide you through the setup and configuration process, ensuring that you can take full advantage of this powerful tool. Whether you’re a musician, podcaster, or audio enthusiast, understanding how to harness the potential of Virtual Audio Cable and your Focusrite interface can greatly enhance your audio production workflow.
By the end of this article, you’ll have a clear understanding of how to set up Virtual Audio Cable with your Focusrite interface and be able to route audio signals effectively for your specific needs.
What is Virtual Audio Cable?
Virtual Audio Cable, also known as VAC, is a software application that allows you to create virtual audio devices on your computer. These virtual devices act as audio routers, enabling you to send audio signals between different applications and devices within your system. VAC essentially emulates the behavior of physical audio cables, but with the added flexibility and convenience of a digital solution.
With Virtual Audio Cable, you can create multiple virtual cables and connect them to audio inputs and outputs from various applications and devices. This opens up a world of possibilities for audio routing and manipulation. You can, for example, route audio from your microphone to multiple applications simultaneously, or play audio from one application through another application’s virtual cable outputs.
Virtual Audio Cable is commonly used by professionals in various fields, including music production, podcasting, streaming, and gaming. It provides a versatile and efficient way to manage audio signals within your computer, removing the limitations imposed by physical audio cables.
Moreover, Virtual Audio Cable offers advanced features such as the ability to adjust buffer parameters for optimal audio performance, control latency, and maintain pristine audio quality throughout the signal routing process.
Now that you have a basic understanding of what Virtual Audio Cable is, let’s move on to setting it up with a Focusrite audio interface.
Setting up Virtual Audio Cable
Before diving into the setup process, ensure that you have downloaded and installed the latest version of Virtual Audio Cable from the official website. Once installed, follow the steps below to set it up:
- Launch Virtual Audio Cable: Open the Virtual Audio Cable application on your computer. You will see the main interface with options to configure virtual cables and their properties.
- Create virtual cables: Click on the “Add New Cable” button to create a virtual cable. You can create multiple virtual cables based on your requirements.
- Configure cable properties: Right-click on a virtual cable and select “Properties” to configure its properties. Here, you can set the sample rate, buffer size, and other parameters. It’s recommended to keep the default settings unless you have specific requirements.
- Assign audio inputs and outputs: Go to the audio settings of the applications or devices you want to route audio from and to. Select the virtual cable you created as the audio output/input device. This will establish the connection between the application/device and the virtual cable.
- Test the setup: Play audio from one application and check if it is being received by the virtual cable. You can use audio monitoring tools within Virtual Audio Cable to monitor the audio signals passing through the virtual cables.
- Adjust settings if necessary: If you experience any issues with audio latency or quality, you can experiment with buffer size and other settings in the virtual cable properties to optimize the performance. Keep in mind that larger buffer sizes may increase latency but provide more stability, while smaller buffer sizes reduce latency but may introduce audio glitches.
Once you have set up Virtual Audio Cable and created the necessary virtual cables, you are ready to configure your Focusrite audio interface to work with it. In the next section, we will guide you through the process of configuring the Focusrite interface as an audio input.
Configuring Focusrite as the audio input
Now that Virtual Audio Cable is set up, we can move on to configuring your Focusrite audio interface as the audio input device. Follow the steps below to complete the configuration:
- Connect your Focusrite interface: Plug in your Focusrite audio interface to your computer using a USB cable. Ensure that it is properly recognized and installed by your operating system.
- Open your audio recording software: Launch your preferred audio recording software, such as Ableton Live, Pro Tools, or Audacity.
- Access audio settings: Navigate to the audio settings or preferences within your software. Look for the section where you can select the audio input device.
- Choose the Focusrite interface: From the available options, select your Focusrite audio interface as the input device. You may see it listed as the model name of your Focusrite device.
- Set the input channels: Depending on your interface model, you may have multiple input channels available. Choose the appropriate input channel for your desired audio source, whether it’s a microphone, instrument, or line input.
- Configure input parameters: Adjust any input parameters such as gain, phantom power, or sample rate to match your recording needs. Consult your audio software’s documentation for guidance on specific settings.
With the Focusrite audio interface configured as the audio input device within your recording software, you are now ready to route the audio signals through Virtual Audio Cable. In the next section, we will cover the steps to configure Virtual Audio Cable as the audio output device.
Configuring Virtual Audio Cable as the audio output
Now that your Focusrite audio interface is set as the audio input device, we can proceed to configure Virtual Audio Cable as the audio output device. Follow the steps below to complete the configuration:
- Open your audio playback software: Launch the audio playback software you wish to use, such as Foobar2000, VLC Media Player, or any other application that allows you to select the audio output device.
- Access audio playback settings: Navigate to the audio settings or preferences within your playback software. Look for the section where you can select the audio output device.
- Choose Virtual Audio Cable: From the available options, select Virtual Audio Cable as the audio output device. It may be listed as “CABLE Input” or a similar name.
- Configure output parameters: Adjust any output parameters such as volume levels or sample rate within the playback software to ensure optimal audio playback.
Now, any audio played through the selected playback software will be routed through Virtual Audio Cable, allowing you to further manipulate or route the audio signals using the virtual cables you created earlier.
It’s important to note that Virtual Audio Cable can also be used to route audio between different applications, allowing you to, for example, play audio from one application through another application’s virtual cable inputs.
With the audio output configuration complete, you have successfully set up Virtual Audio Cable to work with your Focusrite audio interface. However, to ensure optimal audio performance and troubleshoot any potential issues, it’s important to adjust the audio settings properly. We’ll cover this in the next section.
Adjusting audio settings for optimal performance
After completing the configuration of Virtual Audio Cable and your Focusrite audio interface, it’s important to optimize the audio settings for the best performance. Here are some key considerations:
- Buffer size: Adjust the buffer size within Virtual Audio Cable’s properties to find the right balance between latency and stability. Larger buffer sizes may increase latency but provide more stable performance, while smaller buffer sizes reduce latency but may introduce audio glitches. Experiment with different buffer sizes to determine the optimal setting for your specific setup.
- Sample rate: Ensure that the sample rate of your recording and playback software matches the sample rate set in Virtual Audio Cable’s properties. Mismatched sample rates can lead to audio distortion or synchronization issues.
- Latency settings: Some applications, particularly in real-time scenarios like live recording or streaming, allow you to adjust latency settings. Lowering the latency can reduce the delay between input and output, but it may put additional strain on your system and potentially cause audio dropouts. Find the right balance based on your system’s capabilities and the requirements of your audio workflow.
- Monitor audio signals: Utilize the monitoring tools provided by Virtual Audio Cable to monitor the audio signals passing through the virtual cables. This can help diagnose any issues such as distorted audio or low volume levels.
- Update drivers and software: Regularly update the drivers for your Focusrite audio interface and the Virtual Audio Cable software to ensure compatibility and access any performance improvements or bug fixes.
By adjusting these audio settings, you can optimize the performance and stability of your audio setup, ensuring a smooth and reliable audio routing experience with Virtual Audio Cable and your Focusrite interface.
If you encounter any issues during the configuration or experience audio-related problems, refer to the troubleshooting section in the next part of this article.
Troubleshooting common issues
While using Virtual Audio Cable with your Focusrite audio interface, you may encounter some common issues. Here are a few troubleshooting tips to help resolve them:
- No audio signal: If you’re not receiving any audio signal through Virtual Audio Cable, double-check the following:
- Ensure that the virtual cable is properly assigned as the audio output device in the sending application.
- Verify that the virtual cable is selected as the audio input device in the receiving application.
- Check if the virtual cables are connected to the correct audio inputs/outputs within Virtual Audio Cable.
- Audio latency: If you’re experiencing high latency (delay) between the input and output audio, try the following:
- Increase the buffer size within Virtual Audio Cable’s properties to reduce the strain on your system.
- Adjust the latency settings in your audio recording or playback software to find the optimal balance between latency and performance.
- Audio distortion or dropouts: If you notice audio distortion or intermittent dropouts, consider the following:
- Increase the buffer size within Virtual Audio Cable to provide more stability.
- Update the drivers for your Focusrite audio interface to the latest version.
- Verify that your computer meets the system requirements for running Virtual Audio Cable and your audio software.
- Incompatible sample rates: If you’re hearing distorted audio or synchronization issues, ensure that the sample rate of Virtual Audio Cable and your audio software are set to the same value. Mismatched sample rates can cause audio quality problems.
If you’re still experiencing difficulties, consult the user manual or online resources for Virtual Audio Cable and your Focusrite audio interface. Additionally, reach out to the respective support forums or contact the customer support for further assistance.
Remember to keep both Virtual Audio Cable and your Focusrite audio interface drivers updated to access any bug fixes or improvements that may enhance compatibility and performance.
With these troubleshooting tips, you’ll be able to overcome common challenges and enjoy a seamless audio routing experience using Virtual Audio Cable and your Focusrite interface.
Conclusion
Virtual Audio Cable offers a powerful and flexible solution for routing and manipulating audio signals within your computer. By integrating it with your Focusrite audio interface, you can enhance your audio production workflow and achieve new levels of creativity. Whether you’re a musician, podcaster, or audio enthusiast, understanding how to use Virtual Audio Cable with your Focusrite interface can greatly expand your possibilities.
In this article, we covered the process of setting up Virtual Audio Cable and configuring it with your Focusrite audio interface. We explored how to create virtual cables, assign audio inputs and outputs, and adjust audio settings for optimal performance. We also provided troubleshooting tips to address common issues that may arise during the setup.
Remember to experiment with different buffer sizes, adjust latency settings, and monitor audio signals to fine-tune your setup and ensure the best audio quality. Additionally, keep your drivers and software up to date to access any performance improvements and bug fixes.
With Virtual Audio Cable and your Focusrite audio interface working seamlessly together, you have the power to route and manipulate audio like never before. Harness this capability to unleash your creativity and produce high-quality audio content.
Now it’s time to dive into the world of Virtual Audio Cable and explore the endless possibilities it offers. Enjoy your audio production journey!

