Home>Events & Info>Ballet>How Do You Make Ballet Shoes
Ballet
How Do You Make Ballet Shoes
Modified: January 22, 2024
Learn how to make ballet shoes with our step-by-step guide. Discover the materials, techniques, and tips needed to create your own beautiful ballet shoes.
(Many of the links in this article redirect to a specific reviewed product. Your purchase of these products through affiliate links helps to generate commission for AudioLover.com, at no extra cost. Learn more)
Table of Contents
Introduction
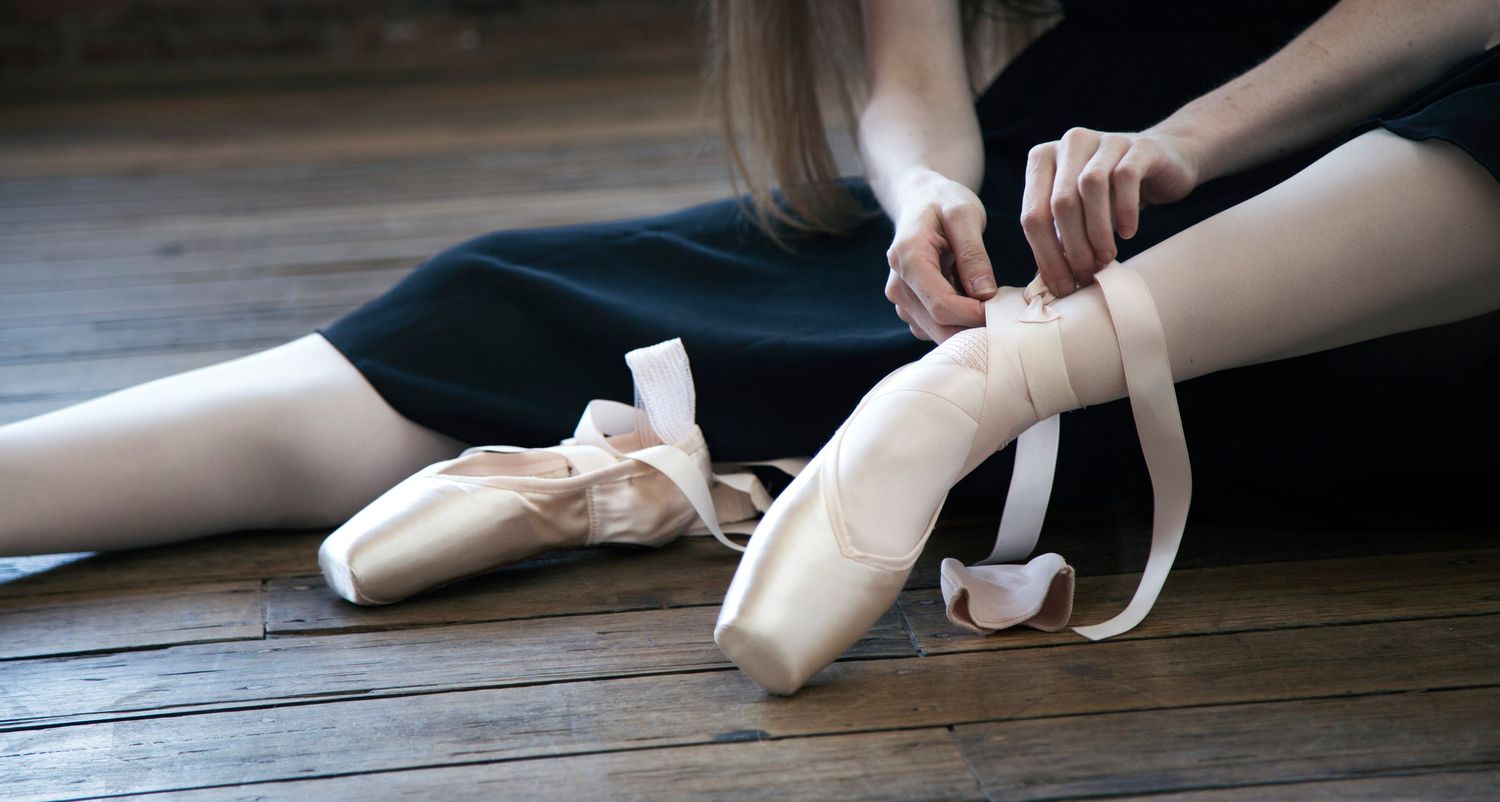
Ballet shoes, also known as ballet slippers, are a crucial component of a ballet dancer’s attire. These delicate and lightweight shoes provide dancers with the flexibility and support they need to execute their intricate footwork and graceful movements. While ballet shoes can be purchased from specialized dance stores, some dancers prefer to make their own customized pairs.
Making ballet shoes allows dancers to have a personalized fit and style that enhances their comfort and confidence on stage. In addition, crafting your own ballet shoes can be a rewarding and creative experience, allowing you to have a deeper connection with the art of ballet.
In this article, we will guide you through the process of making ballet shoes. We will explore the materials you’ll need and provide step-by-step instructions on how to construct a pair of ballet shoes. Whether you’re a ballet dancer, a dance enthusiast, or simply interested in exploring the world of dance, this article will provide you with valuable insights into the craftsmanship behind ballet shoes.
So, let’s dive in and discover the art of creating ballet shoes!
Materials Needed
Before you embark on the journey of making your own ballet shoes, you’ll need to gather a few key materials. Here’s a list of what you’ll need:
- Cotton or satin fabric: Choose a lightweight and durable fabric like cotton or satin. Opt for a color that matches your preference or the requirements of your dance performance.
- Elastic: You’ll need elastic to secure the ballet shoes on your feet. Look for elastic that is specifically designed for dancewear, as it offers the right amount of stretch and durability.
- Thread: Select a strong thread that matches the color of your fabric. A robust thread will ensure the longevity of your ballet shoes.
- Pattern: Find a ballet shoe pattern that suits your needs. You can either purchase a pre-made pattern or create your own by tracing around an existing pair of ballet shoes.
- Scissors: A pair of sharp scissors is essential for cutting the fabric and elastic accurately.
- Sewing machine or needle and thread: Depending on your sewing skills and preferences, you can either use a sewing machine or hand-sew your ballet shoes. Both methods can yield excellent results.
- Pins: Pins will help keep the fabric in place as you cut and sew. Look for fine pins that won’t leave noticeable holes in the fabric.
- Ribbon: If desired, you can add ribbon to your ballet shoes for an extra touch of elegance. Choose satin ribbon in a width and color that complements your design.
Once you have gathered all the necessary materials, you’re ready to move on to the next step: cutting the pattern.
Step 1: Cutting the Pattern
The first step in making ballet shoes is cutting the pattern. This will serve as the template for the shape of your ballet shoes. If you don’t have a pre-made pattern, you can create one by tracing around an existing pair of ballet shoes. Here’s a guideline on how to cut the pattern:
- Place the fabric on a flat surface and ensure it is smooth and wrinkle-free.
- Lay the existing pair of ballet shoes on the fabric and use pins to secure them in place. Make sure the shoes are aligned properly with the grain of the fabric.
- Trace around the shoes with a fabric marker, leaving a small seam allowance of about 1/4 inch.
- Carefully remove the pins and the existing ballet shoes from the fabric.
- Using scissors, cut along the traced lines to create the upper portion of the ballet shoes. Repeat the process to create two identical pieces.
- For the sole of the ballet shoes, place your foot on a separate piece of fabric and trace around it, leaving enough space for comfort.
- Cut along the traced lines to create the soles. Repeat the process to create two identical pieces for each shoe.
Once you have all the pieces cut out, you’re ready to move on to the next step: sewing the uppers.
Step 2: Sewing the Uppers
With the pattern pieces cut out, it’s time to move on to sewing the uppers of your ballet shoes. The uppers are the part of the shoes that cover the top of your foot. Here’s a step-by-step guide on how to sew the uppers:
- Take one of the upper fabric pieces and fold it in half, right sides together.
- Starting from the rounded edge (toe area), sew along the side of the fabric, leaving the top edge open.
- Repeat the process with the second upper fabric piece.
- Trim the seam allowance to reduce bulkiness and turn the fabric right side out.
- Press the seam flat with an iron, ensuring it lies flat and smooth.
- Place the elastic around your foot, and determine the desired length that provides a snug but comfortable fit.
- Cut the elastic into two equal lengths, one for each shoe.
- Pin one end of the elastic to the top edge of the upper fabric, aligning it with the side seam.
- Stretch the elastic gently and pin the other end to the opposite side of the upper fabric.
- Repeat the process with the second upper fabric piece and the remaining elastic.
- Secure the elastic in place by sewing along the top edge of the upper fabric, ensuring the elastic is evenly distributed.
Once you have sewn the uppers and attached the elastic, you can proceed to the next step: attaching the sole.
Step 3: Attaching the Sole
Attaching the sole is a crucial step in the process of making ballet shoes, as it provides support and protects the feet during dance movements. Follow these steps to properly attach the sole to your ballet shoes:
- Take one of the sole fabric pieces and align it with one of the upper fabric pieces. Ensure that the right sides of both fabrics are facing each other.
- Pin the sole and upper fabrics together along the curved edges, matching them carefully. Leave the straight edge (back of the shoe) open.
- Using a sewing machine or needle and thread, sew along the pinned edges, about 1/4 inch from the edge. Be sure to backstitch at the beginning and end to secure the stitches.
- Repeat the process with the remaining sole and upper fabric pieces.
- Trim the excess fabric and clip small notches around the curved edges. This will help the fabric lie flat when turned right side out.
- Turn the shoe right side out, gently pushing out the curved edges and corners for a smooth finish.
- Press the shoe with an iron to flatten any wrinkles and ensure a neat appearance.
- Repeat the steps for the second shoe, making sure to align and sew the fabrics accurately.
Once both shoes have their soles attached, you’re ready to move on to the next step: adding ribbons.
Step 4: Adding Ribbons
Adding ribbons to ballet shoes not only adds an elegant touch, but also helps to securely fasten the shoes around the ankles. Follow these steps to properly add ribbons to your ballet shoes:
- Cut two pieces of satin ribbon, each approximately 24 inches long. The length may vary depending on the size of your feet and personal preference.
- On the inside of each shoe, locate the two side seams at the back of the shoes.
- From the inside, thread one end of the ribbon through one side seam and pull it out through the other side seam. The ribbon should cross over the top of your foot.
- Remove any twists or tangles in the ribbon and adjust the length to your desired fit.
- Tie a square knot or bow on the outside of the shoe to secure the ribbon. Make sure the knot is tight enough to keep the shoe in place during dance movements.
- Repeat the process with the other shoe, ensuring that the ribbons match in length and are positioned symmetrically.
Once you have added the ribbons, you’re nearly finished with making your ballet shoes. The final step involves some finishing touches to ensure the shoes are comfortable and ready for dancing.
Step 5: Finishing Touches
Now that you have completed the main construction of your ballet shoes, it’s time to add some finishing touches to ensure they are comfortable and ready for use. Here are a few final steps to consider:
- Check the fit: Put on the ballet shoes and walk around to ensure they fit properly. Make any necessary adjustments to the elastic or ribbons for a snug yet comfortable fit.
- Secure loose threads: Trim any loose threads carefully to give the shoes a neat and polished appearance.
- Break-in the shoes: Spend some time wearing the ballet shoes and dancing in them to break them in. This will help the fabric conform to the shape of your feet and enhance flexibility.
- Protect the soles: Consider adding protective sole pads or using a suede brush to maintain the grip and prolong the lifespan of the soles.
- Personalize your shoes: Get creative and add embellishments like sequins, gems, or fabric paint to make your ballet shoes stand out and reflect your unique style.
Remember, making ballet shoes is an art form in itself. Each dancer may have their preferred techniques and variations. Don’t be afraid to experiment and make adjustments along the way to suit your personal preferences and needs.
With your ballet shoes now complete, you can step onto the dance floor with confidence, knowing that you’ve crafted a pair of shoes that are tailored to your feet and artistic expression. Enjoy the beauty and freedom of ballet as your handmade shoes support your every graceful movement.
Before you start dancing, make sure you warm up properly to prevent injuries. Enjoy the mesmerizing world of ballet and the joy that comes with wearing your handmade ballet shoes!
Conclusion
Crafting your own ballet shoes is a fulfilling endeavor that allows you to tailor your footwear to your specific needs and style as a dancer. By following the steps outlined in this article, you can create ballet shoes that provide the perfect fit, comfort, and support to enhance your performances.
From cutting the pattern to adding the final finishing touches, each step in the process contributes to the creation of a personalized pair of ballet shoes. The choice of materials, attention to detail, and customization options allow you to create shoes that reflect your personality and artistic expression.
Making ballet shoes can also be an opportunity for creativity and self-expression. You can experiment with different fabrics, colors, and embellishments to make each pair of shoes unique. Whether you’re a professional dancer, a ballet student, or a dance enthusiast, the art of crafting ballet shoes enables you to deepen your connection to dance and showcase your individuality.
Remember, the construction of ballet shoes requires patience and practice. It may take a few attempts to master the process and achieve the desired outcome. Be open to making adjustments along the way and embrace the learning experience.
Now, with your handmade ballet shoes on your feet, it’s time to step into the world of dance. Enjoy the grace, beauty, and freedom that ballet brings, knowing that your handmade shoes have been crafted with care and attention to detail. Cherish every moment on stage, knowing that you are wearing a truly unique pair of ballet shoes that embody your dedication and passion for this timeless art form.
Dance with joy, express with elegance, and let your ballet shoes become an extension of your artistry. Happy dancing!


![Lyrics High You Are[Branchez Remix] What So Not](https://audiolover.com/wp-content/uploads/2023/11/lyrics-high-you-arebranchez-remix-what-so-not-1699242564.jpg)