Home>Instruments>Bass>How To Make Bass Traps

Bass
How To Make Bass Traps
Modified: February 18, 2024
Learn how to effectively create bass traps for your music studio. Improve your acoustics and enhance bass frequencies with our step-by-step guide.
(Many of the links in this article redirect to a specific reviewed product. Your purchase of these products through affiliate links helps to generate commission for AudioLover.com, at no extra cost. Learn more)
Table of Contents
Introduction
Welcome to the world of bass traps! If you’re a music enthusiast or a sound engineer, you understand the importance of having a good acoustic environment. Whether you have a home recording studio, a dedicated listening room, or a professional recording studio, controlling the low-frequency sound reflections can greatly enhance the overall sound quality of your space.
Bass traps are essential acoustic treatment tools that help address issues related to low-frequency build-up and standing waves. They are designed to absorb or diffuse the excessive bass energy in a room, resulting in a more balanced and accurate sound reproduction. In this article, we will guide you through the process of making your own bass traps, allowing you to optimize your listening or recording environment without breaking the bank.
Building your own bass traps can not only save you money compared to purchasing pre-made options, but it also gives you the flexibility to customize them to your specific needs and room dimensions. And don’t worry if you’re not a DIY expert – with a few basic tools and materials, you’ll be able to construct effective bass traps in no time.
Before we dive into the step-by-step process, it’s important to understand the principles behind bass traps and why they are necessary. By understanding the concepts, you’ll be better equipped to optimize your space and achieve the desired sonic results. So, let’s get started and unlock the potential of your room’s acoustics!
What are Bass Traps?
Bass traps are acoustic treatment devices specifically designed to reduce low-frequency sound reflections and standing waves in a room. When sound waves travel through a space, they can bounce off the walls, ceiling, and floor, creating reflections and resonances that can affect the accuracy and clarity of the audio playback. These reflections and resonances can cause a build-up of excessive bass energy, resulting in boomy or muddy sound reproduction.
Low-frequency sound waves are longer in wavelength and have more energy compared to higher frequencies. As a result, they can be more challenging to control and manage in a room. Bass traps work by absorbing or diffusing these low-frequency sound waves, reducing the reflections and resonances that can negatively impact the sound quality.
Bass traps generally consist of a rigid frame filled with an acoustic material that has high-density and sound-absorbing properties. The frame provides the structure and shape while the acoustic material inside acts as the absorber. This combination allows bass traps to effectively trap and dissipate low-frequency sound energy.
There are two main types of bass traps: absorptive and diffusive.
- Absorptive Bass Traps: These bass traps are designed to absorb the sound energy that comes into contact with them. They typically consist of a frame filled with a dense material such as mineral wool or fiberglass. The sound waves penetrate the material and get converted into heat energy, effectively reducing the reflections and resonances.
- Diffusive Bass Traps: Diffusive bass traps are designed to scatter and disperse sound waves instead of absorbing them. They have a specially shaped surface that breaks up the sound reflections and prevents them from being concentrated in certain areas. Diffusive bass traps help create a more even distribution of sound throughout the room, reducing unwanted resonances.
It is important to note that bass traps alone may not completely solve all acoustic issues in a room. They are one component of a comprehensive acoustic treatment strategy that should also include other treatments like acoustic panels, sound diffusers, and bass management systems. By combining different types of treatments strategically, you can achieve optimal acoustic results in your room.
Materials and Tools Needed
Before diving into the construction process, it’s important to gather all the necessary materials and tools. Here’s a list of what you’ll need to make your own bass traps:
Materials:
- Wooden boards or lumber for the frame
- Acoustic insulation material (such as mineral wool or fiberglass)
- Acoustic fabric or breathable fabric
- Wood glue or construction adhesive
- Screws
- Corner brackets
- Foam or rubber padding strips
- Mounting hardware (such as picture hanging brackets or wall studs)
Tools:
- Tape measure
- Saw (circular saw or hand saw)
- Electric drill
- Screwdriver
- Staple gun
- Utility knife
- Sanding block or sandpaper
- Paint or stain (optional)
Ensure that you have all the necessary materials and tools before starting the construction process. This will help streamline the process and prevent interruptions as you build your bass traps.
It’s important to choose high-quality materials for your bass traps, especially for the acoustic insulation material. Opt for materials with good sound absorption properties to ensure the effectiveness of the bass traps. Acoustic fabric or breathable fabric should also be chosen based on its ability to pass sound while remaining visually appealing.
Additionally, consider the dimensions and quantity of materials needed based on the size and number of bass traps you plan to construct. Proper planning will help you budget your materials and ensure a smooth construction process.
Now that you have all the required materials and tools, you’re ready to move on to the next step – choosing the location for your bass traps.
Step 1: Choosing the Location
Choosing the right location for your bass traps is crucial to maximize their effectiveness in improving the acoustics of your room. The placement of the bass traps will depend on factors such as the size and shape of the room, the position of your speakers, and the listening or recording area.
Here are some guidelines to help you choose the optimal locations for your bass traps:
1. Identify the Primary Reflection Points:
Start by identifying the primary reflection points in your room. These are the areas where sound waves from your speakers directly reflect off the walls and reach your ears. Place bass traps at these reflection points to minimize sound reflections and standing waves.
2. Corners of the Room:
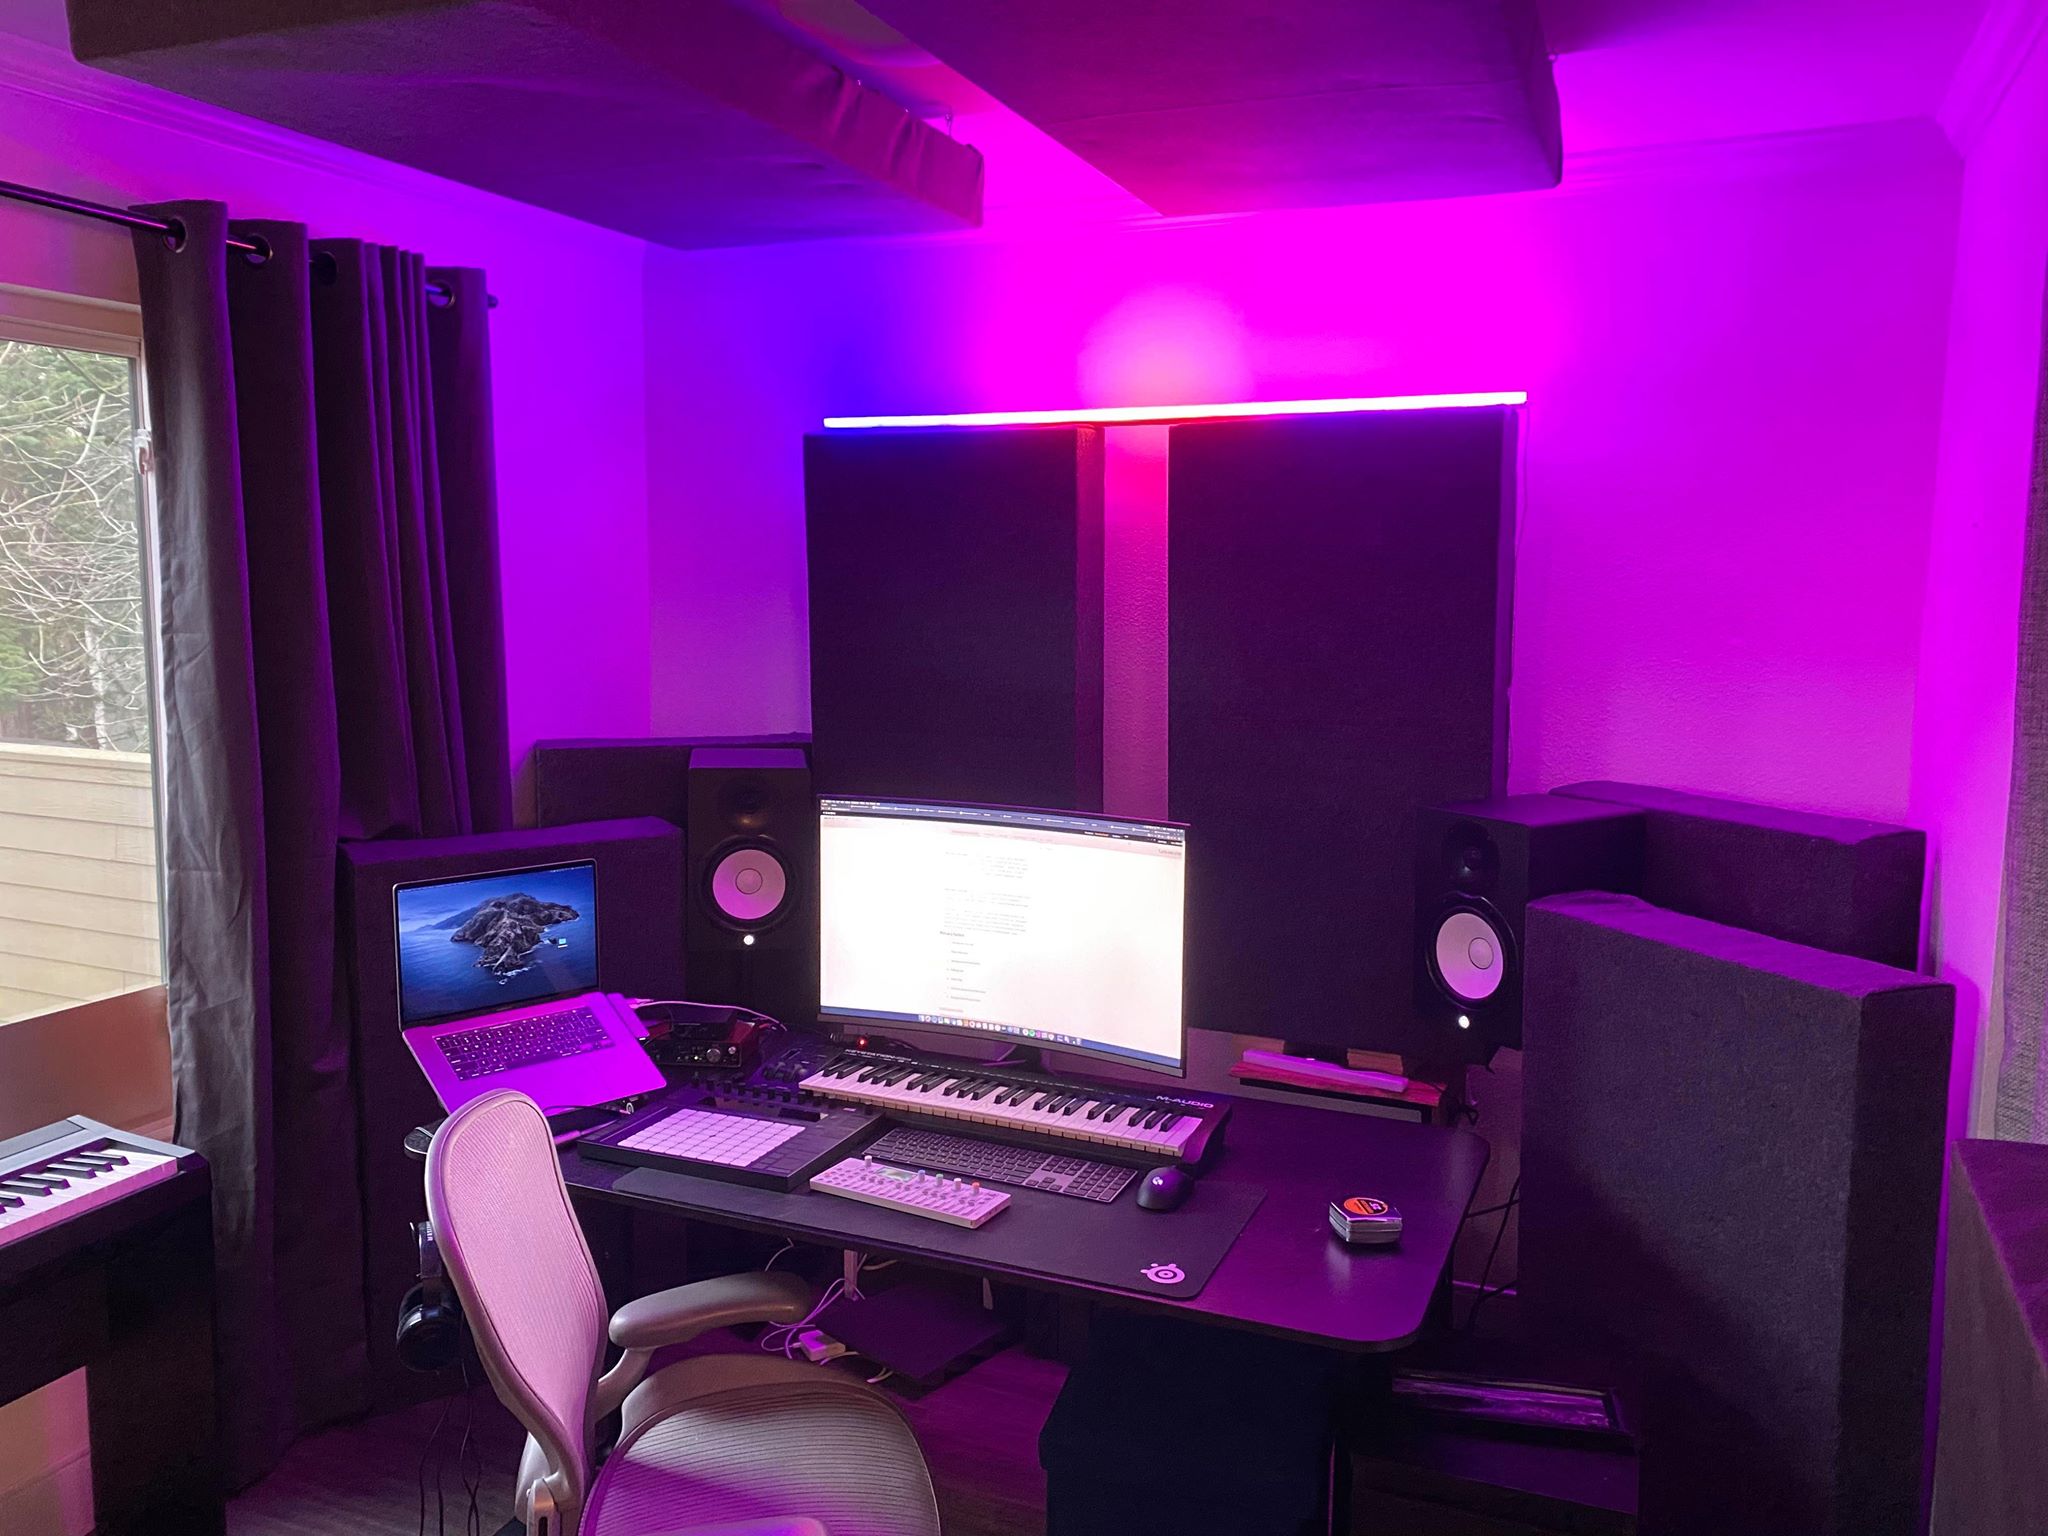
The corners of a room are known to accumulate low-frequency energy and can create significant bass build-up. Installing bass traps in the corners can effectively absorb these bass frequencies and reduce the effect of standing waves.
3. Behind the Speakers:
If your speakers are positioned against a wall, placing bass traps behind them can help absorb the bass energy that reflects off the wall. This can result in cleaner and more accurate bass reproduction.
4. Side Walls and Ceilings:
If your room has particularly strong sound reflections from the side walls or ceiling, consider placing bass traps along these surfaces. This will help minimize excessive reverberation and control the bass response.
5. Multiple Traps for Larger Rooms:
If you have a larger room, consider using multiple bass traps strategically placed throughout the space. This will provide better coverage and control over the room’s acoustics.
It’s important to note that the placement of bass traps should be experimented with and adjusted based on your specific room’s characteristics. Every room is unique, and finding the optimal locations for bass traps may require some trial and error.
By carefully selecting the locations for your bass traps, you can effectively reduce sound reflections, standing waves, and excessive bass energy in your room. Once you have identified the ideal locations, you’re ready to move on to the next step – measuring and marking the positions for your bass traps.
Step 2: Measuring and Marking
Once you have chosen the locations for your bass traps, it’s time to measure and mark the positions before starting the construction process. Precise measurements and markings will ensure that your bass traps are aligned correctly and provide optimal sound treatment for your room.
1. Gather the Necessary Tools
Before you begin measuring and marking, gather a tape measure, pencil, and a level. These tools will help you accurately measure and mark the positions for your bass traps.
2. Measure the Desired Height
Start by measuring the desired height at which you want to install your bass traps. Typically, bass traps are positioned at ear level or slightly above for optimal sound absorption. Using a tape measure, measure the height from the floor or any reference point you prefer, and mark it lightly with a pencil.
3. Measure the Horizontal Placement
Next, determine the horizontal placement of your bass traps. If you’re installing them in the corners, measure the distance from the corner along the wall. If you’re placing them behind the speakers or along the side walls, measure the desired distance from either the wall or the speakers. Again, mark the positions accurately and lightly with a pencil.
4. Use a Level for Alignment
To maintain proper alignment and ensure that your bass traps are straight, use a level to check the horizontal alignment of the markings you made. This will help avoid any tilting or uneven placement of the traps.
5. Double-Check the Measurements
Before proceeding to the construction phase, double-check all the measurements and markings to ensure accuracy. Make any necessary adjustments if needed.
By measuring and marking the positions of your bass traps precisely, you’ll ensure that they are installed in the most effective locations for sound absorption. This step sets the foundation for the construction process, and with accurate measurements, you’re ready to move on to building the frames for your bass traps in the next step.
Step 3: Building the Frame
Now that you have measured and marked the positions for your bass traps, it’s time to move on to building the frames. The frames provide the structure and support for the bass traps, ensuring they maintain their shape and stability over time. Follow these steps to construct the frames for your bass traps:
1. Prepare the Wood
Start by preparing the wooden boards or lumber for the frame. Cut the boards to the required dimensions based on your measurements. Use a saw (circular saw or hand saw) to make clean and precise cuts. Sand the cut edges if necessary to smooth out any roughness.
2. Assemble the Frame
Using wood glue or construction adhesive, attach the cut boards together to form a rectangular or square frame. Apply the adhesive to the ends of the boards and press them firmly together. To reinforce the joints, you can also secure them with screws placed at each corner. Use a drill and screws to fasten the boards together securely.
3. Add Corner Brackets (Optional)
If you want extra stability and durability for your bass trap frames, you can add corner brackets at each joint. These metal brackets provide additional support and prevent the frame from coming apart. Attach the corner brackets to the inside of the frame using screws.
4. Apply Foam or Rubber Padding
To prevent any rattling or vibrations within the frame, apply foam or rubber padding strips along the inner edges. This will help absorb any internal vibrations and further enhance the sound absorption properties of the bass traps.
5. Paint or Stain (Optional)
If desired, you can paint or stain the wooden frame to match your room’s aesthetics. Choose a paint or stain that is safe to use in an acoustic environment. Applying a finish is optional but can add a polished look to your bass traps.
Once you have completed these steps, your bass trap frames are ready for the next phase – filling them with the appropriate acoustic insulation material. Building sturdy frames is crucial to ensure the longevity and effectiveness of your bass traps, so take your time and ensure they are well-constructed.
Step 4: Filling the Frame with Insulation Material
With the frames of your bass traps assembled, it’s time to fill them with the appropriate acoustic insulation material. The choice of insulation material will greatly impact the sound absorption capabilities of your bass traps. Follow these steps to fill the frames with insulation material:
1. Choose the Right Insulation Material
Select a high-density acoustic insulation material such as mineral wool or fiberglass. These materials have excellent sound absorption properties, making them ideal for filling bass traps. Ensure that the insulation material you choose is safe to use in an indoor environment.
2. Cut the Insulation Material
Measure the dimensions of the frame openings and cut the insulation material accordingly. Use a utility knife or a saw to make clean and precise cuts. Make sure the insulation material fits snugly inside the frame with no gaps or spaces.
3. Insert the Insulation Material
Carefully insert the cut insulation material into the frame, ensuring it fills the entire interior space. Press it down gently to ensure a uniform distribution and avoid clumps or uneven sections. Make sure the insulation material is packed tightly but not overly compressed.
4. Secure the Insulation Material
If necessary, use adhesive or staples to secure the insulation material within the frame. This will prevent it from shifting or sagging over time. Be cautious not to damage the insulation material while securing it.
5. Cover the Frame
To enclose the filled frame and give your bass traps a finished appearance, cover them with acoustic fabric or breathable fabric. Cut the fabric to the appropriate size, leaving extra allowance to wrap around the frame edges. Use a staple gun to attach the fabric to the back or sides of the frame, ensuring it is taut and smooth.
By following these steps, you’ll effectively fill your bass trap frames with the right insulation material, enhancing their sound absorption capabilities. The insulation material is a critical component of bass traps, so pay attention to ensure a proper and uniform filling throughout the frames.
Step 5: Covering the Frame
Once you have filled the frames of your bass traps with insulation material, the next step is to cover them with a suitable fabric. The fabric not only provides a clean and finished look, but it also helps to protect the insulation material and allows sound to pass through effectively. Follow these steps to cover the frames of your bass traps:
1. Choose the Fabric
Select a fabric that is acoustically transparent, lightweight, and breathable. Acoustic fabric is specifically designed to allow sound to pass through while providing a clean and professional appearance. Make sure the fabric is large enough to cover the entire frame with some excess to wrap around the edges.
2. Cut the Fabric
Using a sharp pair of scissors, cut the fabric to the appropriate size to cover each side of the frame. Leave some allowance on each side to ensure a secure wrap around the edges. Be mindful of any patterns or designs on the fabric, if applicable, to ensure they align nicely on the finished bass traps.
3. Attach the Fabric
Starting from one side, use a staple gun to attach the fabric to the back or sides of the frame. Begin by stapling one corner, then move to the opposite corner, and continue along the edges. Pull the fabric taut to ensure a smooth and wrinkle-free finish. Space the staples evenly, ensuring a secure attachment without puckering or excessive stretching.
4. Trim Excess Fabric
Once you have stapled the fabric to the frame, trim any excess fabric using scissors or a utility knife. Make clean and precise cuts, being careful not to cut into the frame or damage the fabric. Take your time to trim the excess fabric neatly for a professional appearance.
5. Repeat for Remaining Sides
Repeat the process for each side of the frame until all sides are covered and trimmed. Ensure a consistent and uniform wrapping throughout the bass traps. Pay attention to the corners and edges, ensuring the fabric is securely attached and neatly folded.
By covering the frames of your bass traps with the appropriate fabric, you not only enhance their aesthetic appeal but also protect the insulation material and optimize the sound absorption capabilities. The fabric should be securely attached and smoothly wrapped for a clean and professional finish.
Step 6: Mounting the Bass Traps
Now that your bass traps are constructed and covered with fabric, it’s time to mount them in their designated locations within your room. Proper mounting ensures that the bass traps effectively absorb low-frequency energy and contribute to an improved acoustic environment. Follow these steps to mount your bass traps:
1. Determine the Mounting Method
Consider the mounting method that suits your room and bass traps. There are several options available, including wall mounting, ceiling mounting, or floor placement. Assess your room’s layout and characteristics to determine the most appropriate method for your situation.
2. Prepare the Mounting Hardware
Gather the necessary mounting hardware based on your chosen method. This may include picture hanging brackets, wall studs, ceiling hooks, or floor stands. Ensure that the hardware is compatible with the weight and dimensions of your bass traps.
3. Mark the Mounting Positions
Hold each bass trap in its designated location and mark the positions where the mounting hardware will be installed. Use a pencil or removable tape to make these marks, ensuring accurate placement and alignment.
4. Install the Mounting Hardware
Depending on your chosen method, install the appropriate mounting hardware following the manufacturer’s instructions. This may involve drilling holes, attaching hooks or brackets, or securing the bass traps to floor stands. Ensure that the mounting hardware is securely fixed and can support the weight of the bass traps.
5. Hang or Place the Bass Traps
Once the mounting hardware is installed, position the bass traps onto the hardware carefully. If wall-mounted, hang the traps securely onto the hooks or brackets. If floor-placed, position the traps on the floor stands. Double-check that the bass traps are level and aligned properly.
6. Fine-Tune the Placement
Take a moment to assess the placement of the bass traps and make any necessary adjustments. Pay attention to the angles and distances relative to the walls, corners, and speakers. Experiment with different orientations, if needed, to achieve the desired acoustic results.
By following these steps, you’ll be able to mount your bass traps effectively, optimizing their sound absorption capabilities and contributing to a well-balanced acoustic environment.
Step 7: Testing and Adjusting
Once your bass traps are mounted in their designated locations, it’s time to test and fine-tune their effectiveness in improving the acoustics of your room. Testing and adjusting your bass traps will help ensure optimal sound treatment and a balanced audio environment. Follow these steps to test and adjust your bass traps:
1. Play Test Tracks
Start by playing a variety of test tracks that cover a wide range of frequencies and musical genres. Use tracks that you are familiar with to help assess any noticeable changes in the sound reproduction. Pay attention to the bass response and any improvements or changes you hear.
2. Assess the Sound Quality
Listen carefully to the sound quality and dynamics of the audio playback. Is the bass more controlled? Are there any noticeable reductions in bass build-up or resonance? Take note of any improvements or areas that still require adjustment.
3. Make Adjustments
If you feel that further adjustments are necessary, try repositioning one or more of the bass traps. Experiment with slight changes in their placement to find the optimal configuration for your room. Move them closer or farther from the walls, try different corner placements, or adjust their angles as needed.
4. Test Different Listening Positions
While testing and adjusting your bass traps, try listening from different seating positions within your room. Move around and assess if the changes in bass response are consistent across different locations. This will help you find the best placement for a balanced sound experience throughout the room.
5. Revisit the Test Tracks
After making adjustments, play the test tracks again to evaluate the impact of your changes. Listen for any further improvements or areas that still require adjustment. Repeat the adjusting process if necessary until you achieve the desired sound quality and bass response.
6. Take Objective Measurements (optional)
If you have access to measurement tools such as an audio spectrum analyzer or room correction software, you can take objective measurements to assess the actual changes in the acoustic response. These measurements can provide valuable insights and guide your adjustments to achieve a more accurate and balanced sound reproduction.
By testing, assessing, and making adjustments to your bass traps, you can fine-tune the acoustics of your room for optimal sound quality. Remember that the process may require some experimentation and patience, but the result will be a well-treated and balanced audio environment that enhances your listening or recording experience.
Conclusion
Congratulations! You have successfully learned how to make and optimize your own bass traps. By following the steps outlined in this guide, you have taken a big step towards improving the acoustic environment of your room and enhancing your listening or recording experience.
Bass traps are essential components of any well-designed sound space. They help control low-frequency sound reflections, reduce excessive bass energy, and minimize standing waves. With your homemade bass traps, you’ve created a more balanced and accurate sound reproduction environment, allowing you to fully enjoy your music or create professional recordings with greater clarity.
Remember, the placement of the bass traps is crucial to their effectiveness. Select the locations strategically, considering primary reflection points, corners, and areas with strong sound reflections. Experiment with different orientations and positions to find the optimal configuration for your room.
Additionally, proper construction techniques and the use of quality insulation materials are key to maximizing sound absorption. Craft your frames with care, filling them with dense and appropriate acoustic insulation material. Covering the frames with acoustically transparent fabric adds a professional finish to your bass traps.
Once you have mounted your bass traps, take the time to test and adjust their positioning as needed. Listen critically to the sound quality, dynamics, and bass response. Fine-tune their placement and orientation to achieve the best acoustic results for your space.
Remember, building your bass traps is a cost-effective and rewarding DIY project. However, in complex or large-scale acoustic treatment scenarios, it is advisable to consult with professionals for a comprehensive analysis and additional treatment solutions.
Now that you have the knowledge and skills to make bass traps, go ahead and optimize the acoustics of your room. Enjoy a more accurate and immersive audio experience, whether you’re listening to music, watching movies, or working on professional recordings. Happy trapping!

