Home>Production & Technology>Audio Cable>How To Set Virtual Audio Cable To Record Desktop Sounds


Audio Cable
How To Set Virtual Audio Cable To Record Desktop Sounds
Modified: January 22, 2024
Learn how to set up and use Virtual Audio Cable to record desktop sounds. Follow our step-by-step guide and start capturing audio with this versatile audio cable.
(Many of the links in this article redirect to a specific reviewed product. Your purchase of these products through affiliate links helps to generate commission for AudioLover.com, at no extra cost. Learn more)
Table of Contents
- Introduction
- What is Virtual Audio Cable?
- Why Use Virtual Audio Cable for Recording Desktop Sounds?
- Preparing to Set Up Virtual Audio Cable
- Installing Virtual Audio Cable
- Configuring Virtual Audio Cable for Desktop Sound Recording
- Setting Up Your Recording Software
- Testing and Troubleshooting Virtual Audio Cable
- Conclusion
Introduction
Welcome to the world of virtual audio cables! In this digital age, the need to record desktop sounds has become increasingly important. Whether you are a content creator, a gamer, or simply someone who wants to capture the audio from a video or webinar, having the right tools is crucial. That’s where virtual audio cable comes in.
Virtual audio cable is a software solution that allows you to route audio signals between different programs and devices on your computer. It acts as a virtual bridge, enabling you to capture and transfer audio from one application to another. With virtual audio cable, you can record audio from your computer’s sound card, capture audio from video calls, or even create virtual audio outputs for streaming and broadcasting purposes.
But why should you use virtual audio cable specifically for recording desktop sounds? The answer lies in its versatility and convenience. Unlike physical cables, virtual audio cable eliminates the need for complex hardware setups and messy cable connections. It provides a seamless and efficient way to capture all the audio happening on your computer, allowing you to record, stream, or manipulate desktop sounds with ease.
In this comprehensive guide, we will walk you through the process of setting up and configuring virtual audio cable to record desktop sounds. We will cover everything from installation and setup to troubleshooting common issues. So, whether you are a seasoned audio professional or a beginner in the world of sound recording, this guide will equip you with the knowledge and skills to harness the power of virtual audio cables.
Before we dive into the specifics of setting up virtual audio cable, let’s take a moment to understand what it is and how it works.
What is Virtual Audio Cable?
Virtual audio cable is a software application that enables the routing of audio signals between different programs, devices, or virtual audio endpoints on your computer. It creates virtual audio devices, simulating the functionality of physical cables, to connect audio sources and destinations seamlessly.
Think of virtual audio cable as a virtual patchbay, allowing you to transfer audio from one application or device to another without the need for physical connections. It acts as an intermediary, capturing audio from one source and directing it to a chosen destination.
Virtual audio cable operates on a software level, utilizing your computer’s internal audio routing capabilities. It creates virtual audio input and output devices, which can be used by any audio-enabled application on your computer. These virtual devices appear as separate audio channels, allowing you to route audio signals between multiple programs or devices.
Some common use cases for virtual audio cable include:
- Recording audio from your computer’s sound card for archiving or content creation purposes.
- Streaming and broadcasting audio to different platforms or devices.
- Capturing audio from video calls, webinars, or online meetings.
- Creating virtual audio outputs for software-based audio processing or virtual instruments.
With virtual audio cable, you have full control over the audio routing process. You can choose which audio sources to capture, specify the destination for the audio output, and even apply real-time audio effects or filters before sending the audio to its final destination.
It’s important to note that virtual audio cable is not a physical cable or hardware device. It is a software application that utilizes your computer’s audio infrastructure to create virtual audio connections. This eliminates the need for physical cables and makes the audio routing process more flexible and versatile.
Now that you have a basic understanding of virtual audio cable, let’s explore why it is the ideal solution for recording desktop sounds.
Why Use Virtual Audio Cable for Recording Desktop Sounds?
Virtual audio cable offers several advantages when it comes to recording desktop sounds. Here are some of the key reasons why you should consider using virtual audio cable for your audio recording needs:
1. Versatility: Virtual audio cable allows you to capture audio from any application or device on your computer. Whether you want to record system sounds, music, video game audio, or even audio from video calls, virtual audio cable can handle it all. This versatility gives you the flexibility to capture any audio source that is playing on your computer.
2. Ease of Use: Setting up virtual audio cable is relatively simple. Once installed, you can easily configure the virtual audio devices and route audio signals using a user-friendly interface. Compared to physical audio cables, virtual audio cable eliminates the hassle of dealing with tangled wires and confusing audio connections.
3. Flexibility in Audio Routing: With virtual audio cable, you have complete control over audio routing. You can select which audio sources you want to record and where you want the audio to be sent. This flexibility allows you to capture audio from specific applications or mix multiple audio sources together, giving you the ability to create professional-quality recordings.
4. Real-time Audio Processing: Virtual audio cable also enables real-time audio processing. You can apply various effects and filters to the captured audio before it reaches the output destination. This opens up possibilities for enhancing the audio quality, adding special effects, or making adjustments to achieve the desired sound.
5. Avoiding Audio Capture Limitations: By using virtual audio cable, you can bypass any limitations imposed by applications that may not support direct audio recording. Some applications may restrict audio capture to specific devices or may not have built-in recording functionality at all. Virtual audio cable overcomes these limitations, allowing you to record audio from any source regardless of the application’s capabilities.
6. Improved Audio Quality: Since virtual audio cable captures audio directly from the source, it bypasses any audio degradation that may occur from using external microphones or speakers. This results in better audio quality and clarity in your recordings.
7. Cost-effective Solution: Virtual audio cable eliminates the need to invest in additional hardware devices or cables for recording desktop sounds. It provides a cost-effective solution by utilizing your computer’s existing audio infrastructure.
Now that you understand the benefits of using virtual audio cable for recording desktop sounds, it’s time to prepare for setting it up. In the following sections, we will guide you through the process of installing and configuring virtual audio cable.
Preparing to Set Up Virtual Audio Cable
Before you jump into setting up virtual audio cable, there are a few important things to consider to ensure a smooth installation and configuration process:
1. Compatible Operating System: Virtual audio cable is available for various operating systems, including Windows and macOS. Make sure your computer’s operating system is compatible with the version of virtual audio cable you plan to use. Check the software’s official website for system requirements and compatibility information.
2. System Resources: Virtual audio cable utilizes your computer’s processing power and resources. Ensure that your computer meets the minimum system requirements to run the software efficiently. Insufficient system resources may lead to performance issues or audio disruptions during the recording process.
3. Know Your Recording Needs: Determine the specific desktop sounds you want to record. Are you looking to capture music, game sounds, system audio, or a combination of sources? Having a clear understanding of your recording needs will help you configure virtual audio cable accordingly.
4. Recording Software: Identify the recording software you intend to use in conjunction with virtual audio cable. Popular options include Audacity, OBS Studio, Adobe Audition, or any other software that allows you to select audio devices for recording. Make sure your recording software supports virtual audio devices.
5. Backup and Test Existing Audio Setup: If you already have an audio setup or use specific audio devices for recording, consider backing up your settings and testing your current setup before installing and configuring virtual audio cable. This will help you revert to your original configuration if needed and ensure that your existing audio setup is functioning properly.
6. Set Realistic Expectations: Virtual audio cable provides a powerful and flexible way to route and capture audio, but it’s essential to set realistic expectations. While virtual audio cable enables you to record desktop sounds with ease, the quality of the final recording can still be influenced by factors such as the audio source’s original quality and any processing applied during capture.
By keeping these points in mind and preparing adequately, you will be ready to move on to the next steps: installing and configuring virtual audio cable. In the following sections, we will guide you through the process, ensuring a successful setup for recording desktop sounds.
Installing Virtual Audio Cable
Installing virtual audio cable is a straightforward process. Here’s a step-by-step guide to help you get started:
1. Download the Software: Visit the official website of the virtual audio cable provider and navigate to the downloads section. Choose the appropriate version for your operating system and click on the download link.
2. Run the Installer: Once the download is complete, locate the installation file in your downloads folder or the location you specified. Double-click the installer to run the installation process.
3. Follow the Installation Wizard: The installation process will be guided by an installation wizard. Follow the on-screen instructions and agree to the terms and conditions when prompted.
4. Choose Installation Options: During the installation, you may be presented with various options. It is recommended to leave the default settings unchanged unless you have specific requirements or preferences. Click “Next” or “Install” to proceed.
5. Complete the Installation: After all the necessary files have been installed, click “Finish” or “Close” to complete the installation process. Make sure to restart your computer if prompted or if it is recommended by the software.
Congratulations! You have successfully installed virtual audio cable on your computer. Now it’s time to move on to the next step: configuring virtual audio cable for desktop sound recording.
Note: While virtual audio cable providers offer free trial versions, they may also provide paid versions with additional features or limitations. Consider exploring the functionalities and limitations of the version you installed to ensure it meets your recording needs.
In the next section, we will guide you through the process of configuring virtual audio cable to route and capture desktop sounds efficiently.
Configuring Virtual Audio Cable for Desktop Sound Recording
Once you have installed virtual audio cable, it’s time to configure it to capture desktop sounds. Follow these steps to set up and optimize your virtual audio cable for a successful recording:
1. Open Virtual Audio Cable Control Panel: Locate and open the virtual audio cable control panel. It is typically found in your computer’s system tray or in the list of installed programs. If you can’t find it, try searching for “Virtual Audio Cable Control Panel” in the Start Menu or by using the search function in your operating system.
2. Check Default Settings: In the control panel, you will see various settings and options. For most recording needs, the default settings should work fine. However, it’s worth taking a look at the sample rate and buffer settings to ensure they match the requirements of your recording software.
3. Configure Channels: Virtual audio cable allows you to create multiple virtual audio devices with different numbers of channels. For desktop sound recording, you typically need stereo output. In the control panel, select the virtual audio cable device you want to use and set the number of output channels to 2 (for stereo).
4. Adjust Buffer Size: The buffer size determines the amount of audio data that is processed at once. By default, virtual audio cable sets the buffer size to an optimal value. If you experience audio latency or glitches during recording, you can try adjusting the buffer size to a higher value. Keep in mind that increasing the buffer size may introduce additional latency.
5. Set Applications to Use Virtual Audio Cable: To route desktop sounds through virtual audio cable, you will need to configure the audio settings of your desired applications. For most recording software, you can go to its settings or preferences and select the virtual audio cable device as the audio input or output device. Consult the documentation of your specific recording software for more detailed instructions on configuring audio settings.
6. Test the Setup: Before you start recording, it’s a good idea to test your virtual audio cable setup. Open your recording software and play some audio on your computer. Check if the virtual audio cable is capturing the sound correctly. You should see the audio levels moving in your recording software’s input level meter or mixer panel.
7. Adjust Volume Levels: Depending on your recording setup, you may need to adjust the volume levels. Use the volume controls in your software, operating system, or audio devices to ensure that the input and output levels are set at an appropriate level for recording the best quality sound.
With virtual audio cable properly configured, you are ready to start recording desktop sounds. Remember to save your settings, as they may need to be adjusted if you change recording setups or software configurations in the future.
In the next section, we will cover how to set up your recording software to work seamlessly with virtual audio cable.
Setting Up Your Recording Software
Now that you have configured virtual audio cable, it’s time to set up your recording software to work seamlessly with it. Follow these steps to ensure your recording software is properly configured:
1. Open Your Recording Software: Launch the recording software you plan to use for capturing desktop sounds. If you haven’t installed one yet, choose a recording software that supports selecting audio devices for recording, such as Audacity, OBS Studio, or Adobe Audition.
2. Access Audio Settings: Navigate to the audio settings or preferences section of your recording software. The location of these settings may vary depending on the software. Look for options related to audio input devices, audio sources, or recording devices.
3. Select Virtual Audio Cable Device: Locate the input or output device selection dropdown menu within the audio settings. Choose the virtual audio cable device that corresponds to the configured settings in the virtual audio cable control panel. This is the device that will capture the desktop sounds and route them to your recording software.
4. Configure Sample Rate and Bit Depth: Ensure that the sample rate and bit depth settings in your recording software match those of your virtual audio cable settings. Having consistent settings across your recording software and virtual audio cable will help maintain audio quality and minimize compatibility issues.
5. Set Recording Levels: Adjust the recording levels within your recording software to ensure that the input signal is strong enough but not clipping or distorting. Monitor the input levels as you speak, play audio, or perform actions on your computer to ensure they are within an acceptable range.
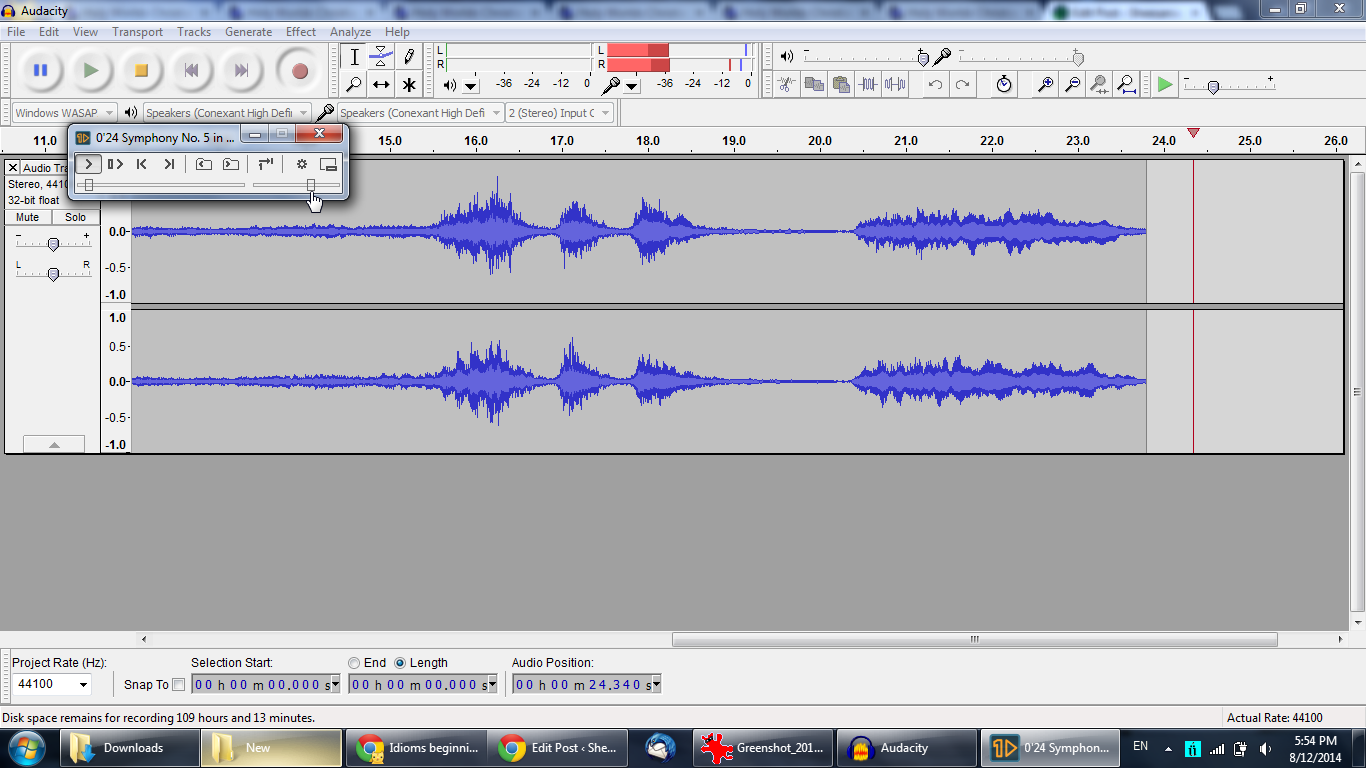
6. Test Recording: Perform a test recording to verify that the virtual audio cable is capturing the desktop sounds accurately. Play some audio on your computer while monitoring the recording software. Check the recorded waveform or audio signal to ensure it matches the expected sound.
7. Adjust Settings as Needed: Depending on your specific recording needs and software capabilities, you may need to make additional adjustments. This could include configuring audio effects, setting up multiple tracks for separate audio sources, or adjusting preferences to optimize your recording workflow.
Remember to consult the documentation or support resources for your specific recording software if you encounter any issues or need further assistance with configuring audio settings.
With your recording software properly set up to utilize virtual audio cable, you are ready to start capturing high-quality desktop sounds. In the next section, we will cover how to test and troubleshoot common issues that may arise when using virtual audio cable.
Testing and Troubleshooting Virtual Audio Cable
After setting up virtual audio cable and configuring your recording software, it’s important to test and troubleshoot your setup to ensure optimal performance. Here are some tips to help you test and troubleshoot virtual audio cable:
1. Test Recording: Perform test recordings to ensure that virtual audio cable is capturing the desktop sounds accurately. Record various types of audio, such as music, system sounds, and voice, to see if they are being captured properly. Monitor the recording levels and listen to the playback to ensure the quality meets your expectations.
2. Check Audio Routing: Verify that the audio sources are correctly routed through virtual audio cable. Ensure that the desired sources are being captured and that the audio is being sent to the correct output destination. Make any necessary adjustments in the virtual audio cable control panel or your recording software’s audio settings.
3. Monitor Latency: Pay attention to the latency introduced by virtual audio cable. Latency refers to the delay between an audio signal entering the system and being outputted. If you experience noticeable latency during recording, you may need to adjust the buffer size or experiment with different settings to minimize the delay.
4. Troubleshoot Audio Distortion: If you encounter audio distortion or crackling sounds, it could be due to buffer underruns or issues with sample rate mismatch. Try increasing the buffer size in the virtual audio cable control panel or ensure that the sample rate settings are consistent across your virtual audio cable and recording software.
5. Verify Software Compatibility: In some cases, certain recording software may not fully support virtual audio cable or may have compatibility issues. Check for any updates or forums related to the software to see if others have encountered similar problems. You may need to consider alternative recording software that is fully compatible with virtual audio cable.
6. Upgrade Virtual Audio Cable: If you are using an older version of virtual audio cable and encounter issues, consider upgrading to the latest version. Updates often address bugs, improve performance, and introduce new features that can enhance the functionality of virtual audio cable.
7. Seek Support: If you’ve exhausted troubleshooting options and still experience issues, reach out to the support team of the virtual audio cable provider or consult online forums and communities dedicated to audio recording. They may be able to provide specific guidance and solutions based on your setup and software configuration.
Remember that troubleshooting virtual audio cable requires patience and flexibility. It’s important to experiment with different settings and configurations to find the best setup for your recording needs. With persistence and the right adjustments, you can overcome any challenges and achieve high-quality desktop sound recordings.
In the final section, we will conclude our journey through virtual audio cable and summarize the key points discussed in this guide.
Conclusion
Congratulations! You have successfully learned how to utilize virtual audio cable to record desktop sounds. Virtual audio cable offers a versatile and convenient solution for capturing audio from various applications and devices on your computer. With its ability to route audio signals, you can easily capture system sounds, music, game audio, and more for your recording needs.
In this guide, we started by introducing you to the concept of virtual audio cable and its benefits. We then guided you through the process of preparing for the setup and installation of virtual audio cable. Following that, we explored the configuration steps to optimize virtual audio cable for desktop sound recording, including channel settings, buffer adjustments, and more.
Next, we delved into the setup of your recording software to ensure seamless integration with virtual audio cable. By selecting the virtual audio cable device as the input or output device in your recording software, you can capture and record desktop sounds accurately.
We also discussed the importance of testing and troubleshooting your virtual audio cable setup. By conducting test recordings, monitoring latency, troubleshooting audio distortion, and seeking support when needed, you can overcome any challenges that may arise during the recording process.
Throughout this guide, we emphasized the versatility, ease of use, and cost-effectiveness of virtual audio cable. It eliminates the need for complex hardware setups and offers a flexible way to capture and route audio signals on your computer.
By following the steps outlined in this guide and adapting them to your specific recording needs, you are now equipped to record high-quality desktop sounds using virtual audio cable. Whether you are a content creator, gamer, or simply someone looking to capture audio from your computer, virtual audio cable provides a powerful tool for achieving your recording goals.
Remember to stay updated with the latest version of virtual audio cable and regularly explore the features and functionalities it offers. Continuously improving your setup, exploring different recording software options, and experimenting with audio settings will lead to enhancing the quality and usability of your recordings.
Now, it’s time to put your knowledge into practice and start capturing those captivating desktop sounds with virtual audio cable. Happy recording!


