Home>Production & Technology>Audio Cable>How To Play Spotify Through Virtual Audio Cable


Audio Cable
How To Play Spotify Through Virtual Audio Cable
Modified: January 22, 2024
Learn how to play Spotify through a virtual audio cable and boost your audio experience. Connect your devices seamlessly with this simple guide.
(Many of the links in this article redirect to a specific reviewed product. Your purchase of these products through affiliate links helps to generate commission for AudioLover.com, at no extra cost. Learn more)
Table of Contents
Introduction
Welcome to the world of audio cables! In this digital age, where streaming music has become the norm, it’s essential to have a versatile and reliable audio setup. Whether you’re a music enthusiast, a gamer, or a podcaster, having the right equipment can greatly enhance your audio experience.
One of the key components of any audio setup is the audio cable. Audio cables are designed to transmit audio signals from one device to another, ensuring high-quality sound reproduction. With the advancement of technology, audio cables have evolved to meet the demands of modern audio equipment.
In this article, we will delve into the realm of audio cables, with a focus on virtual audio cables. We will explore what virtual audio cables are, how they work, and how you can set them up to play Spotify or any other audio source through them. Whether you’re an audiophile or a casual listener, this article will equip you with the knowledge and tools to optimize your audio setup.
So, let’s dive into the world of virtual audio cables and unlock the full potential of your audio experience!
What is Virtual Audio Cable?
Virtual Audio Cable, also known as VAC, is a software application that allows you to create virtual audio devices and routes audio signals between different programs and devices on your computer. It acts as a bridge between your audio sources and destinations, enabling you to route audio in a flexible and customizable way.
Unlike physical audio cables that connect hardware devices, virtual audio cables function within your computer’s operating system. They create virtual audio devices that appear as separate inputs and outputs within your audio settings. This means that you can route audio signals between applications, mix audio sources, and even create virtual audio loops.
Virtual audio cables are particularly useful in situations where you want to stream audio from one program to another or capture audio from multiple sources simultaneously. They can be used for a variety of purposes, including recording streams, creating virtual DJ setups, and routing audio for broadcasting or live streaming.
One of the key advantages of using virtual audio cables is their flexibility. With physical cables, you are limited by the number of physical ports on your audio interface. However, with virtual audio cables, you can create as many virtual inputs and outputs as you need, allowing for complex audio routing setups.
Virtual audio cables also offer low latency, meaning there is minimal delay between audio input and output. This is crucial for live streaming, gaming, and any other real-time audio applications.
It’s important to note that Virtual Audio Cable is just one of many software applications that provide virtual audio routing capabilities. Other popular options include Voicemeeter, Loopback, and JACK Audio Connection Kit. Each software has its own unique features and capabilities, so it’s worth exploring different options to find the one that best suits your needs.
Now that we have an understanding of what virtual audio cables are, let’s move on to setting them up and configuring Spotify to use them.
Setting Up Virtual Audio Cable
Setting up Virtual Audio Cable is a straightforward process that involves installing the software and configuring it within your computer’s audio settings. Follow these steps to get started:
- Download and install Virtual Audio Cable from the official website. Make sure to choose the version that is compatible with your operating system.
- Once the installation is complete, launch the Virtual Audio Cable control panel. You should see a window with two virtual cables, labeled “Cable Input” and “Cable Output”. These act as virtual audio devices that you can use to route audio.
- Next, you’ll need to configure the settings for the virtual cables. Right-click on “Cable Output” and select “Properties”. In the “Buffer” settings, you can adjust the buffer size and other settings to optimize the audio latency. It’s recommended to leave the default settings unless you encounter specific issues.
- After configuring the virtual cables, you’ll need to set them as the default audio devices on your computer. To do this, right-click on the volume icon in the system tray and select “Sounds”. In the “Playback” tab, set “Cable Output” as the default playback device, and in the “Recording” tab, set “Cable Input” as the default recording device.
- Click “Apply” and “OK” to save the changes. Your computer’s audio system will now recognize the virtual cables as the default devices for audio input and output.
Now that you have set up Virtual Audio Cable, it’s time to configure Spotify to use the virtual cables as its audio output.
Configuring Spotify to Use Virtual Audio Cable
Configuring Spotify to use Virtual Audio Cable as its audio output requires some additional steps. Follow these instructions to ensure that Spotify routes its audio through the virtual cables:
- Open Spotify on your computer and click on the “Settings” option in the top-right corner of the screen.
- In the Settings menu, scroll down to the “Playback” section.
- Under “Audio Output”, select “Cable Output” or the specific virtual cable you want to use. This will route Spotify’s audio through the virtual cable instead of the default audio output.
- Save the changes and exit the Settings menu.
With these settings in place, Spotify will now use Virtual Audio Cable as its audio output, allowing you to route the audio to other applications or devices.
Keep in mind that any changes you make in the Spotify settings will only affect the audio output within the Spotify application. If you want to route Spotify’s audio to other applications or devices, you will need to configure the audio settings within those specific programs or devices.
Now that you have configured Spotify to use Virtual Audio Cable, let’s move on to the next step: testing the setup to ensure everything is working correctly.
Testing the Setup
After setting up Virtual Audio Cable and configuring Spotify to use it as the audio output, it’s important to test the setup to ensure that the audio is being routed correctly. Follow these steps to test your Virtual Audio Cable setup:
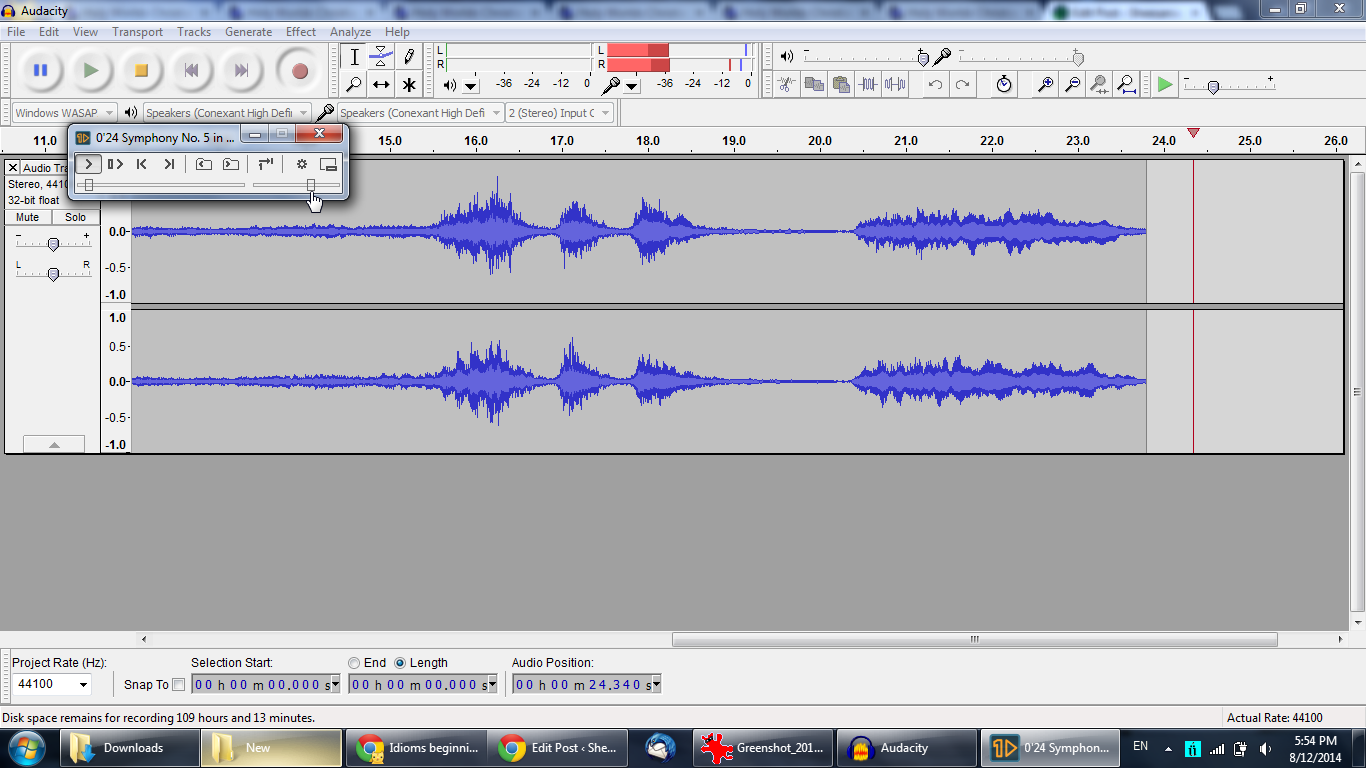
- Open your preferred audio recording or streaming software, such as Audacity or OBS Studio.
- Configure the software to use the virtual cable as the audio input device. The specific steps may vary depending on the software you are using, but typically you can choose the virtual cable as the audio source in the software’s audio settings.
- Start playing a song or audio track in Spotify. You should hear the audio playback through the virtual cable.
- Check the audio recording or streaming software to ensure that the audio from Spotify is being captured or streamed correctly. You can do this by checking the audio levels or monitoring the recorded/streamed audio output.
If you can hear the audio from Spotify through the virtual cable and it is being properly recorded or streamed, then your setup is working correctly. Congratulations!
However, if you encounter any issues, such as no audio playback or distorted sound, there are a few troubleshooting steps you can try:
- Make sure that the virtual cable is set as the default playback device in your computer’s audio settings.
- Verify that the virtual cable is selected as the audio input device in the recording or streaming software you are using.
- Check if there are any conflicting applications or audio settings that may interfere with the virtual cable. Close any unnecessary applications and ensure that the virtual cable is given priority in the audio routing.
- Restart your computer and test the setup again. Sometimes, a simple reboot can resolve any temporary issues.
If you have followed these troubleshooting steps and are still experiencing issues, it may be helpful to consult the documentation or support resources for Virtual Audio Cable or the specific software you are using for additional assistance.
Once you have successfully tested the setup and confirmed that everything is working as expected, you are ready to enjoy Spotify or any other audio source through your virtual audio cables! Embrace the versatility and flexibility that virtual audio cables bring to your audio setup.
Troubleshooting and Common Issues
While setting up and using virtual audio cables can greatly enhance your audio experience, you might encounter some common issues along the way. Here are a few troubleshooting tips to help you address these issues:
- No audio playback: If you’re not hearing any audio playback through the virtual audio cables, check your computer’s audio settings to make sure the virtual cables are set as the default playback device. Additionally, ensure that the correct output device is selected within the application you’re using.
- Distorted or low-quality audio: If the audio quality through the virtual audio cables is poor or distorted, try adjusting the buffer settings within the virtual audio cable control panel. Experiment with different buffer sizes to find the optimal balance between audio latency and quality.
- Audio latency: If you’re experiencing noticeable audio latency (a delay between the audio input and output), try reducing the buffer size within the virtual audio cable settings. However, keep in mind that reducing the buffer size too much may lead to audio glitches or dropouts.
- Conflicting applications: If you’re encountering conflicts with other applications or audio settings, try closing unnecessary applications that may be using the same audio resources. Ensure that the virtual audio cables are given priority in the audio routing settings of your operating system.
- Incompatibility with certain programs: Although virtual audio cables are designed to be compatible with most programs, there may be some exceptions. If you’re experiencing issues with a specific program, check the program’s documentation or support resources for any known compatibility issues or recommended settings.
- Driver issues: Occasionally, issues with the audio drivers on your computer can interfere with the proper functioning of virtual audio cables. Make sure that your audio drivers are up to date and compatible with the virtual audio cable software you’re using. Consider reinstalling the virtual audio cable software or updating your audio drivers if necessary.
If you encounter any other issues or have specific questions, it’s recommended to consult the documentation or support resources provided by the virtual audio cable software developer. They will be able to provide more tailored guidance based on your specific setup and requirements.
By troubleshooting these common issues, you can ensure a seamless audio experience and fully capitalize on the capabilities of virtual audio cables.
Conclusion
Virtual audio cables provide a flexible and powerful solution for routing audio between different programs and devices on your computer. By utilizing virtual audio cables, you can create complex audio setups, stream audio from one application to another, and capture audio from multiple sources simultaneously.
In this article, we explored what virtual audio cables are and how they work. We walked through the process of setting up Virtual Audio Cable on your computer and configuring it within your audio settings. We also discussed how to configure Spotify to use virtual audio cables as its audio output.
Testing the setup is crucial to ensure that the audio is being routed correctly. If you encounter any issues, we provided troubleshooting tips to help you address common problems, such as no audio playback or distorted sound. Additionally, we mentioned some potential conflicts and incompatibilities that you might come across.
Remember, virtual audio cables offer versatility, low latency, and the ability to create virtual audio devices within your computer’s operating system. With the right setup, you can maximize your audio experience whether you’re a music enthusiast, podcaster, or gamer.
So, go ahead and explore the world of virtual audio cables. Experiment with different setups, route audio to your liking, and unleash the full potential of your audio equipment. Enjoy streaming Spotify or any other audio source through your virtual audio cables, and immerse yourself in a rich and dynamic audio experience!


