Home>Production & Technology>DJ>How To Change Skin In Virtual DJ 8
DJ
How To Change Skin In Virtual DJ 8
Published: March 4, 2024
Learn how to change the skin in Virtual DJ 8 and customize your DJ experience. Follow these simple steps to personalize your DJ setup.
(Many of the links in this article redirect to a specific reviewed product. Your purchase of these products through affiliate links helps to generate commission for AudioLover.com, at no extra cost. Learn more)
Table of Contents
Introduction
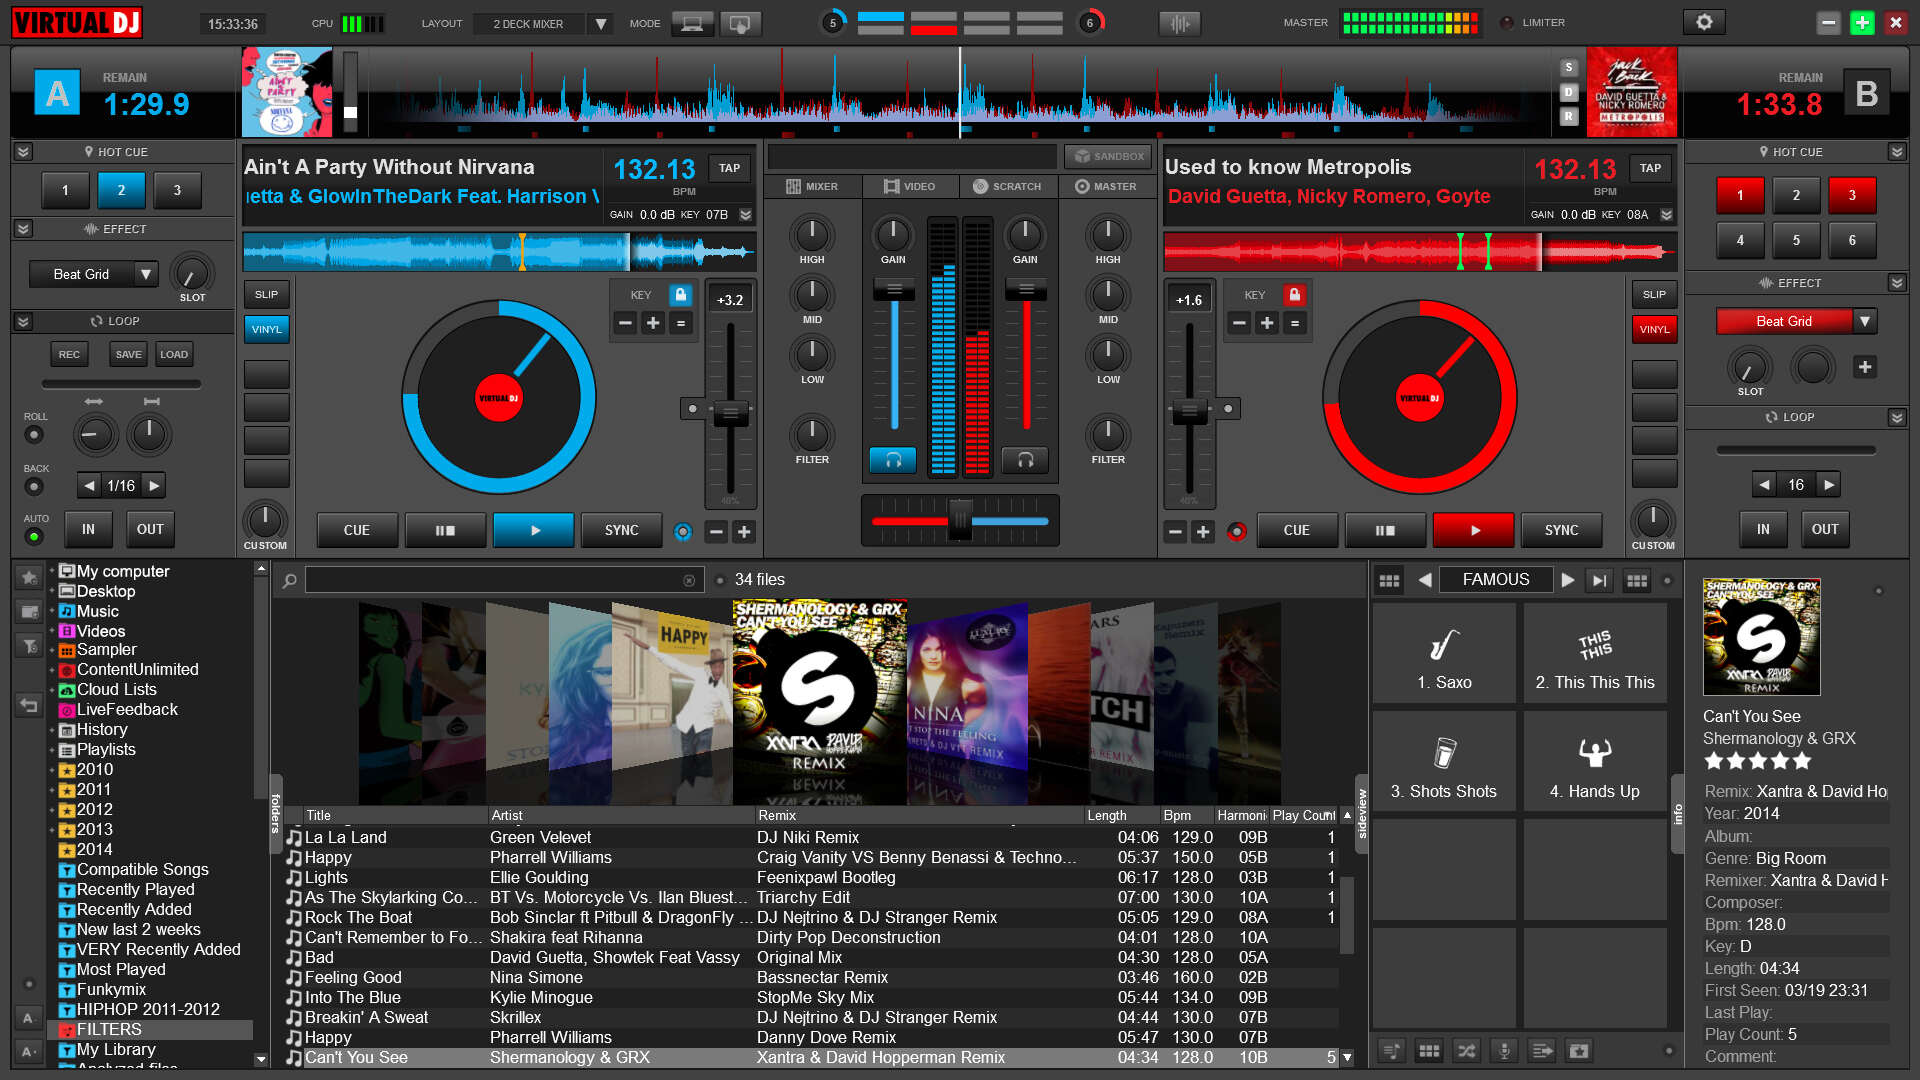
Virtual DJ 8 is a powerhouse for DJs, offering a range of features to elevate your mixing experience. One of the most exciting aspects of Virtual DJ 8 is the ability to customize the interface with different skins. These skins not only add a personal touch to your DJ setup but also enhance the visual appeal, making the entire experience more immersive and enjoyable.
In this guide, we will walk you through the process of changing the skin in Virtual DJ 8. Whether you're looking to freshen up the look of your software or seeking a skin that aligns with your unique style, this step-by-step tutorial will equip you with the knowledge to effortlessly transform the appearance of Virtual DJ 8.
So, if you're ready to infuse your DJing setup with a fresh new look, let's dive into the process of downloading, installing, and changing the skin in Virtual DJ 8. Whether you're a seasoned DJ or just starting out, customizing your Virtual DJ 8 interface with a new skin is a fantastic way to express your individuality and enhance your DJing experience.
Step 1: Downloading new skins
The process of changing the skin in Virtual DJ 8 begins with acquiring the desired skin through the download process. Follow these steps to obtain new skins for your Virtual DJ 8 software:
-
Explore Reputable Sources: Start by exploring reputable sources for Virtual DJ 8 skins. Websites such as the official Virtual DJ forum, specialized DJ forums, and trusted third-party platforms often host a wide array of skins created by talented designers and developers.
-
Selecting the Perfect Skin: Once you've identified a source for skins, browse through the available options to find a skin that resonates with your personal style and preferences. Whether you're drawn to sleek and modern designs or prefer a more vibrant and colorful interface, there are numerous skins to cater to diverse tastes.
-
Downloading the Skin: Upon finding the perfect skin, initiate the download process by clicking on the designated download button or link. Ensure that you are obtaining the skin from a trusted source to safeguard the integrity of your Virtual DJ 8 software.
-
Verifying Compatibility: Before finalizing the download, it's crucial to verify the compatibility of the skin with your version of Virtual DJ 8. Some skins may be specifically designed for certain software versions, so confirming compatibility is essential to avoid any potential issues during the installation process.
-
Organizing Downloaded Skins: As you accumulate various skins, it's beneficial to organize them within a dedicated folder on your computer. This systematic approach allows for easy access to your collection of skins and simplifies the installation process when you're ready to apply a new skin to Virtual DJ 8.
By following these steps, you can effortlessly acquire a diverse range of skins to revamp the visual aesthetic of your Virtual DJ 8 software. The process of downloading new skins sets the stage for the subsequent steps of installing and applying the chosen skin, ultimately enhancing your DJing experience with a personalized and visually captivating interface.
Step 2: Installing the new skin
With a collection of enticing skins at your disposal, the next pivotal step is the seamless installation of your chosen skin. Follow these comprehensive steps to ensure a smooth and successful installation process:
-
Locate the Skin Folder: Begin by locating the "Skins" folder within the Virtual DJ 8 directory on your computer. This folder serves as the designated repository for all installed skins and is where your new skin will find its home.
-
Extract the Skin: If the downloaded skin is in a compressed format, such as a ZIP file, extract its contents to reveal the individual files and folders that constitute the skin. This step ensures that all necessary components of the skin are readily accessible for installation.
-
Transfer the Skin: Once the skin's contents are extracted, transfer the entire folder containing the skin files into the "Skins" directory within the Virtual DJ 8 folder on your computer. This straightforward action effectively places the new skin within the software's repository, ready to be applied to the interface.
-
Launch Virtual DJ 8: With the new skin now residing in the "Skins" folder, launch the Virtual DJ 8 software. Upon startup, navigate to the "Settings" or "Options" menu within the software, where you will find the "Interface" or "Skins" tab, depending on the specific version of Virtual DJ 8.
-
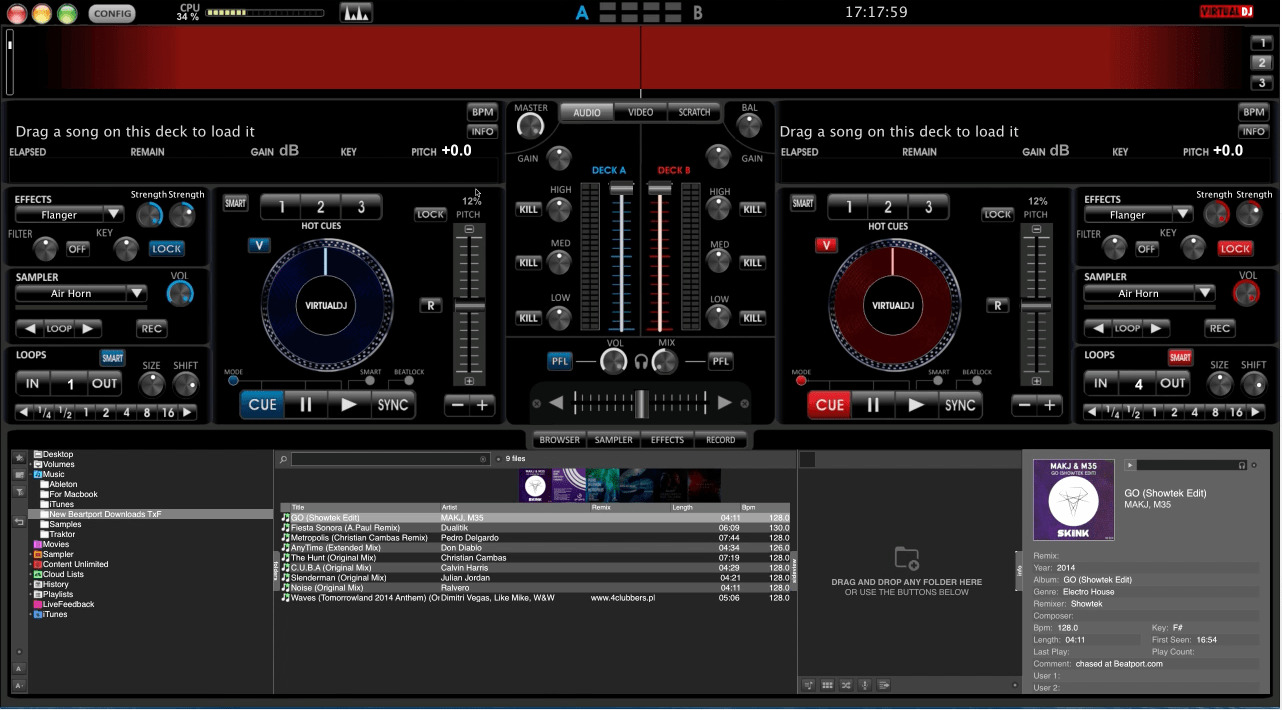
Select the New Skin: Within the "Interface" or "Skins" tab, locate the list of available skins. From this menu, select the newly installed skin from the list of options. Once selected, the interface of Virtual DJ 8 will seamlessly transition to showcase the visual elements of the chosen skin.
-
Customize and Enjoy: After successfully applying the new skin, take a moment to explore and familiarize yourself with the revamped interface. Some skins may offer customizable elements, allowing you to tailor specific aspects of the interface to your preferences, further enhancing the personalization of your DJing experience.
By meticulously following these steps, you can effortlessly install a new skin in Virtual DJ 8, infusing your DJing setup with a fresh and visually captivating interface. The process of installing the new skin sets the stage for an enhanced and personalized DJing experience, reflecting your unique style and preferences in the visual presentation of Virtual DJ 8.
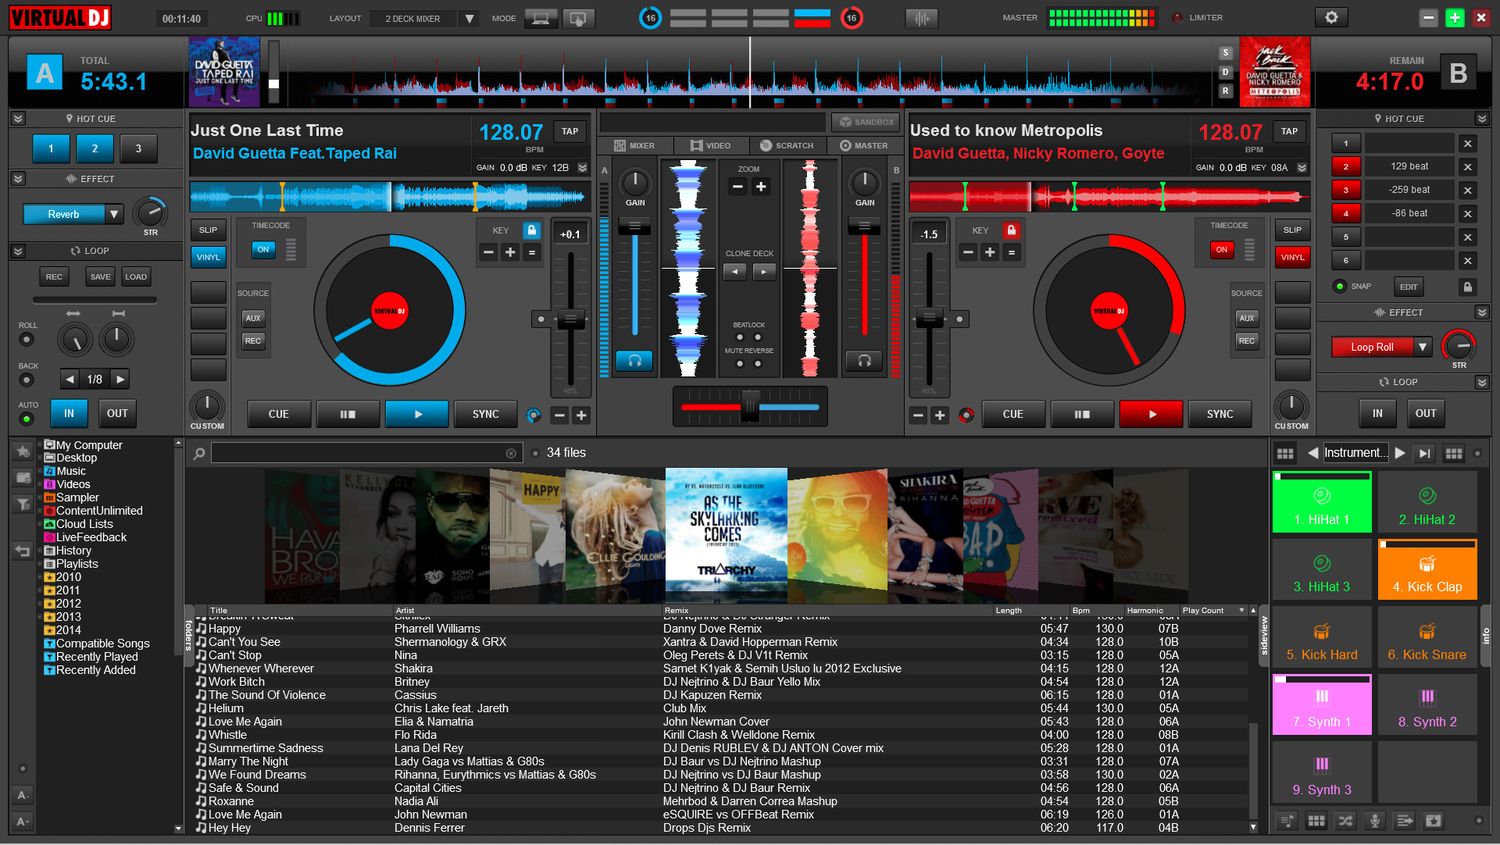
Step 3: Changing the skin in Virtual DJ 8
Changing the skin in Virtual DJ 8 is a straightforward process that allows you to seamlessly transition from the current interface to a new and visually captivating skin. This step is the culmination of acquiring and installing a new skin, ultimately refreshing the aesthetic presentation of Virtual DJ 8 to align with your unique style and preferences.
Once you've successfully installed the new skin, the process of changing the skin within Virtual DJ 8 involves a few simple yet impactful steps. Follow the instructions below to effortlessly transition to your newly installed skin:
-
Accessing the Interface Options: Begin by launching Virtual DJ 8 on your computer. Once the software is running, navigate to the "Settings" or "Options" menu, typically located in the upper toolbar or within a designated settings panel. Within the settings menu, look for the "Interface" or "Skins" tab. This is where you will initiate the process of changing the skin.
-
Selecting the New Skin: Within the "Interface" or "Skins" tab, you will encounter a list of available skins, including the newly installed skin. Browse through the list to locate the name or thumbnail representation of the new skin. Click on the name or thumbnail to select the new skin as the active interface for Virtual DJ 8.
-
Applying the New Skin: After selecting the new skin from the list of available options, the interface of Virtual DJ 8 will seamlessly transition to showcase the visual elements and design of the chosen skin. This instantaneous transformation reflects the seamless integration of the new skin into the software, presenting you with a fresh and visually captivating interface.
-
Exploring Customization Options (if available): Some skins may offer customization options, allowing you to tailor specific elements of the interface to your preferences. If customization features are available, take the opportunity to explore and personalize the visual presentation of Virtual DJ 8 further.
By following these steps, you can effortlessly change the skin in Virtual DJ 8, ushering in a new visual identity for your DJing experience. The ability to seamlessly transition between different skins empowers you to curate a personalized and visually engaging interface that complements your individual style and enhances your overall DJing experience.
The process of changing the skin in Virtual DJ 8 is a pivotal aspect of customizing your DJ setup, offering a dynamic way to express your creativity and individuality through the software's interface. Whether you're seeking a sleek and modern aesthetic or a vibrant and energetic design, the ability to change skins in Virtual DJ 8 provides a canvas for personal expression within the realm of DJing.
Conclusion
In conclusion, the process of changing the skin in Virtual DJ 8 represents a dynamic opportunity to elevate your DJing experience through personalized visual expression. By following the comprehensive steps outlined in this guide, you have gained the knowledge and proficiency to seamlessly acquire, install, and change skins within Virtual DJ 8, effectively transforming the interface into a reflection of your unique style and preferences.
The ability to download new skins from reputable sources opens the door to a diverse array of visual themes, ranging from sleek and modern designs to vibrant and energetic interfaces. This extensive selection empowers you to curate a visual identity for your DJing setup, aligning the software's aesthetic presentation with your individual taste and creative vision.
Furthermore, the installation process ensures a smooth integration of the chosen skin into Virtual DJ 8, allowing for a seamless transition to a visually captivating interface. With the newly installed skin in place, the process of changing the skin within Virtual DJ 8 becomes a simple yet impactful endeavor, instantly refreshing the software's appearance to align with your current creative inspiration.
Ultimately, the ability to change skins in Virtual DJ 8 serves as a testament to the software's versatility and adaptability, providing a canvas for personal expression within the realm of DJing. Whether you're a seasoned DJ seeking to revitalize your setup or an aspiring DJ looking to infuse your unique style into your software interface, the process of changing skins in Virtual DJ 8 offers a dynamic avenue for visual creativity and individuality.
As you continue to explore the world of DJing and immerse yourself in the art of mixing and performance, the visual identity of your DJing setup will serve as a reflection of your passion and creativity. By leveraging the process of changing skins in Virtual DJ 8, you have the opportunity to curate an interface that resonates with your artistic vision, enhancing your DJing experience and captivating your audience with a visually engaging presentation.
In essence, the process of changing skins in Virtual DJ 8 transcends mere customization; it represents a celebration of individuality and creative expression within the vibrant landscape of DJing. Embrace the opportunity to infuse your DJing setup with a fresh new look, and let your chosen skin serve as a visual testament to your unique identity as a DJ.