Home>Production & Technology>Stereo>How Do You Fit A Standard Stereo In A Nissan 2007 Frontier Stereo
Stereo
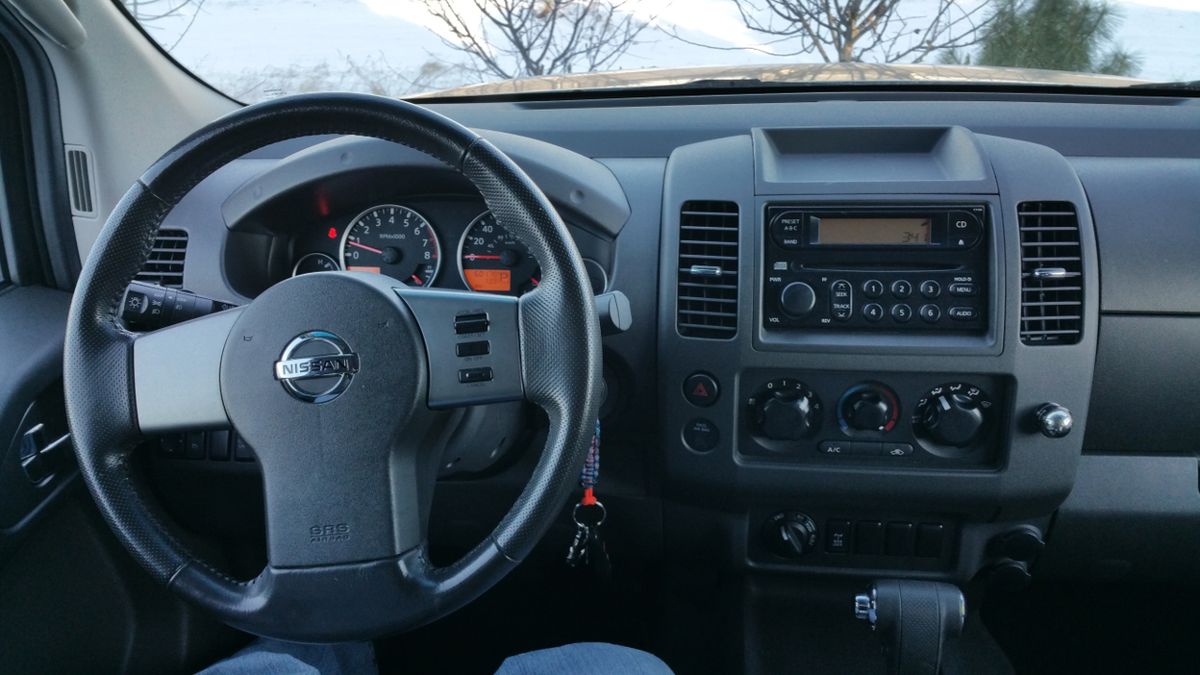
How Do You Fit A Standard Stereo In A Nissan 2007 Frontier Stereo
Modified: January 22, 2024
Learn how to easily install a standard stereo in your Nissan 2007 Frontier. Improve your driving experience with a new stereo.
(Many of the links in this article redirect to a specific reviewed product. Your purchase of these products through affiliate links helps to generate commission for AudioLover.com, at no extra cost. Learn more)
Table of Contents
- Introduction
- Step 1: Gather the necessary tools and equipment
- Step 2: Disconnect the negative battery cable
- Step 3: Remove the trim panel surrounding the stereo
- Step 4: Disconnect the wiring harness and antenna cable
- Step 5: Remove the old stereo unit
- Step 6: Prepare the new standard stereo unit
- Step 7: Connect the wiring harness and antenna cable to the new stereo
- Step 8: Install the new stereo unit into the dashboard
- Step 9: Reinstall the trim panel surrounding the stereo
- Step 10: Reconnect the negative battery cable
- Conclusion
Introduction
Welcome to our guide on how to fit a standard stereo in a Nissan 2007 Frontier. If you’re looking to upgrade your car’s audio system or replace a faulty stereo unit, this step-by-step tutorial will walk you through the process. Adding a standard stereo can greatly enhance your driving experience, allowing you to enjoy your favorite music with better sound quality and additional features.
Fitting a new stereo unit may seem daunting at first, but with the right tools and a little patience, it can be a straightforward task. We’ll provide you with detailed instructions and helpful tips to ensure a successful installation.
Before we begin, it’s important to note that this guide is specifically for the Nissan 2007 Frontier model. Although the process may be similar for other vehicles, it’s always best to consult the specific instructions or seek professional help.
Now, let’s get started on upgrading your Nissan 2007 Frontier stereo!
Step 1: Gather the necessary tools and equipment
Before you begin the installation process, it’s important to gather all the necessary tools and equipment. Having everything ready beforehand will make the installation smoother and more efficient. Here’s a list of what you’ll need:
- A standard stereo unit compatible with the Nissan 2007 Frontier: Make sure to purchase a stereo that is specifically designed for your car model to ensure compatibility and proper fitment.
- Trim panel removal tool: This tool will help you safely remove the trim panel surrounding the stereo unit without causing any damage.
- Wire harness adapter: This adapter will allow you to connect the car’s existing wiring harness to the new stereo unit without the need for cutting or splicing any wires.
- Antenna adapter: This adapter will enable you to connect the car’s antenna cable to the new stereo unit.
- Socket wrench set: You may need a socket wrench set to remove any bolts or screws that are holding the stereo unit in place.
- Electrical tape: Electrical tape will come in handy for securing and insulating any wire connections.
- Wire cutters and strippers: These tools will be useful for removing any unnecessary wiring or preparing the wires for proper connections.
- Phillips screwdriver: You may need a Phillips screwdriver to remove screws or fasteners during the installation process.
- Disposable gloves: Wearing disposable gloves can help protect your hands from any sharp edges or dirt during the installation.
By ensuring you have all these tools and equipment on hand, you’ll be well-prepared for the installation process. Once you have gathered everything, you’re ready to move on to the next step: disconnecting the negative battery cable.
Step 2: Disconnect the negative battery cable
Prior to any electrical work in your car, it is essential to disconnect the negative battery cable. This will help prevent any accidental short circuits and ensure your safety throughout the installation process. Follow the steps below to disconnect the negative battery cable:
- Locate the car’s battery: The battery is usually located under the hood of your Nissan 2007 Frontier. It is typically on the driver’s side of the engine bay.
- Verify the battery terminals: Identify the negative (-) terminal on the battery. It is usually black and labeled with a minus sign.
- Put on disposable gloves: Before handling the battery, it’s a good idea to wear disposable gloves to protect your hands from any corrosion or dirt.
- Loosen the cable clamp: Using a wrench or socket, loosen the nut that secures the negative cable clamp to the battery terminal. Turn the nut counterclockwise to loosen it.
- Detach the negative cable: Once the nut is loose, carefully remove the negative cable clamp from the battery terminal. Ensure that it is clear of any contact points to prevent accidental reconnection.
- Insulate the cable end: To avoid unintended contact with the battery terminal, cover the end of the negative cable with electrical tape. This provides an extra layer of protection.
By disconnecting the negative battery cable, you eliminate the risk of electrical shock or damage while working on the stereo installation. Remember to keep the negative cable clear of the battery terminal throughout the installation process. With the negative battery cable disconnected, you can now proceed to the next step: removing the trim panel surrounding the stereo.
Step 3: Remove the trim panel surrounding the stereo
With the negative battery cable safely disconnected, it’s time to remove the trim panel surrounding the stereo. This panel covers the stereo unit and may also house other components such as air vents or climate controls. Follow the steps below to remove the trim panel:
- Inspect the trim panel: Take a close look at the trim panel and locate any screws, fasteners, or clips that may be securing it in place. These can vary depending on the car model and trim level.
- Remove screws or fasteners: If there are any visible screws or fasteners on the trim panel, use a suitable screwdriver or socket wrench to carefully remove them. Keep these screws or fasteners in a safe place for reinstallation later on.
- Release plastic clips: In some cases, the trim panel may be held in place by plastic clips. These clips can be gently released by using a trim panel removal tool or a flat-head screwdriver. Insert the tool between the trim panel and the dashboard and pry it carefully to pop the clips out.
- Gently pull the trim panel: Once the screws and clips are removed or released, it’s time to remove the trim panel. Use your hands to grip the edges of the panel and gently pull it away from the dashboard. Take care not to use excessive force to avoid damaging the panel or any underlying components.
- Disconnect any electrical connectors: As you remove the trim panel, you may encounter electrical connectors attached to it. Carefully disconnect these connectors by pressing on any release tabs or squeezing the sides of the connector and gently pulling it apart.
- Set aside the trim panel: Once the connectors are disconnected, safely set aside the trim panel in a clean and secure location. This will prevent any damage or scratches during the remainder of the installation process.
By removing the trim panel, you gain access to the stereo unit and the necessary components for the installation. Take your time to ensure a careful removal, and keep track of any screws or electrical connectors for reassembly later. With the trim panel removed, you’re ready to move on to the next step: disconnecting the wiring harness and antenna cable.
Step 4: Disconnect the wiring harness and antenna cable
Now that the trim panel has been successfully removed, it’s time to disconnect the wiring harness and antenna cable from the old stereo unit. These cables are responsible for powering and transmitting signals to the stereo. Follow the steps below to disconnect them:
- Identify the wiring harness: Locate the wiring harness connected to the back of the stereo unit. The wiring harness consists of a series of colored wires and a main connector.
- Disconnect the wiring harness: Depending on the type of connector, you may need to press a release tab or squeeze the sides of the connector to disconnect it from the stereo unit. Take care not to pull on the wires themselves as this can cause damage.
- Locate the antenna cable: The antenna cable is a thicker cable that connects to the back of the stereo unit. It’s responsible for receiving radio signals.
- Remove the antenna cable: Similar to the wiring harness, the antenna cable may have a connector that needs to be disconnected. Release any tabs or gently pull apart the connector to remove it from the stereo unit.
- Secure the disconnected cables: Once the wiring harness and antenna cable are disconnected, it’s important to secure them to prevent them from falling back into the dashboard. Use tape or zip ties to hold the cables together and ensure they are out of the way during the remaining installation process.
By carefully disconnecting the wiring harness and antenna cable, you ensure a smooth transition to the new stereo unit. Take note of the connector types and pay attention to any release mechanisms to avoid damaging the cables or connectors. With the cables safely disconnected, you’re ready to move on to the next step: removing the old stereo unit.
Step 5: Remove the old stereo unit
With the wiring harness and antenna cable disconnected, it’s time to remove the old stereo unit from your Nissan 2007 Frontier. The stereo unit is typically held in place by screws, brackets, or a mounting cage. Follow the steps below to safely remove the old stereo:
- Identify the mounting method: Take a close look at the stereo unit and determine how it is secured in the dashboard. It may be held in place by screws, brackets, or a mounting cage.
- Remove any screws or brackets: If there are visible screws or brackets securing the stereo unit, use a suitable screwdriver or socket wrench to carefully remove them. Keep these screws or brackets in a safe place for later use.
- Release the mounting cage (if applicable): If your stereo unit is secured in a mounting cage, look for release tabs or levers on the sides of the cage. Press or slide these tabs to release the stereo unit from the cage.
- Gently pull out the old stereo: With any screws, brackets, or the mounting cage released, gently pull the old stereo unit out of the dashboard. Use caution to avoid pulling too forcefully and damaging any wiring or components.
- Disconnect any remaining connectors: As you remove the old stereo unit, you may encounter additional connectors attached to the back. Disconnect these connectors by pressing on any release tabs or squeezing the sides of the connector and gently pulling it apart.
- Set aside the old stereo unit: Once all connectors are disconnected, safely set aside the old stereo unit in a clean and secure location. Properly dispose of it or keep it as a backup if desired.
By successfully removing the old stereo unit, you have made way for the installation of your new standard stereo. Take your time and ensure a careful removal to prevent any damage to the surrounding components. With the old stereo unit removed, you’re ready to move on to the next step: preparing the new standard stereo unit.
Step 6: Prepare the new standard stereo unit
Now that the old stereo unit has been removed, it’s time to prepare the new standard stereo unit for installation in your Nissan 2007 Frontier. Follow the steps below to ensure proper preparation:
- Inspect the new stereo unit: Take a moment to closely examine the new stereo unit. Check for any visible damage, missing components, or loose parts. Contact the manufacturer or retailer if you notice any issues.
- Check for compatibility: Verify that the new stereo unit is compatible with your Nissan 2007 Frontier. Look for the specific model number or compatible car list provided by the manufacturer.
- Connect the wiring harness: Take the wiring harness adapter that you purchased for your Nissan 2007 Frontier and connect it to the wiring harness on the new stereo unit. The adapter will allow for a plug-and-play connection without the need for cutting or splicing any wires.
- Attach the antenna adapter: Connect the antenna adapter to the corresponding port on the back of the new stereo unit. This adapter will enable you to connect the car’s antenna cable.
- Test the connections: Before proceeding with the installation, test the connections by briefly reconnecting the negative battery cable and turning on the new stereo unit. Ensure that all functions, such as audio playback and display, are working properly.
- Disconnect the negative battery cable again: Once you have confirmed that the connections are functioning correctly, disconnect the negative battery cable once more to proceed with the installation.
By properly preparing the new standard stereo unit, you ensure a smooth installation process and minimize the risk of any issues or compatibility concerns. Take your time to perform a thorough inspection and test the connections before moving forward. With the new stereo unit prepared, you’re ready to move on to the next step: connecting the wiring harness and antenna cable.
Step 7: Connect the wiring harness and antenna cable to the new stereo
With the new stereo unit prepared, it’s time to connect the wiring harness and antenna cable to the new unit. This step is crucial to ensure a proper and functional installation. Follow the steps below to connect the wiring harness and antenna cable:
- Locate the wiring harness and antenna cable: Take the wiring harness adapter that you connected to the new stereo unit in the previous step. Identify the corresponding wiring harness and antenna cable in your Nissan 2007 Frontier.
- Connect the wiring harness: Align the wiring harness connector on the car’s wiring harness with the corresponding connector on the wiring harness adapter. Press the connectors together until you hear a click or feel a firm connection. Ensure that all the wires are securely connected.
- Connect the antenna cable: Take the antenna cable from the car and connect it to the antenna adapter that is connected to the new stereo unit. Make sure the connection is secure and tight.
- Double-check the connections: Once the wiring harness and antenna cable are connected, double-check all the connections to ensure they are properly aligned and secure. This will help prevent any electrical or audio issues when you power up the stereo unit.
It’s crucial to ensure the correct wiring harness and antenna cable are connected to the new stereo unit to prevent any compatibility or functionality problems. Take your time and make sure the connections are solid and secure. With the wiring harness and antenna cable properly connected, you’re ready to move on to the next step: installing the new stereo unit into the dashboard.
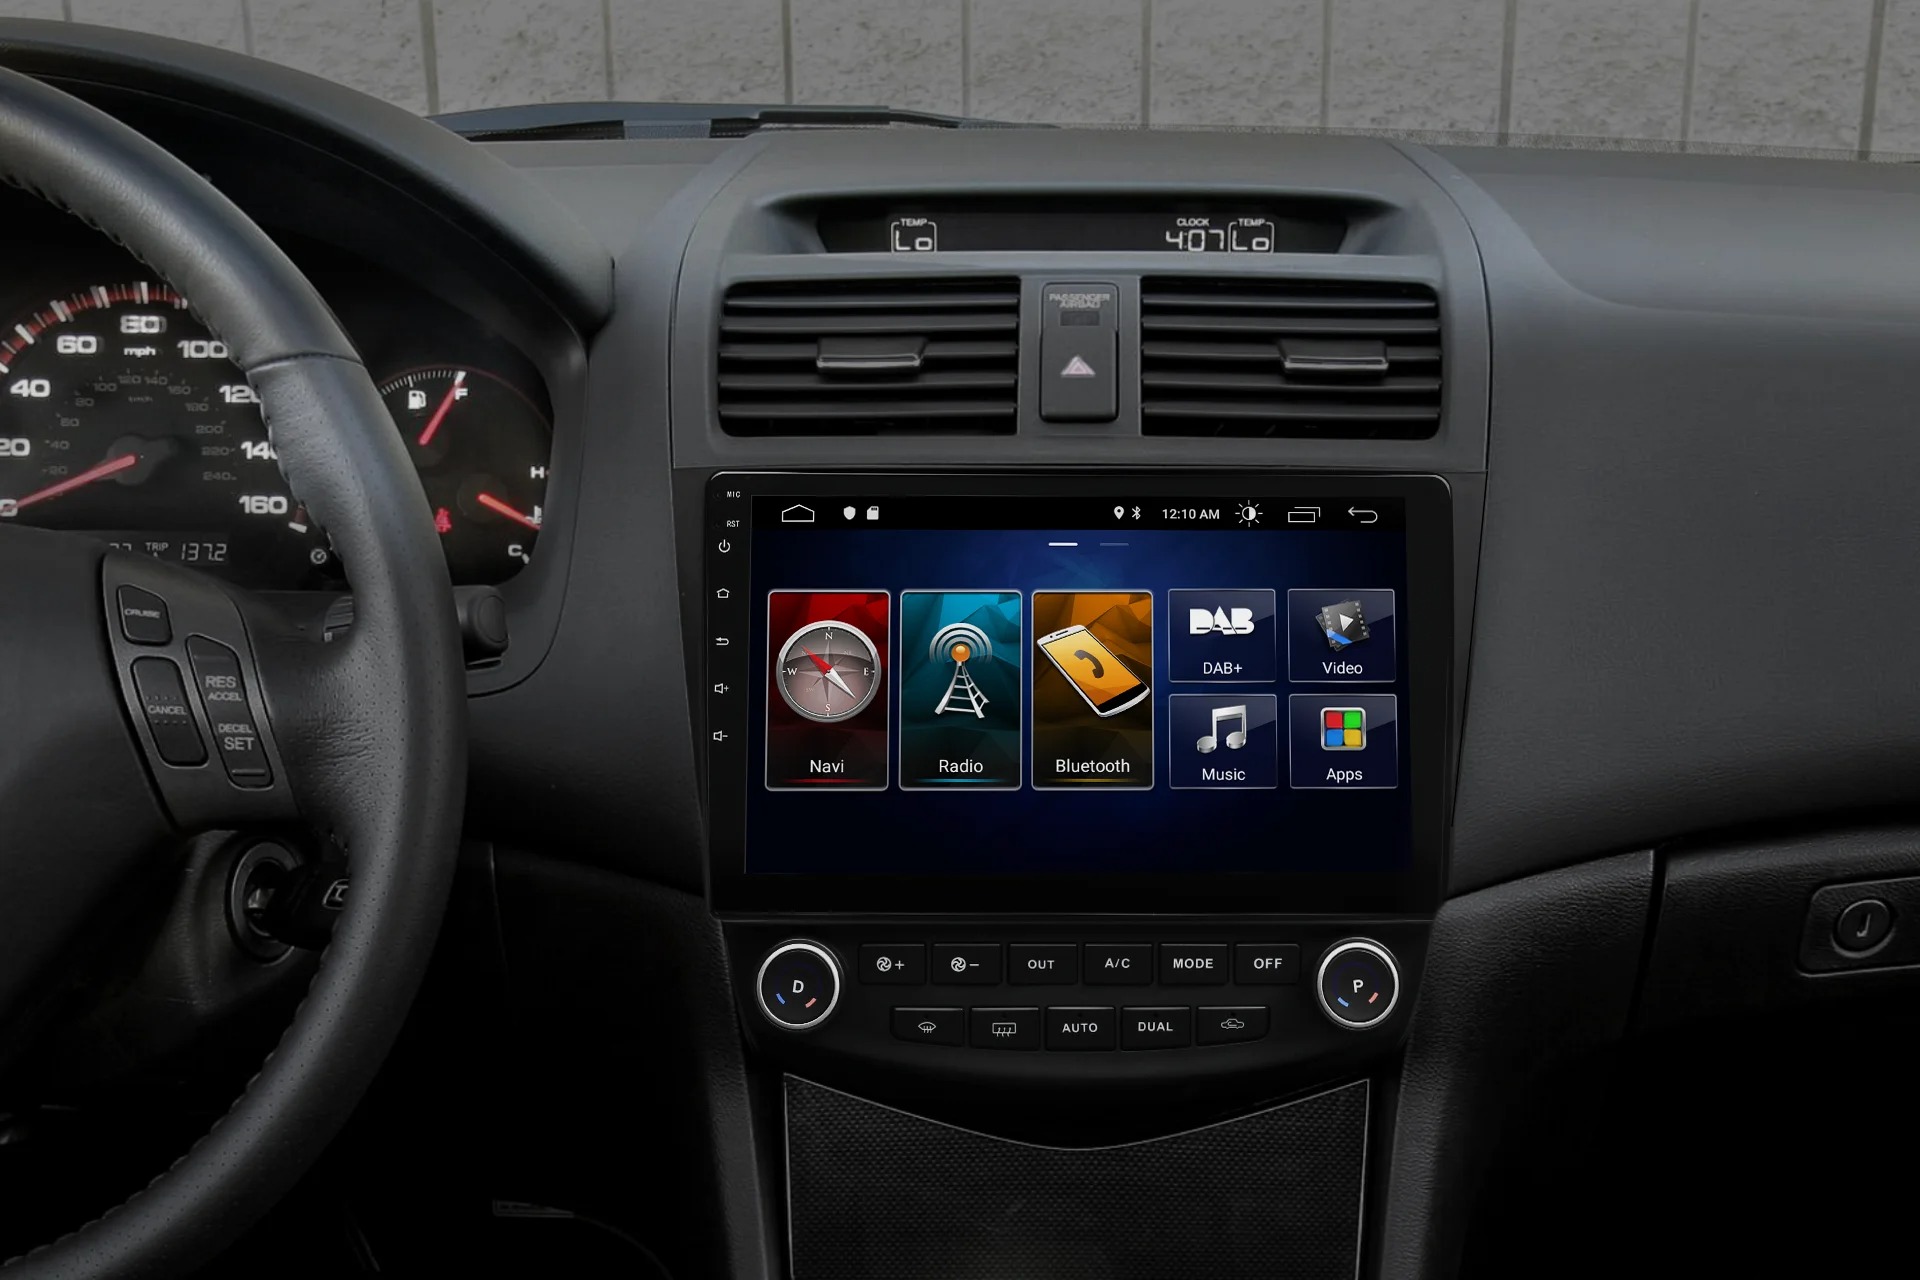
Step 8: Install the new stereo unit into the dashboard
With the wiring harness and antenna cable securely connected, it’s time to install the new stereo unit into the dashboard of your Nissan 2007 Frontier. This step will ensure a proper fit and function within the car’s interior. Follow the steps below to install the new stereo unit:
- Position the new stereo unit: Carefully position the new stereo unit into the dashboard opening. Align the mounting holes or brackets on the stereo unit with the corresponding slots or mounting points in the dashboard.
- Secure the stereo unit: Once positioned correctly, use screws, brackets, or a mounting cage (if applicable) to secure the new stereo unit in place. Use the screws or brackets you removed earlier, or refer to the manufacturer’s instructions for specific mounting requirements.
- Ensure a snug fit: Check that the stereo unit is snugly and securely installed. It should be level and flush with the dashboard, without any gaps or movement. This will ensure proper function and prevent any rattling sounds.
- Reconnect any remaining connectors: As you install the new stereo unit, you may need to reconnect any remaining connectors from components such as audio controls or additional features. Consult the manufacturer’s instructions or your car’s manual for specific connector locations and instructions.
Take your time to ensure a proper and secure installation of the new stereo unit. Double-check all the connections and mounting points before proceeding to the next step. With the new stereo unit in place, you’re ready to move on to the next step: reinstalling the trim panel surrounding the stereo.
Step 9: Reinstall the trim panel surrounding the stereo
Now that the new stereo unit is securely installed, it’s time to reinstall the trim panel surrounding the stereo in your Nissan 2007 Frontier. This panel not only enhances the appearance of the dashboard but also protects the stereo unit and other components. Follow the steps below to reinstall the trim panel:
- Check the condition of the trim panel: Before reinstalling the trim panel, inspect it for any damage, missing clips, or broken fasteners. Replace or repair any damaged components as necessary.
- Position the trim panel: Carefully align the trim panel with the openings and mounting points in the dashboard. Begin by inserting any protruding components, such as air vents or climate controls, into their appropriate slots.
- Press the panel into place: Once aligned, apply gentle pressure to the trim panel, ensuring it fits securely. Firmly press along the edges and corners until the panel snaps or clips back into position. You may hear a satisfying click when the clips engage.
- Reattach any screws or fasteners: If you removed any screws or fasteners during the initial trim panel removal, reattach them using the appropriate screwdriver or socket wrench. Ensure they are tightened but not overly tightened, as this can cause damage.
- Reconnect any electrical connectors: If the trim panel includes any electrical connectors for features like lighting or controls, carefully reconnect them. Align the connectors and gently push them together until they click into place.
Take your time during the trim panel reinstallation process to ensure a proper fit and alignment. Avoid forcing any components or over-tightening screws. With the trim panel securely back in place, you’re ready to move on to the final step: reconnecting the negative battery cable.
Step 10: Reconnect the negative battery cable
With the new stereo unit installed and the trim panel securely reattached, it’s time to complete the installation process by reconnecting the negative battery cable in your Nissan 2007 Frontier. Follow the steps below to safely reconnect the negative battery cable:
- Locate the car’s battery: As before, locate the car’s battery under the hood. Be sure to identify the negative (-) terminal, which is usually black and labeled with a minus sign.
- Remove the electrical tape: If you applied electrical tape to the end of the negative cable during the initial disconnection, carefully remove it to expose the cable end.
- Position the cable clamp: Take the cable clamp attached to the negative battery cable and position it over the negative terminal of the battery.
- Tighten the cable clamp: Using a wrench or socket, tighten the nut on the cable clamp to secure it to the negative terminal. Turn the nut clockwise to tighten it, ensuring a snug fit.
- Check the connection: Once the cable clamp is tightened, give it a gentle tug to ensure it is securely attached to the battery terminal. The connection should be firm and not easily disconnected.
By reconnecting the negative battery cable, you restore power to your Nissan 2007 Frontier’s electrical system. This allows the new stereo unit to function properly and other car components to operate seamlessly. After completing this step, you can turn on the car and test the new stereo to ensure everything is working as expected.
Congratulations! You have successfully completed the process of fitting a standard stereo in your Nissan 2007 Frontier. Enjoy your enhanced audio experience and the features offered by your new stereo unit.
Conclusion
Upgrading and fitting a standard stereo in your Nissan 2007 Frontier can greatly enhance your driving experience by providing improved sound quality and additional features. Throughout this guide, we have taken you through each step of the installation process, from gathering the necessary tools to reconnecting the negative battery cable.
By following the detailed instructions and utilizing the right tools, you can successfully install a new stereo unit in your vehicle. Remember to exercise caution and take your time during each step to ensure proper connections and a secure fit.
With the new stereo unit installed, you can now enjoy your favorite music, podcasts, and radio stations with enhanced audio quality. Take advantage of any additional features your new stereo unit offers, such as Bluetooth connectivity, USB ports, or touchscreen interfaces, to maximize your driving experience.
Keep in mind that this guide is specific to the Nissan 2007 Frontier model, and it’s always best to consult the specific instructions provided by the manufacturer or seek professional help if you have any uncertainties or concerns.
We hope that this guide has provided you with valuable insights and instructions for fitting a standard stereo in your Nissan 2007 Frontier. Enjoy your newly upgraded audio system and happy driving!