Home>Production & Technology>Stereo>Where Is The Stereo Fuse Located?
Stereo
Where Is The Stereo Fuse Located?
Published: November 19, 2023
Find out where the stereo fuse is located in your vehicle to troubleshoot sound issues. Learn how to easily replace the stereo fuse.
(Many of the links in this article redirect to a specific reviewed product. Your purchase of these products through affiliate links helps to generate commission for AudioLover.com, at no extra cost. Learn more)
Table of Contents
Introduction
Welcome to the world of car audio systems, where a stereo is often the centerpiece of the entertainment experience. But what happens when your stereo suddenly stops working? One possible culprit could be a blown fuse. The stereo fuse acts as a safeguard, protecting your audio system from power surges and electrical faults. If the fuse blows, it cuts off the power supply to the stereo, rendering it non-functional.
In this article, we will explore the world of stereo fuses, understand their importance, and learn how to locate them in different car models. We will also provide you with a step-by-step guide to finding the stereo fuse and troubleshooting common issues.
So, whether you’re a car enthusiast trying to fix a malfunctioning audio system or a DIYer looking to upgrade your stereo, this article is your comprehensive guide to understanding and locating the stereo fuse.
Before we dive in, it’s important to note that finding the stereo fuse location may vary depending on the make, model, and year of your vehicle. Therefore, it’s always recommended to consult your car’s owner’s manual for specific instructions. However, we’ll provide you with a general overview that should apply to most car models.
Understanding the Stereo Fuse
Before we start looking for the stereo fuse, let’s first understand its purpose and how it functions within the car’s electrical system. The stereo fuse is a small component that is part of the car’s fuse box, also known as the fuse panel. It is designed to protect the radio and audio system from power surges and electrical faults.
When an electrical overload or fault occurs in the stereo system, the fuse is designed to break the circuit and prevent damage to the components. This is important because a power surge can not only render the stereo system inoperable but also cause damage to other electrical systems in the vehicle.
The stereo fuse is typically a blade fuse, which is a rectangular-shaped device with two metal prongs on either end. When excessive current flows through the fuse, the filament inside it will melt, breaking the circuit and cutting off the power supply to the stereo. This protects the system from potential damage.
It’s worth noting that the stereo fuse is not the only fuse responsible for the audio system. Depending on the car, there might be additional fuses for functions like the amplifier, speakers, or auxiliary inputs. However, the stereo fuse acts as the primary safeguard for the entire audio system.
It’s also important to mention that the stereo fuse can sometimes blow even without any electrical faults. This can happen due to age, heat, or other factors that weaken the fuse over time. In such cases, replacing the blown fuse should solve the issue, allowing your stereo to function normally again.
Now that we have a basic understanding of what a stereo fuse is and how it works, let’s move on to the next section to learn about locating the stereo fuse in different car models.
Locating the Stereo Fuse in Different Car Models
Locating the stereo fuse in your car may vary depending on the make, model, and year of your vehicle. While there are general guidelines, it’s always recommended to consult your car’s owner’s manual for specific instructions tailored to your vehicle.
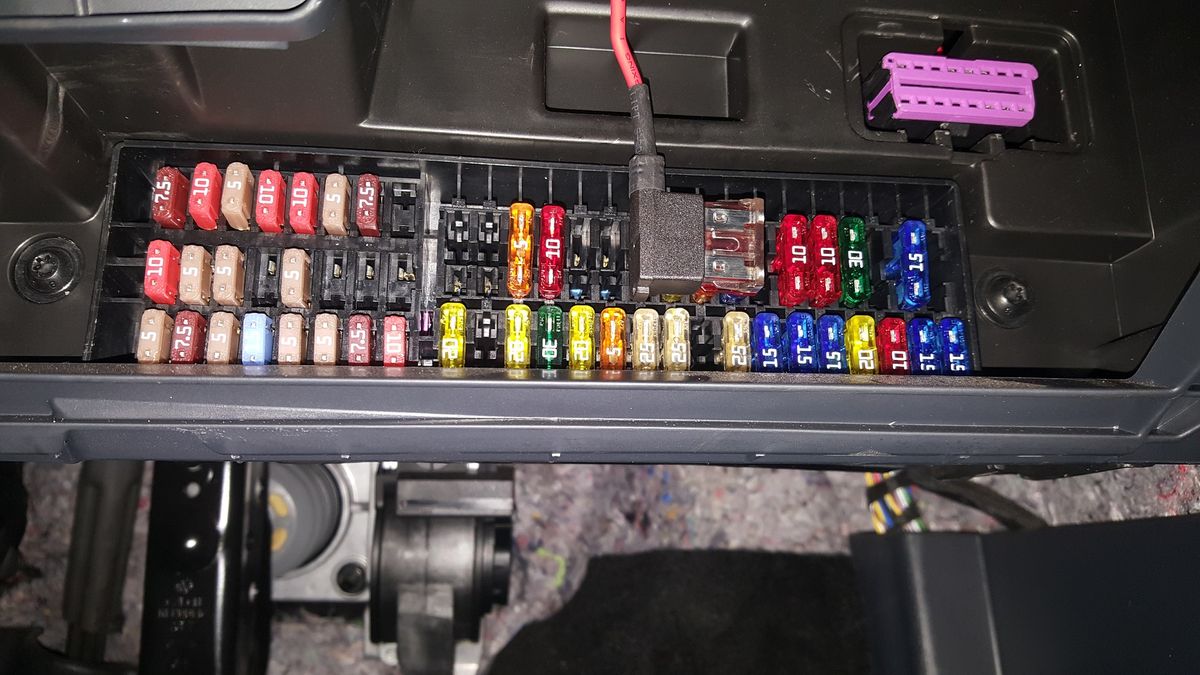
That being said, in most vehicles, the stereo fuse can be found in the fuse box, which is typically located under the dashboard on the driver’s side or in the engine compartment. The fuse box is a black plastic box that contains multiple fuses, each responsible for different electrical components of the vehicle.
To locate the stereo fuse, follow these general steps:
- Start by locating the fuse box in your vehicle. Consult your car’s owner’s manual or look for a fuse box diagram to help you in identifying the correct location.
- Once you’ve found the fuse box, open the cover. Some fuse boxes have a latch or a tab that needs to be released, while others may have a removable cover.
- Inspect the inside cover of the fuse box. It often includes a label or a diagram that indicates the different fuse positions and their corresponding functions. Look for a reference to the stereo or audio system.
- Identify the fuse number or symbol that corresponds to the stereo system. Depending on the fuse box, it may be labeled as “Audio,” “Radio,” “Stereo,” or “ACC” (short for accessory).
- Using a fuse puller or a pair of needle-nose pliers, carefully remove the stereo fuse from its position. Be gentle and avoid damaging other fuses or components.
- Inspect the fuse for any signs of damage, such as a broken filament or discoloration. If the fuse appears to be intact, there may be another issue causing the stereo problem.
Remember, these steps are a general guide, and the exact location and appearance of the stereo fuse may vary between different car models. If you’re unsure or need more specific information, consult your car’s owner’s manual or consider seeking professional assistance.
Now that you know how to locate the stereo fuse in different car models, let’s move on to the next section for a step-by-step guide to finding the stereo fuse.
Step-by-Step Guide to Finding the Stereo Fuse
If you’re experiencing issues with your car stereo and suspect that a blown fuse might be the cause, here is a step-by-step guide to help you find and replace the stereo fuse:
- Turn off your vehicle’s engine and engage the parking brake for safety.
- Locate the fuse box in your vehicle. It is commonly located under the dashboard on the driver’s side or in the engine compartment.
- Refer to your car’s owner’s manual or the fuse box diagram for the specific location of the stereo fuse.
- Open the fuse box cover by either releasing the latch or removing the removable cover.
- Inspect the inside cover of the fuse box for a fuse diagram or label that indicates the position of the stereo fuse.
- Identify the stereo fuse by its corresponding number or symbol. It may be labeled as “Audio,” “Radio,” “Stereo,” or “ACC.”
- Using a fuse puller or a pair of needle-nose pliers, carefully remove the stereo fuse from its position. Be cautious not to damage any adjacent fuses or components.
- Examine the fuse for any signs of damage, such as a broken filament or discoloration. If the fuse appears blown, proceed to the next step.
- Replace the blown fuse with a new one of the same amperage rating. It’s important to use a fuse with the correct rating to ensure the protection of your stereo system.
- Insert the new fuse into the designated position within the fuse box.
- Close the fuse box cover securely.
- Start your vehicle’s engine and test the stereo to see if it is functioning properly.
By following these steps, you should be able to locate the stereo fuse, identify any potential issues, and replace it if necessary. However, if replacing the fuse does not resolve the issue with your car stereo, it may be a sign of a deeper electrical problem or a faulty component. In such cases, it’s recommended to consult a professional mechanic or automotive audio specialist.
Now, armed with the knowledge of locating and replacing the stereo fuse, you can troubleshoot and resolve issues with your car’s audio system.
Troubleshooting Common Stereo Fuse Issues
While a blown stereo fuse is a common cause of audio system issues, there can be other factors contributing to the problem. Here are some troubleshooting steps to help you identify and resolve common stereo fuse issues:
- Check for Multiple Fuses: Some vehicles have multiple fuses related to the stereo system. Make sure to check all relevant fuses, including those labeled for the radio, amplifier, or speakers. If multiple fuses are blown, it may indicate a more significant electrical issue.
- Inspect Other Components: If the stereo fuse keeps blowing repeatedly, it could be due to a faulty stereo head unit or a malfunctioning amp or speakers. Inspect these components for any visible signs of damage, loose connections, or short circuits.
- Disconnect Accessories: If you have any aftermarket accessories connected to the stereo system, such as Bluetooth adapters or auxiliary inputs, disconnect them temporarily and check if the fuse still blows. Faulty accessories can cause electrical issues and trigger blown fuses.
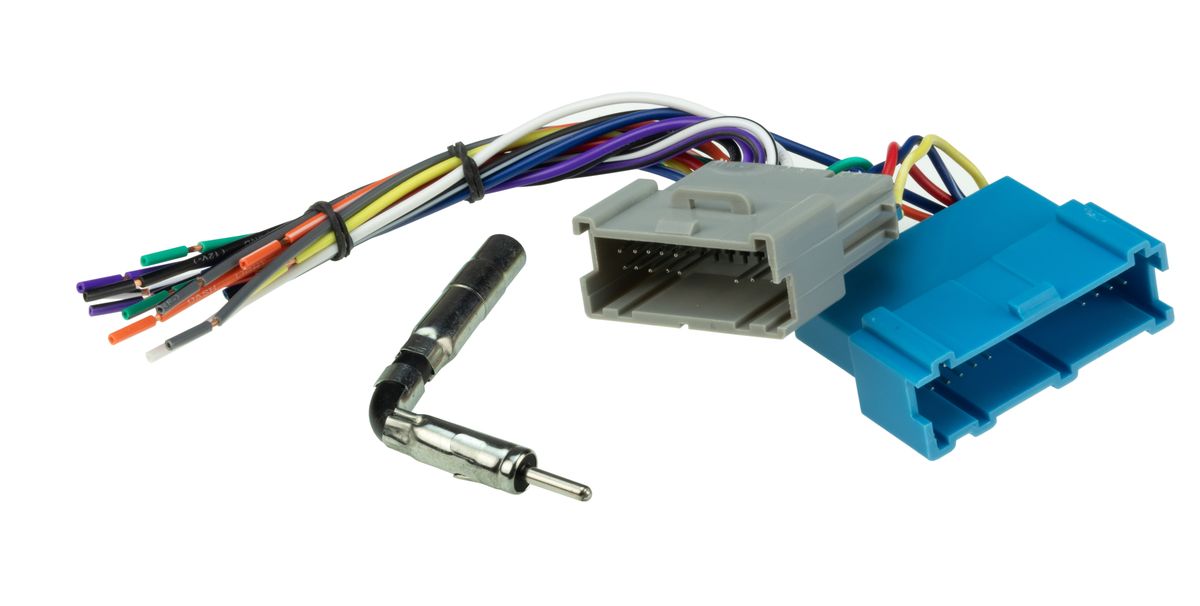
- Check Wiring: Inspect the wiring connected to the stereo system, both at the head unit and the speakers. Look for any loose, frayed, or damaged wires that can cause a short circuit and blow the fuse.
- Verify Correct Fuse Rating: Ensure that you are using the correct fuse with the appropriate amperage rating for the stereo system. Using a fuse with a higher rating can lead to further damage, while a lower-rated fuse may blow frequently.
- Consult a Professional: If you have gone through the troubleshooting steps and still cannot resolve the issue, it is recommended to seek professional assistance from a qualified car audio technician. They have the expertise and specialized tools to diagnose and repair complex electrical issues.
Remember, troubleshooting and resolving stereo fuse issues may require patience and attention to detail. If you are uncomfortable or unsure about any steps involved, it is best to seek professional help to avoid causing further damage to your car’s electrical system.
By following these troubleshooting steps, you can have a better understanding of potential issues and work towards a solution to get your stereo system up and running again.
Conclusion
In conclusion, the stereo fuse is an essential component of a car’s audio system, designed to protect the stereo and prevent damage from electrical faults. Understanding the purpose and function of the stereo fuse is crucial for troubleshooting and resolving audio system issues.
Locating the stereo fuse in different car models may vary, but it is commonly found in the fuse box under the dashboard or in the engine compartment. Consulting the car’s owner’s manual and following a step-by-step guide can help in finding and replacing the stereo fuse with ease.
When troubleshooting stereo fuse issues, it’s important to check for multiple fuses, inspect other components, disconnect accessories, examine wiring, and verify the correct fuse rating. If the problem persists, seeking assistance from a professional car audio technician is recommended.
By taking the time to understand the stereo fuse and following the necessary steps, you can effectively resolve audio system issues and enjoy uninterrupted music and entertainment while driving.
Remember, proper maintenance and regular checks of the stereo fuse and other electrical components are essential to ensure the longevity and optimal performance of your car’s audio system.
We hope this comprehensive guide has provided you with the knowledge and confidence to locate, replace, and troubleshoot stereo fuses in your car. Enjoy your music on the road!