Home>Events & Info>Podcast>How To Record A Podcast From 2 Locations

Podcast
How To Record A Podcast From 2 Locations
Modified: January 22, 2024
Learn how to record a podcast from two different locations with our step-by-step guide. Enhance your podcasting experience and reach a wider audience.
(Many of the links in this article redirect to a specific reviewed product. Your purchase of these products through affiliate links helps to generate commission for AudioLover.com, at no extra cost. Learn more)
Table of Contents
Introduction
Podcasts have become an increasingly popular medium for sharing information, stories, and entertainment. Whether you’re a seasoned podcaster or just starting out, the quality of your recordings plays a crucial role in capturing and retaining your audience’s attention. One challenge many podcasters face is recording from different locations, particularly when collaborating with co-hosts or guests who are not in the same physical space.
In this article, we will discuss how to overcome the hurdles of recording a podcast from two different locations. We will explore the equipment needed, setting up the recording space, choosing the right communication platform, establishing a reliable internet connection, microphone setup, adjusting audio levels, conducting a sound check, recording the podcast, post-production editing, and finalizing the podcast.
By following these steps, you can ensure that your podcast sounds professional and engaging, despite the geographical distance between you and your co-host or guest. So, let’s dive in and discover how you can record a podcast from two locations.
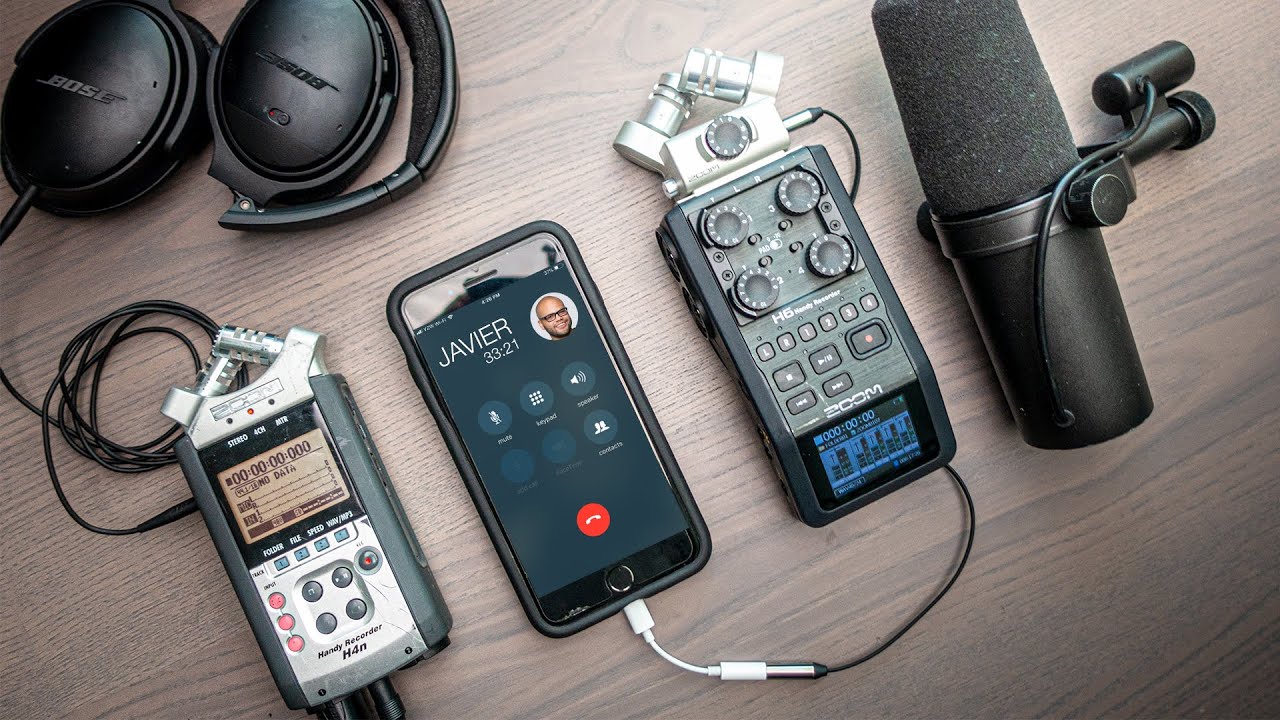
Equipment Needed
Before you start recording a podcast from two locations, it’s important to make sure you have the right equipment. Here are the essential tools you’ll need:
- Microphones: High-quality microphones are essential for clear and professional-sounding audio. Ideally, each participant should have their own microphone to minimize background noise and ensure consistent audio quality. USB microphones or XLR microphones with audio interfaces are popular choices for podcasters.
- Headphones: It’s crucial for all participants to wear headphones during the recording to prevent audio feedback and improve overall sound quality. Closed-back headphones are recommended to block out external noises.
- Computer or Laptop: You’ll need a reliable computer or laptop to host the podcast recording software and manage the audio files. Make sure your device has enough processing power and storage capacity.
- Audio Interface: If you’re using XLR microphones, you’ll need an audio interface to connect the microphones to your computer. An audio interface converts analog audio signals into digital signals for recording.
- Boom Arms or Stands: To position the microphones at the proper distance and angle, boom arms or microphone stands are useful. This ensures that everyone’s voice is captured clearly without straining their necks or arms.
- Pop Filters: Pop filters are essential for reducing plosive sounds caused by strong puffs of air hitting the microphone. They help to eliminate harsh popping sounds when pronouncing words with “P” or “B” sounds.
- Wired or Wireless Internet Connection: A stable internet connection is crucial for seamless communication between locations. Whether you choose a wired or wireless connection, ensure that it has sufficient bandwidth for audio transmission.
- Recording and Editing Software: There are various recording and editing software options available, ranging from free to paid. Find a user-friendly and reliable software that suits your needs, allowing you to record and edit your podcast episodes.
- Backup System: It’s important to have a backup system in place to prevent any loss of data in case of power outages or technical issues. Consider using an external hard drive or cloud storage to securely store your podcast files.
Having the right equipment can significantly enhance the audio quality of your podcast, creating a more enjoyable listening experience for your audience. Invest in reliable and high-quality gear to ensure professional results.
Setting Up the Recording Space
A well-prepared recording space is essential for achieving optimal sound quality in your podcast. Here are some steps to set up your recording space:
- Select a quiet and controlled environment: Find a room or area with minimal background noise. Choose a space with good sound insulation, such as a room with carpeting or foam soundproofing.
- Clear the area: Remove any objects that may cause unwanted vibrations or noises during the recording. Keep the space clean and free of clutter to prevent any distractions while recording.
- Position the microphones: Place the microphones on the boom arms or stands in front of each participant at a comfortable distance. Ensure that the microphones are positioned at the correct height and angle, typically around mouth level.
- Add acoustic treatment: If possible, incorporate acoustic treatment in your recording space to improve sound quality. This can include using foam panels or bass traps to reduce echo and control reverberation.
- Maintain proper microphone technique: Educate yourself and the participants on proper microphone technique. This includes speaking directly into the microphone, avoiding excessive movement or handling of the microphone, and maintaining a consistent distance from the microphone.
- Check for ambient noise: Before recording, listen carefully for any ambient noises, such as air conditioning, electrical hums, or outside traffic. Minimize or eliminate these noises as much as possible to ensure a clean recording.
- Use a visual cue system: Consider implementing a visual cue system, such as hand signals or a chat feature on your communication platform, to indicate when someone wants to speak. This helps prevent interruptions or overlapping speech during the recording.
- Test the recording space: Conduct a test recording to ensure that the audio quality is satisfactory. Listen back to the recording and make any necessary adjustments to the setup or acoustic treatment before starting the actual podcast recording.
By taking the time to properly set up your recording space, you can minimize audio issues, create a more professional sound, and deliver a better listening experience for your audience.
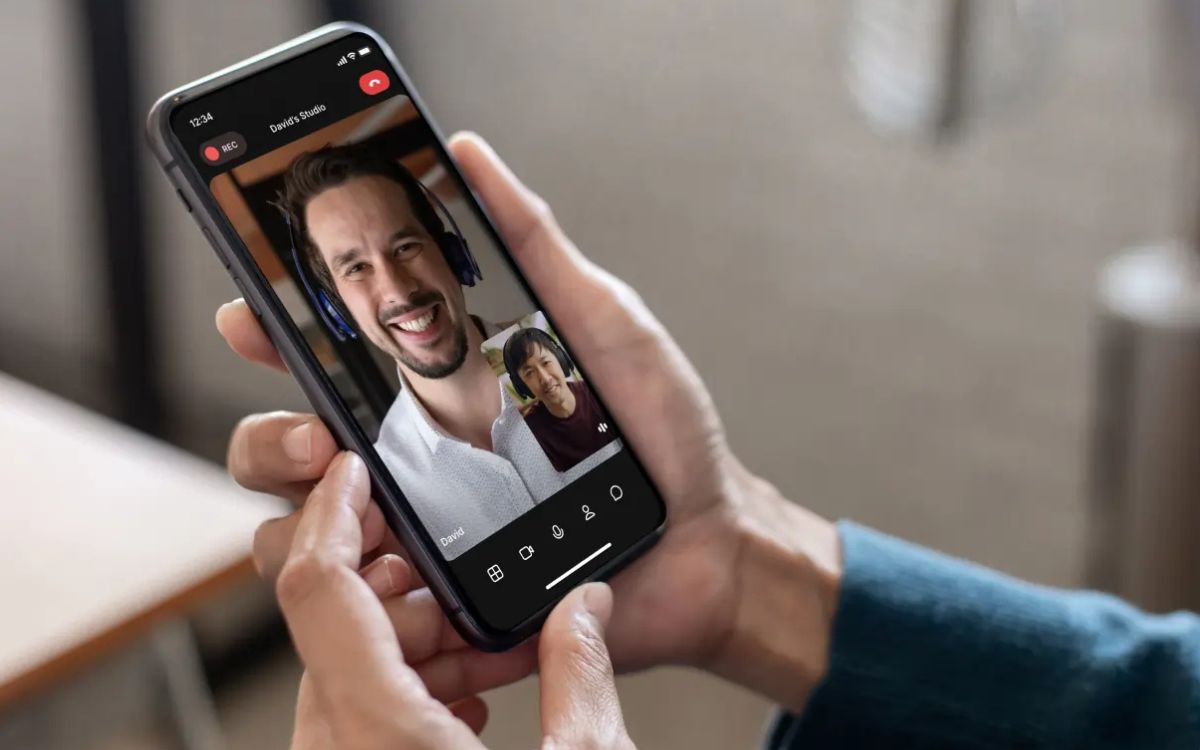
Choosing the Communication Platform
When recording a podcast from two different locations, choosing the right communication platform is crucial for seamless collaboration and clear communication. Here are some factors to consider when selecting a communication platform:
- Audio quality: Look for a platform that provides high-quality audio transmission, ensuring that your voices are clear and easily understandable. Consider platforms that prioritize audio fidelity and have features like noise reduction and echo cancellation.
- Reliability: Choose a platform that has a proven track record of reliability. You don’t want to experience any dropped calls or sudden disconnections during your podcast recording sessions. Look for platforms that offer stable connections even with varying internet speeds.
- Compatibility: Ensure that the chosen communication platform is compatible with the devices and operating systems being used by all participants. Whether it’s a web-based platform or requires a specific app, make sure everyone can easily access and use the platform without technical difficulties.
- Multiparty capabilities: Consider the number of participants you anticipate having on your podcast. Choose a platform that allows for multiple participants to join the conversation simultaneously without sacrificing audio quality or experiencing lag. Some platforms offer features like virtual rooms or group chat functions to enhance collaboration.
- Additional features: Explore the additional features and tools provided by the communication platform. Some platforms offer features like screen sharing, recording capabilities, chat functions, and integrations with audio editing software, which can streamline your podcasting workflow.
- User-friendly interface: Opt for a communication platform that has an intuitive and easy-to-use interface. This ensures a smooth experience for all participants and minimizes the learning curve, allowing you to focus on the content of your podcast rather than navigating complex software.
- Security and privacy: Evaluate the security and privacy measures implemented by the communication platform. It’s essential to choose a platform that safeguards your conversations and personal information. Look for end-to-end encryption and other security features to protect your podcast recordings.
- Cost: Consider your budget when selecting a communication platform. There are both free and paid options available, each with its own set of features and limitations. Assess the features you need and choose a platform that offers the best value for your specific requirements.
Research and try out different communication platforms to find the one that best suits your podcasting needs. Remember to prioritize audio quality, reliability, compatibility, and the availability of additional features to facilitate a seamless recording experience.
Establishing a Reliable Internet Connection
One of the key factors in recording a podcast from two different locations is having a reliable internet connection. A stable and fast internet connection ensures smooth communication and prevents any disruption during the recording process. Here are some steps to establish a reliable internet connection:
- Use a wired connection: Whenever possible, opt for a wired internet connection instead of relying on Wi-Fi. Ethernet connections tend to be more stable and have lower latency, reducing the chance of dropouts or interruptions during your podcast recording.
- Check your internet speed: Use an online speed test tool to check your internet speed. Aim for a minimum upload speed of 1 Mbps per participant to ensure sufficient bandwidth for audio transmission. If your current speed is insufficient, consider upgrading your internet plan.
- Reduce network congestion: Limit the number of devices connected to the same network during the podcast recording. Streaming videos, downloading large files, or using bandwidth-intensive applications in the background can consume valuable bandwidth and affect the quality of your internet connection.
- Minimize latency: Latency, or the delay in data transmission, can disrupt the flow of conversation during a podcast recording. Close unnecessary applications or browser tabs that may be consuming bandwidth and causing latency issues.
- Position yourself closer to the router: If using Wi-Fi, ensure that your recording space is in close proximity to your router. This reduces the chance of signal degradation and can result in a stronger and more reliable connection.
- Consider using a wired connection for critical participants: If one participant consistently experiences poor internet connectivity, consider using a wired connection for them. This can help ensure that their audio quality remains stable throughout the recording.
- Anticipate and mitigate potential issues: Prepare for potential internet issues by informing all participants to have a backup plan in case of an internet failure. This can include using a mobile hotspot, accessing a nearby Wi-Fi network, or rescheduling the recording session if necessary.
- Invest in a reliable router: If you frequently experience internet connectivity issues, consider upgrading your router to a more powerful and reliable model. A quality router can provide a stronger signal and improved stability for your recordings.
By following these steps, you can establish a reliable internet connection and minimize any disruptions during your podcast recording from different locations. A stable connection ensures smooth communication and allows you to focus on delivering valuable content without technical interruptions.
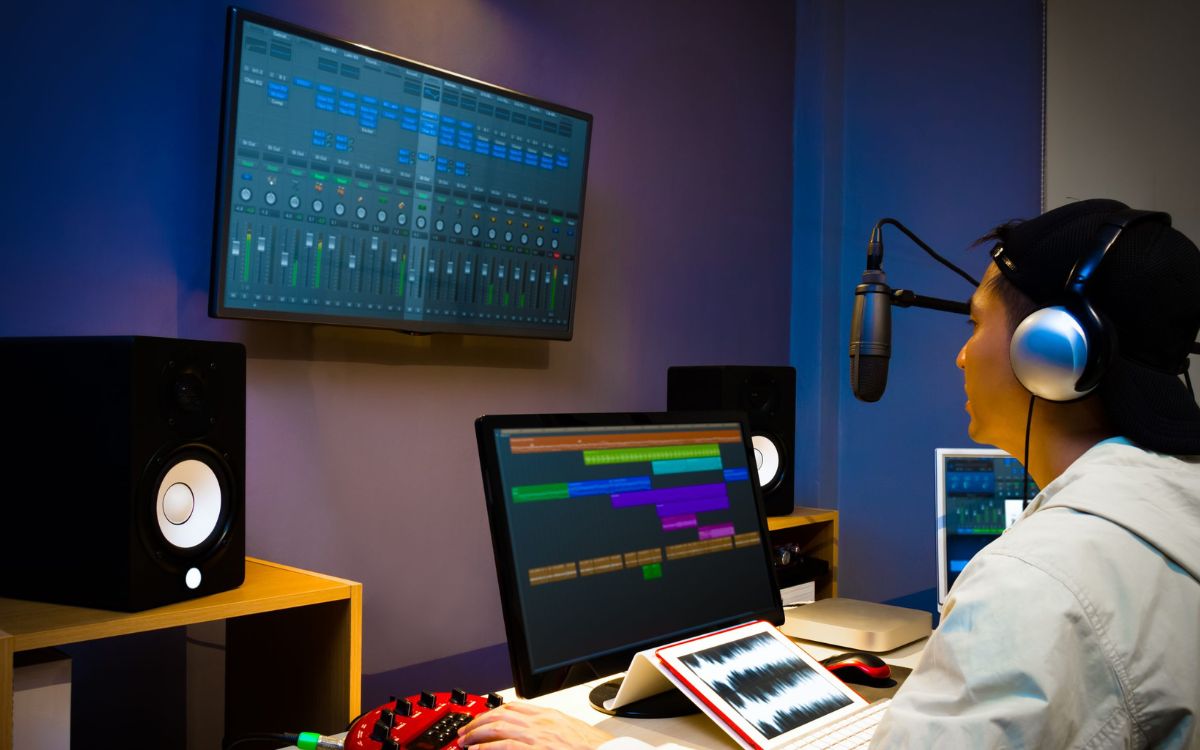
Microphone Setup
The quality of your microphone setup can greatly impact the overall sound quality of your podcast recording. Follow these steps to set up your microphones properly:
- Choose the right microphone: Select a high-quality microphone that suits your needs and budget. USB microphones are a popular choice for podcasters due to their ease of use and affordability, while XLR microphones offer professional-grade audio quality.
- Position the microphones correctly: Position the microphones at a comfortable distance from each participant. Typically, placing the microphone around 6-12 inches away from the speaker’s mouth helps capture clear and balanced sound. Adjust the height and angle to ensure optimal placement.
- Use a shock mount: A shock mount helps reduce vibrations and handling noise, resulting in cleaner audio recordings. Attach the microphones to shock mounts to minimize any unwanted noise that may occur if the microphones are accidentally bumped or jostled.
- Attach pop filters: Pop filters help minimize plosive sounds caused by bursts of air hitting the microphone when pronouncing certain sounds like “P” and “B.” Position the pop filters a few inches away from the microphone to effectively reduce these plosive noises without obstructing the voice.
- Control room reflections: If your recording space has reflective surfaces, such as bare walls or windows, place absorption panels or foam strategically around the microphones. This helps minimize echo and reverberation, resulting in a cleaner and more professional sound.
- Polar pattern selection: Some microphones offer different pickup patterns, such as cardioid, omnidirectional, or bidirectional. Choose the appropriate polar pattern based on your recording setup. Cardioid microphones are commonly used for individual recordings, while omnidirectional or bidirectional microphones are suitable for group recordings with multiple participants.
- Adjust microphone gain: Set the microphone gain at an appropriate level to avoid clipping or distortion. Too high of a gain can result in audio distortion, while a low gain may produce soft or muffled audio. Test the microphone levels and adjust the gain accordingly.
- Monitor audio through headphones: Have all participants wear headphones to monitor the audio during the recording. This allows you to catch any potential audio issues, adjust levels, and ensure that everyone sounds clear and balanced.
By following these microphone setup tips, you can achieve high-quality audio recordings for your podcast. Take the time to position and adjust the microphones properly to capture the best sound from all participants and deliver an engaging listening experience for your audience.
Adjusting Audio Levels
Adjusting the audio levels of your podcast recording is crucial to ensure that all participants’ voices are clear and balanced. Here are some steps to help you adjust the audio levels effectively:
- Use headphones: Have all participants wear headphones during the recording to accurately monitor the audio levels. This allows you to hear any imbalances or issues in real-time and make the necessary adjustments.
- Start with individual microphone levels: Begin by having each participant speak individually into their respective microphones. This allows you to set the initial levels for each microphone based on the volume of their voice. Aim for a consistent level across all participants.
- Utilize the audio interface or recording software: Adjust the input gain settings on your audio interface or through your recording software. This controls the sensitivity of the microphone and the volume of the input signal. Gradually increase or decrease the gain until the audio level is optimized and free from distortion.
- Use audio meters: Take advantage of the audio meters in your recording software to visually monitor the audio levels. Watch for any peaks or clipping in the meters, which indicate that the input signal is too loud. Adjust the gain accordingly to prevent distortion.
- Consider dynamic range: Pay attention to the dynamic range of the audio. Ensure that the softer parts of the conversation are still audible without being overpowered by louder segments. Adjust the gain to achieve a balanced and natural dynamic range.
- Have participants speak at similar volume: During the recording, encourage participants to speak at a similar volume. If one person’s voice is significantly louder or softer than others, adjust their microphone level accordingly to maintain a uniform sound.
- Perform periodic audio checks: Take breaks during the recording session to listen back to the recorded audio and make necessary adjustments. This helps ensure that the audio levels remain consistent throughout the podcast episode.
- Leave some headroom: It’s important to leave some headroom when adjusting audio levels. Avoid maximizing the volume to the point of constant peak levels. Leaving some headroom prevents distortion and clipping during loud moments in the podcast.
By following these steps and regularly monitoring the audio levels, you can achieve a well-balanced and professional sound for your podcast. Properly adjusted audio levels create a more enjoyable listening experience and improve the overall quality of your recordings.
Conducting a Sound Check
Conducting a sound check before starting the podcast recording is essential to ensure that all audio components are working properly and that the sound quality is optimized. Follow these steps to conduct an effective sound check:
- Check microphone connections: Verify that all microphones are properly connected to their respective audio interfaces or computer inputs. Ensure that the cables are secure and not causing any connection issues.
- Test microphone functionality: Take a moment to test each microphone individually. Have each participant speak into their microphone while monitoring the audio levels. Listen for any distortion, background noise, or technical issues that may need to be addressed.
- Verify headphone functionality: Ensure that all participants can hear the audio through their headphones. Check for any audio glitches, distortion, or uneven volume levels. Resolve any headphone connectivity or audio playback issues before proceeding.
- Check recording software settings: Review the settings of your recording software. Confirm that the correct audio inputs are selected for each microphone. Adjust any necessary settings, such as sample rate or recording format, to match your desired specifications.
- Test audio playback: Play back a recorded segment or a previous podcast episode to ensure that the audio playback is clear and consistent. Listen for any abnormalities or artifacts in the audio quality.
- Listen for ambient noise: Observe and identify any background noise or interference that may affect the overall sound quality. Listen for distractions such as fans, air conditioning, computer hum, or external noises coming from either location.
- Adjust microphone positions if necessary: If certain participants’ voices are too soft or too loud compared to others, adjust the microphone positions or gain settings accordingly to achieve a balanced sound.
- Repeat the sound check process: After making any adjustments, conduct a second sound check to ensure that the changes have resulted in improved audio quality. Make any additional modifications as needed.
- Ask for feedback from participants: Communicate with all participants to gather their input on the sound quality. Confirm that they can hear each other clearly and that their own voices sound natural. Address any concerns or issues that arise during the sound check.
A thorough sound check helps identify and address any technical or audio quality problems before the actual podcast recording begins. Taking the time to ensure optimal sound during the sound check will contribute to a smoother recording process and improve the overall listening experience for your audience.
Recording the Podcast
Now that you have completed the necessary preparations, it’s time to start recording your podcast from two different locations. Follow these steps to ensure a successful recording session:
- Introduce the podcast: Begin the recording by introducing the podcast, stating the episode number and title, and providing a brief overview of the topics you’ll be discussing.
- Set the tone and energy: Establish the desired tone and energy for the episode. Communicate with the participants to ensure everyone is on the same page regarding the vibe and engagement level.
- Follow a structured outline or script: Have an outline or script prepared to guide the conversation. This helps maintain flow and ensures that all planned topics and segments are covered.
- Allow space for organic conversation: While it’s important to follow the outline, also allow room for spontaneous discussions and natural conversation. This can add authenticity and keep the podcast engaging for listeners.
- Monitor audio levels throughout the recording: Keep an eye on the audio levels during the recording to ensure that the sound remains balanced. Make any necessary adjustments to individual microphone levels or the overall mix as needed.
- Speak clearly and at a consistent volume: Encourage all participants to speak clearly and project their voices. Remind everyone to maintain a consistent volume to avoid audio imbalances and ensure that all voices are easily heard.
- Use visual cues for smooth conversation flow: Utilize visual cues, such as hand signals or a chat feature on your communication platform, to prevent participants from interrupting or speaking over each other. This promotes a smoother and more organized conversation.
- Take breaks when necessary: If the recording is lengthy or intense, schedule short breaks to allow participants to rest and recharge. This helps maintain energy levels and ensures the quality of the content.
- Handle technical issues calmly: In the event of technical difficulties or interruptions, remain calm and address the issues promptly. Pause the recording if necessary to troubleshoot and resolve any technical problems before resuming.
- Encourage engagement and active listening: Foster an environment where all participants actively engage in the conversation. Encourage active listening, respectful communication, and active participation to create an engaging and dynamic podcast episode.
- Conclude the podcast: Wrap up the podcast by summarizing the main points discussed and providing any closing remarks. Mention any upcoming episodes or call-to-action for listeners, such as subscribing or leaving a review.
Recording a podcast from two different locations requires coordination and communication between participants. By following these steps and maintaining a clear and organized recording process, you can produce a high-quality podcast episode that captivates your audience.
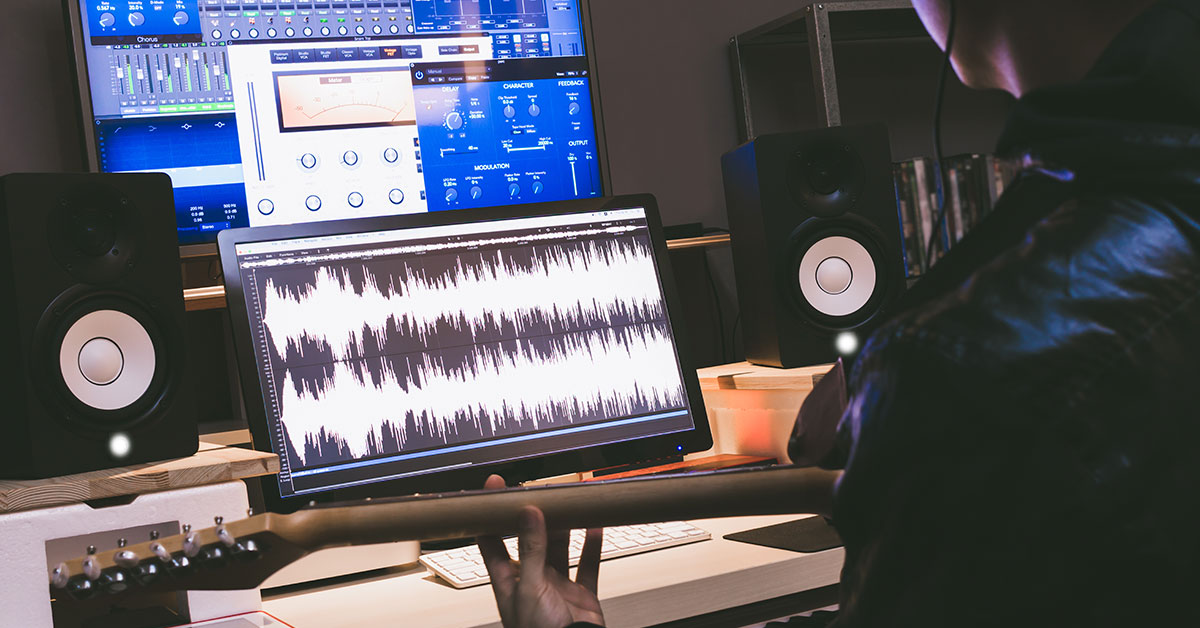
Post-Production Editing
After completing the recording, it’s time to enhance the audio and fine-tune your podcast episode through post-production editing. Follow these steps to ensure a polished final product:
- Organize and backup your files: Gather all the recorded audio files and create a backup to prevent any accidental loss. This ensures that you have a copy of the original recordings for future reference.
- Import the audio files into editing software: Use your chosen audio editing software to import the recorded audio files. Familiarize yourself with the editing tools and features available in the software.
- Remove background noise: Listen carefully to the recorded audio and identify any background noise or unwanted sounds. Use noise reduction tools or filters in your editing software to minimize or remove these distractions.
- Edit out pauses and interruptions: Review the recording and edit out any long pauses, interruptions, or irrelevant segments of conversation. This helps maintain a smooth and succinct flow in the final podcast episode.
- Adjust audio levels: Normalize the audio levels across all participants to ensure a consistent volume. Use compression techniques to balance out any discrepancies in volume between speakers.
- Trim and edit conversations: Trim any unnecessary or repetitive content to keep the podcast focused and engaging. Remove any instances of cross-talk or overlapping speech to improve clarity and comprehension.
- Add music and sound effects: Incorporate music tracks or sound effects to enhance the overall listening experience. Select appropriate music and effects that suit the tone and theme of your podcast.
- Apply EQ, reverb, and other audio enhancements: Utilize equalization (EQ) tools to adjust the frequency balance of the audio, enhancing the clarity and richness of voices. Consider adding subtle reverb or ambiance to create a more professional and immersive sound.
- Integrate transitions: Smoothly transition between segments or topics by adding fade-ins, fade-outs, or crossfades. This helps create a seamless flow between different parts of the podcast episode.
- Add show notes and timestamps: Include relevant show notes or timestamps in the podcast description or episode description. This helps listeners navigate the episode and find specific topics of interest.
- Export the final podcast episode: Once you’re satisfied with the edits, export the final podcast episode in the desired format (e.g., MP3). Pay attention to the required specifications for file format, sample rate, and bit rate based on your hosting platform’s guidelines.
Post-production editing plays a crucial role in refining the overall sound and structure of your podcast episode. With careful editing and attention to detail, you can create a polished and professional product that captivates and engages your audience.
Finalizing the Podcast
After completing the post-production editing, it’s time to finalize your podcast episode and prepare it for distribution. Follow these steps to ensure a professional and polished final product:
- Review the edited episode: Take the time to listen to the fully edited podcast episode from start to finish. Pay attention to any remaining audio issues, transitions, or any other details that may need adjustment.
- Observe the episode length: Consider the optimal length for your podcast episode. Ensure that the episode is concise and engaging, holding the attention of your audience throughout its duration. Remove any unnecessary content that may make the episode too long or digressive.
- Include your podcast intro and outro: Add your podcast’s intro and outro to the episode. The intro should include your show’s name, a brief description, and any other branding elements. The outro can contain a reminder to subscribe, leave a review, or mention upcoming episodes.
- Review show notes and timestamps: Double-check the show notes and timestamps that provide an overview of the topics covered in the episode. Ensure the accuracy and relevancy of the information to help listeners navigate through the episode.
- Write a compelling episode description: Craft an engaging and informative episode description that entices potential listeners. Highlight the main topics discussed and include any relevant guest information or special features.
- Edit the ID3 tags and artwork: Update the ID3 tags of the episode with appropriate metadata, such as episode title, artist name, and episode number. Also, ensure that the podcast artwork is correctly displayed for the episode.
- Select podcast episode keywords and tags: Choose relevant keywords and tags for the episode to improve its discoverability in search engines and podcast directories. Use keywords that accurately represent the content and focus of the episode.
- Upload the episode to your hosting platform: Upload the finalized episode to your chosen podcast hosting platform. Follow the platform’s guidelines for formatting, file size, and metadata requirements.
- Publish and promote the episode: Once the episode is uploaded, schedule the release date and make it live. Share the episode on your social media platforms, website, or through newsletter updates to generate excitement and drive listeners to tune in.
- Engage with your audience: Encourage your listeners to provide feedback and interact with your podcast. Respond to comments, reviews, and messages to foster a sense of community and build relationships with your audience.
- Monitor and analyze performance: Track the performance of your podcast episode using analytics provided by your hosting platform. Analyze listener statistics, engagement levels, and feedback to gain insights and refine future episodes.
By following these steps, you can ensure that your podcast episode is finalized and ready for distribution. Take pride in your work and celebrate the completion of each episode as you continue to deliver valuable content to your audience.
Conclusion
Recording a podcast from two different locations may present some challenges, but with the right equipment, setup, communication platform, and attention to detail, it can be a seamless and rewarding process. By following the steps outlined in this article, you can ensure a professional and engaging podcast that resonates with your audience.
Start by acquiring the necessary equipment, such as high-quality microphones, headphones, and a reliable internet connection. Set up your recording space to minimize background noise and optimize sound quality. Choose a communication platform that offers clear audio transmission and multiparty capabilities.
Once everything is in place, conduct a sound check to confirm that all audio components are functioning correctly. Adjust microphone levels, trim irrelevant content, and apply post-production editing techniques to enhance the audio quality and create a polished final product.
Take the time to finalize your podcast episode by reviewing the edited version, adding your show’s intro and outro, crafting a compelling episode description, and optimizing metadata. Upload the episode to your chosen hosting platform, promote it through various channels, and engage with your audience to build a sense of community and gather feedback.
Remember, the key to a successful podcast lies in the content and the connection you establish with your listeners. Putting effort into recording from different locations demonstrates your dedication to delivering valuable content while overcoming logistical obstacles.
As you continue to record podcasts from two locations, always strive for improvement and innovation. Learn from each episode, and adapt your practices to enhance the overall quality of your podcast.
So, gear up, set up the microphones, overcome the geographical barriers, and start creating impactful and compelling podcasts that captivate your audience, no matter the distance.