Home>Devices & Equipment>Earbuds>Why Is One Of My Raycon Earbuds Not Working


Earbuds
Why Is One Of My Raycon Earbuds Not Working
Modified: January 22, 2024
Discover why one of your Raycon Earbuds is not working and find solutions to fix the issue. Troubleshoot your Earbuds with our helpful tips and tricks.
(Many of the links in this article redirect to a specific reviewed product. Your purchase of these products through affiliate links helps to generate commission for AudioLover.com, at no extra cost. Learn more)
Table of Contents
Introduction
When it comes to enjoying your favorite music or podcasts on the go, a pair of reliable earbuds is essential. Unfortunately, even the best earbuds can sometimes encounter issues, and one of the most frustrating problems is when one of them stops working. Whether it’s a lack of sound, a connectivity issue, or any other malfunction, the experience can be incredibly disappointing.
In this article, we will walk you through the troubleshooting steps to help you fix the problem of one of your Raycon earbuds not working. Raycon is known for producing high-quality wireless earbuds that offer excellent sound performance and comfort. But like any electronic device, they are not immune to occasional glitches. Fortunately, you can try a few simple steps before resorting to more drastic measures.
By following the troubleshooting steps outlined in this article, you can increase the chances of getting your Raycon earbuds up and running again. Before we dive into the solutions, it’s important to note that these steps can apply to most Raycon earbud models, including the popular E25, E55, and E100 series.
So, if you’re ready to troubleshoot the issue and revive your one-sided sound experience, let’s get started with the first step: checking the battery level.
Troubleshooting Steps
When faced with the problem of one of your Raycon earbuds not working, it’s important to go through a series of troubleshooting steps to identify and resolve the issue. By following these steps, you can determine whether the problem is due to a simple technical glitch or a more serious hardware malfunction.
Here are the troubleshooting steps you can take to address the issue:
- Checking the Battery Level: The first and simplest step is to ensure that your earbuds have sufficient battery power. Make sure both earbuds are fully charged, as an imbalance in battery levels can result in only one earbud working. You can check the battery level either through the LED indicator on the earbuds or via the companion app if your Raycon earbuds have one.
- Resetting the Earbuds: If checking the battery level doesn’t solve the problem, the next step is to reset your Raycon earbuds. Different models have different reset procedures, so refer to the user manual or the Raycon website for specific instructions. Resetting the earbuds can often resolve connectivity issues and restore proper functioning.
- Cleaning the Earbuds: Sometimes, the problem may not lie with the electronic components but rather with dirt or debris lodged in the earbuds. Gently clean the earbuds using a soft, dry cloth to remove any dirt or wax buildup. Be careful not to use any liquid or cleaning agents that could damage the earbuds.
- Ensuring Proper Pairing: In some cases, the issue may be due to improper pairing between the earbuds and your device. Check the Bluetooth settings on your device and make sure that both earbuds are correctly connected. You may need to unpair and repair the earbuds to establish a stable connection.
- Updating Firmware (if applicable): Firmware updates can sometimes address bugs or software compatibility issues that could cause one earbud to stop working. Check the Raycon website or contact customer support to see if there are any available firmware updates for your specific earbud model.
- Contacting Customer Support: If none of the previous steps resolve the issue, it’s time to reach out to Raycon’s customer support. Explain the problem you are facing with your earbuds, and they will be able to provide further assistance and guide you through any additional troubleshooting steps or warranty claims.
By going through these troubleshooting steps, you will have a good chance of resolving the issue of one of your Raycon earbuds not working. Remember to be patient and follow the instructions carefully. With a little troubleshooting, you can get back to enjoying your favorite audio content with both earbuds fully functional.
Checking the Battery Level
One of the first things to check when facing the issue of one of your Raycon earbuds not working is the battery level. Low battery power can often be the culprit behind a malfunctioning earbud. Here’s how you can check the battery level:
- Start by placing both earbuds in their respective charging case and make sure the case is properly charged as well.
- Once the earbuds are securely placed in the case, check the LED indicator on the case. A solid green light indicates that the earbuds have a sufficient charge, while a red light means the battery is low and needs to be charged.
- If the LED light shows a low battery level, connect the charging case to a power source using the provided charging cable and allow the earbuds to charge for a while.
- After the earbuds have been fully charged, remove them from the case and try using them again to see if both earbuds are functioning properly.
If the battery level was indeed the issue, charging the earbuds should restore their functionality. However, if the problem persists even after charging, there may be a different underlying cause.
It’s essential to maintain regular charging habits to ensure uninterrupted use of your Raycon earbuds. Make it a habit to charge the earbuds after every use or whenever the battery level gets low. This will help prevent future issues with one of the earbuds not working.
If the battery level isn’t the problem, it’s time to move on to the next troubleshooting step: resetting the earbuds.
Resetting the Earbuds
If checking the battery level didn’t resolve the issue of one of your Raycon earbuds not working, the next step is to reset the earbuds. Resetting the earbuds can help resolve connectivity issues and restore them to their default settings. Here’s how you can reset your Raycon earbuds:
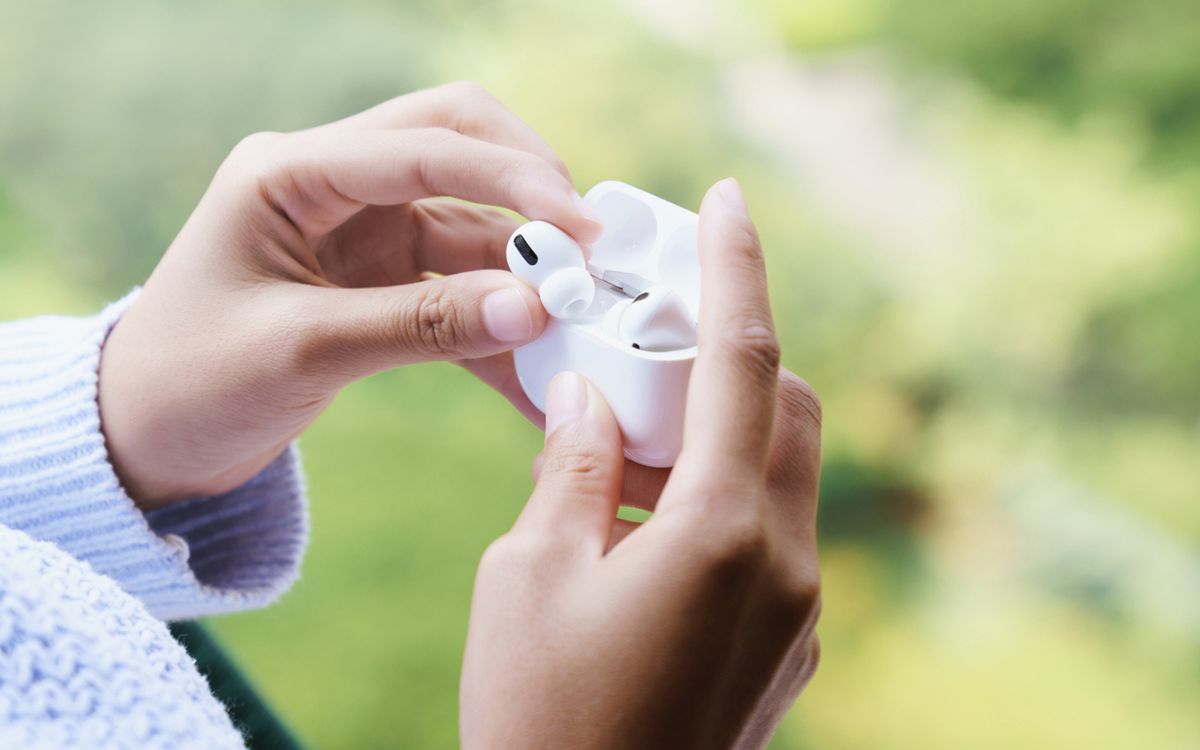
- Start by placing both earbuds back into the charging case and ensure they are properly seated.
- Close the lid of the charging case and leave the earbuds inside.
- Locate the small reset button on the charging case. The location of the reset button may vary depending on the model, so refer to the user manual or Raycon’s website for specific instructions.
- Using a small pin or toothpick, press and hold the reset button for about 10 seconds. Keep the button pressed until you see the LED indicator on the charging case flash or change color.
- Release the reset button and open the lid of the charging case.
- Now, take out both earbuds from the charging case and try pairing them with your device again.
Resetting the earbuds clears any stored connections and resets them to their factory settings, which can often resolve connectivity issues and restore functionality. After the reset, make sure to follow the pairing instructions provided in the user manual or on the Raycon website to properly connect the earbuds to your device.
If the problem of one earbud not working persists even after resetting, it’s time to move on to the next troubleshooting step: cleaning the earbuds.
Cleaning the Earbuds
If you’re still facing the problem of one of your Raycon earbuds not working after checking the battery level and resetting them, the issue may be due to dirt or debris obstructing the earbuds. Cleaning the earbuds can help restore functionality by removing any buildup that may be interfering with the audio output. Here’s how you can clean your Raycon earbuds:
- Start by removing both earbuds from the charging case and giving them a visual inspection. Look for any visible dirt, wax, or debris that may be blocking the sound vents or interfering with the charging contacts.
- Gently wipe the surface of the earbuds using a soft, lint-free cloth. Do not use any liquid cleaners or harsh chemicals as they can damage the earbuds.
- For more stubborn dirt or wax buildup, you can use a soft-bristled brush or a cotton swab dipped in isopropyl alcohol. Be careful not to apply excessive pressure or allow any liquid to enter the earbud’s openings.
- If your Raycon earbuds come with detachable ear tips, remove them and clean them separately using a mild soap solution. Rinse and dry them thoroughly before reattaching them to the earbuds.
- Once the earbuds and ear tips are clean and dry, re-insert the earbuds into the charging case and then take them out again. This can help remove any residual debris or moisture.
Regular cleaning of your earbuds is essential to maintain their performance and prolong their lifespan. It’s recommended to clean them periodically or whenever you notice a decrease in audio quality or connectivity.
If cleaning the earbuds didn’t resolve the issue, it’s time to move on to the next troubleshooting step: ensuring proper pairing.
Ensuring Proper Pairing
If you’re still experiencing the problem of one of your Raycon earbuds not working after checking the battery, resetting them, and cleaning them, the issue may be related to improper pairing. Ensuring that both earbuds are correctly paired with your device is crucial for optimal functionality. Here’s how you can ensure proper pairing:
- Start by removing both earbuds from the charging case and make sure they are powered on.
- Check your device’s Bluetooth settings and make sure Bluetooth is enabled.
- Look for the name of your Raycon earbuds in the list of available Bluetooth devices. It should appear as the model name or a similar identifier.
- If you see only one of the earbuds listed, select it and try connecting it to your device.
- If the initially connected earbud works fine, proceed to the next step. But if it’s still not functioning properly, try unpairing and repairing both earbuds.
- If both earbuds are listed separately in the Bluetooth settings, select the “Pair” or “Connect” option for each of them. Make sure to follow any on-screen instructions or prompts to complete the pairing process.
- Once both earbuds are successfully paired, test them to ensure that both are working properly.
Proper pairing is essential to ensure that audio signals are routed correctly to each earbud and that both receive the necessary data for optimal performance. Sometimes, when only one earbud is paired or connected, it can result in audio imbalance or one earbud not working at all.
If ensuring proper pairing doesn’t resolve the issue, it’s time to move on to the next troubleshooting step: updating the firmware (if applicable).
Updating Firmware (if applicable)
If you have tried all the previous troubleshooting steps and are still facing the problem of one of your Raycon earbuds not working, it’s worth checking if there are any firmware updates available. Firmware updates can address bugs, improve performance, and fix compatibility issues. Here’s how you can update the firmware of your Raycon earbuds:
- Visit the official Raycon website or refer to the user manual to check if there are any firmware updates available for your specific earbud model.
- If a firmware update is available, download the firmware file onto your computer or mobile device.
- Make sure that your Raycon earbuds are fully charged and connected to your device via Bluetooth.
- Open the companion app (if available) or the firmware update tool provided by Raycon.
- Follow the on-screen instructions to initiate the firmware update process. This may involve connecting the earbuds to your device or selecting the downloaded firmware file.
- Allow the firmware update to complete. This may take a few minutes, and it’s important to keep the earbuds connected and undisturbed during the process.
- Once the firmware update is finished, test your Raycon earbuds to see if both are working properly.
Updating the firmware can often resolve software-related issues that may be causing one earbud to stop working. It’s always recommended to keep your earbuds up to date with the latest firmware releases to ensure optimal performance and compatibility with your devices.
If updating the firmware doesn’t fix the problem, it’s time to reach out to Raycon’s customer support for further assistance.
Contacting Customer Support
If you have gone through all the previous troubleshooting steps and are still facing the issue of one of your Raycon earbuds not working, it’s time to reach out to Raycon’s customer support. They have trained professionals who can provide further assistance and guide you through any additional troubleshooting steps or warranty claims.
Before contacting customer support, make sure you have the following information ready:
- Model number and serial number of your Raycon earbuds (can usually be found on the charging case or the earbuds themselves).
- A detailed description of the issue you are experiencing, including any error messages or specific symptoms.
- Any troubleshooting steps you have already tried and their results.
- The date of purchase and the place of purchase (if applicable).
Once you have gathered all the necessary information, you can reach out to Raycon’s customer support through their website, email, or phone. Explain the problem you are facing with your earbuds, provide the requested details, and they will assist you in resolving the issue.
Raycon’s customer support team is dedicated to ensuring customer satisfaction and will do their best to help you get your earbuds working properly again. They may be able to offer further troubleshooting steps, repair options, or even a replacement if your earbuds are still under warranty.
Remember to be patient and cooperative throughout the process, as resolving technical issues may take some time. Stay in regular communication with customer support and follow their guidance to get the best possible outcome.
Finally, if all else fails, and your earbuds are out of warranty or cannot be fixed, you may consider purchasing a new pair of Raycon earbuds or exploring other options available in the market.
Conclusion
Dealing with the problem of one of your Raycon earbuds not working can be frustrating, but through the troubleshooting steps outlined in this article, you can increase the chances of resolving the issue and getting your earbuds back to optimal functionality.
We started by checking the battery level and ensuring both earbuds were properly charged. Then, we moved on to resetting the earbuds, cleaning them, and ensuring proper pairing. If those steps didn’t solve the problem, we explored the option of updating the firmware (if applicable). Finally, if all else fails, contacting Raycon’s customer support can provide you with additional assistance and potential warranty solutions.
Remember to follow the instructions provided for your specific earbud model and exercise patience throughout the troubleshooting process. Technical issues can sometimes take time to diagnose and resolve.
If none of the troubleshooting steps work, it may be time to consider purchasing a new pair of Raycon earbuds or exploring alternative options in the market.
Keep in mind that maintaining regular cleaning habits, charging your earbuds after each use, and staying updated with firmware releases can help prevent future issues and ensure the longevity of your Raycon earbuds.
We hope this guide has been helpful in getting your Raycon earbuds back to full working order, allowing you to enjoy your favorite music, podcasts, and more with both earbuds delivering an immersive audio experience.

