Home>Devices & Equipment>Music Box>How To Fix A Snow Globe Music Box
Music Box
How To Fix A Snow Globe Music Box
Modified: January 22, 2024
"Learn effective methods to repair your snow globe music box and bring back its enchanting melodies. Discover how to fix common issues with your music box, including broken mechanisms and loose parts. Dive into the world of music box restoration and keep your favorite trinket playing beautiful tunes for years to come."
(Many of the links in this article redirect to a specific reviewed product. Your purchase of these products through affiliate links helps to generate commission for AudioLover.com, at no extra cost. Learn more)
Table of Contents
- Introduction
- Understanding the Snow Globe Music Box
- Common Issues with Snow Globe Music Box
- Tools and Materials Needed
- Step 1: Opening the Snow Globe
- Step 2: Checking the Musical Mechanism
- Step 3: Repairing or Replacing the Musical Mechanism
- Step 4: Inspecting the Glass Globe
- Step 5: Fixing a Leak or Water Damage
- Step 6: Reassembling the Snow Globe
- Conclusion
Introduction
Snow globe music boxes are enchanting and delicate treasures that bring joy and nostalgia to many. These whimsical decorations combine the beauty of a glass globe filled with glittering snow and a charming musical mechanism that plays a delightful melody. However, like any intricate item, snow globe music boxes may encounter problems over time.
Whether it’s a broken musical mechanism, a leaky globe, or damage to the internal components, knowing how to fix a snow globe music box can save you from the disappointment of losing a beloved keepsake. In this article, we will guide you through the process of troubleshooting and repairing common issues that you may encounter.
Before diving into the repair process, it’s important to note that fixing a snow globe music box requires patience, attention to detail, and a gentle touch. These delicate objects are often sentimental and hold sentimental value, so it’s crucial to handle them with care throughout the repair process.
Now, let’s explore the intricacies of snow globe music boxes and learn how to address some of the most common issues that may arise.
Understanding the Snow Globe Music Box
A snow globe music box is a captivating decorative item that combines a traditional music box mechanism with a glass globe filled with water and suspended particles, often shaped like snowflakes or glitter. When you wind up the music box, it activates the internal mechanism, which causes the suspended particles to swirl around, creating the illusion of falling snow.
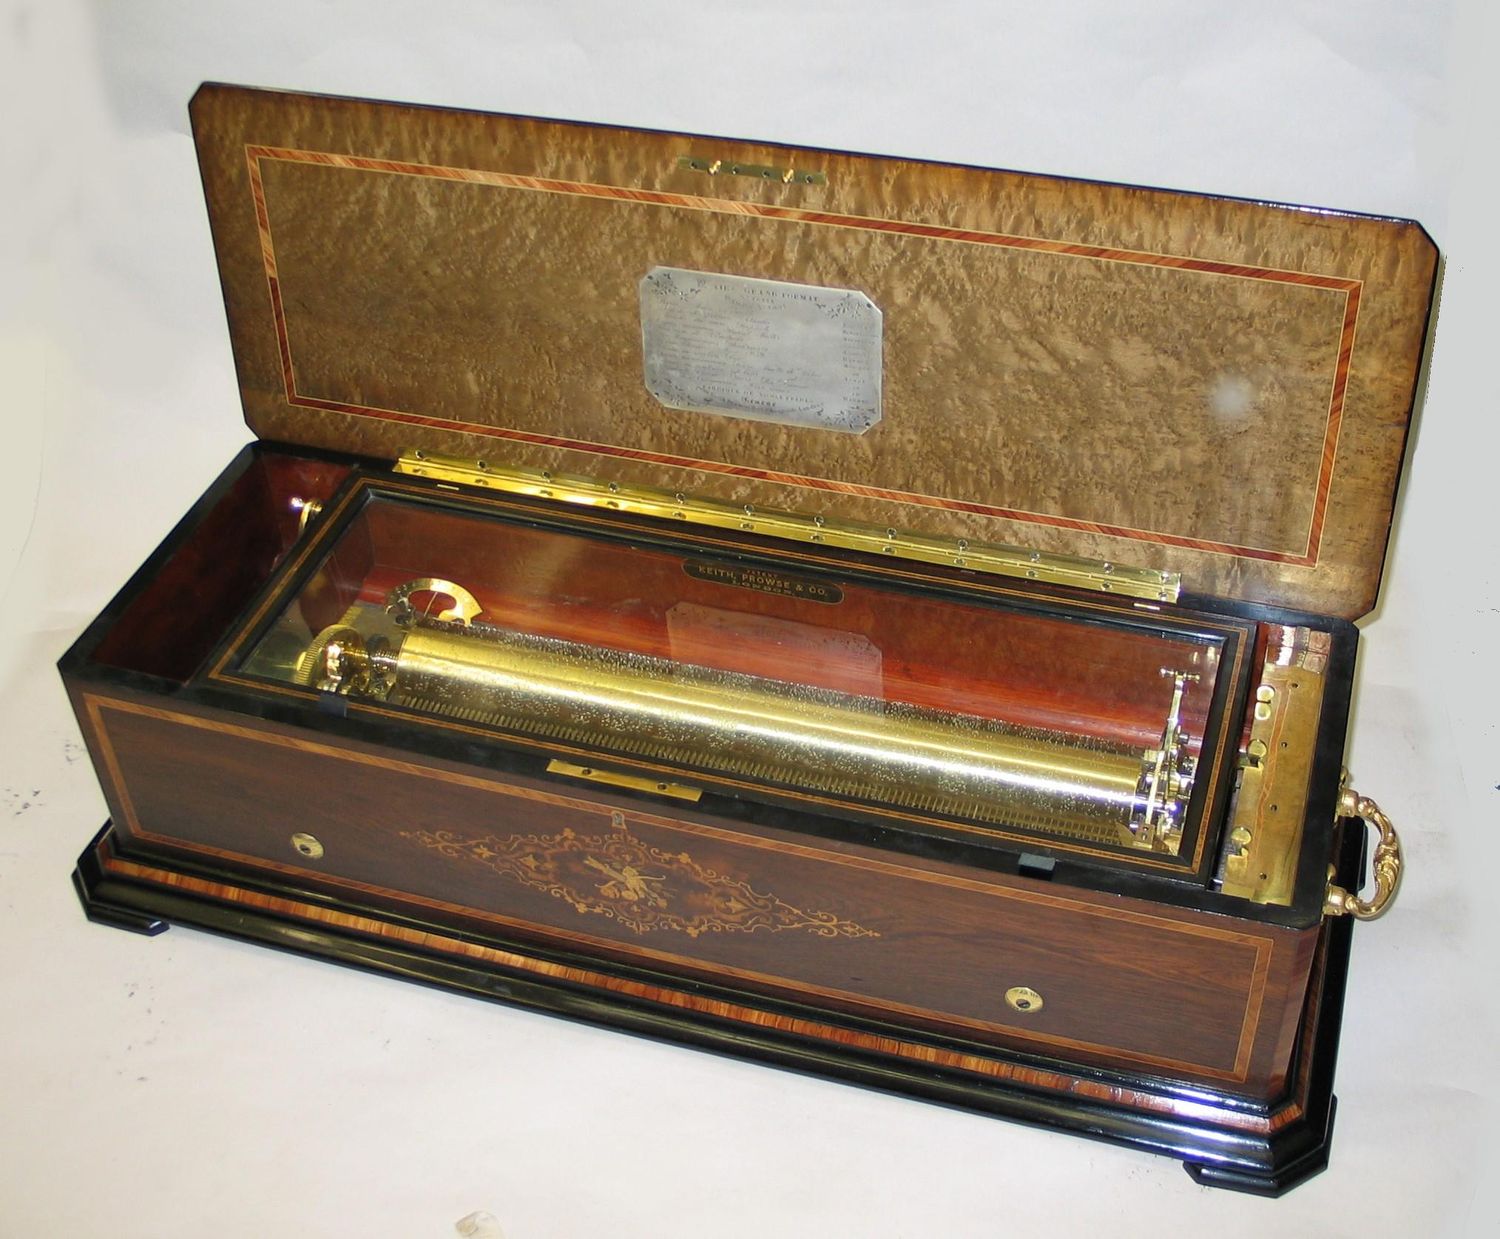
These music boxes come in various designs and themes, ranging from classic holiday scenes to whimsical figurines and iconic landmarks. They are typically comprised of three main components: the glass globe, the musical mechanism, and the base. The glass globe holds the water and suspended particles, while the musical mechanism, usually located in the base, controls the music and movement.
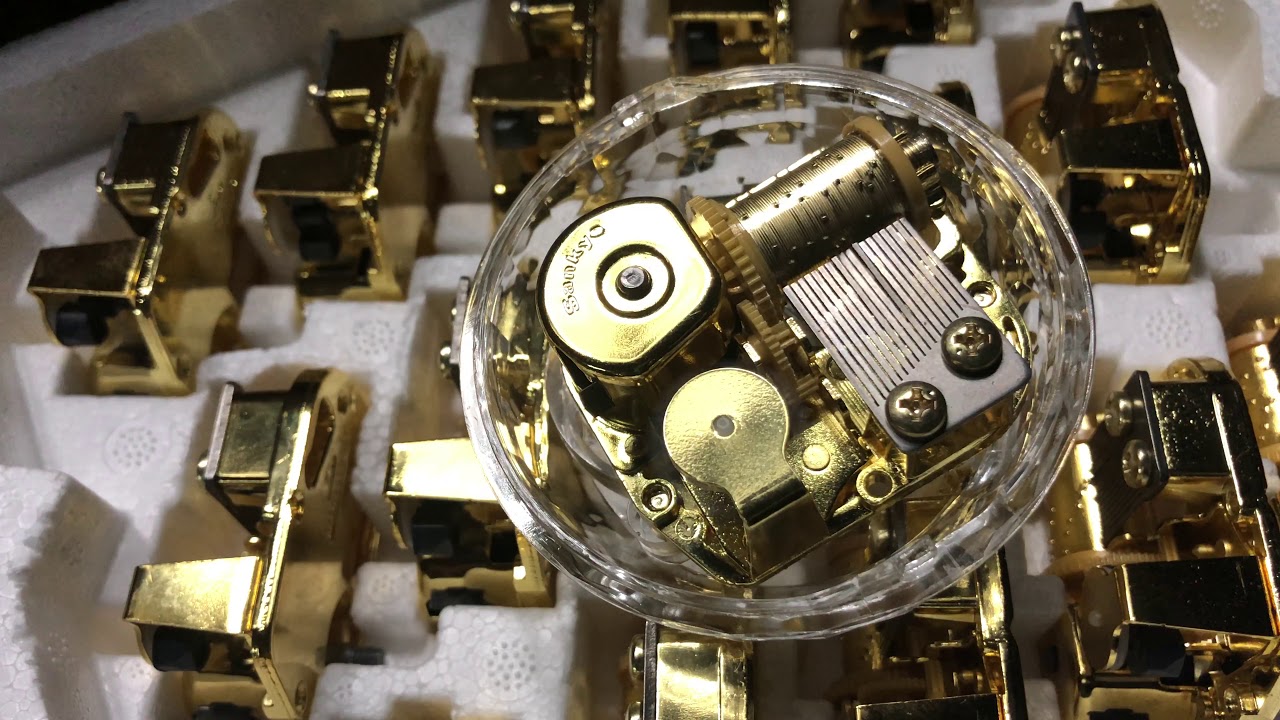
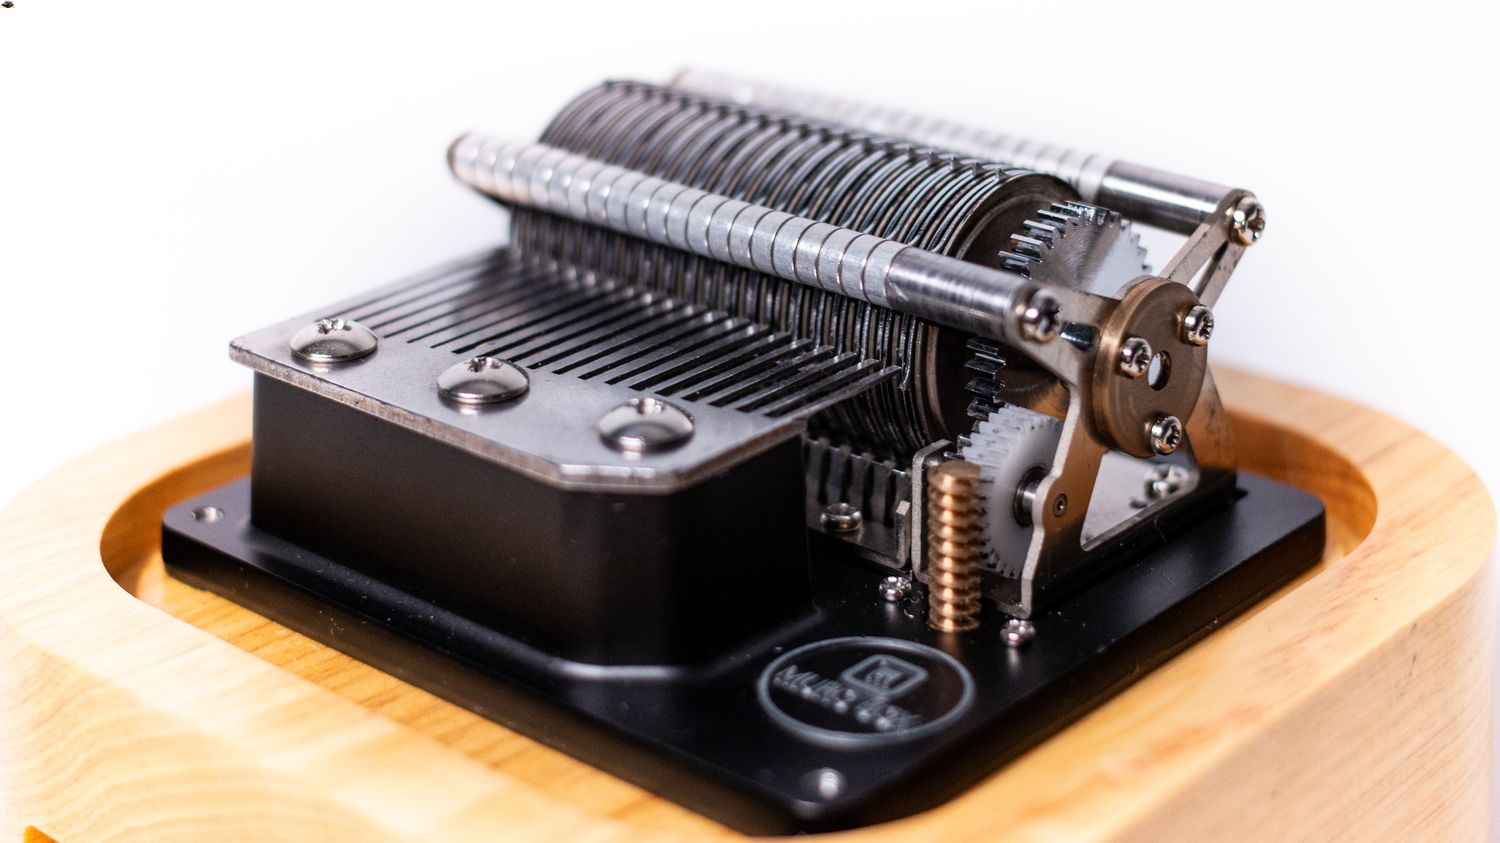
The musical mechanism inside a snow globe music box utilizes a small metal cylinder or disc with strategically placed pins. As the mechanism rotates, these pins pluck individual metal tines or combs, producing different musical notes. This creates a melodic tune that accompanies the swirling snowflakes inside the globe.
Snow globe music boxes are not only visually captivating but also evoke a sense of nostalgia and wonder. They serve as cherished gifts, collectibles, and holiday decorations. However, like any intricate object, they may experience wear and tear or encounter issues that require repair or maintenance.
Understanding the inner workings of a snow globe music box is essential when it comes to troubleshooting and fixing common issues. By familiarizing yourself with the key components and mechanisms, you can confidently tackle any repairs or adjustments needed to restore the magic of your beloved music box.
Common Issues with Snow Globe Music Box
Snow globe music boxes are delicate and intricate items, and over time, they can encounter various issues that may affect their functionality and appearance. Understanding these common issues will help you diagnose and address the problem effectively. Here are some of the most common issues you may come across:
- Musical mechanism not working: One of the most prevalent issues is a malfunctioning musical mechanism. This can manifest as a complete lack of sound or distorted and off-tune music. Possible causes include a loose or dislodged component, a worn-out mechanism, or a stuck rotor.
- Broken or bent musical tines: The small metal tines or combs responsible for producing the musical notes can become damaged or bent. This can result in a distorted or incomplete melody.
- Leaky globe: Over time, the glass globe of a snow globe music box may develop cracks or leaks, leading to water damage or the loss of the suspended particles. This can affect the overall aesthetic and movement of the snowflakes inside the globe.
- Water discoloration: The water inside the globe may become discolored due to the deterioration of the suspended particles or microbial growth. This can impact the visual appeal of the snowflakes and the overall appearance of the snow globe.
- Loss of snowflake movement: If the swirling snowflakes inside the globe are not moving or are getting stuck, it can be due to debris or foreign particles interfering with the mechanism or the suspension system not functioning properly.
- Damaged base: The base of a snow globe music box can sometimes experience damage, such as cracks, scratches, or loose components. This can affect the stability and overall aesthetic appeal of the music box.
By identifying these common issues, you can take the necessary steps to address them and restore the beauty and functionality of your snow globe music box. In the following sections, we will guide you through the process of fixing these issues and bringing your beloved music box back to life.
Tools and Materials Needed
Before you begin repairing your snow globe music box, it’s important to gather the necessary tools and materials. Having the right supplies on hand will make the process smoother and more efficient. Here are some essential tools and materials you will likely need:
- Screwdriver set: A set of screwdrivers with various sizes and types (such as Phillips and flathead) will help you remove screws and access the internal components of the snow globe music box.
- Tweezers: Tweezers with a fine-pointed tip will be useful for delicately adjusting or handling small parts and components inside the music box.
- Needle-nose pliers: Needle-nose pliers can assist in bending or straightening metal tines, adjusting springs, or handling any small and delicate parts.
- Adhesives: Depending on the issue you are addressing, you may need adhesives such as epoxy glue, super glue, or silicone sealant to secure loose parts, fix leaks, or repair the glass globe.
- Replacement parts: If you discover that certain components of your snow globe music box are irreparably damaged or missing, you may need to purchase replacement parts. This could include musical mechanisms, tines, glass globes, or bases.
- Clean cloth: A soft, lint-free cloth will be useful for cleaning the glass globe, base, and other components of the snow globe music box.
- Distilled water: If you need to refill the globe or address water discoloration, using distilled water is recommended to prevent mineral deposits or impurities.
- Decorative items: If you want to enhance the overall aesthetic of the snow globe music box, you may consider adding decorative elements such as new snowflakes, glitter, or figurines.
Having these tools and materials prepared beforehand will ensure that you have everything you need to successfully repair and maintain your snow globe music box. Additionally, it’s a good idea to work on a clean and organized surface to prevent any damage or loss of small components during the repair process.
Step 1: Opening the Snow Globe
Before beginning any repairs or adjustments, the first step is to safely open the snow globe music box. Keep in mind that the process may vary depending on the specific design and construction of the music box. Here’s a general guide on how to open a snow globe:
- Find the base: Look for the base of the music box, which is usually attached to the glass globe. It may be secured with screws, clips, or adhesive.
- Remove any visible screws: If there are visible screws on the base of the music box, use an appropriate screwdriver to carefully remove them. Keep the screws in a safe place to avoid misplacing them.
- Check for hidden fasteners: Some snow globe music boxes may have hidden fasteners or clips that hold the base and globe together. Look for any small tabs, slots, or concealed screws that may be securing the two components.
- Apply gentle pressure: Once you have removed all visible screws and located any hidden fasteners, use gentle pressure to separate the base from the glass globe. Be cautious not to apply excessive force, as this can cause damage to the music box.
- Remove the base: Once the base is detached from the glass globe, set it aside in a safe place. Take note of any parts or components that may come loose during this process and make sure to keep them together.
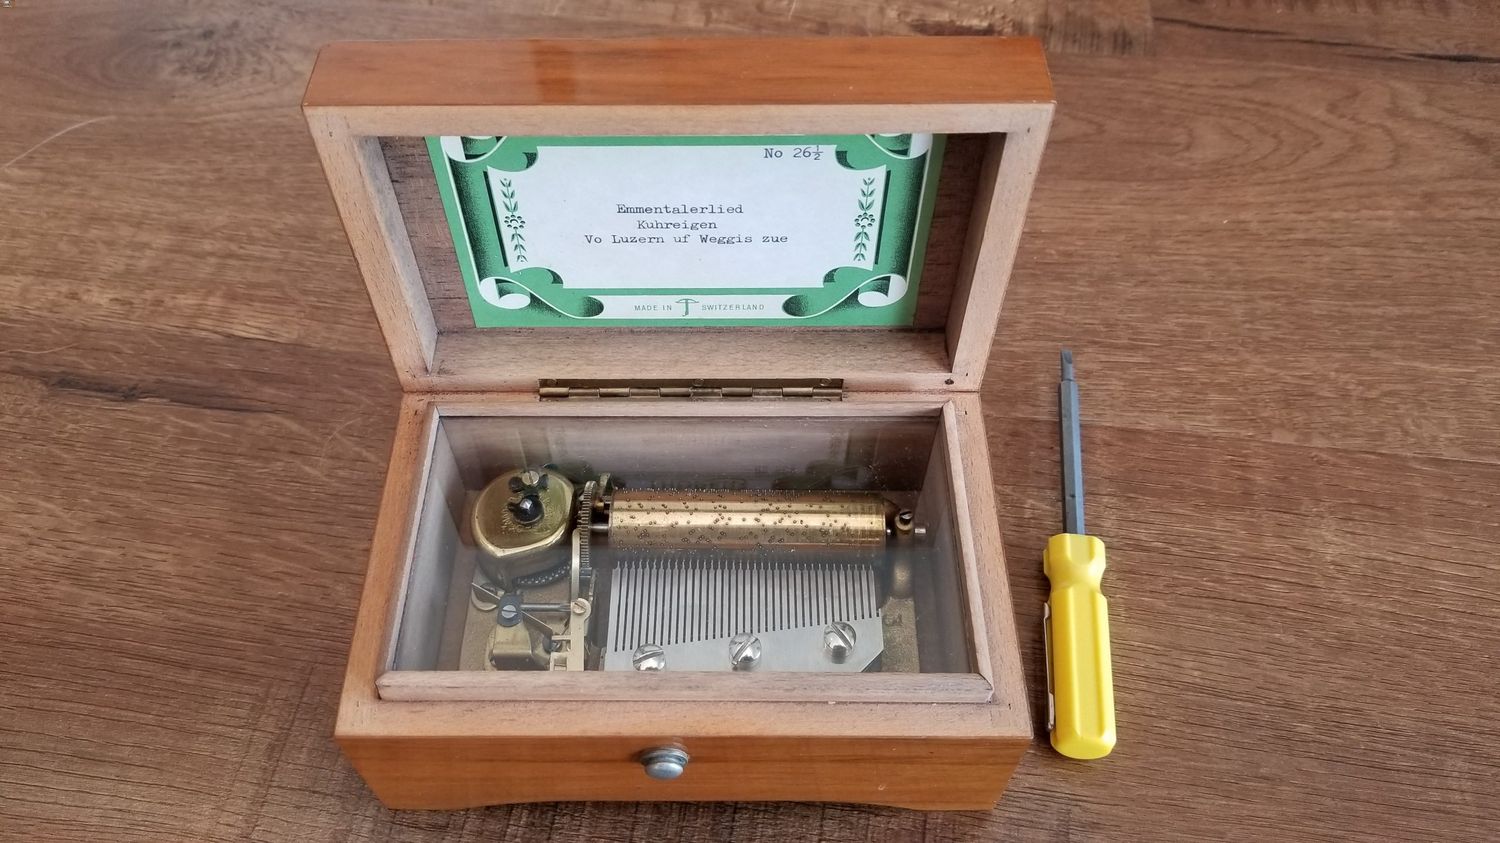
- Inspect the internal components: With the base removed, you will have a clear view of the internal mechanisms, including the musical mechanism and the suspended particles. Take a moment to examine them for any signs of damage, misalignment, or loose parts.
Opening the snow globe music box can give you access to the various components that may require repair. However, it’s essential to handle the glass globe and base with utmost care to avoid any accidental breakage. Take your time during this process to ensure a successful repair process in the following steps.
Step 2: Checking the Musical Mechanism
After opening the snow globe music box, the next step is to assess and check the musical mechanism. This component is responsible for producing the delightful melody that accompanies the swirling snowflakes inside the globe. Follow these steps to examine and troubleshoot the musical mechanism:
- Identify the musical mechanism: Locate the musical mechanism within the base of the snow globe. It is typically a small metal cylinder or disc with pins that pluck the metal tines to produce musical notes.
- Check for visible damage: Inspect the musical mechanism for any visible signs of damage, such as bent pins, broken tines, or loose components. Pay close attention to any areas that may be causing friction or hindering the movement of the mechanism.
- Ensure proper alignment: Verify that the musical mechanism is properly aligned and seated correctly within the base. If it appears to be misaligned or crooked, gently adjust it to ensure smooth operation.
- Test the musical mechanism: Wind up the music box to activate the musical mechanism and observe its performance. Listen to the melody closely to identify any distortion, skipped notes, or irregular timing.
- Address loose components: If you notice any loose parts or screws, carefully tighten them to ensure stability. Be cautious not to overtighten, as it may cause damage to the mechanism.
- Consider lubrication: If the musical mechanism seems sluggish or stiff, applying a small amount of lubricant specifically designed for music box mechanisms may help improve its performance. Consult the manufacturer’s instructions for appropriate lubrication recommendations.
By thoroughly examining and troubleshooting the musical mechanism, you can identify any issues that may be affecting the functionality and quality of the music produced by the snow globe. This step is crucial in determining the necessary repairs or replacements needed for the musical mechanism.
Step 3: Repairing or Replacing the Musical Mechanism
If you have identified issues with the musical mechanism of your snow globe music box during the previous step, it’s time to repair or replace it. The actions required will depend on the specific problem you have encountered. Here are some common scenarios and the corresponding steps to address them:
- Bent or broken tines: If you notice bent or broken tines, use needle-nose pliers to carefully bend them back into shape or replace them with new ones. Ensure that the tines are properly aligned and positioned to produce the correct musical notes.
- Dislodged or misaligned mechanism: If the musical mechanism appears to be dislodged or misaligned, gently nudge it back into its proper position within the base. Make sure it is securely seated and aligned for smooth operation.
- Stuck rotor: If the rotor or rotating mechanism of the musical mechanism is stuck or not moving freely, apply a small amount of lubricant designed for music box mechanisms. Rotate the mechanism by hand to distribute the lubricant evenly and help restore its proper functionality.
- Worn-out mechanism: If the musical mechanism is severely worn-out or damaged beyond repair, you may need to replace it entirely. Look for replacement musical mechanisms that are compatible with your snow globe music box model.
When repairing or replacing the musical mechanism, always prioritize gentle handling and alignment. Avoid applying excessive force or pressure, as it can cause further damage. Take note of any specific guidelines or instructions provided by the manufacturer to ensure a successful repair or replacement process.
Once you have repaired or replaced the musical mechanism, test the music box to ensure that it is producing the desired melody and functioning properly. The musical component is a crucial part of the snow globe music box experience, and addressing any issues with it will greatly enhance the overall enjoyment of your cherished music box.
Step 4: Inspecting the Glass Globe
After addressing any issues with the musical mechanism, it’s important to inspect the glass globe of your snow globe music box. The globe houses the water, suspended particles, and the captivating scene that adds to the charm of the music box. Follow these steps to inspect and maintain the glass globe:
- Examine the external surface: Carefully inspect the exterior of the glass globe for any cracks, chips, or scratches. These can compromise the integrity of the globe and potentially lead to leaks or other damage.
- Check the water level: Take note of the water level inside the globe. Ensure that it is at the appropriate level, not too high or too low. Adjust the water level if needed by adding or removing distilled water.
- Inspect the suspended particles: Observe the suspended particles inside the globe, such as snowflakes or glitter. Check for any signs of discoloration, clumping, or deterioration. If necessary, consider replacing the particles to restore the desired visual effect.
- Repair or replace damaged globe: If you discover any cracks or leaks in the glass globe, you can attempt to repair them using a suitable adhesive or sealant. However, if the damage is extensive or the repair is not successful, it may be necessary to replace the entire globe.
- Clean the glass globe: Use a soft, lint-free cloth to gently clean the glass globe, removing any dust, fingerprints, or smudges. Avoid harsh chemicals or abrasive cleaners, as they may damage the glass.
Inspecting the glass globe allows you to identify any issues that may affect its aesthetics, water integrity, or the movement of the suspended particles. By promptly addressing these issues, you can maintain the visual appeal and functionality of the snow globe music box for years to come.
Remember, handling the glass globe requires care and caution. Always hold it by the base or the non-decorated area to avoid smudging or damaging the scene inside. Take your time during this step to ensure that the glass globe is in optimal condition before proceeding to the next steps of the repair process.
Step 5: Fixing a Leak or Water Damage
If you have discovered a leak or water damage during the inspection of the glass globe, it’s essential to address these issues in order to preserve the functionality and aesthetic appeal of your snow globe music box. Follow these steps to fix a leak or water damage:
- Assess the extent of the damage: Determine the location and severity of the leak or water damage. Note any areas where the water is escaping or where damage has occurred, such as cracks, breaks, or loose seals.
- Empty the globe: Carefully remove the water and suspended particles from the globe. Thoroughly clean and dry the interior before proceeding with the repair process.
- Repair small cracks or leaks: For minor cracks or small leaks, apply a specialized glass adhesive or sealant to seal the damaged area. Follow the instructions provided by the adhesive manufacturer, ensuring proper application and curing time.
- Replace broken or extensively damaged globe: If the glass globe is extensively damaged or the repair is not successful, it may be necessary to replace the entire globe. Look for a suitable replacement globe that matches the dimensions and style of your snow globe music box.
- Address water damage to the base: If the water has caused damage to the base, such as swelling, warping, or discoloration, you may need to repair or replace the base as well. Depending on the extent of the damage, this step may involve sanding, refinishing, or purchasing a new base.
- Refill and test: Once the repairs are complete, refill the glass globe with distilled water up to the appropriate level. Ensure that the suspended particles are evenly distributed. Wind up the music box to test its functionality and observe the movement of the snowflakes.
Fixing a leak or addressing water damage requires attention to detail and patience. Take the necessary precautions to avoid damage to the glass globe or other components during the repair process. By addressing these issues, you can restore the enchanting beauty and functionality of your snow globe music box.
Step 6: Reassembling the Snow Globe
After completing the necessary repairs and adjustments to your snow globe music box, the final step is to reassemble the components and ensure everything is properly aligned. Follow these steps to reassemble your snow globe:
- Ensure clean and dry components: Make sure that all the components, including the glass globe, base, and any repaired or replaced parts, are clean and completely dry before proceeding with the reassembly process.
- Position the musical mechanism: Carefully place the musical mechanism back into the base, ensuring that it is aligned correctly and securely seated. Take note of any specific alignment marks or instructions provided by the manufacturer.
- Attach the glass globe: Align the glass globe with the base and gently press the two components together. If there are any screws or fasteners, carefully secure them, following the original positioning and tightening them just enough to hold the globe in place.
- Test the functionality: Wind up the music box to activate the musical mechanism and observe the movement of the snowflakes inside the globe. Listen to the melody to ensure that it sounds clear and in tune. Verify that the swirling snowflakes are moving freely and without any obstructions.
- Make necessary adjustments: If you notice any issues during the testing phase, such as sticking snowflakes or irregular music, carefully disassemble the music box again and make the necessary adjustments. You may need to realign components, tighten screws, or address any other specific issues that arise.
- Finalize reassembly: Once you are satisfied with the functionality of the snow globe music box, secure any remaining screws or fasteners to ensure that all components are firmly in place. Give the exterior of the music box a final wipe down to remove any fingerprints or residue.
Reassembling the snow globe music box requires precision and attention to detail to ensure proper alignment and functionality. Take your time during this step to ensure that everything is securely in place.
Once the snow globe is reassembled, take a moment to admire your work and enjoy the enchanting beauty of your repaired music box. Your efforts have preserved a cherished keepsake and brought new life to the beloved snow globe music box.
Conclusion
A snow globe music box is more than just a decorative item—it’s a sentiment of nostalgia, joy, and cherished memories. Taking the time to repair and maintain your snow globe allows you to continue enjoying its enchanting beauty for years to come.
In this article, we explored the various steps involved in fixing common issues with a snow globe music box. From opening the music box to inspecting the glass globe, repairing the musical mechanism, and addressing leaks or water damage, each step plays a crucial role in restoring the functionality and visual appeal of your beloved music box.
Throughout the repair process, it’s important to handle the delicate components with care and to follow any specific instructions provided by the manufacturer. This will ensure that you successfully address the issues without causing additional damage.
Remember, repairing a snow globe music box requires patience, attention to detail, and a gentle touch. By investing time and effort into the repair process, you can breathe new life into your treasured music box, preserving its magic and sentimental value.
Now, armed with the knowledge and steps outlined in this article, you can confidently embark on repairing your snow globe music box. So gather your tools, embrace the joy of the process, and let the melodies and swirling snowflakes fill your heart with delight once more.