Home>Devices & Equipment>Music Box>How To Fix A Music Box That Got Wound To Tight
Music Box
How To Fix A Music Box That Got Wound To Tight
Published: January 11, 2024
Learn how to fix a music box that has been wound too tight with our step-by-step guide. Avoid potential damage and enjoy your music box again.
(Many of the links in this article redirect to a specific reviewed product. Your purchase of these products through affiliate links helps to generate commission for AudioLover.com, at no extra cost. Learn more)
Table of Contents
- Introduction
- Understanding the Problem
- Tools and Materials Needed
- Step 1: Opening the Music Box
- Step 2: Assessing the Damage
- Step 3: Loosening the Winding Mechanism
- Step 4: Testing the Music Box
- Step 5: Adjusting the Tension
- Step 6: Final Testing and Troubleshooting
- Conclusion
- Additional Tips and Considerations
Introduction
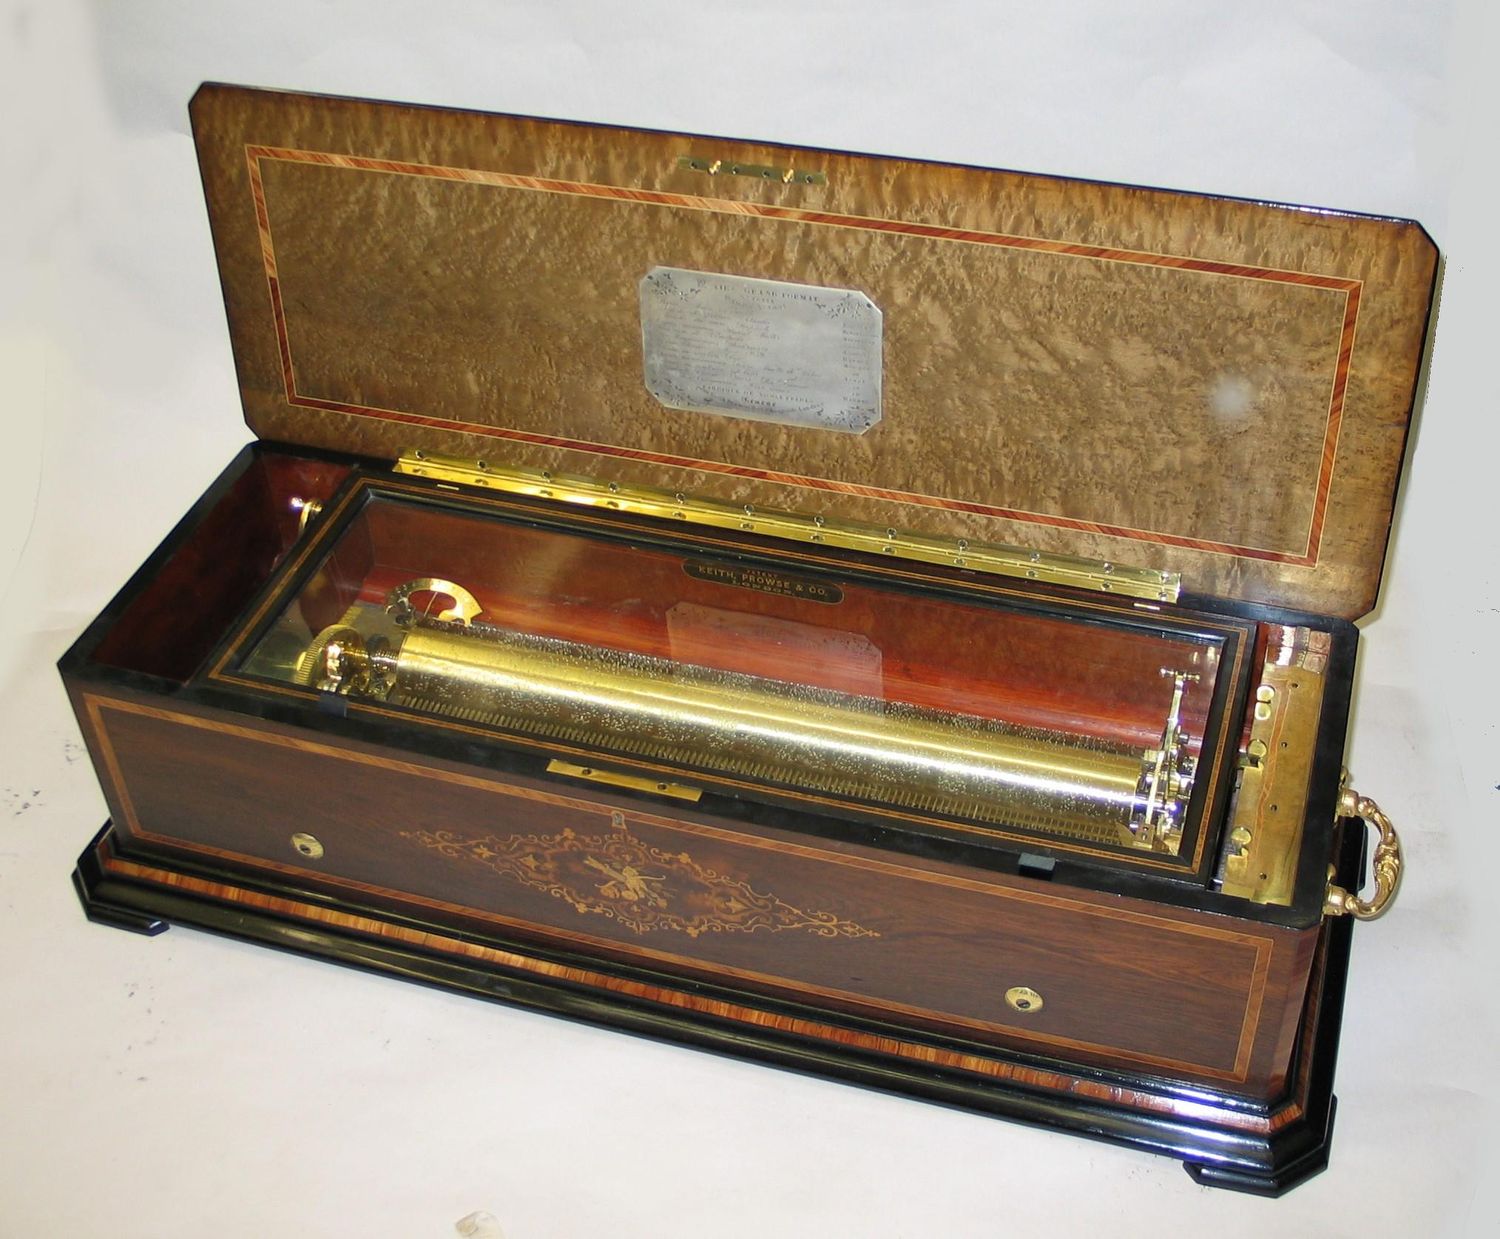
A music box is a cherished keepsake that brings joy and nostalgia with its beautiful melodies. However, sometimes these delicate instruments can encounter problems, such as getting wound too tightly. This issue can cause the music box to stop playing or produce distorted sounds.
If you find yourself in this frustrating situation, don’t worry! In this article, we will guide you through the process of fixing a music box that has been wound too tight. With a few simple steps and the right tools, you can get your music box back to its melodic charm in no time.
Before we dive into the troubleshooting steps, it’s important to note that each music box is unique, and the exact procedure may vary depending on the design and mechanism of your specific music box. It’s always a good idea to consult the manufacturer’s instructions if you have them, or seek professional assistance if you’re unsure about any aspect of the repair.
Now, let’s get started with understanding the problem and gathering the necessary tools and materials to fix your music box.
Understanding the Problem
When a music box is wound too tightly, it can put excessive strain on the internal mechanism. This can lead to a range of issues, such as the music box not playing at all, playing intermittently, or producing distorted and muffled sounds. If you notice any of these symptoms, it’s likely that your music box has been wound too tight.
The main cause of a tightly wound music box is over-enthusiastic winding. It’s important to remember that music boxes are delicate instruments and should be handled with care. Overwinding can cause the internal spring mechanism to become tightly coiled and lose its necessary tension, which is essential for proper functioning.
It’s essential to address this problem promptly to avoid any further damage to the music box. Continuing to attempt to play the music box when it’s tightly wound can exacerbate the issue and potentially lead to irreversible damage.
Now that you understand the problem, let’s move on to the tools and materials you’ll need to fix your music box.
Tools and Materials Needed
Before you begin the process of fixing your music box, it’s important to gather the necessary tools and materials. Having everything ready beforehand will ensure a smoother and more efficient repair. Here’s a list of what you’ll need:
- Screwdriver Set: A set of small screwdrivers with various sizes will be needed to open the music box and access the internal components. The sizes required may vary depending on your specific music box.
- Tweezers: Tweezers will come in handy for delicate handling of small parts and intricate adjustments.
- Compressed Air Canister: Dust and debris can accumulate inside the music box over time, affecting its performance. A canister of compressed air will help in cleaning out any dirt or particles.
- Lubricant: A high-quality watch or clock lubricant will be needed to apply a small amount to the necessary parts of the music box mechanism. This helps ensure smooth and proper functioning.
- Soft Cloth or Pad: A soft cloth or pad will provide a gentle surface to work on to protect the delicate components of the music box.
Remember to gather all the tools and materials listed above before you begin the repair process. This will help ensure that you have everything you need within reach, minimizing any interruptions or delays.
With the tools and materials ready, let’s move on to the first step: opening the music box.
Step 1: Opening the Music Box
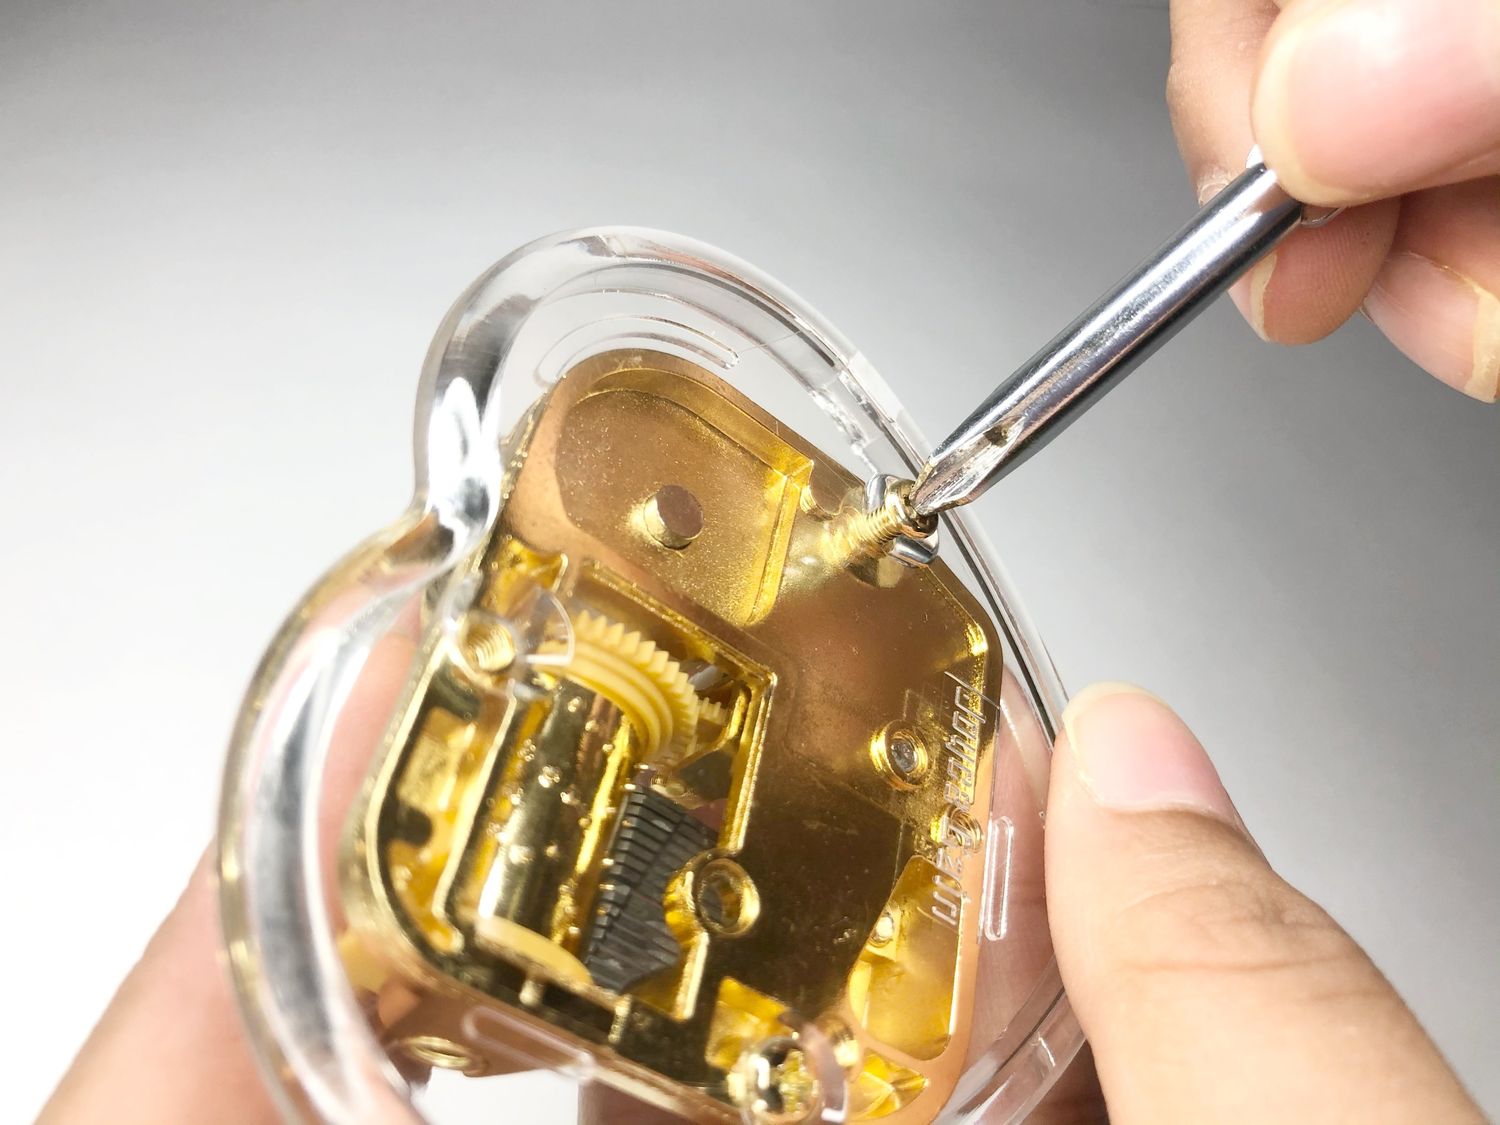
The first step in fixing a music box that has been wound too tight is to open the casing to access the internal components. Keep in mind that the specific method of opening the music box may vary depending on its design and construction. Here’s a general guideline to help you get started:
- Find the screws:
- Inspect the music box casing to locate the screws that hold it together. These screws are usually small and can be found on the bottom or back of the music box.
- Use the appropriate sized screwdriver from your set to carefully remove the screws. Set them aside in a safe place to avoid misplacing them.
- Gently remove the casing:
- Once all the screws have been removed, gently lift and remove the casing of the music box. Take care to avoid applying excessive force or damaging any delicate components.
- Place the casing aside on a soft cloth or pad to protect it from scratches or damage.
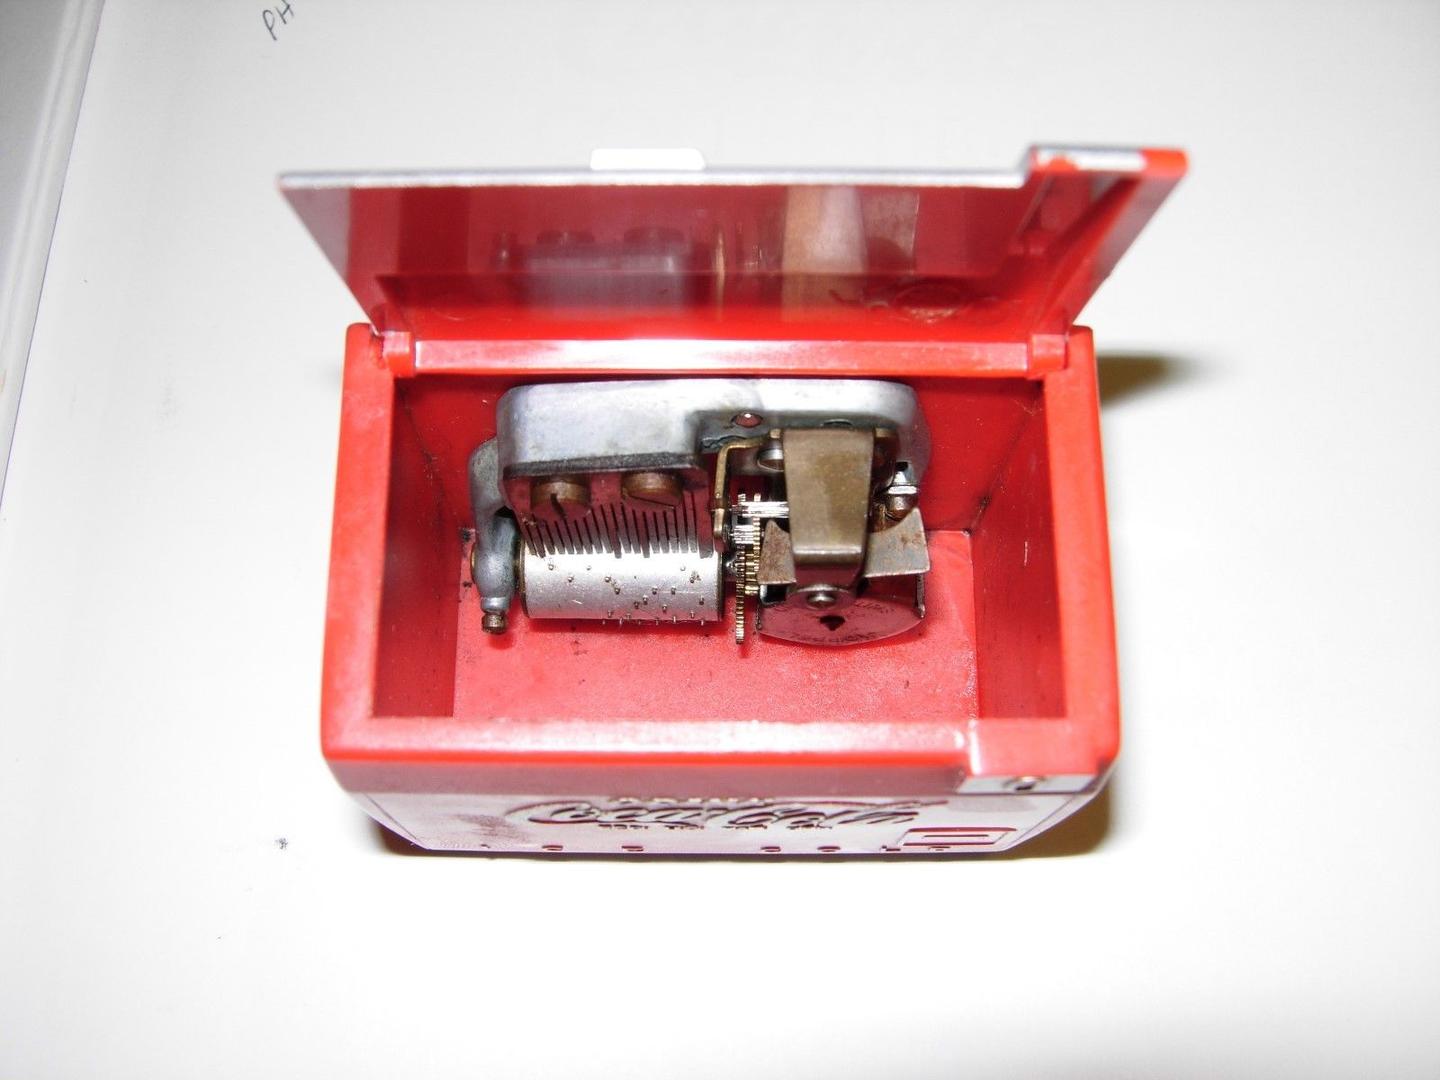
With the casing removed, you should now have access to the internal mechanism of the music box. Take a moment to familiarize yourself with the various components before proceeding to the next step.
It’s important to note that not all music boxes can be easily opened. Some may have a more complex design that requires additional steps or the assistance of a professional. If you encounter any difficulties or uncertainties during this process, it’s best to consult the manufacturer’s instructions or seek professional help.
Now that you have successfully opened the music box, we can move on to the next step: assessing the damage.
Step 2: Assessing the Damage
Once you have opened the music box and gained access to its internal components, it’s time to assess the damage caused by the overwinding. This step will help you identify any visible issues and determine the extent of the damage before proceeding with the repair. Here’s what you should do:
- Inspect the spring mechanism:
- Take a close look at the spring mechanism inside the music box. Look for any signs of excessive coiling, twisting, or displacement.
- If the spring looks heavily coiled or tangled, it is likely the main cause of the problem.
- Examine the gears and other components:
- Check the gears, levers, and other components of the music box for any visible signs of damage or misalignment.
- Look for any broken or bent parts that may need to be repaired or replaced.
- Test the music box:
- Attempt to play the music box by spinning the winding key or activating the play button, if applicable.
- Observe the movement of the components and listen to the sound produced. Note any irregularities or unusual noises.
By carefully assessing the damage, you will have a better understanding of the specific issues that need to be addressed during the repair process. This will help you plan your next steps accordingly and ensure a more effective and successful repair.
Once you have completed the assessment, you can move on to the next step: loosening the winding mechanism.
Step 3: Loosening the Winding Mechanism
After assessing the damage caused by the overwinding of your music box, it’s time to focus on loosening the tightly wound mechanism. This step is crucial to restore the proper tension and functionality of the music box. Follow these steps to loosen the winding mechanism:
- Identify the winding key:
- Locate the winding key of your music box. It’s usually a small knob or peg typically found on the side or bottom of the mechanism.
- Turn the winding key counterclockwise:
- Using gentle pressure, turn the winding key counterclockwise to unwind the spring. Be careful not to apply too much force to avoid damaging the mechanism.
- Continue turning the key until you feel some resistance or until the spring is fully unwound. This will release the tension from the mechanism.
- Test the movement of the components:
- Now that the spring is unwound, test the movement of the gears and other components by manually turning them.
- Listen for any clicking or grinding sounds that may indicate further damage or misalignment.
By loosening the winding mechanism, you are relieving the excess tension that was causing the music box to malfunction. This step will help restore the proper balance and functioning of the internal components.
If the winding key doesn’t turn or if you encounter any difficulties during this step, it’s advisable to seek professional help. Attempting to force the key or make any adjustments without proper knowledge or expertise may result in irreversible damage to the music box.
Now that you have successfully loosened the winding mechanism, it’s time to move on to the next step: testing the music box.
Step 4: Testing the Music Box
After loosening the winding mechanism of your music box, it’s essential to test its functionality to ensure that it is working properly. This step will help you determine if the tension has been adjusted correctly and if the music box is ready to play. Here’s how you can test the music box:
- Safely place the music box on a flat surface:
- Ensure that the music box is stable and positioned on a flat surface to prevent it from falling or sliding during the testing process.
- Manually wind the music box:
- If your music box has a winding key, gently turn it clockwise to wind the spring. Avoid overwinding the mechanism.
- If your music box has a play button, press it to initiate the music playback.
- Observe the movement and sound:
- As the music box plays, observe the movement of the internal components. Check for smooth and consistent motion.
- Listen carefully to the sound produced. Ensure that it is clear, melodious, and free from distortions or irregularities.
If the music box plays correctly and the sound is satisfactory, it indicates that the repair process has been successful. However, if you notice any issues such as the music box not playing or producing distorted sounds, further adjustments may be required.
It is important to note that each music box is unique, and the adjustments needed may vary for different models. If you encounter any difficulties during the testing process or if the issues persist, it is advisable to consult the manufacturer’s instructions or seek professional assistance.
Now that you have tested the music box and confirmed its functionality, let’s move on to the next step: adjusting the tension.
Step 5: Adjusting the Tension
Adjusting the tension of the spring mechanism is a crucial step in ensuring that your music box functions properly. It allows you to find the optimal balance between too loose and too tight, resulting in a smooth and melodious performance. Follow these steps to adjust the tension:
- Identify the tension adjustment mechanism:
- Examine the internal components of your music box to locate the tension adjustment mechanism. This may vary depending on the design and model of your music box.
- Look for a small knob, screw, or lever that is connected to the spring mechanism or gear system.
- Make small adjustments:
- Using a screwdriver or suitable tool, make small adjustments to the tension adjustment mechanism. Turn it clockwise to increase tension and counterclockwise to decrease tension.
- Make slight adjustments and test the music box after each turn. Repeat this process until you find the optimal tension for smooth and clear playback.
- Listen and observe:
- As you adjust the tension, listen carefully to the sound produced by the music box. Ensure that it is pleasing to the ear and free from any distortions or unusual noises.
- Observe the movement of the components and make sure they are operating smoothly without any signs of strain or resistance.
Remember to make small and gradual adjustments to avoid over-tightening or loosening the spring mechanism. It may take some trial and error to find the perfect balance, so be patient and methodical in your approach.
Once you have achieved the desired tension level, you can proceed to the final testing and troubleshooting step to ensure the effectiveness of the repair.
Step 6: Final Testing and Troubleshooting
After adjusting the tension of the spring mechanism in your music box, it’s important to perform a final testing to ensure that the repair has been successful. This step will help you identify any remaining issues and troubleshoot them accordingly. Here’s what you need to do:
- Wind the music box:
- Using the winding key or play button, wind up the music box according to the manufacturer’s instructions.
- Observe the movement and sound:
- Watch the movement of the internal components as the music box plays. Ensure that they are working smoothly and synchronously.
- Listen to the sound produced. Check for clarity, volume, and the absence of any distortions or irregularities.
- Troubleshoot any issues:
- If you encounter any problems during the testing, such as the music box not playing, or producing distorted sounds, there are a few things you can try:
- Clean the internal components: Remove any dust or debris that may be affecting the performance of the music box. Use a canister of compressed air to gently blow away any particles.
- Check for misalignment: Ensure that all components are properly aligned and in their correct positions. Adjust any misaligned parts as necessary.
- Inspect for damage: Look for any broken or damaged parts that may be causing the issue. Consider repairing or replacing these components.
If you’re unable to resolve the issues or if you’re uncertain about making further adjustments, it’s recommended to consult the manufacturer’s instructions or seek professional assistance. They will have the expertise and knowledge to address more complex issues or perform intricate repairs.
By thoroughly testing and troubleshooting any remaining problems, you can be confident that your music box has been successfully repaired and restored to its full musical charm.
With the final testing and troubleshooting complete, you have completed the process of fixing a music box that had been wound too tightly. Congratulations! Now you can enjoy the beautiful melodies of your music box once again.
Conclusion
Fixing a music box that has been wound too tightly requires a careful and systematic approach. By following the steps outlined in this guide, you can successfully address the issue and restore your music box to its original melodic charm.
Understanding the problem of a tightly wound music box and gathering the necessary tools and materials are the first crucial steps. Opening the music box and assessing the damage allows you to identify any visible issues and determine the extent of the problem. Loosening the winding mechanism relieves the excess tension, while testing the music box confirms its functionality.
Adjusting the tension of the spring mechanism is a vital step to ensure smooth and proper playback. By making small and gradual adjustments, you can find the optimal tension for your music box. The final testing and troubleshooting step allows you to identify and address any remaining issues, ensuring that the repair process is effective.
It’s important to note that each music box is unique, and the specific repair process may vary. Always refer to the manufacturer’s instructions or seek professional assistance if you encounter difficulties or uncertainties.
Remember to handle your music box with care and avoid overwinding in the future. By maintaining a gentle touch and periodic cleaning and maintenance, you can prolong the life and functionality of your beloved music box.
So go ahead, fix that tightly wound music box, and let it fill your life with joy and beautiful melodies once again.
Additional Tips and Considerations
Here are some additional tips and considerations to keep in mind when fixing a music box that has been wound too tightly:
- Patience is key: Take your time throughout the entire repair process. Rushing can lead to mistakes or further damage to the music box.
- Document the process: Consider taking photos or making notes as you disassemble the music box. This will help you remember the correct sequence of parts during reassembly.
- Keep small parts organized: Use a small container or magnetic tray to keep track of the screws and other tiny components. This will prevent them from getting lost.
- Be gentle with fragile parts: Certain components of a music box, such as delicate gears or springs, require careful handling. Avoid applying excessive force or pressure that may cause damage.
- Regular maintenance: To keep your music box in top condition, clean it periodically with a soft cloth or brush to remove any dust or debris. Lubricate the necessary parts with a high-quality lubricant according to the manufacturer’s recommendations.
- Professional assistance: If you’re unsure about any aspect of the repair process or if the issues persist, don’t hesitate to seek assistance from a professional music box technician. They have the expertise to handle complex repairs and ensure the longevity of your music box.
With these additional tips and considerations in mind, you can confidently approach the repair process and successfully fix your tightly wound music box.
Remember, the beauty of a music box lies in its ability to bring joy and evoke emotions through its melodious tunes. By addressing any issues promptly and with care, you can continue to enjoy the enchanting melodies of your music box for years to come.