Home>Devices & Equipment>Subwoofer>How To Set Low Pass Filter Subwoofer
Subwoofer
How To Set Low Pass Filter Subwoofer
Modified: February 18, 2024
Learn how to set a low pass filter on your subwoofer to enhance bass performance. Step-by-step guide for optimizing your subwoofer settings and enjoying immersive sound.
(Many of the links in this article redirect to a specific reviewed product. Your purchase of these products through affiliate links helps to generate commission for AudioLover.com, at no extra cost. Learn more)
Table of Contents
Introduction
Welcome to the world of subwoofers, where thunderous bass and immersive audio experiences come to life. If you’re a music lover or an avid movie enthusiast, you know the importance of a powerful subwoofer in delivering deep, rumbling lows that can shake your entire room.
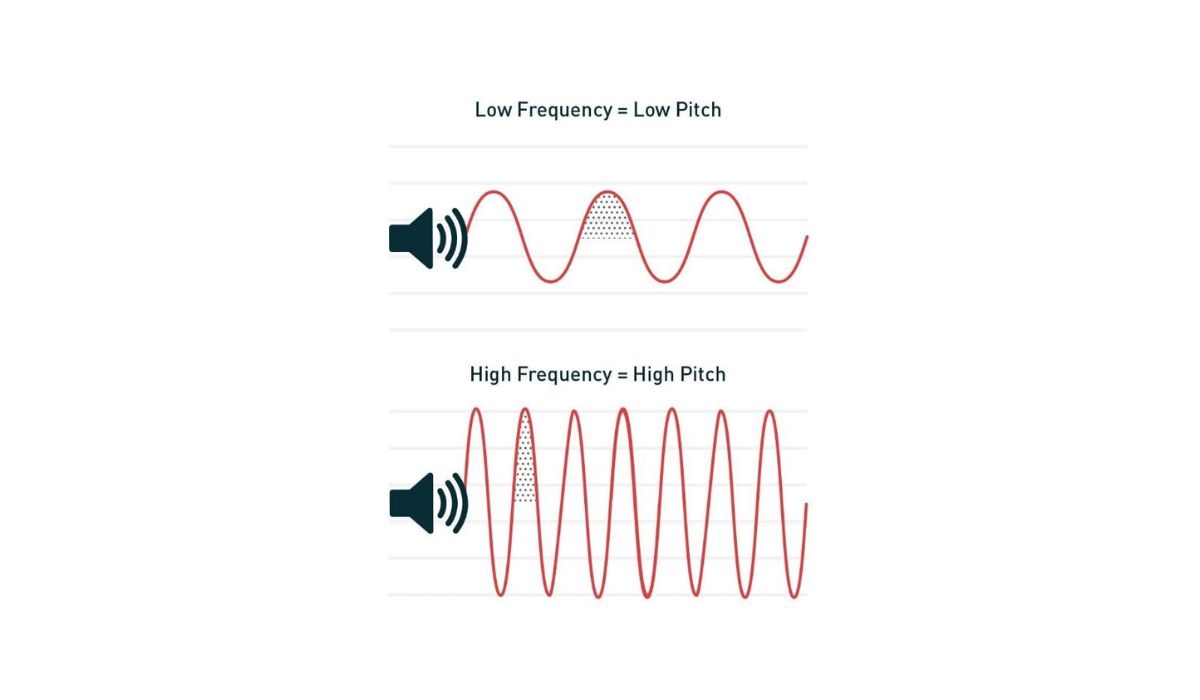
But what exactly is a subwoofer? Simply put, it’s a specialized speaker designed to reproduce low-frequency sounds, specifically the bass notes that standard speakers struggle to handle. It adds depth and impact to your audio, enhancing the overall listening experience.
However, to truly optimize your subwoofer’s performance, you need to understand the role of a low pass filter. A low pass filter is a crucial component that allows only low-frequency signals to pass through while blocking higher frequencies. By integrating a low pass filter into your subwoofer setup, you can ensure that only the intended bass frequencies are sent to the subwoofer, resulting in cleaner, more accurate bass reproduction.
In this article, we will guide you through the process of setting up a low pass filter for your subwoofer. Whether you’re a seasoned audiophile or a newbie looking to enhance your home audio system, we’ve got you covered. So, let’s dive in and unlock the full potential of your subwoofer!
Understanding Subwoofers and Low Pass Filters
To comprehend the importance of a low pass filter in optimizing your subwoofer’s performance, it’s essential to have a clear understanding of how subwoofers and low pass filters work together.
A subwoofer is a specialized speaker that is responsible for reproducing the low-frequency sounds in an audio system. Unlike the other speakers in a system that focus on mid-range and high-frequency sound reproduction, a subwoofer is specifically designed to handle the deep, rumbling bass notes that add depth and impact to the audio.
The low pass filter is a critical component in the subwoofer setup. It filters out the higher frequencies and allows only the low-frequency signals to pass through to the subwoofer. This is necessary because subwoofers are not designed to handle high-frequency sounds effectively. By integrating a low pass filter, you ensure that only the intended bass frequencies are sent to the subwoofer, preventing distortion and allowing for cleaner and more accurate sound reproduction.
There are different types of low pass filters, including passive and active filters. Passive filters are typically built into the subwoofer itself and are determined by the subwoofer’s design. On the other hand, active filters are external devices that allow for more precise control over the filtering process. They offer the flexibility to adjust the cutoff frequency and slope to achieve the desired bass response.
The cutoff frequency is a key parameter set in the low pass filter. It determines the point at which the filter starts to attenuate the higher frequencies. The slope, measured in decibels per octave, indicates how quickly the filter rolls off the high frequencies above the cutoff point.
By selecting the appropriate low pass filter and adjusting the cutoff frequency and slope, you can ensure that your subwoofer is receiving the right frequencies to deliver the best bass performance for your specific audio setup.
In the next sections, we’ll guide you through the process of choosing the right low pass filter, connecting it to your subwoofer, and fine-tuning the settings for optimal bass reproduction.
Step 1: Choosing the Right Low Pass Filter
Choosing the right low pass filter for your subwoofer is crucial to ensure optimal bass reproduction and integration with your existing audio system. Here are some factors to consider when selecting a low pass filter:
- Crossover Frequency: The crossover frequency determines the point at which the low pass filter starts to attenuate the higher frequencies. It is important to choose a crossover frequency that complements your main speakers. As a general rule, a crossover frequency between 80Hz and 120Hz is a good starting point.
- Slope: The slope of the low pass filter indicates how quickly it rolls off the high frequencies above the crossover point. Common slope options are 12dB/octave, 24dB/octave, and 48dB/octave. A steeper slope will provide a sharper cutoff, ensuring better separation between the subwoofer and the main speakers.
- Frequency Response: Consider the frequency response of the low pass filter, which refers to its ability to accurately reproduce frequencies within its intended range. Look for a low pass filter with a wide frequency response, ensuring that it doesn’t introduce distortion or coloration to the bass frequencies.
- Compatibility: Make sure the low pass filter is compatible with your subwoofer and audio system. Check the input and output connections to ensure they match the connectors on your subwoofer. Additionally, consider whether you need a passive or active filter based on your system setup and preferences.
- Budget: Determine your budget for the low pass filter. There are a wide range of options available at different price points, so it’s important to find a balance between quality and affordability.
Research and read reviews from reputable sources, and if possible, listen to demonstrations or seek recommendations from audio professionals to help you make an informed decision. Remember that finding the right low pass filter is a critical step in optimizing the performance of your subwoofer and achieving the desired bass response.
Once you have chosen the right low pass filter for your subwoofer, it’s time to move on to the next step – connecting the low pass filter to your subwoofer.
Step 2: Connecting the Low Pass Filter to the Subwoofer
Now that you have selected the appropriate low pass filter, it’s time to connect it to your subwoofer. Follow these steps for a seamless connection:
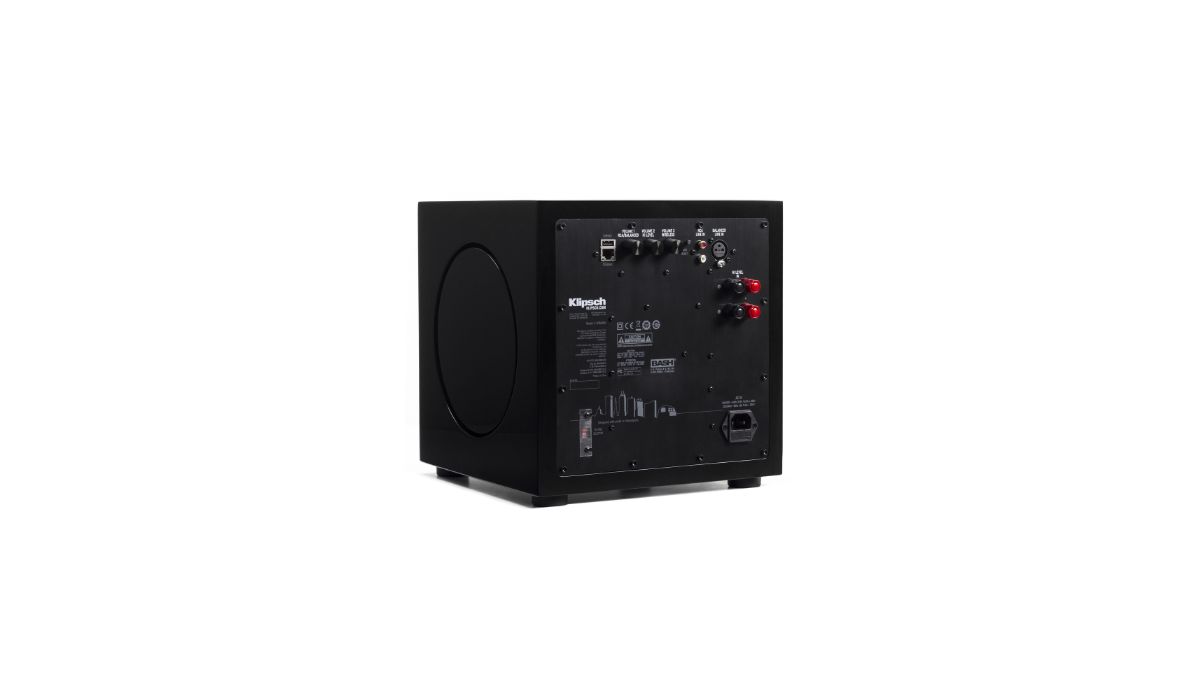
- Identify the Input and Output Connections: Locate the input and output connections on both the low pass filter and the subwoofer. The input connection on the low pass filter receives the audio signal from your audio source, while the output connection sends the filtered signal to the subwoofer.
- Ensure Power is Disconnected: Before connecting any cables, make sure that both the low pass filter and the subwoofer are powered off and unplugged. This ensures safety and prevents any potential damage to the equipment during the setup process.
- Connect the Audio Source to the Input: Take an RCA cable and connect one end to the output of your audio source (such as a receiver or preamp) and the other end to the input connection on the low pass filter. Ensure a secure connection by firmly inserting the connectors into the jacks.
- Connect the Output to the Subwoofer: Take another RCA cable and connect one end to the output connection on the low pass filter. Then, connect the other end to the input connection on your subwoofer. Again, ensure a secure connection by firmly inserting the connectors into the jacks.
- Double-check the Connections: Once all the connections are made, double-check that each cable is securely plugged in. Ensure that the connectors are fully inserted into the jacks to avoid any signal losses or intermittent connections.
- Power on the Equipment: After confirming the connections, plug in and power on the low pass filter and the subwoofer. If your low pass filter requires an external power source, make sure to connect it and turn it on as well.
- Test the Connection: Play some audio through your audio source and listen for the bass coming from the subwoofer. If everything is connected correctly, you should hear a noticeable difference in the low-frequency output compared to when the subwoofer was not connected to the low pass filter.
By following these steps, you can ensure a proper and secure connection between the low pass filter and your subwoofer, enabling the accurate filtering and delivery of bass frequencies to your subwoofer. With the connection established, it’s time to move on to the next step – adjusting the low pass filter settings.
Step 3: Adjusting the Low Pass Filter Settings
Once you have connected the low pass filter to your subwoofer, it’s crucial to properly adjust the settings to optimize the bass performance. Follow these steps to fine-tune the low pass filter:
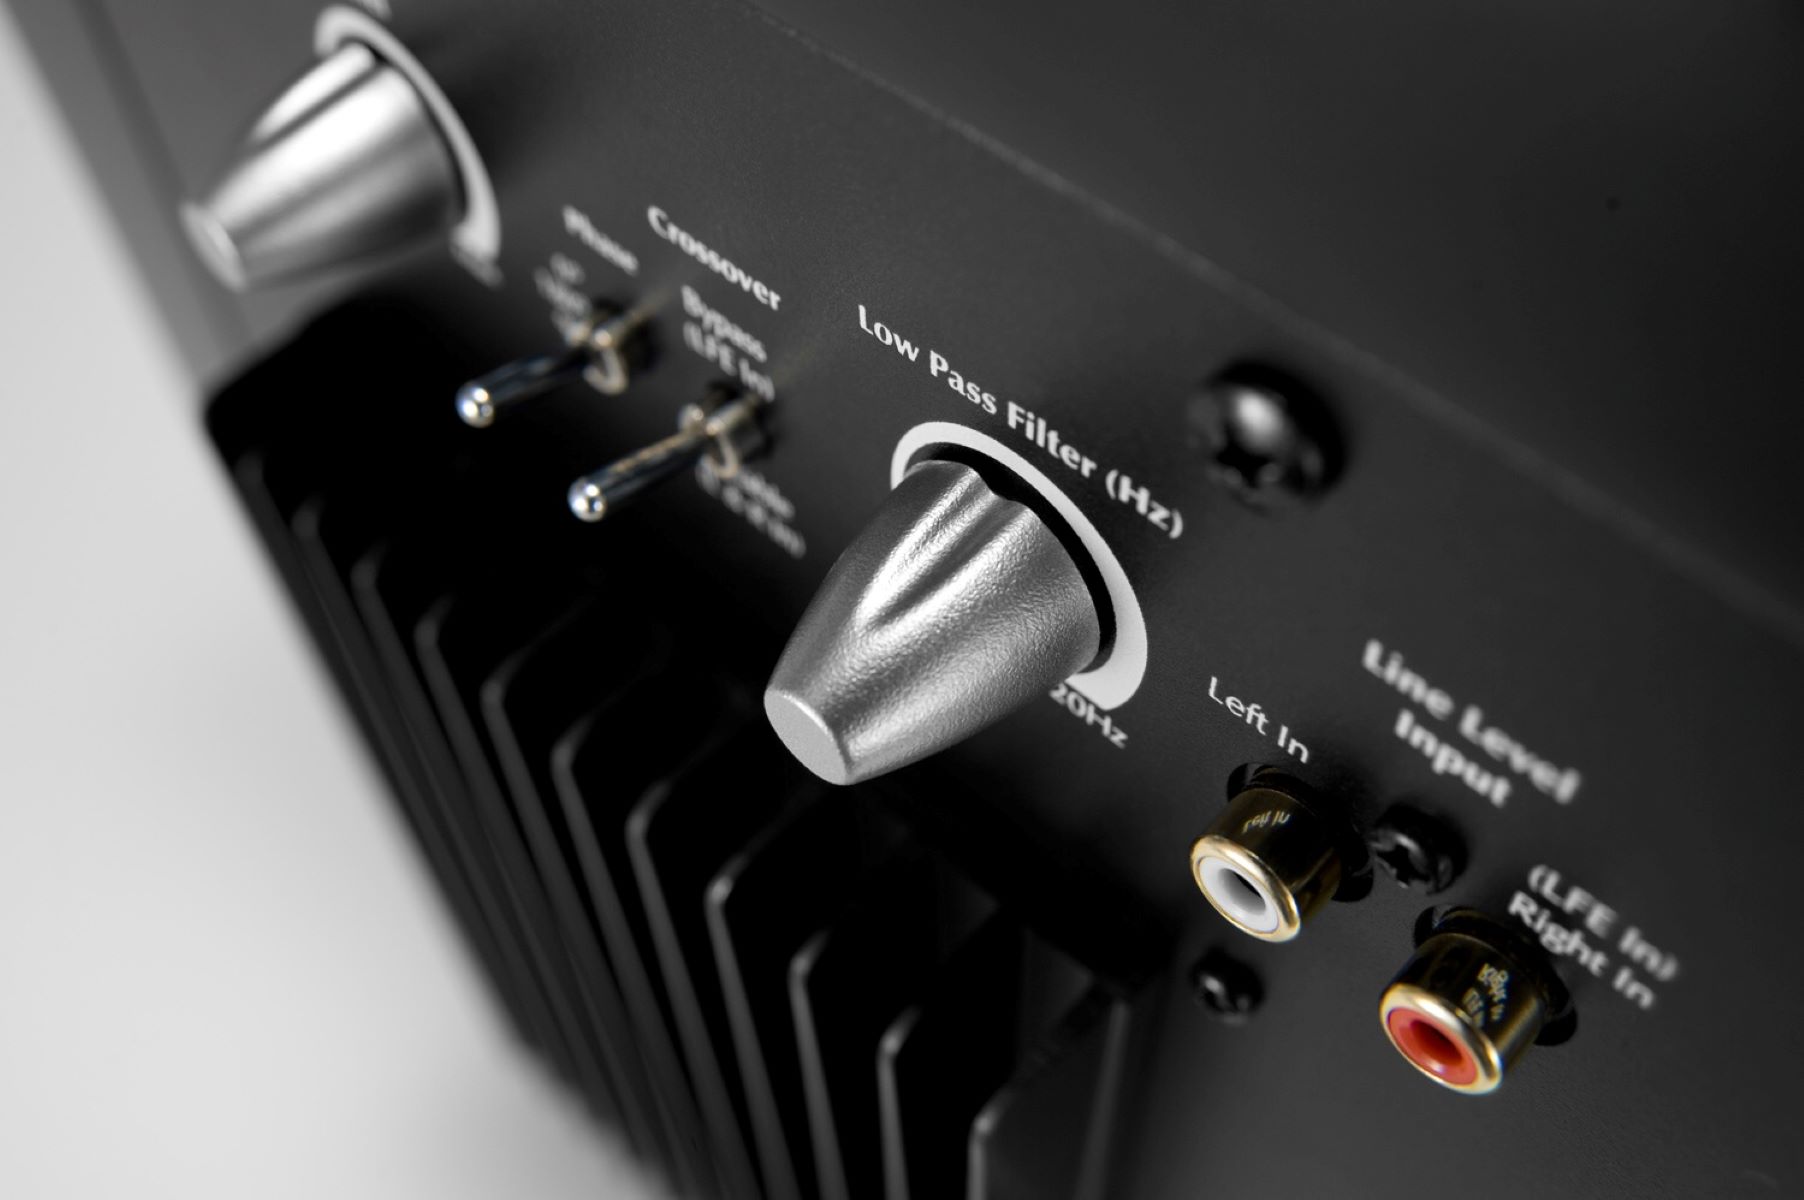
- Locate the Adjustable Settings: Identify the adjustable settings on your low pass filter. These typically include the cutoff frequency and the slope. Some filters may also have additional controls such as phase adjustment or subwoofer level.
- Set the Cutoff Frequency: Begin by setting the cutoff frequency on the low pass filter. Experiment with different frequencies within the recommended range (usually between 80Hz and 120Hz) to find the sweet spot for your specific audio setup. The goal is to seamlessly blend the subwoofer’s bass output with the main speakers.
- Adjust the Slope: Next, adjust the slope of the low pass filter. A steeper slope (e.g., 24dB/octave or 48dB/octave) will provide better separation between the subwoofer and the main speakers, preventing any overlap or distortion in the frequency response. Fine-tune the slope to achieve a smooth transition between the subwoofer and the other speakers in your system.
- Consider Additional Controls: If your low pass filter has additional controls like phase adjustment or subwoofer level, experiment with these as well. The phase adjustment can help align the subwoofer’s output with the other speakers, while the subwoofer level control allows you to balance the bass volume to your preference.
- Listen and Make Adjustments: Play some audio content that includes a variety of bass frequencies and listen carefully to the output from your subwoofer. Pay attention to any distortion, muddiness, or overpowering bass. Make small adjustments to the cutoff frequency, slope, or other settings as needed until you achieve a well-integrated, balanced bass response
- Take Room Acoustics into Account: Remember that room acoustics can significantly impact the performance of your subwoofer. Adjustments made in an empty room might not yield the same results in a fully furnished space. Experiment with different settings while considering the size, shape, and furniture placement in your room to achieve the best possible sound.
Remember, the goal is to achieve a seamless integration between the subwoofer and the rest of your audio system, ensuring accurate and impactful bass reproduction without overpowering or distorting the sound. Don’t be afraid to experiment and take your time to find the perfect settings that suit your preferences and the characteristics of your room.
Once you’re satisfied with the low pass filter settings, you’re ready to move on to the final step – testing and fine-tuning your subwoofer.
Step 4: Testing and Fine-Tuning the Subwoofer
After setting up the low pass filter and adjusting its settings, it’s time to put your subwoofer to the test and fine-tune its performance for the best possible audio experience. Here are some steps to follow:
- Play Various Audio Content: Start by playing a variety of audio content that includes different types of bass frequencies. This can range from music with deep basslines to movies with powerful low-frequency effects. This will allow you to assess the subwoofer’s performance across different genres and ensure that it can handle a wide range of bass frequencies.
- Listen for Clarity and Detail: Pay attention to the clarity and detail in the bass sound. Is it clean and well-defined, or does it sound muddy or distorted? Make note of any issues you hear and adjust accordingly.
- Adjust Subwoofer Placement: Subwoofer placement can have a significant impact on its performance. Try different positions in the room to find the optimal placement that minimizes any boomy or resonant sounds and maximizes the overall bass impact.
- Consider Room Acoustics: Take into account the acoustics of your room. Large, open spaces may require different adjustments compared to smaller, enclosed rooms. Experiment with positioning furniture, adding acoustic treatment, or using room correction software to mitigate any unfavorable room effects.
- Make Small Tweaks to Settings: Continuously make small adjustments to the low pass filter settings based on your observations. Fine-tune the cutoff frequency, slope, phase adjustment, or subwoofer level to achieve the desired bass response. Remember to make minor adjustments and listen carefully as you go.
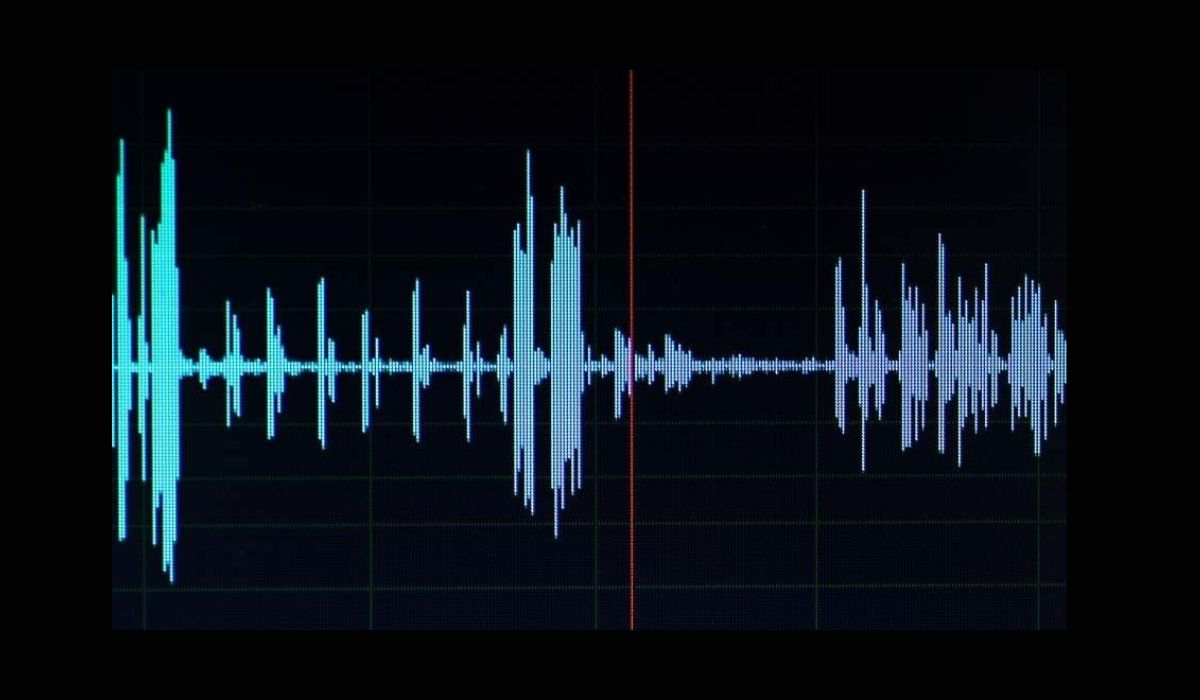
- Use Test Tones and Measurement Tools: If you have access to test tones and measurement tools, such as an audio analyzer or room correction software, they can further assist in analyzing and optimizing the subwoofer performance. These tools can provide objective measurements to guide your fine-tuning process.
- Trust Your Ears: Ultimately, trust your ears. The goal is to achieve a sound that pleases you and matches your listening preferences. Take your time and experiment until you find the perfect balance of bass response that complements your audio system.
Remember that subwoofer tuning is a continuous process. As you make adjustments, revisit different audio content to ensure consistency in performance. Additionally, keep in mind that personal preferences vary, so the recommended settings may not work for everyone. Trust your ears and strive to achieve the best sound that meets your specific preferences.
By following these steps and fine-tuning your subwoofer, you can unlock its full potential and enjoy an immersive audio experience with deep, accurate, and impactful bass reproduction.
Now that you have completed the testing and fine-tuning process, you are ready to sit back, relax, and enjoy the incredible soundstage that your subwoofer adds to your audio setup.
Conclusion
Congratulations! You’ve successfully set up and optimized your subwoofer with a low pass filter, allowing you to experience the full potential of deep, rumbling bass in your audio system. Understanding the role of a low pass filter and following the steps outlined in this guide will help you achieve precise and impactful bass reproduction.
Choosing the right low pass filter, connecting it to your subwoofer, and fine-tuning the settings are essential steps in maximizing the performance of your subwoofer. By selecting an appropriate crossover frequency and slope, you can seamlessly blend the subwoofer’s output with your main speakers. Adjusting the low pass filter settings and taking room acoustics into consideration will ensure accurate and balanced bass reproduction.
Remember, the key to achieving the best sound is to trust your ears. Experiment with different settings, listen attentively, and make gradual adjustments until you achieve the desired bass response that complements your audio system and personal preferences. Room acoustics and placement also play a significant role, so don’t hesitate to make changes if necessary.
As you enjoy your newfound bass experience, keep in mind that every audio setup is unique. The recommendations provided in this guide serve as a starting point, but you may need to make additional adjustments based on your specific equipment and room characteristics.
By diving into the world of subwoofers and low pass filters, you have taken a significant step towards creating an immersive audio environment. Whether you’re watching a movie, listening to music, or playing video games, the enhanced bass reproduction will add depth, impact, and excitement to your overall audio experience.
Now, sit back, relax, and let the thunderous bass of your subwoofer immerse you in a world of extraordinary sound!