Home>Devices & Equipment>Subwoofer>How To Adjust Subwoofer Settings
Subwoofer
How To Adjust Subwoofer Settings
Published: January 20, 2024
Learn how to optimize your subwoofer settings for the best audio experience. Adjust the subwoofer to enhance bass and achieve deep, immersive sound.
(Many of the links in this article redirect to a specific reviewed product. Your purchase of these products through affiliate links helps to generate commission for AudioLover.com, at no extra cost. Learn more)
Table of Contents
Introduction
Welcome to the world of subwoofers! Whether you’re a music lover, a movie enthusiast, or an audiophile, a high-quality subwoofer can take your audio experience to the next level. A subwoofer is a specialized speaker that is designed to reproduce low-frequency sounds, adding depth and impact to your audio system.
However, simply adding a subwoofer to your setup is not enough. To get the best performance out of your subwoofer, it is important to understand and adjust its settings properly. In this article, we will guide you through the process of adjusting your subwoofer settings and optimizing its performance.
Before we dive into the technical details, let’s quickly touch upon the importance of a subwoofer in your audio system. The subwoofer is responsible for reproducing the low-frequency sounds that regular speakers struggle to reproduce accurately. This includes deep bass notes, rumbling thunder, and powerful explosions in movies.
By adding a subwoofer to your setup, you can experience a more immersive and dynamic soundstage, allowing you to feel the impact of the audio in a way that regular speakers alone cannot achieve. A well-tuned subwoofer not only enhances the overall listening experience but also adds a sense of realism and depth to your favorite music, movies, and games.
Now that we understand the importance of a subwoofer, let’s move on to the next section, where we will explore the various settings that you need to adjust to optimize its performance.
Understanding Subwoofer Settings
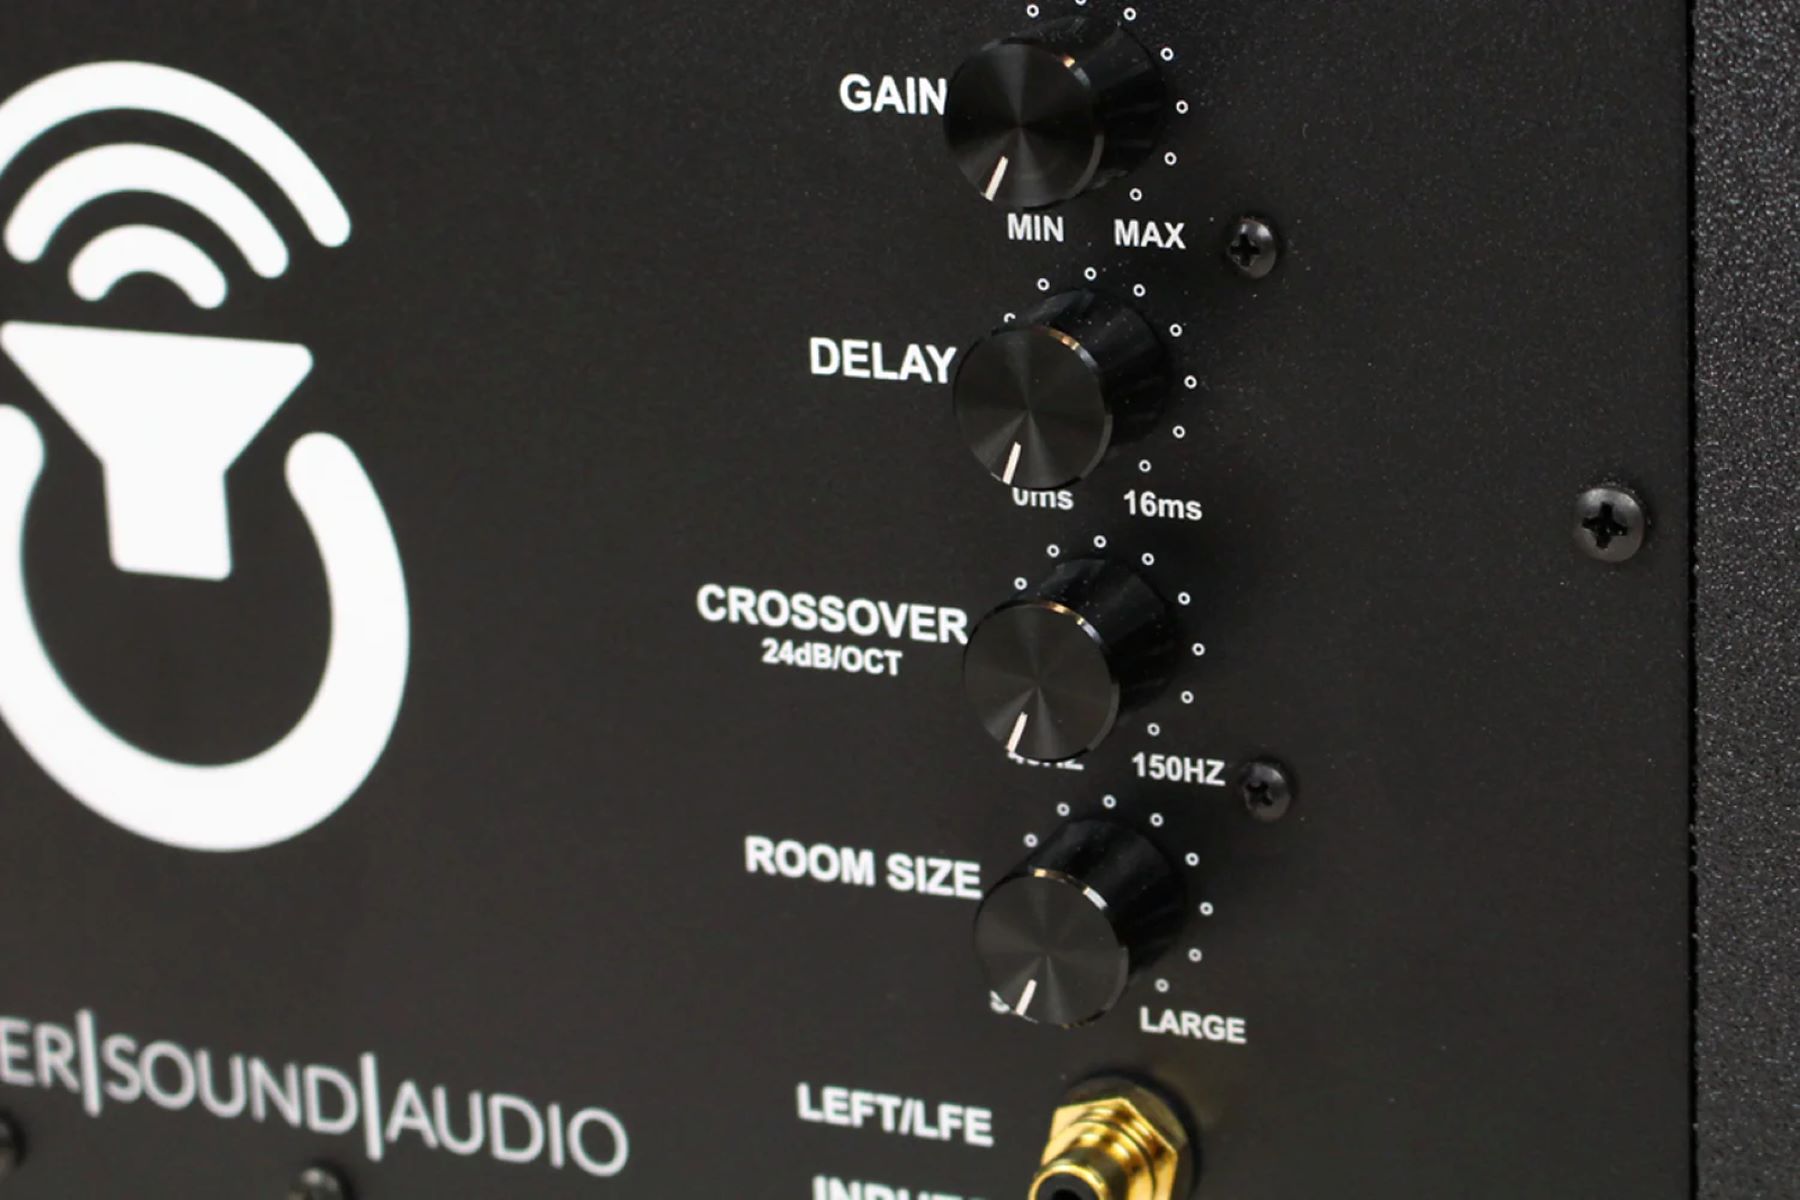
Before you start adjusting the settings of your subwoofer, it’s important to have a basic understanding of what each setting does. Here are the key subwoofer settings you need to be familiar with:
- Volume: The volume control determines how loud the subwoofer is relative to the rest of your audio system.
- Crossover Frequency: The crossover frequency determines the point at which the subwoofer starts playing and the main speakers stop. It ensures that the right frequencies are sent to the appropriate speakers.
- Phase Control: The phase control allows you to align the timing of the subwoofer with the main speakers, ensuring proper integration and eliminating any potential sound cancellations or reinforcements.
- Placement: The placement of your subwoofer in the room can have a significant impact on its performance. Finding the right spot where it blends seamlessly with your main speakers is crucial.
- Room EQ: Some subwoofers offer advanced features like room equalization, which automatically adjusts the subwoofer settings to compensate for the acoustic characteristics of your room.
By understanding these settings and knowing how they interact with each other, you’ll be able to fine-tune your subwoofer for optimal performance. In the next sections, we’ll go into detail on how to adjust each setting to achieve the best possible sound.
Adjusting the Subwoofer Volume
The subwoofer volume is one of the most basic and essential settings to adjust. It determines how loud the subwoofer is relative to the rest of your audio system. Finding the right balance is crucial to ensure a smooth and well-integrated sound.
Start by playing a track or movie scene that has a balanced mix of low-frequency sounds. Slowly increase the subwoofer volume until you reach a point where the bass feels present and impactful without overpowering the main speakers. Ideally, the subwoofer should complement the sound without drawing too much attention to itself.
It’s important to note that the ideal subwoofer volume will vary depending on your personal preference, the size of your room, and the type of content you’re listening to. A larger room may require a higher volume setting to fill the space, while a smaller room may need a lower setting to prevent overwhelming bass response.
Additionally, different genres of music or movies may have different bass requirements. For example, action-packed movies with explosive sound effects may benefit from a slightly higher subwoofer volume, while classical music may require a more subtle and refined bass response.
Take the time to experiment and listen to different audio content at various subwoofer volume levels. Trust your ears and make incremental adjustments until you find the sweet spot that delivers the desired level of bass impact without overpowering the rest of the audio system.
Once you’ve set the subwoofer volume to your liking, you can move on to the next step of adjusting the crossover frequency, which we’ll explore in the following section.
Setting the Crossover Frequency
The crossover frequency is a critical setting that determines the point at which the subwoofer starts playing and the main speakers stop. It ensures that the right frequencies are directed to the appropriate speakers, optimizing the overall sound balance.
To set the crossover frequency, start by understanding the capabilities of your main speakers. Most speakers have a specified frequency range (e.g., 50Hz-20kHz) indicating the lowest and highest frequencies they can reproduce accurately. Ideally, the crossover frequency should be set just below the lowest frequency your speakers can handle.
Most subwoofers offer a variable crossover control, allowing you to adjust the frequency. Begin by setting the crossover frequency to around 80Hz, which is a commonly recommended starting point. This frequency is a good choice for most music and movie content as it allows for a seamless transition between the subwoofer and the speakers.
Once you’ve set the initial crossover frequency, listen to some audio content and pay attention to the bass response. If you notice a gap or lack of bass between the subwoofer and the speakers, gradually increase the crossover frequency in small increments to redirect more bass to the subwoofer. Conversely, if the bass feels boomy or overpowering, lower the crossover frequency to send less bass to the subwoofer.
Keep in mind that finding the optimal crossover frequency may require some trial and error. Every audio system and room configuration is different, and personal preferences can also play a role. Trust your ears and make small adjustments until you find the crossover frequency that provides a smooth and seamless blend of bass between the subwoofer and the main speakers.
Setting the crossover frequency correctly is crucial for achieving a balanced and natural soundstage. Once you’ve dialed in the crossover, you can proceed to the next step of adjusting the phase control, which we’ll discuss in the following section.
Tuning the Phase Control
The phase control on a subwoofer allows you to align the timing of the subwoofer’s output with that of the main speakers. Properly tuning the phase control ensures that the sound waves from both the subwoofer and the main speakers are in sync, resulting in a more cohesive and accurate bass response.
To begin tuning the phase control, start by playing a track or movie scene with a consistent and prominent bass line. Set the phase control on the subwoofer to the 0-degree position. Listen carefully and pay attention to the bass response.
Now, switch the phase control to the 180-degree position and listen again. Take note of any changes in the bass response. In some cases, you may notice that the bass becomes weaker or cancels out when the phase control is set to 180 degrees.
If you experience a loss of bass or a cancellation effect with the phase set to 180 degrees, return it to the 0-degree position. However, if you notice an improvement or a more coherent bass output at 180 degrees, leave it in that position.
It’s important to note that the ideal phase setting can vary depending on the specific room acoustics and the placement of your subwoofer. In certain scenarios, a phase setting between 0 and 180 degrees may be necessary for the best bass response.
Always trust your ears when fine-tuning the phase control. Make small adjustments, going back and forth between the 0 and 180-degree positions and listening for any changes in the bass. Aim for a setting that provides the most accurate and impactful bass reproduction.
Once you’re satisfied with the phase control, you can move on to adjusting the subwoofer placement, which can further optimize the bass performance in your room.
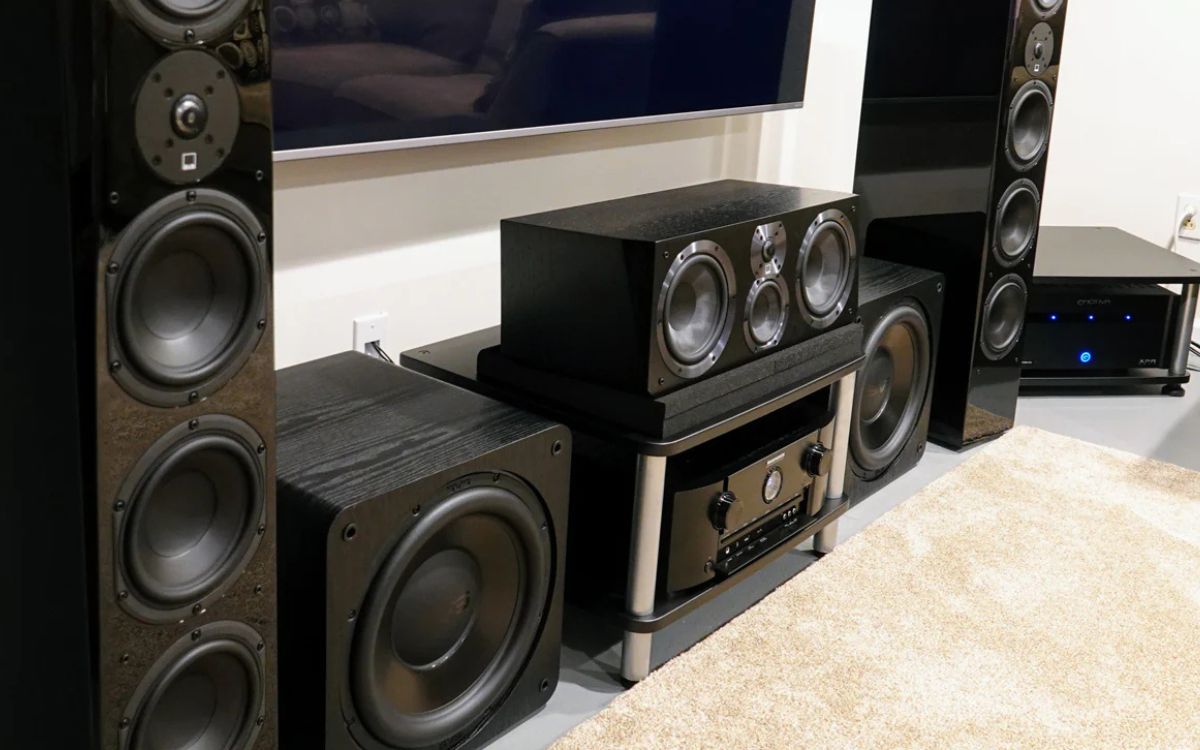
Adjusting the Subwoofer Placement
The placement of your subwoofer plays a crucial role in its overall performance and the quality of bass reproduction. Finding the optimal placement can greatly enhance the impact and accuracy of the low-frequency sounds. Here are some considerations when adjusting the subwoofer placement:
1. Experiment with different positions: Start by placing the subwoofer near your listening area, such as next to the TV or along the front wall. Then, move it around the room and listen for any changes in the bass response. Small adjustments in placement can make a significant difference in bass quality.
2. Avoid corner placement: While it may be tempting to place the subwoofer in a corner for maximum bass impact, this can lead to boomy and overpowering bass. Try to keep the subwoofer away from corners to achieve a more balanced and controlled bass response.
3. Consider room mode effects: Every room has its own acoustic characteristics, and certain positions may result in bass buildup or cancellation due to room modes. Room modes are resonant frequencies that can affect how bass frequencies interact with the room’s dimensions. Experiment with different placements to minimize any negative room mode effects.
4. Use room boundaries to your advantage: Placing the subwoofer near a wall or using room boundaries like walls or furniture can help reinforce the bass response and provide a sense of depth. However, be aware of the potential for excessive bass buildup in certain positions.
5. Use a subwoofer crawl technique: If you’re unsure about the optimal placement, try the subwoofer crawl technique. Place the subwoofer in your listening position and move around the room while listening for the spot with the most balanced and natural bass response. This technique helps you find the optimal placement based on your room’s specific acoustics.
Remember, every room is different, and the best subwoofer placement will depend on your specific environment. Take the time to experiment with different positions and listen for changes in bass response. By finding the optimal placement, you can maximize the impact and accuracy of your subwoofer’s performance.
Once you have adjusted the subwoofer placement, you can consider utilizing room equalization (EQ) features, if available, to further optimize the subwoofer settings, which we will explore in the next section.
Using Room EQ to Optimize Subwoofer Settings
Room equalization (EQ) is a powerful tool that can help optimize the subwoofer settings and enhance the overall audio performance in your specific listening environment. It takes into account the unique acoustic characteristics of your room and adjusts the subwoofer’s settings accordingly.
Many subwoofers are equipped with built-in room EQ features, while others may require the use of external devices or software. The process typically involves using a microphone to measure the frequency response at various locations in your room and applying corrective adjustments to compensate for any acoustic anomalies.
To start using room EQ, follow these general steps:
- Measure the room response: Set up the microphone at your primary listening position and run the room EQ system or software. It will generate a set of test tones that are played through the subwoofer. The system then measures the frequency response at different locations, taking into account reflections and room resonances.
- Analyze the measurements: After the measurements are complete, the room EQ system will analyze the data and generate a correction curve based on any frequency response irregularities it detected. This curve represents the adjustments that need to be applied to optimize the subwoofer’s output in your room.
- Apply the correction curve: Once the correction curve is generated, you can load it into your subwoofer or the associated EQ device/software. The corrections may involve boosting or attenuating specific frequencies to achieve a flatter and more balanced frequency response throughout the listening area.
- Refine the settings: Listen to various audio content and make fine adjustments to the room EQ settings if needed. Trust your ears and make incremental changes to ensure that the bass response remains natural and pleasing to your preferences.
Using room EQ can greatly improve the accuracy and consistency of the bass response in your room. It helps to minimize any negative effects caused by room acoustics and ensures a more enjoyable and immersive audio experience.
However, it’s important to note that room EQ is not a one-size-fits-all solution. Each room is unique, and the effectiveness of room EQ can vary depending on factors like room size, shape, and furniture placement. It’s always a good idea to consult the user manual or seek professional advice for optimal usage of the room EQ features available in your subwoofer.
With the subwoofer settings now optimized using room EQ, you can move on to the final section of this article, where we will discuss common subwoofer issues and how to troubleshoot them.
Troubleshooting Common Subwoofer Issues
Even with proper adjustments and optimization, subwoofers may encounter certain issues that can impact their performance. Here are some common subwoofer issues and troubleshooting tips to resolve them:
1. No sound from the subwoofer: Check the power supply and ensure that the subwoofer is properly plugged in. Verify that the audio cables are securely connected to both the subwoofer and the audio source. Adjust the volume and crossover settings to make sure they are not set too low.
2. Weak or distorted bass: If the bass feels weak or distorted, first check the subwoofer volume and adjust it accordingly. Ensure that the crossover frequency is set correctly, aligning with the capabilities of your main speakers. Consider adjusting the subwoofer’s phase control to optimize synchronization with the main speakers.
3. Excessive bass or boomy sound: If the bass sounds overwhelming and boomy, try reducing the subwoofer volume. Also, experiment with different subwoofer placements to find a position that provides a more balanced and controlled bass response. Consider adjusting the crossover frequency and phase control as well.
4. Lack of integration with main speakers: If the subwoofer feels disconnected from the main speakers, check the crossover frequency to ensure it is properly routing the right frequencies to the subwoofer. Adjust the phase control to align the timing of the subwoofer with the main speakers, enhancing integration and avoiding sound cancellations.
5. Rattling or vibrating noises: Rattling or vibrating sounds can be caused by loose objects or cables near the subwoofer. Ensure that all connections are secure and check for any loose items nearby. If the issue persists, it may be a mechanical problem within the subwoofer, and it’s advised to contact the manufacturer or seek professional assistance.
6. Inconsistent bass response throughout the room: If the bass response varies significantly from one listening position to another, consider utilizing room EQ features, if available, to compensate for the room’s acoustic anomalies. You can also experiment with subwoofer placement and fine-tune the position to achieve a more balanced bass response throughout the room.
Remember, troubleshooting subwoofer issues may require some experimentation and adjustments. It’s important to take your time, trust your ears, and make incremental changes to optimize the subwoofer’s performance in your specific setup.
With these troubleshooting tips, you can address common subwoofer issues and ensure that you’re getting the best possible bass performance from your subwoofer.
Now, armed with the knowledge of subwoofer settings, adjustments, and troubleshooting, you’re well equipped to optimize your subwoofer for an incredible audio experience. Enjoy immersive sound, deep bass, and an enhanced sensory journey through music, movies, and more!
Conclusion
Optimizing the settings and performance of your subwoofer is an essential step in creating a captivating audio experience. By understanding and adjusting the subwoofer volume, crossover frequency, phase control, and placement, you can achieve a well-balanced and immersive bass response that enhances your favorite music, movies, and games.
Remember that finding the ideal settings may require some experimentation and careful listening. Trust your ears, make incremental adjustments, and strive for a balanced and natural bass output that complements your main speakers.
In addition, using room EQ can further enhance the bass performance by compensating for the unique acoustic characteristics of your room. Take advantage of the room EQ features available in your subwoofer to achieve a flatter frequency response and improve overall audio accuracy.
Lastly, be aware of common subwoofer issues and troubleshoot them accordingly. From no sound to weak bass or rattling noises, understanding how to address these issues ensures that your subwoofer operates optimally and delivers the best possible audio experience.
With proper subwoofer settings, adjustments, and troubleshooting, you can unlock the full potential of your audio system and immerse yourself in rich, deep, and impactful bass. Whether you’re enjoying your favorite music tracks, watching blockbuster movies, or immersing yourself in virtual worlds, a well-tuned subwoofer will elevate your audio experience to new heights.
So, take the time to fine-tune your subwoofer settings, experiment with placement, and make use of room EQ features. The effort will be rewarded with a powerful, immersive, and extraordinary audio experience that will truly bring your entertainment to life.