Home>Devices & Equipment>Subwoofer>How To Set Up Subwoofer
Subwoofer
How To Set Up Subwoofer
Modified: February 17, 2024
Learn how to set up a subwoofer like a pro and enhance your audio experience. Step-by-step guide for optimal placement and connection.
(Many of the links in this article redirect to a specific reviewed product. Your purchase of these products through affiliate links helps to generate commission for AudioLover.com, at no extra cost. Learn more)
Table of Contents
Introduction
Welcome to the world of deep bass and rumbling vibrations! If you’re a music enthusiast or a movie lover looking to take your audio experience to the next level, a subwoofer is an essential component to consider. A subwoofer is a specialized speaker designed specifically to reproduce low-frequency sounds, adding depth and impact to your favorite music tracks and enhancing the cinematic experience.
In this guide, we will walk you through the process of setting up a subwoofer to ensure optimal performance and enjoyment. Whether you’re a seasoned audio enthusiast or a beginner, we’ve got you covered with easy-to-follow steps and expert tips to help you make the most out of your subwoofer.
But before we dive into the installation process, it’s important to understand the role of a subwoofer in your audio setup. A subwoofer is responsible for reproducing the low-frequency sounds, typically below 120Hz, which are crucial for creating a rich, full-bodied audio experience. These low-frequency sounds include the deep bass of a kick drum, the rumble of an explosion in a movie, or the throbbing energy of a bass guitar.
Without a properly set up subwoofer, you may find that your audio setup lacks depth and impact, making it feel incomplete or lacking in power. However, with the right setup and calibration, a subwoofer can transform your listening space into a dynamic audio oasis, allowing you to fully immerse yourself in your favorite music, movies, and games.
Now that we have an understanding of the importance of a subwoofer, let’s dive into the step-by-step process of setting up and optimizing your subwoofer for maximum performance.
Step 1: Choosing the Right Location
When it comes to setting up your subwoofer, one of the most critical factors to consider is the location. The placement of your subwoofer can significantly impact its performance and the overall audio experience. Here are some essential tips to help you choose the right location:
- Consider room acoustics: Take into account the size and shape of your room. Different rooms have different acoustic properties, and the placement of your subwoofer can affect the way the low-frequency sounds propagate. Experiment with different locations to find the one that produces the best bass response.
- Avoid corners: While it may be tempting to place your subwoofer in a corner to save space, this can often result in exaggerated bass response and muddiness. Try to keep the subwoofer at least a few feet away from corners to achieve a more controlled and balanced sound.
- Keep some distance from walls: Placing the subwoofer too close to walls can also lead to unwanted resonances and boomy bass. Aim to keep a gap of at least a foot or two between the subwoofer and the walls. If possible, experiment with different distances to find the sweet spot with the best bass response.
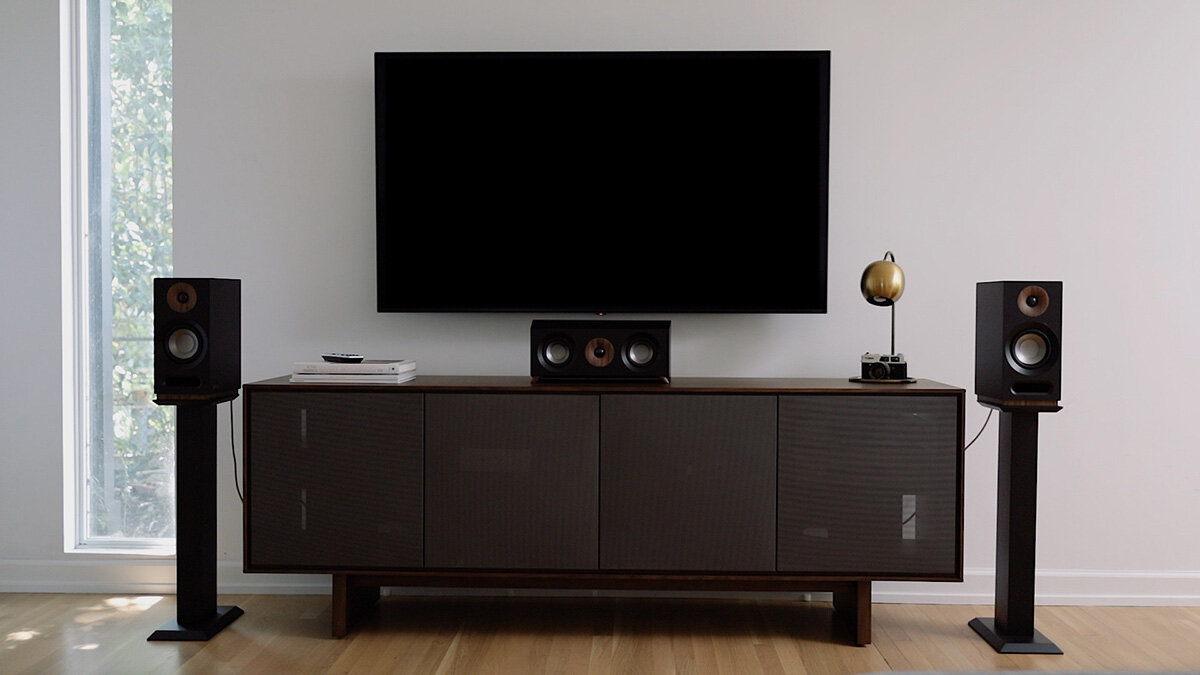
- Consider room layout and furniture placement: Your room’s layout and furniture placement can affect the sound quality. Avoid placing the subwoofer behind large pieces of furniture or in areas where its performance may be obstructed. Ideally, position it in a central location, either along the front wall or near the TV or main listening area.
- Test different locations: To find the optimal location for your subwoofer, consider performing a “subwoofer crawl.” Place the subwoofer in your main listening position and crawl around the room while playing bass-heavy music or content with deep rumbling effects. This will help you identify areas where the bass sounds the most balanced and even throughout the room.
Remember, finding the perfect location for your subwoofer may require some trial and error. Take the time to experiment with different placements and make adjustments as needed to achieve the best sound quality and bass response in your listening space. Once you’ve found the ideal location, you can move on to the next step: connecting the subwoofer to the audio source.
Step 2: Connecting the Subwoofer to the Audio Source
Now that you have found the perfect location for your subwoofer, it’s time to connect it to your audio source. The process may vary depending on the type of audio system you have, but here are some general steps to follow:
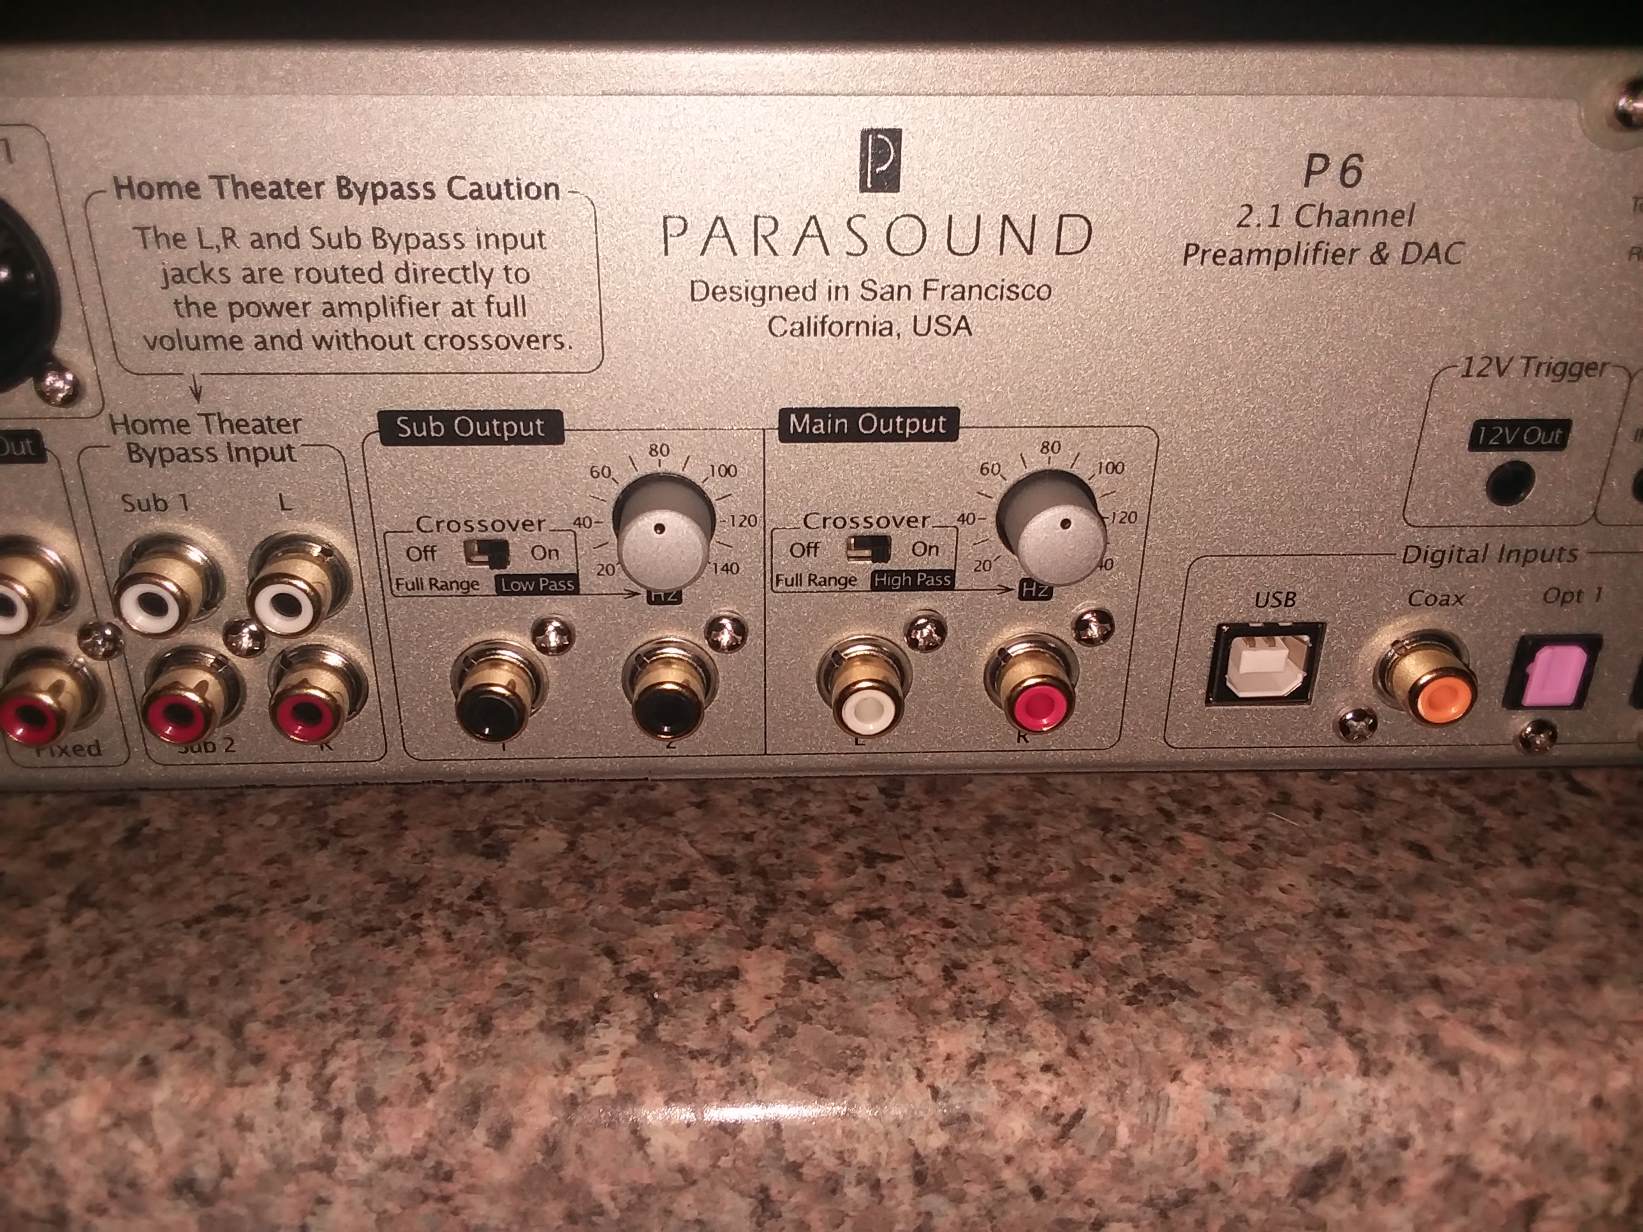
- Locate the subwoofer output on your audio source: Most audio systems, whether it’s a stereo receiver, home theater amplifier, or soundbar, will have a designated output specifically for the subwoofer. Look for a labeled “SUB OUT” or “LFE OUT” port on the back or side of the audio device.
- Connect the subwoofer cable: Once you’ve located the subwoofer output, connect one end of the subwoofer cable to the corresponding port on your audio source. The subwoofer cable is typically a single RCA cable with a red or white connector.
- Connect the other end of the subwoofer cable to the subwoofer: Depending on your subwoofer model, you may have a variety of input options. The most common connection method is using an RCA input on the subwoofer. Simply plug the other end of the subwoofer cable into the designated RCA input on the subwoofer. Make sure to connect it to the “LINE IN” or “LFE” input.
- Secure the connections: Ensure that the connections are secure by gently twisting the cable connectors until they are tight. Loose connections can result in a loss of signal or poor audio quality.
- Power on the subwoofer: Once the connections are in place, plug in the subwoofer’s power cord and turn on the subwoofer. Check the subwoofer’s manual or indicator lights to ensure that it is receiving power.
It’s essential to note that some subwoofers might require an additional step to enable the subwoofer output on your audio source. In such cases, refer to the user manual for your audio device to locate the appropriate settings or consult the manufacturer’s website for guidance.
With the subwoofer correctly connected to the audio source, you’re ready to move on to the next step: adjusting the subwoofer’s settings to optimize its performance.
Step 3: Adjusting the Subwoofer’s Settings
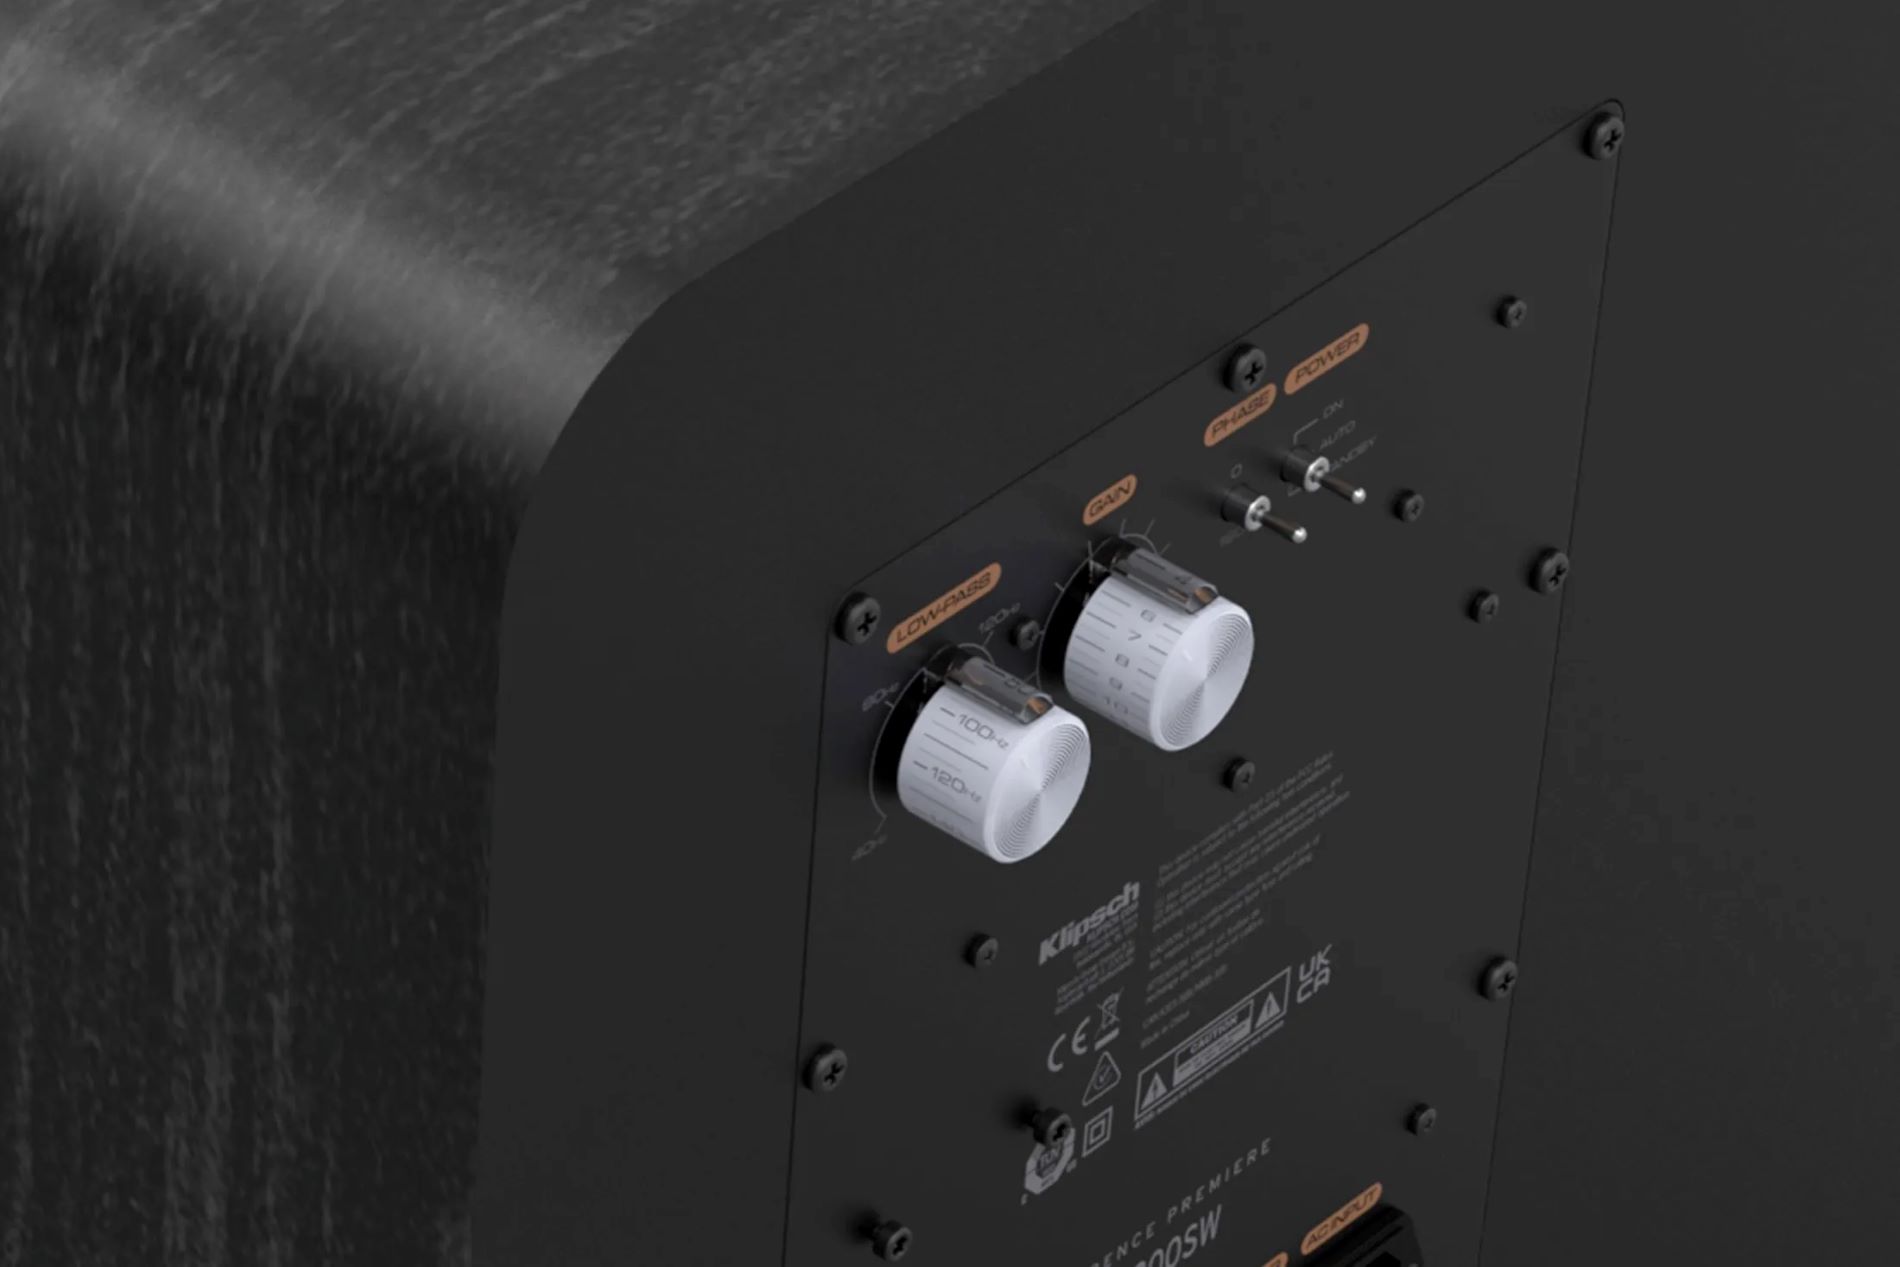
Now that you have successfully connected your subwoofer to the audio source, it’s time to fine-tune its settings to achieve the best possible sound quality. Most subwoofers have built-in controls that allow you to adjust various parameters to optimize its performance. Here are the key settings to consider:
- Volume control: Start by setting the subwoofer volume to the halfway mark or a comfortable level. You can then make adjustments later based on your preference and the balance with the rest of the speakers. Be cautious not to overpower the other speakers or cause distortion by setting the volume too high.
- Crossover frequency: The crossover frequency determines the point at which the subwoofer starts playing frequencies and the point where the main speakers take over. It’s important to set the crossover frequency to ensure a seamless transition between the main speakers and the subwoofer. The recommended starting point is usually around 80Hz, but you can experiment with different frequencies to find the one that blends well with the rest of your speakers.
- Phase adjustment: The phase setting helps synchronize the subwoofer’s output with the main speakers, ensuring that the bass frequencies are in phase and not canceling each other out. Begin by setting the phase to 0 degrees and make small adjustments to fine-tune the bass response. Listen for changes in the bass impact and overall clarity as you make adjustments.
- EQ or equalization: Some subwoofers have built-in equalization options to adjust the sound based on your room’s acoustics or personal preference. This allows you to boost or reduce certain frequencies to achieve the desired sound balance. Use the EQ settings sparingly and make small adjustments to avoid creating unnatural or boomy bass.
- Auto On/Off or power-saving mode: Many modern subwoofers come with an auto on/off feature that automatically detects audio signals and powers the subwoofer on or off accordingly. It’s a convenient feature that helps conserve energy. Ensure that this feature is enabled if available, or set the subwoofer to power-saving mode if you won’t be using it for an extended period.
Keep in mind that the specific settings and controls on your subwoofer may vary slightly depending on the model and manufacturer. Consult the user manual or the manufacturer’s website for detailed instructions on adjusting these settings for your specific subwoofer model.
Once you have made the necessary adjustments, it’s time to move on to the next step: calibrating the subwoofer with your surround sound system to ensure optimal performance.
Step 4: Calibrating the Subwoofer with the Surround Sound System
Calibrating your subwoofer with your surround sound system is crucial to achieve a balanced and immersive audio experience. This step will ensure that the subwoofer blends seamlessly with the other speakers in your setup. Here’s how to calibrate your subwoofer:
- Access the audio system’s speaker setup menu: Most modern surround sound systems have a dedicated speaker setup menu that allows you to adjust various audio settings. Refer to your system’s user manual to locate and access this menu.
- Configure the speaker size and crossover settings: In the speaker setup menu, set the speaker sizes and crossover frequencies for all the speakers in your system, including the subwoofer. This step helps your audio system distribute the correct frequencies to each speaker, ensuring a smooth integration between the subwoofer and the other speakers.
- Utilize automated calibration systems (if available): Many home theater receivers come with automated calibration systems, such as Audyssey or YPAO. These systems use a microphone to measure your room’s acoustics and make adjustments automatically. Follow the instructions provided with your receiver to perform the automated calibration process.
- Manually adjust subwoofer levels (if necessary): After running an automated calibration or if your system doesn’t have one, you may still need to manually adjust the subwoofer levels. Use the test tones or audio signals provided in the speaker setup menu to fine-tune the subwoofer’s volume until it blends seamlessly with the other speakers. Be careful to maintain a balanced sound without overpowering or overshadowing the rest of the audio system.
- Perform a sound test: Once you have made all the necessary adjustments, play some audio content that features a range of frequencies and dynamic bass passages. Listen carefully for any inconsistencies or imbalances in the sound. Make additional adjustments to the subwoofer volume or other settings as needed to achieve optimal integration with the surround sound system.
Remember, calibrating your subwoofer will be an iterative process. It may take a few adjustments and sound tests to find the perfect balance for your audio system. Take your time and be patient in fine-tuning the settings until you achieve the desired audio quality.
With the subwoofer properly calibrated and integrated with your surround sound system, you’re now ready for the final step: testing and fine-tuning the subwoofer to ensure it delivers optimal performance.
Step 5: Testing and Fine-Tuning the Subwoofer
Now that you have completed the initial setup and calibration of your subwoofer, it’s time to test and fine-tune its performance to ensure it delivers optimal bass impact and integration with your audio system. Follow these steps to test and fine-tune your subwoofer:
- Play a range of audio content: Start by playing a variety of audio content that encompasses different genres and styles. This can include music tracks with deep bass, action-packed movie scenes with explosions or rumbling effects, and video game sequences with intense sound effects. This will help you evaluate the subwoofer’s performance across a range of frequencies and dynamic levels.
- Listen for accuracy and impact: Pay close attention to the accuracy and impact of the bass sounds produced by the subwoofer. The bass should sound clear and well-defined without muddiness or distortion. It should have a smooth transition between the main speakers and the subwoofer, creating a cohesive and immersive audio experience.
- Make adjustments as needed: If you notice any issues with the subwoofer’s performance, such as overpowering bass or lack of impact, you can make additional adjustments to the settings. Experiment with the volume control, crossover frequency, and phase adjustment to find the optimal balance and impact. Fine-tune these settings until you achieve the desired bass response.
- Consider room treatments (optional): If you’re still not satisfied with the subwoofer’s performance, you may want to consider room treatments to improve the overall acoustics. Adding bass traps or acoustic panels to address standing waves or reflections can help optimize the bass response and reduce unwanted resonances in the room.
- Re-test and fine-tune again: After making adjustments, repeat the testing process to assess the improvements. Fine-tune further if necessary until you’re satisfied with the subwoofer’s performance. Remember, achieving the perfect balance and integration may take some time and experimentation.
By following this step-by-step process of testing and fine-tuning your subwoofer, you can ensure that it is delivering the best possible sound quality and enhancing your audio experience. Keep in mind that personal preference plays a role in fine-tuning, so trust your ears and make adjustments that suit your taste and the characteristics of your listening environment.
Congratulations! You have successfully set up, calibrated, and fine-tuned your subwoofer. Now, sit back, relax, and enjoy the deep, impactful bass that will elevate your music, movies, and gaming experience to a whole new level!
Conclusion
Setting up and optimizing a subwoofer may seem like a daunting task at first, but with the right knowledge and guidance, it becomes a rewarding experience that enhances your audio system’s performance. By following the step-by-step process outlined in this guide, you can ensure that your subwoofer is integrated seamlessly into your setup to deliver deep, powerful bass and elevate your listening experience.
Choosing the right location for your subwoofer is crucial for achieving optimal sound quality. Take into account the room acoustics, avoid corners, and keep some distance from walls to achieve a balanced bass response. Experiment with different locations and perform a subwoofer crawl to find the sweet spot where the bass sounds the best.
Connecting the subwoofer to the audio source is a straightforward process. Locate the subwoofer output on your audio device, connect the subwoofer cable, and ensure the connections are secure. Power on the subwoofer and confirm that it is receiving power.
Adjusting the subwoofer’s settings allows you to fine-tune its performance. Set the volume to a comfortable level, adjust the crossover frequency for smooth integration with the main speakers, and experiment with the phase adjustment and EQ options to achieve the desired sound balance.
Calibrating the subwoofer with your surround sound system ensures a balanced audio experience. Configure the speaker sizes, crossover frequencies, and utilize automated calibration systems if available. Make manual adjustments to fine-tune the subwoofer levels and perform sound tests to ensure optimal integration.
Finally, testing and fine-tuning the subwoofer involves listening to a range of audio content, evaluating the accuracy and impact of the bass, and making adjustments as needed. Consider room treatments if necessary, and repeat the testing process until you are satisfied with the subwoofer’s performance.
Remember, setting up a subwoofer is as much an art as it is a science. Trust your ears, experiment, and make adjustments based on your personal preferences and the characteristics of your listening environment. By following these steps, you can unlock the full potential of your subwoofer and enjoy a rich and immersive audio experience for music, movies, and gaming.