Home>Devices & Equipment>Subwoofer>How To Set Up Sonos Subwoofer
Subwoofer
How To Set Up Sonos Subwoofer
Modified: January 22, 2024
Learn how to set up a Sonos subwoofer and improve your audio experience. Enhance the bass and immerse yourself in rich, deep sound with this easy-to-follow guide.
(Many of the links in this article redirect to a specific reviewed product. Your purchase of these products through affiliate links helps to generate commission for AudioLover.com, at no extra cost. Learn more)
Table of Contents
Introduction
Welcome to the world of powerful and immersive sound! If you’re a music enthusiast or a movie buff, you know that a good subwoofer can take your audio experience to a whole new level. With its ability to reproduce low-frequency sounds with precision and depth, a subwoofer is an essential component of any audio setup.
In this article, we will guide you through the process of setting up a Sonos Subwoofer. Sonos is renowned for their high-quality audio products, and their Subwoofer is no exception. Designed to complement their range of speakers and soundbars, the Sonos Subwoofer delivers deep bass that adds richness and impact to your favorite music, movies, and games.
Whether you’re a seasoned audio enthusiast or a newcomer to the world of subwoofers, this step-by-step guide will help you get the most out of your Sonos Subwoofer. We’ll cover everything from unboxing the Subwoofer to fine-tuning its settings for optimal performance. So let’s dive in and elevate your audio experience to new heights!
Step 1: Unboxing the Sonos Subwoofer
The journey to unleashing powerful bass begins with unboxing the Sonos Subwoofer. When your package arrives, ensure you have a clear and spacious area to work in. Here’s how to unbox your Sonos Subwoofer:
- Start by carefully removing the outer packaging. Look for any tape or labels securing the box, and gently cut them open.
- Lift the lid of the box and set it aside. You should now see the Sonos Subwoofer securely nestled inside, protected by foam inserts.
- Gently lift the Sonos Subwoofer out of the box, being mindful of its weight. The Subwoofer is solidly built and may require two people to handle comfortably.
- Once the Subwoofer is out of the box, remove any remaining packaging materials, such as plastic wrapping or foam inserts. Set these aside for recycling.
- Inspect the Subwoofer for any visible damage or defects. Sonos takes great care in packaging their products, but it’s always good practice to double-check before proceeding.
- Now that your Sonos Subwoofer is unboxed and ready, take a moment to appreciate its sleek and elegant design. Its minimalist form will seamlessly fit into your home audio setup.
Unboxing the Sonos Subwoofer is an exciting moment, as it marks the beginning of your journey towards experiencing deep, immersive bass. Now that you have followed the first step, you’re ready to move on to the next crucial stage: choosing the optimal placement for your Subwoofer.
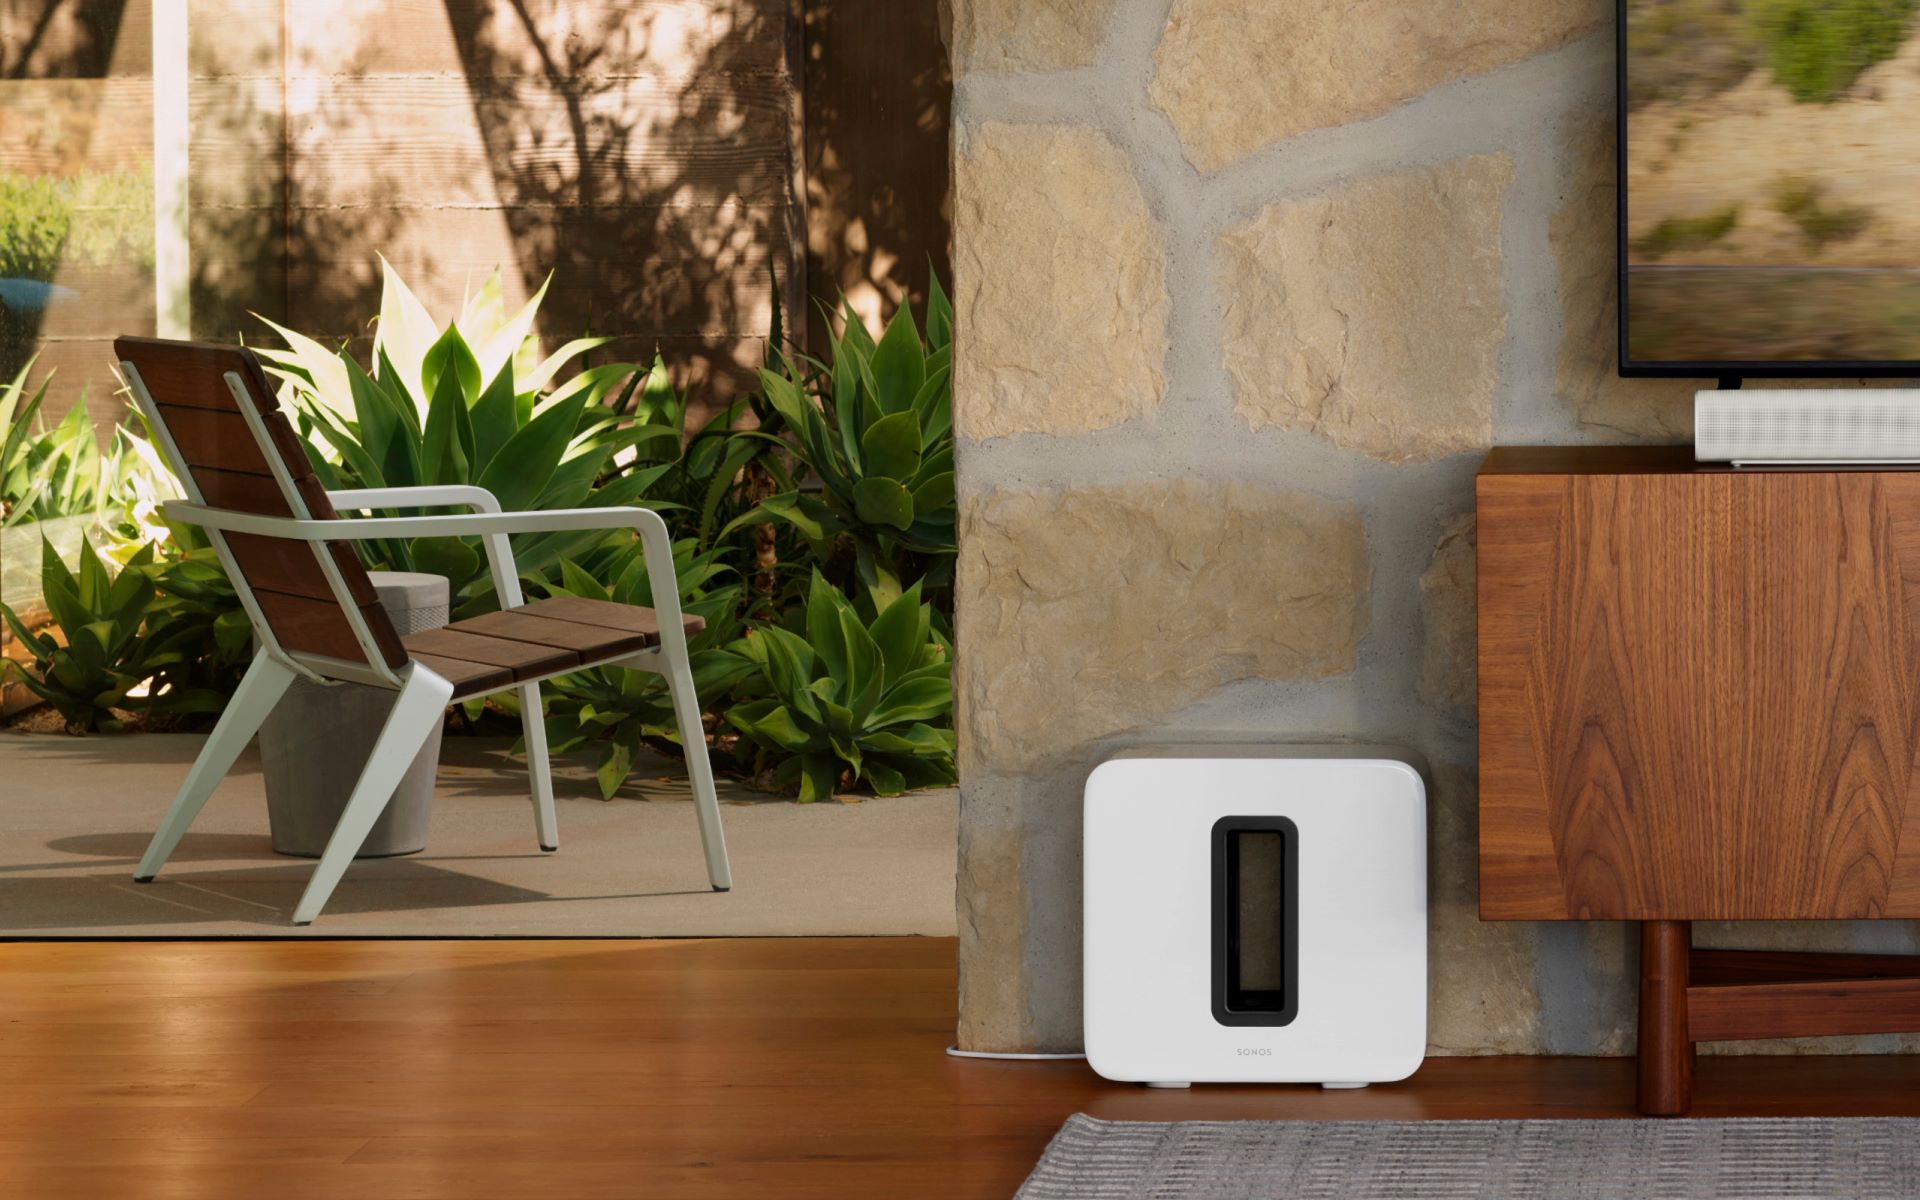
Step 2: Choosing the Placement for the Subwoofer
Choosing the right placement for your Sonos Subwoofer is essential to ensure optimal sound quality and performance. The location of the Subwoofer can greatly affect its ability to produce deep, rich bass tones. Here are some factors to consider when choosing the placement for your Subwoofer:
- Room Acoustics: Take into account the size and shape of your room. Different room layouts can have a significant impact on how the Subwoofer interacts with the surrounding space. Experiment with different placements to find the sweet spot where bass response is balanced and resonates well.
- Distance from Walls: It is generally recommended to place the Subwoofer away from walls and corners. This helps to reduce reflections and unwanted resonance that may affect the clarity of the bass. Aim for a distance of at least 9-12 inches from any walls or obstacles.
- Optimal Positioning: Placing the Subwoofer near the front of the room, preferably close to your main listening area, can help create a cohesive sound stage and ensure that the bass is evenly distributed. Experiment with different positions to find what works best with your room and audio preferences.
- Elevated or Floor Placement: Depending on personal preference and room layout, you can choose to place the Subwoofer on the floor or elevate it using a stand or shelf. Elevating the Subwoofer can sometimes help improve the dispersion of bass frequencies and prevent them from being localized to a specific spot.
- Speaker/Subwoofer Relationship: If you are using a Sonos speaker or a soundbar along with the Subwoofer, it’s important to consider their placement as well. Aim for a placement where the Subwoofer and the speakers are relatively close and at a similar height to create a cohesive and immersive audio experience.
Remember, finding the ideal placement for the Subwoofer may require some trial and error. Take the time to experiment with different positions and configurations to achieve the best results. Once you have determined the optimal placement, you’re ready to move on to the next step: connecting the Subwoofer to a Sonos speaker or soundbar.
Step 3: Connecting the Subwoofer to a Sonos Speaker or Soundbar
Now that you have chosen the perfect placement for your Sonos Subwoofer, it’s time to connect it to a Sonos speaker or soundbar. This step is crucial in ensuring that the Subwoofer integrates seamlessly with your existing audio setup and delivers the full impact of deep bass. Here’s how you can connect the Subwoofer:
- Make sure that your Sonos speaker or soundbar is already set up and connected to your Wi-Fi network. If not, refer to the respective setup guides by Sonos to complete the initial setup process.
- Locate the “Join” button on the back of the Sonos Subwoofer. This is the button you will use to connect the Subwoofer to your existing Sonos system.
- Press and hold the “Join” button for about five seconds until the light on the Subwoofer starts flashing. This indicates that the Subwoofer is in pairing mode and ready to connect.
- Open the Sonos app on your smartphone or tablet, and navigate to the Settings menu.
- Select “System” and then choose “Add Product” or “Add Subwoofer” depending on the app version.
- The Sonos app will start searching for available Subwoofers. Once it detects the Subwoofer, follow the on-screen prompts to complete the pairing process.
- Once the pairing is successful, the Subwoofer will be integrated into your Sonos system. You can now control the Subwoofer’s settings and volume directly from the Sonos app.
It’s important to note that the Sonos app and the Subwoofer should be connected to the same Wi-Fi network for successful pairing. Also, ensure that the Subwoofer is placed within a reasonable distance from your Sonos speaker or soundbar to maintain a stable connection.
Once you have successfully connected the Subwoofer to your Sonos speaker or soundbar, you’re one step closer to experiencing powerful and immersive bass. The next step will guide you through adjusting the Subwoofer settings for optimal performance.
Step 4: Adjusting the Subwoofer Settings
Now that your Sonos Subwoofer is connected to your speaker or soundbar, it’s time to fine-tune its settings to ensure the best audio experience. The Subwoofer settings allow you to customize the bass output according to your preferences and the characteristics of your room. Here’s how to adjust the Subwoofer settings:
- Open the Sonos app on your device and navigate to the Settings menu.
- Select the room where your Subwoofer is located.
- Choose “Subwoofer Settings” or “Bass” from the available options.
- Adjust the bass level using the provided sliders or controls. You can increase or decrease the bass output according to your preference.
- Some Sonos products also offer advanced settings such as crossover frequency and phase adjustment. These settings allow you to fine-tune the interaction between the Subwoofer and other speakers in your setup.
- Experiment with different settings and listen to various audio sources to find the optimal balance that suits your taste and the characteristics of your room.
When adjusting the Subwoofer settings, keep in mind that it’s important to maintain a balance between the bass and the rest of the audio frequencies. Too much bass can overpower the audio, while too little can make the Subwoofer sound weak. Aim for a well-integrated and natural-sounding bass response.
If you find it challenging to adjust the settings to your liking, consider using the Trueplay feature offered by Sonos. Trueplay uses the microphone on your iOS device to analyze the acoustics of the room and automatically calibrate the audio settings for optimal sound quality. Follow the instructions provided in the Sonos app to perform the Trueplay calibration.
By adjusting the Subwoofer settings, you can fine-tune the bass output to match your preferences and create a truly immersive audio experience. Now that the settings are customized, it’s time for the final step: testing and fine-tuning the Subwoofer.
Step 5: Testing and Fine-tuning the Subwoofer
After setting up and adjusting the Subwoofer settings, it’s important to test and fine-tune its performance to ensure optimal sound quality. By following this step, you’ll be able to make any necessary adjustments and maximize the impact of your Sonos Subwoofer. Here’s how to test and fine-tune your Subwoofer:
- Play a variety of audio content, including music, movies, and games, to gauge the performance of the Subwoofer. This will help you understand how it handles different frequencies and audio effects.
- Listen carefully to the bass output and pay attention to its clarity, depth, and impact. Take note of any areas where the bass may sound overwhelming or lacking.
- If you feel that the bass is overwhelming, consider lowering the bass level in the Subwoofer settings. On the other hand, if the bass feels weak, try increasing the bass level.
- Do a few test runs with different settings to find the optimal balance that suits your listening preferences and the characteristics of your room.
- Experiment with different audio genres and sources to get a sense of how the Subwoofer performs across various types of content.
- Consider repositioning the Subwoofer if you encounter any issues with bass localization or uneven sound distribution. Small adjustments to the placement can sometimes make a significant difference in the overall performance.
- If you have multiple Sonos speakers or soundbars in your setup, ensure that the Subwoofer is properly synced with the other devices. This will help create a cohesive audio experience without any delays or synchronization issues.
Testing and fine-tuning the Subwoofer is an iterative process. It may require some trial and error to find the perfect balance between bass impact and overall audio coherence. Take your time, listen critically, and make adjustments as needed until you achieve the desired sound quality.
Remember that personal preferences play a significant role in fine-tuning the Subwoofer. What sounds great to one person may not be the same for another. Trust your ears and adjust the settings to create a sound signature that aligns with your preferences and brings the best out of your audio content.
With the Subwoofer tested and fine-tuned, you can now enjoy a truly immersive audio experience, complete with deep, impactful bass. Congratulations on successfully setting up your Sonos Subwoofer!
Conclusion
Congratulations! You’ve reached the end of our comprehensive guide on setting up and optimizing your Sonos Subwoofer. By following the steps outlined in this article, you have learned how to unbox the Subwoofer, choose the ideal placement, connect it to your Sonos speaker or soundbar, adjust the settings, and fine-tune its performance.
A properly set up and calibrated Subwoofer can transform your audio experience, adding depth, impact, and realism to your favorite music, movies, and games. With its ability to reproduce low-frequency sounds with precision, the Sonos Subwoofer enhances the overall quality and immersiveness of your audio setups.
Remember, finding the perfect placement for the Subwoofer and adjusting the settings may require some experimentation. Take the time to listen critically, make adjustments, and fine-tune the bass output to suit your preferences and the characteristics of your room.
As you enjoy the powerful and immersive bass delivered by your Sonos Subwoofer, don’t forget to regularly check for software updates provided by Sonos. These updates can bring new features, enhancements, and performance improvements to further enhance your audio experience.
Now that you have the knowledge and steps to set up and optimize your Sonos Subwoofer, it’s time to put it into practice. Elevate your audio experience to new heights, and get ready to feel the bass like never before!
Happy listening!