Home>Devices & Equipment>Turntable>How To Tell If Turntable Needle Is Bad

Turntable
How To Tell If Turntable Needle Is Bad
Modified: January 22, 2024
Learn how to determine if your turntable needle is bad and needs replacement. Discover signs of wear and distortion that indicate it's time to upgrade your turntable needle.
(Many of the links in this article redirect to a specific reviewed product. Your purchase of these products through affiliate links helps to generate commission for AudioLover.com, at no extra cost. Learn more)
Table of Contents
Introduction
A turntable is a beloved piece of audio equipment that allows us to enjoy the warmth and authenticity of vinyl records. However, over time, the needle, also known as the stylus, can become worn-out or damaged, affecting the quality of sound reproduction.
Knowing when your turntable needle is bad is crucial to ensure optimal audio performance. A worn-out needle can cause issues such as scratchy or distorted sound, skipping or jumping, poor tracking ability, and a lack of high-frequency response.
In this article, we will explore the signs that indicate a bad turntable needle and provide you with the knowledge to visually inspect and test your needle for proper functioning. By understanding these indicators, you can take the necessary steps to maintain and preserve the sound quality of your turntable.
So, if you’re ready to dive into the world of turntable troubleshooting, let’s take a closer look at these signs.
Signs of a Bad Turntable Needle
Recognizing the signs of a bad turntable needle is essential for maintaining optimal audio quality. Here are some indicators that your needle may need replacement:
- Scratchy or Distorted Sound: If you notice a consistent presence of scratches, pops, or distortion in the audio playback, it is likely that your turntable needle is worn-out or damaged. These issues can significantly impact the overall listening experience, diminishing the enjoyment of your vinyl records.
- Skipping or Jumping: A bad turntable needle may cause the record to skip or jump, causing the music to briefly pause or repeat. This skipping can be frustrating and disruptive to your listening experience. If you consistently experience this problem, it is a strong indicator that your needle needs replacement.
- Poor Tracking Ability: The needle’s ability to stay in the grooves of the record is crucial for accurate tracking and optimal sound quality. If your turntable needle struggles to track properly, causing it to wander off the record or forcefully dig into the grooves, it is a clear sign that it needs to be replaced.
- Lack of High-Frequency Response: A worn-out needle may result in a lack of high-frequency response, where the delicate nuances and details of the music are lost. If you notice that the highs are muffled or missing from the audio playback, it is likely due to the needle’s inability to accurately reproduce these frequencies.
These signs can manifest individually or in combination. If you experience any of these issues, it is important to address them promptly to preserve the integrity of your vinyl collection and ensure a satisfying listening experience.
Scratchy or Distorted Sound
One of the most common signs of a bad turntable needle is the presence of scratchy or distorted sound during playback. When your needle becomes worn-out or damaged, it can no longer effectively trace the grooves of the record, resulting in a compromised audio quality.
A worn-out needle may cause crackling noises, pops, or hissing sounds throughout the playback. These unwanted sounds can be distracting and significantly diminish the enjoyment of your vinyl records. The distortion may also manifest as a muffled or unclear sound, where the music lacks the clarity and sharpness it should have.
There are a few possible causes for scratchy or distorted sound. Firstly, the delicate tip of the needle may have become worn-down or damaged over time, affecting its ability to accurately reproduce the sound from the grooves. Additionally, accumulated dust, debris, or dirt on the needle can also cause distortion as it interferes with the smooth contact between the needle and the record.
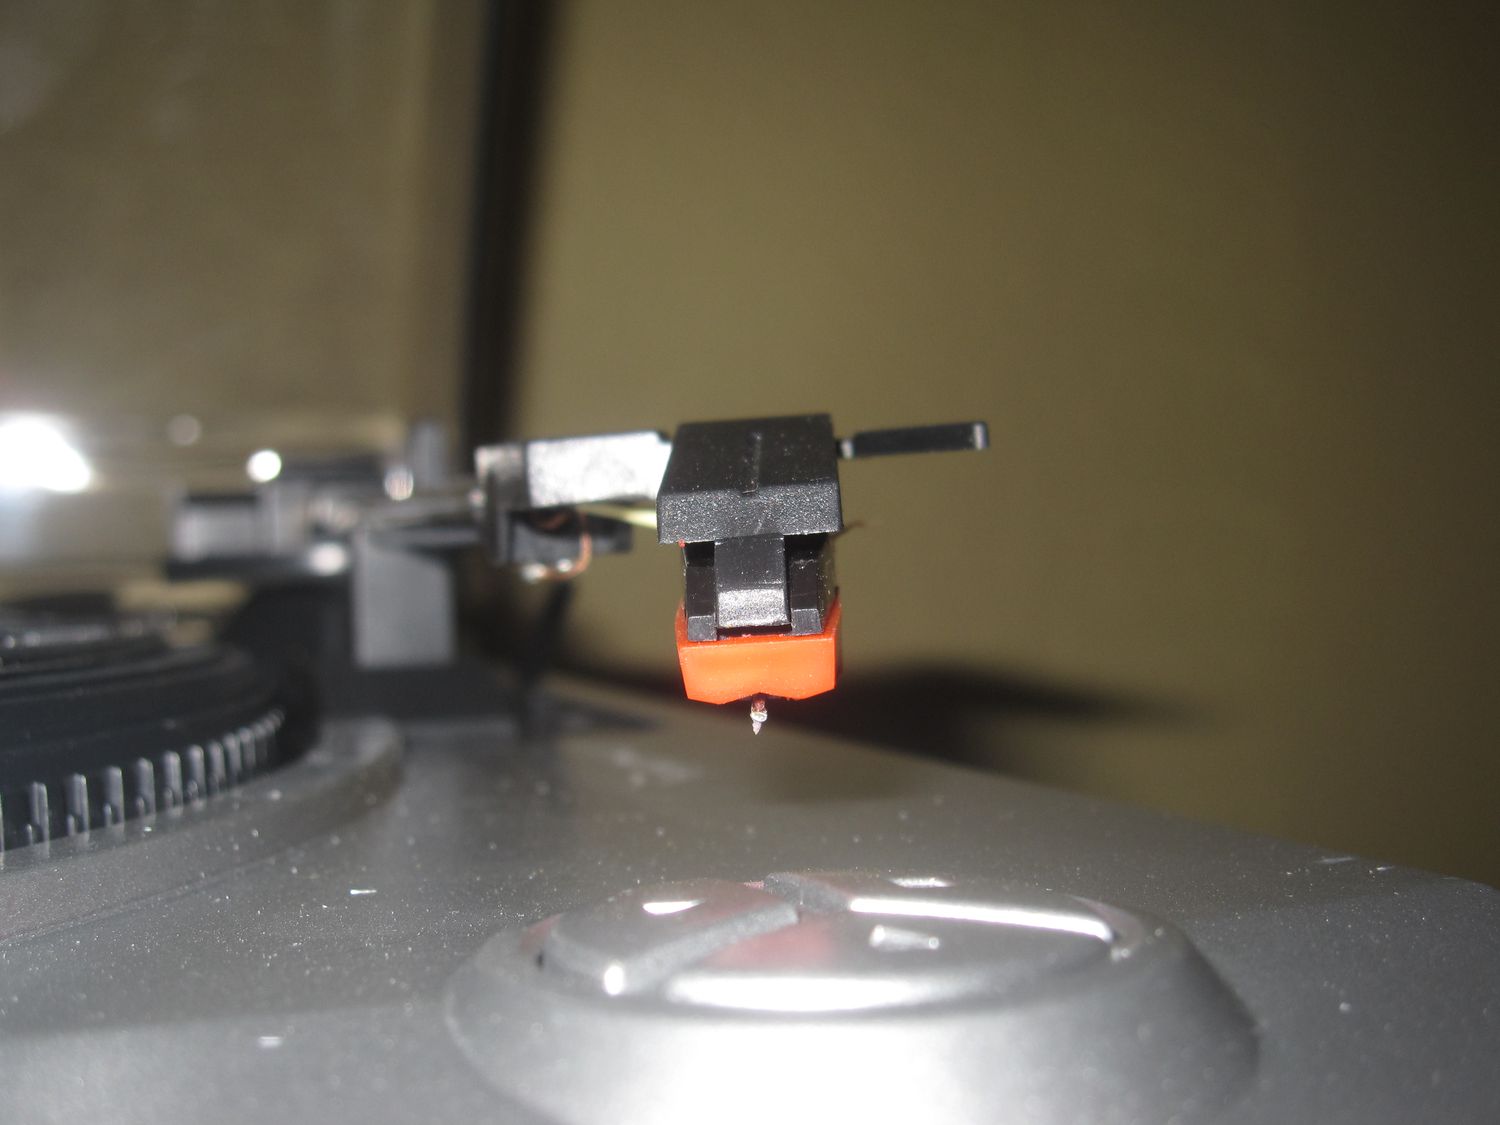
So, how can you determine if the scratchy or distorted sound is due to a bad turntable needle? One effective way is to perform a needle inspection. Gently remove the needle from the cartridge and examine it under a magnifying glass or with good lighting. Look for signs of wear, such as a flattened or chipped tip. If you notice any significant damage or wear, it is likely time to replace the needle.
Regularly cleaning your turntable needle can also help maintain its performance and prevent excessive scratching or distortion. To clean the needle, use a specialized stylus brush or a stylus cleaning solution. Gently brush the stylus from back to front to remove any debris or dust that may have accumulated. Avoid using excessive force or cleaning solutions that may damage the delicate tip of the needle.
By identifying and addressing scratchy or distorted sound promptly, you can ensure that your turntable continues to deliver the high-quality audio experience that vinyl records are known for.
Skipping or Jumping
Another common sign of a bad turntable needle is when the record starts skipping or jumping during playback. This issue can be frustrating and disruptive, disrupting the flow and enjoyment of your music.
When a turntable needle is in good condition, it smoothly glides along the grooves of the record, allowing for consistent playback. However, a worn-out or damaged needle may struggle to maintain proper contact with the grooves, causing the needle to skip or jump out of place.
Several factors can contribute to skipping or jumping. One of the main reasons is a worn-out needle tip that can’t effectively grip the grooves of the record. If the tip is worn down or damaged, it may lose its ability to track properly, causing the needle to skip across the surface or jump to a different section of the record.
Another possible cause of skipping or jumping is improper tracking force. It’s important to ensure that the tracking force—the amount of weight applied to the needle—is set correctly for your specific turntable and cartridge. If the tracking force is too light, the needle may not have enough downward force to stay in the grooves, leading to skipping. Conversely, if the tracking force is too heavy, it can cause excessive pressure on the grooves, also resulting in skipping or jumping.
If you notice the record skipping or jumping consistently, it’s crucial to address the issue promptly. Start by inspecting the turntable needle for any signs of wear or damage. Look for a worn-down or chipped tip, as this can greatly impact the needle’s tracking ability.
Additionally, check the tracking force of your turntable. Consult the manufacturer’s instructions or the user manual to determine the correct tracking force for your specific model. Use a stylus force gauge or scale to measure and adjust the tracking force accordingly.
By addressing the issue of skipping or jumping, you can ensure smoother and uninterrupted playback, allowing you to fully enjoy your vinyl records.
Poor Tracking Ability
Poor tracking ability is a telltale sign of a bad turntable needle. Tracking refers to the needle’s ability to accurately follow the grooves of the record as it plays, ensuring consistent contact and reliable playback. When the tracking ability is compromised, it can result in various issues that affect the overall audio experience.
A worn-out or damaged needle may struggle to maintain proper tracking, causing it to wander off the grooves and potentially skip or jump. This poor tracking can be caused by several factors, such as a worn or bent cantilever (the arm that supports the needle) or a damaged stylus tip.
If you suspect poor tracking ability, there are a few ways to diagnose the issue. One method is to visually inspect the needle and cantilever for any visible damage or abnormalities. Look for signs of bending, warping, or misalignment. Additionally, use a magnifying glass or strong lighting to examine the stylus tip. If you notice a flattened or worn-down tip or any other signs of damage, it’s a clear indication that the needle needs replacement.
Another way to assess the tracking ability is to listen carefully to the playback. If you notice the audio cutting in and out or experiencing inconsistency in volume or clarity, it’s likely due to poor tracking. The needle may struggle to stay in the grooves, resulting in a fluctuating and unreliable output.
In some cases, poor tracking ability can also be caused by improper turntable setup or adjustments. Ensure that the tracking force—the amount of downward force applied to the needle—is set correctly for your cartridge and turntable. Improper tracking force can lead to excessive wear on the needle and affect its tracking ability.
Addressing poor tracking ability is essential to ensure a smooth and enjoyable listening experience. If you identify issues with tracking, it’s recommended to replace the needle with a new one that is compatible with your turntable. Regular maintenance of the turntable and proper tracking force adjustment can also help preserve the tracking ability and prolong the life of your needle.
Lack of High-Frequency Response
A common sign of a bad turntable needle is a lack of high-frequency response in the audio playback. High-frequency response refers to the needle’s ability to accurately reproduce the higher-pitched sounds and details present in the music.
When a turntable needle becomes worn or damaged, it can struggle to trace the intricate grooves of the record, resulting in a diminished high-frequency response. This can manifest as a dull or muffled sound, where the music lacks brightness, clarity, and the subtle nuances that make vinyl records so enjoyable.
A worn-out needle typically has a rounded or flattened tip, which hampers its ability to accurately track the higher frequencies. Without the proper contact and precision, these delicate details can be lost, significantly impacting the overall audio quality.
If you suspect a lack of high-frequency response in your turntable, there are a few steps you can take to diagnose the issue. First, visually inspect the needle under good lighting or with the help of a magnifying glass. Look for any signs of wear or damage on the stylus tip. A flattened or worn-down tip is a clear indication that the needle is not functioning optimally and may need replacement.
Another way to assess the high-frequency response is to listen for differences in the audio playback. Pay attention to the clarity and presence of the higher frequencies. If you notice a significant lack of brightness or detail in the music, it’s likely due to the needle’s diminished high-frequency response.
Replacing a worn-out or damaged needle is the most effective solution for restoring the high-frequency response in your turntable. Make sure to choose a replacement needle that is compatible with your cartridge and turntable model. Regular cleaning and maintenance of the needle can also help preserve its performance and extend its lifespan.
By addressing the lack of high-frequency response, you can ensure that the vibrant and detailed aspects of your records are faithfully reproduced, enhancing your listening experience and keeping your vinyl collection alive.
Visual Inspection
A visual inspection is an important step in determining the condition of your turntable needle. By closely examining the needle, you can identify signs of wear, damage, or misalignment that may affect its performance. Here are some steps to follow for a thorough visual inspection:
- Remove the needle: Start by carefully removing the needle from the cartridge. Follow the manufacturer’s instructions or consult the turntable’s user manual for guidance on proper removal.
- Examine the tip: Use good lighting or a magnifying glass to inspect the tip of the needle. Look for any signs of wear, such as a flattened or chipped tip. A worn-out or damaged tip can significantly impact the needle’s ability to accurately track the grooves of the record.
- Inspect the cantilever: Pay attention to the cantilever, which is the arm that supports the needle. Check for any signs of bending, warping, or misalignment. A damaged or misaligned cantilever can affect the tracking ability and performance of the needle.
- Check for debris: Carefully examine the needle and stylus for any visible debris, dust, or dirt. Accumulated debris can interfere with the proper contact between the needle and the record, leading to compromised audio quality. If you notice any debris, use a stylus brush or a specialized cleaning solution to gently remove it.
- Inspect the cartridge: Take a moment to inspect the cartridge, which holds the needle. Look for any signs of damage or wear, such as loose or bent parts. A faulty cartridge can impact the overall performance and tracking ability of the needle.
During the visual inspection, it’s important to handle the needle with care to avoid causing further damage. Use a gentle touch and avoid putting excessive pressure on the delicate components. Take note of any significant issues or abnormalities that you observe during the inspection.
A thorough visual inspection can provide valuable insights into the condition of your turntable needle. If you notice any signs of wear, damage, or misalignment, it’s likely time to consider replacing the needle to ensure optimal performance and audio quality.
Checking for Proper Alignment
Proper alignment of the turntable needle is crucial for accurate tracking and optimal sound reproduction. When the needle is misaligned, it can result in issues such as distortion, poor tracking, and even damage to your precious vinyl records. Here’s how you can check for proper alignment:
1. Cartridge Alignment: Start by ensuring that the cartridge is properly aligned. The cartridge is the component that holds the needle. Check the manufacturer’s instructions or consult the turntable’s user manual for guidance on the correct alignment procedure specific to your cartridge.
2. Overhang Measurement: Measure the overhang, which refers to the distance from the front of the cartridge body to the stylus tip. Use a protractor tool specifically designed for turntable alignment or refer to the manufacturer’s instructions for the correct overhang measurement for your particular turntable model.
3. Azimuth Adjustment: Azimuth refers to the horizontal alignment of the needle. Improper azimuth can result in channel imbalance and affects stereo image accuracy. Use a dedicated azimuth adjustment tool or follow the instructions provided with your turntable to fine-tune the azimuth alignment.
4. Tracking Force: Ensure that the tracking force—the amount of weight applied to the needle—is set correctly for your specific cartridge. Use a stylus force gauge or a calibrated scale to measure and adjust the tracking force according to the manufacturer’s recommended range.
5. Vertical Tracking Angle (VTA): The VTA refers to the angle at which the needle makes contact with the record. Improper VTA can result in suboptimal sound reproduction. Some turntables allow for VTA adjustment, so consult your turntable’s user manual or the manufacturer’s instructions for the correct procedure if adjustment is necessary.
Regularly checking and adjusting the alignment of your turntable needle is essential for maintaining the best possible sound quality and protecting your records. Proper alignment ensures that the needle accurately tracks the grooves of the record, minimizing distortion and optimizing the playback experience.
If you’re unsure about how to check or adjust the alignment of your turntable needle, don’t hesitate to consult a professional or seek guidance from experienced audio enthusiasts. They can provide expert advice and assistance to ensure that your needle is properly aligned and functioning at its best.
Testing with Different Records
Testing your turntable needle with different records is an effective way to further assess its performance and identify potential issues. By playing a variety of records, you can gauge the needle’s tracking ability, sound quality, and overall functionality. Here’s how you can conduct this test:
1. Select a Variety of Records: Choose records from different genres, eras, and conditions. This will allow you to test the needle’s ability to handle various types of music and different levels of wear on the records.
2. Observe Playback: Carefully listen to the audio playback as you play different records. Pay attention to any signs of distortion, skipping, or issues with tracking. Note any inconsistencies or abnormalities in the sound quality that could indicate a problem with the needle.
3. Assess Sound Quality: Evaluate the overall sound quality of the playback. Look for any signs of muffled or dull sound, a lack of detail or clarity, or any other noticeable deficiencies in sound reproduction. These issues can be indicative of a worn-out or damaged needle.
4. Note Skipping or Jumping: Take note if the needle skips or jumps during playback, especially in specific sections of certain records. Skipping or jumping can be a clear sign of a worn-out or misaligned needle that is struggling to track the grooves properly.
5. Test Different Tracking Forces: If your turntable allows for adjustable tracking force, consider testing different settings while playing different records. Gradually adjust the tracking force within the manufacturer’s recommended range and listen for any improvements or differences in sound quality and tracking ability.
Testing your turntable needle with different records provides valuable insights into its performance across various music styles and conditions. It allows you to assess its ability to accurately track the grooves, reproduce sound faithfully, and maintain a consistent playback experience.
If you consistently encounter issues such as skipping, distortion, or poor sound quality across multiple records, it’s a strong indication that your turntable needle may need replacement. A damaged or worn-out needle can significantly impact the enjoyment of your vinyl collection, so it’s essential to address any issues promptly.
Remember to handle and store your records with care and keep them clean to maintain optimal playback quality. Regular maintenance and proper needle care, including cleaning and timely replacement, are key practices for preserving the performance and longevity of your turntable needle.
Conclusion
Recognizing the signs of a bad turntable needle is crucial for preserving the audio quality and overall performance of your vinyl records. Scratchy or distorted sound, skipping or jumping, poor tracking ability, and a lack of high-frequency response are all indicators that your needle may need replacement.
Performing a visual inspection of the needle, checking for proper alignment, and testing with different records are effective ways to assess the condition and performance of your turntable needle. Visual inspection allows you to identify any visible wear or damage, while alignment and testing with different records help evaluate tracking ability and sound quality.
If you determine that your turntable needle is indeed bad, it is important to replace it promptly. A worn-out or damaged needle can not only compromise the sound quality but also potentially damage your cherished vinyl records. Choose a replacement needle that is compatible with your cartridge and turntable, and follow proper installation procedures.
Regular maintenance and care of your turntable needle are essential in prolonging its lifespan and ensuring optimal performance. Clean the needle regularly, handle records with care, and adjust the tracking force and alignment as needed to maintain the best sound quality.
By being attentive to the condition of your turntable needle and taking necessary steps for replacement and maintenance, you can continue to enjoy the rich and immersive sound that vinyl records provide. Preserve your vinyl collection and prolong the life of your turntable by ensuring that the needle is in top-notch condition for many enjoyable listening sessions to come.

