Home>Devices & Equipment>Turntable>How To Replace Turntable Needle
Turntable
How To Replace Turntable Needle
Published: January 17, 2024
Learn how to easily replace the turntable needle in just a few simple steps. Enhance your vinyl listening experience with this quick and essential maintenance tip for your turntable.
(Many of the links in this article redirect to a specific reviewed product. Your purchase of these products through affiliate links helps to generate commission for AudioLover.com, at no extra cost. Learn more)
Table of Contents
Introduction
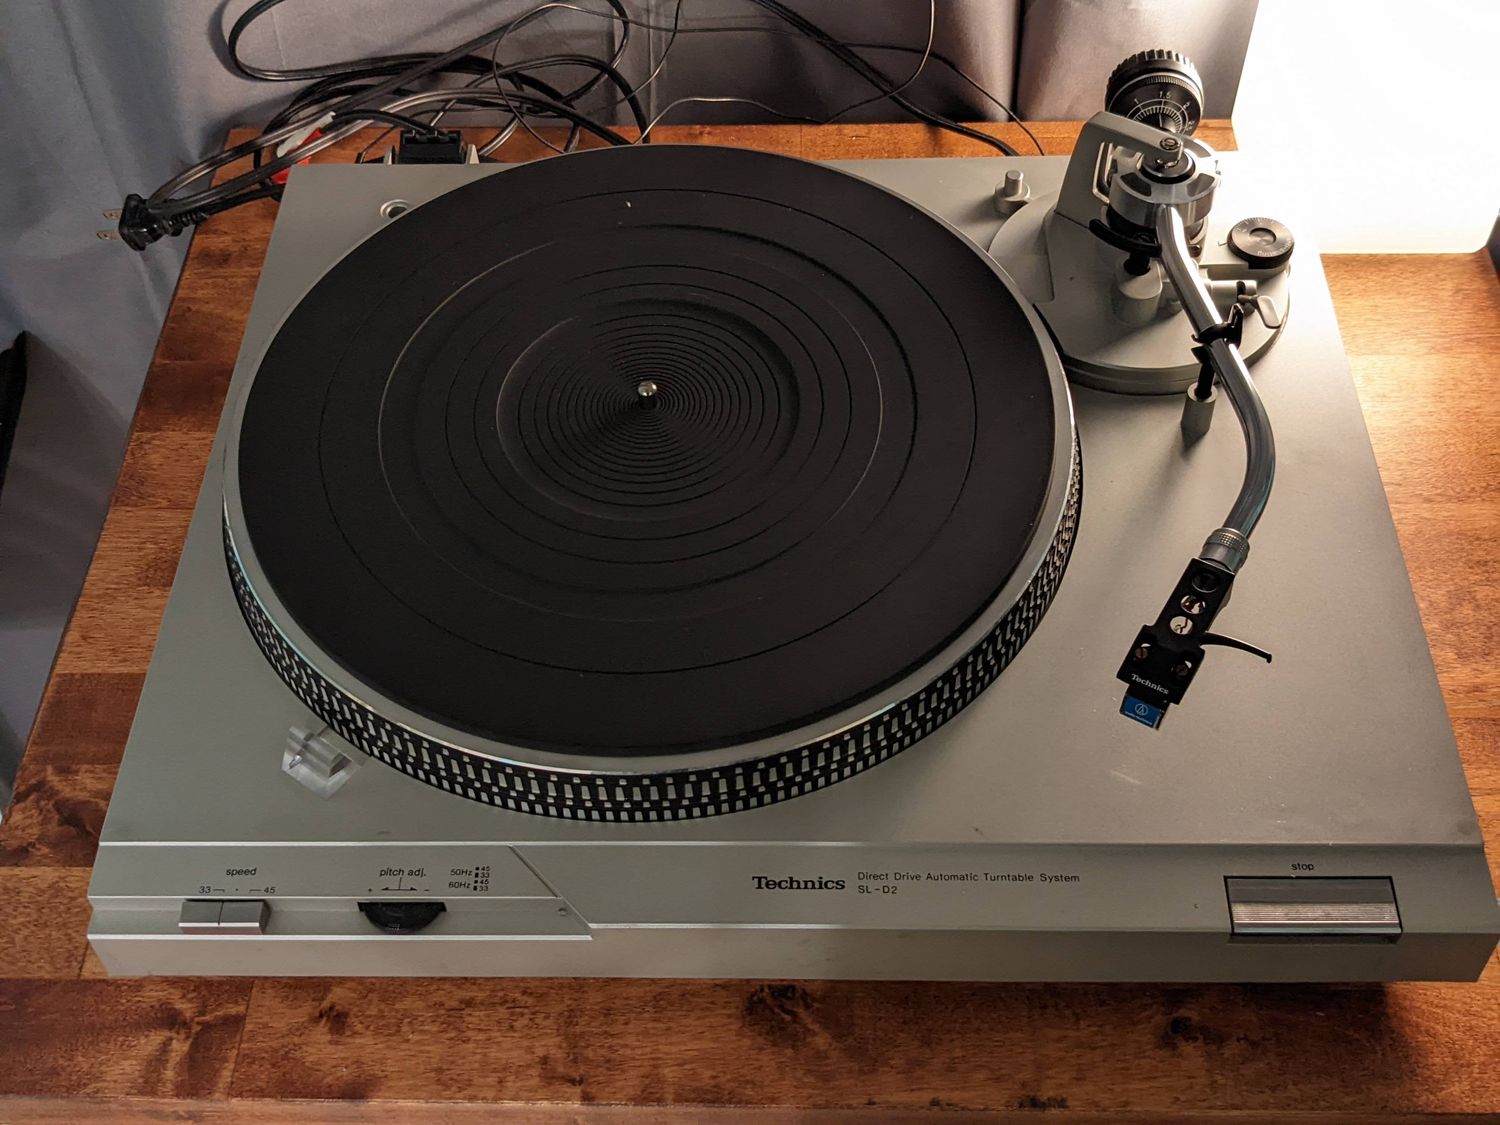
The turntable has long been a beloved piece of equipment for music enthusiasts, offering a unique and warm sound that vinyl records provide. However, like any mechanical device, turntables require regular maintenance and occasional repair. One of the most common repairs is replacing the turntable needle, also known as the stylus, which can become worn or damaged over time.
In this article, we will guide you through the process of replacing a turntable needle. Whether you are a seasoned vinyl enthusiast or new to the world of records, this step-by-step guide will provide you with the knowledge and confidence to successfully replace the needle on your turntable.
Before we dive into the process, it’s important to note that turntable needle replacement may vary depending on the specific model and brand of your turntable. It is always a good idea to consult your turntable’s user manual for any specific instructions or recommendations. Additionally, if you are not comfortable or confident in performing the replacement yourself, it is advisable to seek professional assistance from a certified technician.
Now, let’s gather the necessary equipment and get ready to replace the turntable needle!
Step 1: Gathering the necessary equipment
Before beginning the needle replacement process, it’s important to gather all the necessary equipment. Having the right tools on hand will make the process smoother and ensure a successful replacement. Here is a list of the essential equipment you will need:
- New Turntable Needle: The first item on your list should be the replacement needle. Make sure you purchase a needle that is compatible with your turntable model. You can find the exact replacement needle by checking your turntable’s user manual or contacting the manufacturer.
- Tweezers or Needle-Nose Pliers: These tools will come in handy when removing the old needle and installing the new one. They allow for precise handling of the delicate components.
- Anti-static Brush: An anti-static brush is essential for keeping your records and turntable clean. It helps remove dust and other particles that can affect the performance of the needle.
- Isopropyl Alcohol: Isopropyl alcohol is used to clean the needle and remove any dirt or residue. Make sure to use a high-quality alcohol with a concentration of at least 70%.
- Clean Cloth: A soft, lint-free cloth is necessary for cleaning various parts of the turntable, including the needle and tonearm.
- User Manual: Although not a physical tool, having your turntable’s user manual readily available is crucial. It will provide specific instructions and guidance for your particular turntable model.
Once you have gathered all the necessary equipment, you are ready to move on to the next step: preparing the turntable for needle replacement. Make sure you have a clean and well-lit workspace to perform the replacement and follow all safety precautions to avoid damaging the turntable or yourself.
Step 2: Preparing the turntable for needle replacement
Before you can start replacing the needle on your turntable, it’s important to properly prepare the turntable to ensure a smooth and safe replacement process. Follow these steps to prepare your turntable:
- Turn off the turntable: Start by turning off your turntable and ensuring that it is completely powered down. This will prevent any accidental movement or damage during the replacement process.
- Remove any records: Take off any records that may be on the turntable platter. Place them in a safe and secure location to avoid any potential damage.
- Clean the turntable: Use an anti-static brush or a soft, lint-free cloth to clean the turntable platter, tonearm, and other accessible parts. Removing any dust or debris will help maintain the performance of the new needle.
- Secure the tonearm: The tonearm is the component that holds the needle. It’s essential to secure it in place to prevent any accidental movement or damage. Most turntables have a locking mechanism or a tonearm rest that you can engage to keep the tonearm securely in place.
- Read the user manual: Take a moment to review your turntable’s user manual for any specific instructions or precautions related to needle replacement. Different turntables may have unique requirements or additional steps that you need to follow.
By properly preparing your turntable, you create a safe and clean environment for the needle replacement process. Now that your turntable is ready, it’s time to move on to the next step: removing the old needle.
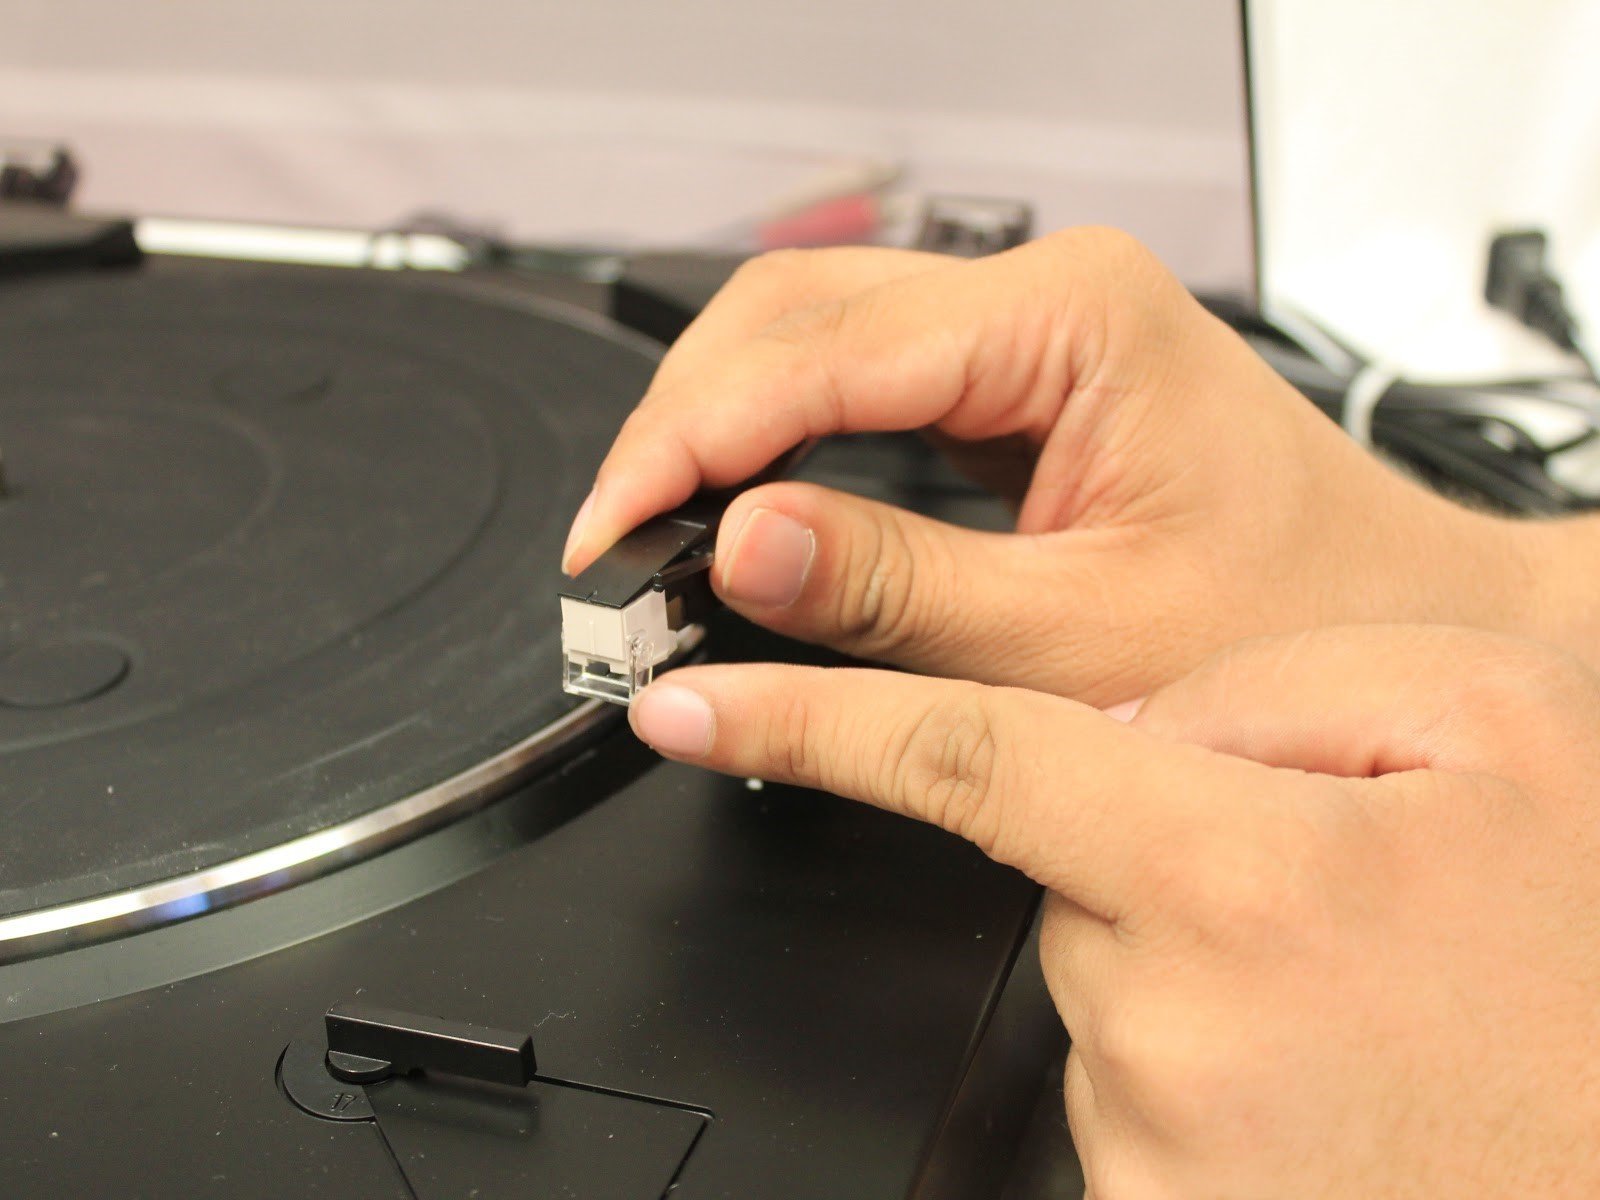
Step 3: Removing the old needle
Now that your turntable is prepared, it’s time to remove the old needle. Follow these steps to safely and effectively remove the old needle:
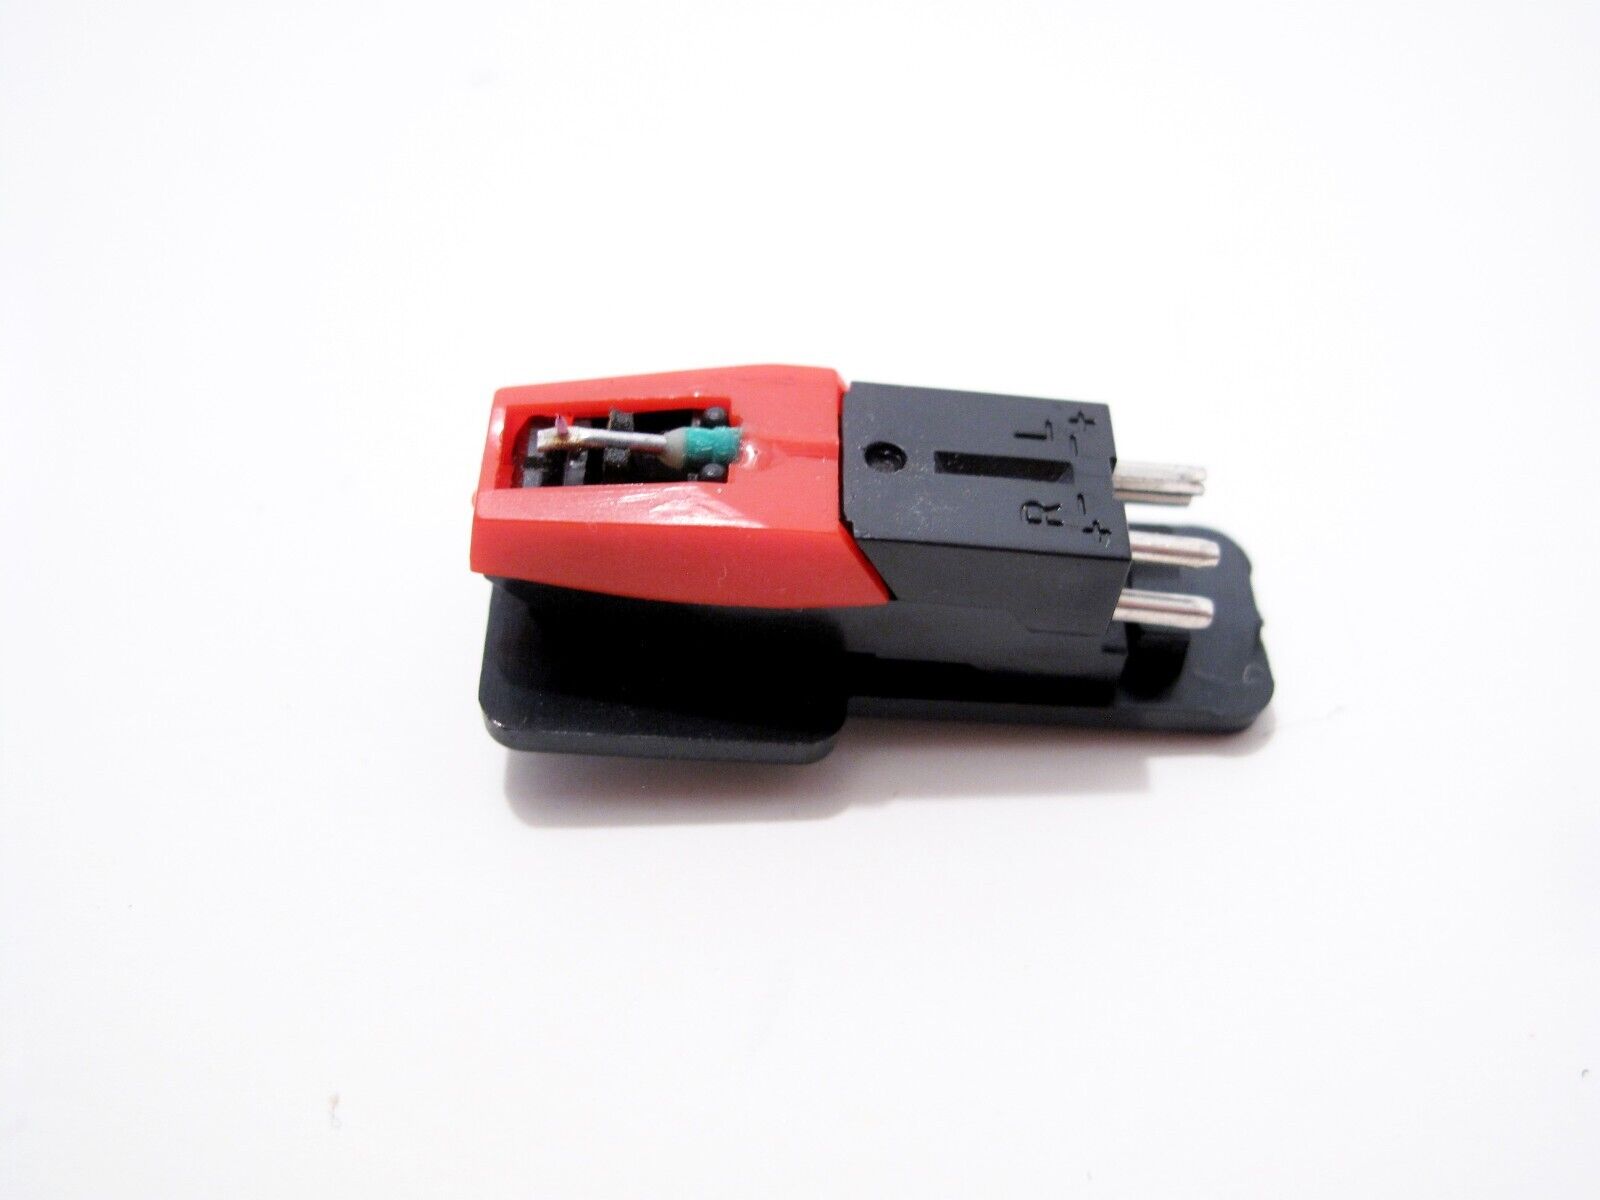
- Locate the cartridge: The cartridge is the component that holds the needle. It is usually attached to the tonearm. Identify the cartridge and familiarize yourself with its structure.
- Locate the locking mechanism: Some cartridges have a locking mechanism that secures the needle in place. If your cartridge has a locking mechanism, locate it and disengage it by gently lifting or sliding it as per the manufacturer’s instructions.
- Remove the old needle: Gently grip the base of the old needle with a pair of tweezers or needle-nose pliers. Apply gentle upward pressure while keeping the needle parallel to the cartridge. Make sure to hold the base firmly and avoid any excessive force that may damage the cartridge or tonearm.
- Inspect the cartridge and tonearm: Once you have removed the old needle, take a moment to inspect the cartridge and tonearm for any signs of damage or wear. Look for any loose wires or bent components. If you notice any significant damage, it may be necessary to replace the entire cartridge or seek professional help.
With the old needle successfully removed, you are one step closer to installing the new one. Before you proceed, make sure to handle the old needle with care and dispose of it properly. Do not touch the tip of the old needle as it may still be sharp and can cause injuries.
Now that you have removed the old needle, it’s time to move on to the next step: installing the new needle.
Step 4: Installing the new needle
With the old needle removed, it’s time to install the new needle on your turntable. Follow these steps to properly install the new needle:
- Prepare the new needle: Take the new needle out of its packaging and familiarize yourself with its shape and orientation. Make sure to handle the needle with clean hands to avoid transferring any dirt or oils to the delicate components.
- Align the new needle: Align the new needle with the cartridge. Look for a small groove or indicator that will help you align the needle correctly. Ensure that the needle is parallel to the cartridge and pointing towards the record grooves.
- Secure the new needle: Once aligned, gently place the needle into the cartridge. You may need to apply slight pressure to ensure a snug fit. Avoid excessive force, as it can damage the needle or the cartridge.
- Engage the locking mechanism: If your cartridge has a locking mechanism, engage it to secure the new needle in place. Refer to the turntable’s user manual for specific instructions on how to engage the locking mechanism.
After installing the new needle, take a moment to double-check its alignment and make sure it is properly seated in the cartridge. Give it a gentle wiggle to ensure it is securely in place. If everything looks good, you can proceed to the final step: testing the new needle.
It’s worth noting that some turntables may require additional steps or adjustments for needle alignment and tracking force. Consult your turntable’s user manual for any specific instructions or recommendations regarding needle installation for your particular model.
Now that you have successfully installed the new needle, it’s time to move on to the final step: testing the new needle’s performance.
Step 5: Testing the new needle
After installing the new needle, it’s essential to test its performance to ensure optimal sound quality and playback. Follow these steps to test the new needle on your turntable:
- Select a test record or album: Choose a test record or album that you are familiar with and that contains a range of frequencies. This will allow you to assess the performance of the new needle across different audio elements.
- Clean the record: Before playing the record, make sure it is clean and free of dust or debris. Use an anti-static brush to gently remove any particles from the surface of the record.
- Set the tracking force: Check your turntable’s user manual for the recommended tracking force for your specific cartridge and needle. Adjust the tracking force accordingly to ensure proper playback and prevent excessive wear on the record and needle.
- Carefully place the record: Gently place the record on the turntable platter and ensure it is properly centered. Use the cueing lever to lower the tonearm onto the record, guiding it down slowly and avoiding any abrupt movements.
- Listen and observe: As the turntable begins to play, listen carefully for any distortions, skips, or other audio issues. Pay attention to the overall sound quality and clarity. Observe the needle’s movement on the record surface to ensure it tracks properly without jumping or slipping.
- Make adjustments if necessary: If you notice any audio issues or tracking problems, it may be necessary to make adjustments. Check the tonearm and cartridge alignment, tracking force, and anti-skate settings. Refer to your turntable’s user manual for guidance on making these adjustments.
Through the testing process, you can evaluate the performance of the new needle and make any necessary adjustments to ensure optimal sound quality and playback. Take your time to fine-tune the settings and make additional tests if needed.
Congratulations! You have successfully replaced the needle on your turntable and tested its performance. By regularly maintaining and replacing the needle, you can enjoy high-quality sound and prolong the life of your turntable and records.
Before we wrap up, here’s a quick recap of the steps:
- Gather the necessary equipment
- Prepare the turntable for needle replacement
- Remove the old needle
- Install the new needle
- Test the new needle
Remember, if you encounter any difficulties or are unsure about any step, it’s always recommended to consult your turntable’s user manual or seek assistance from a professional technician. Enjoy your newly replaced needle and the beautiful sound of your vinyl records!
Conclusion
Replacing the needle on your turntable can help maintain the optimal sound quality and prolong the life of your vinyl records. It is a relatively simple process that can be done at home with the right tools and instructions. By following the step-by-step guide outlined in this article, you can confidently replace the needle on your turntable and enjoy your favorite music with clarity and precision.
Remember, before starting the needle replacement process, gather all the necessary equipment and consult your turntable’s user manual for any specific instructions. Preparing the turntable and removing the old needle are crucial steps that require attention to detail and careful handling.
When installing the new needle, ensure proper alignment and secure it according to the manufacturer’s guidelines. Take your time to test the new needle’s performance by playing a test record or album, making any necessary adjustments to tracking force or tonearm alignment for optimal sound quality.
By regularly replacing the needle and maintaining your turntable, you can enjoy the full potential of your vinyl records for years to come. It’s important to note that if you encounter any difficulties or are unsure about any step, it is always advisable to seek professional assistance from a certified technician to avoid any damage to the turntable or records.
With a bit of care and attention, you can continue to appreciate the unique and timeless experience that turntables and vinyl records provide. So go ahead, replace that old needle, and immerse yourself in the rich and warm sound of your favorite albums!