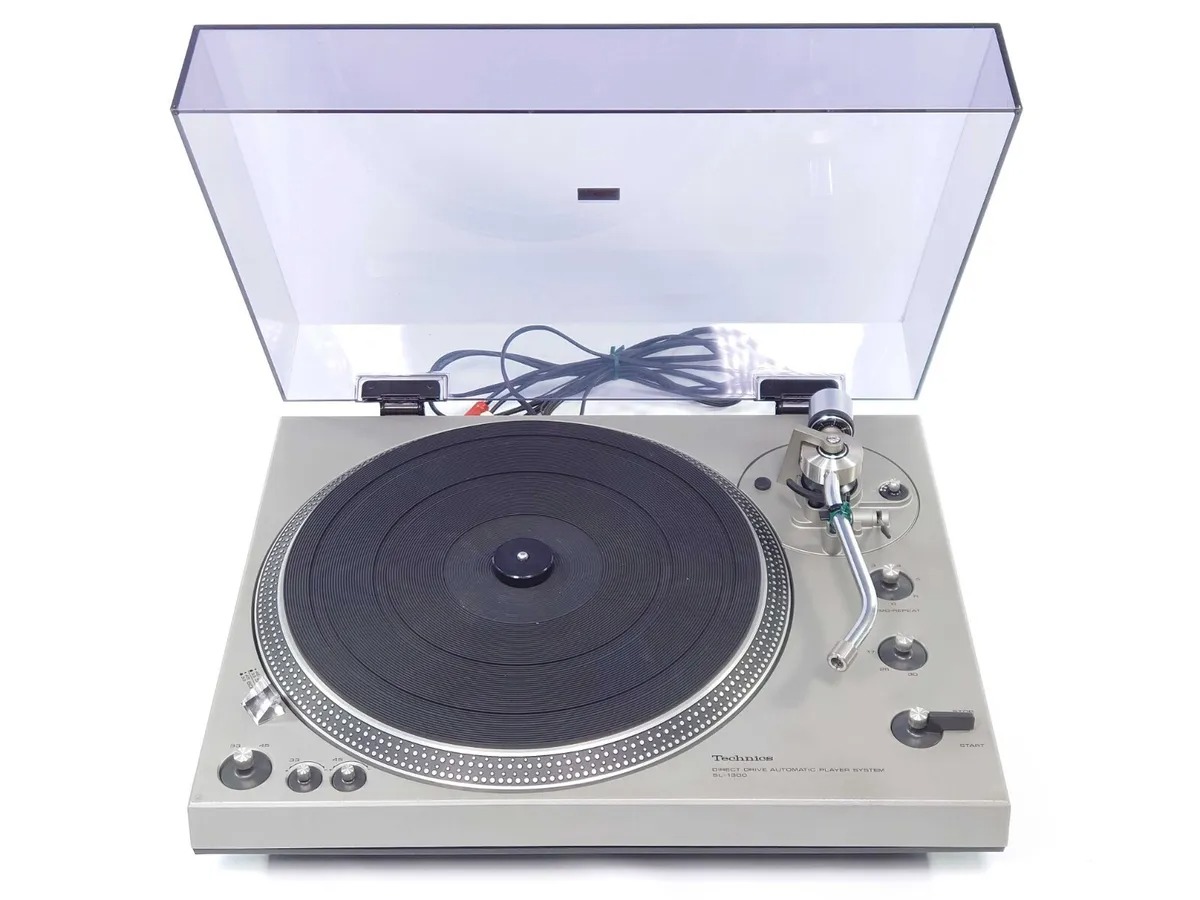
Home>Devices & Equipment>Turntable>How To Change The Needle In A Technics Quartz Direct Drive Automatic Turntable Sl Q2

Turntable
How To Change The Needle In A Technics Quartz Direct Drive Automatic Turntable Sl Q2
Modified: January 22, 2024
Learn how to easily change the needle in your Technics Quartz Direct Drive Automatic Turntable SL Q2. Keep your turntable in optimal condition for the best audio experience.
(Many of the links in this article redirect to a specific reviewed product. Your purchase of these products through affiliate links helps to generate commission for AudioLover.com, at no extra cost. Learn more)
Table of Contents
- Introduction
- Step 1: Gather the Necessary Tools
- Step 2: Power Off and Disconnect the Turntable
- Step 3: Remove the Platter
- Step 4: Locate the Needle Assembly
- Step 5: Remove the Old Needle
- Step 6: Insert the New Needle
- Step 7: Secure the Needle Assembly
- Step 8: Reassemble the Platter
- Step 9: Power On and Test the Turntable
- Conclusion
Introduction
Welcome to this comprehensive guide on how to change the needle in a Technics Quartz Direct Drive Automatic Turntable SL Q2. Whether you’re a vinyl enthusiast, a DJ, or simply someone looking to maintain their turntable, knowing how to replace the needle is an essential skill. The needle, also known as the stylus, is a crucial component that directly affects the sound quality and longevity of your turntable.
The Technics Quartz Direct Drive Automatic Turntable SL Q2 is a popular model known for its high-quality sound reproduction and reliability. With proper care and maintenance, it can provide you with countless hours of listening pleasure.
In this guide, we will walk you through the step-by-step process of changing the needle in your Technics SL Q2 turntable. We will cover everything from gathering the necessary tools to testing the turntable after the needle replacement. By following these steps, you can ensure that your turntable continues to deliver optimal performance.
Before we begin, it’s important to mention that if you are uncomfortable performing these steps yourself, it is always wise to consult a professional. However, with a little patience and attention to detail, changing the needle in your Technics SL Q2 can be a straightforward task.
So, without further ado, let’s dive into the process of changing the needle in a Technics Quartz Direct Drive Automatic Turntable SL Q2. Gather your tools, power off the turntable, and let’s get started!
Step 1: Gather the Necessary Tools
Before you begin the process of changing the needle on your Technics Quartz Direct Drive Automatic Turntable SL Q2, it’s important to gather all the necessary tools. Having the right tools at hand will ensure a smooth and hassle-free experience. Here’s a list of tools you will need:
- Replacement Needle/Stylus: The most important tool you’ll need is a replacement needle or stylus that is compatible with your Technics SL Q2 turntable. Make sure to choose a high-quality replacement needle to ensure optimal sound quality and performance.
- Turntable Manual: It’s always a good idea to refer to the turntable’s manual for specific instructions and guidelines. The manual will provide valuable information on how to correctly replace the needle.
- Small Screwdriver: You may need a small screwdriver to remove or secure certain components during the needle replacement process. Make sure it is the appropriate size for the screws on your turntable.
- Antistatic Gloves: Handling the needle with antistatic gloves helps prevent any damage caused by electrostatic discharge. It’s a good practice to wear antistatic gloves to protect the delicate components of the needle.
- Soft Cloth: Keep a soft cloth nearby to wipe away any dust or debris from the turntable components during the process.
- Isopropyl Alcohol: Isopropyl alcohol can be used to clean the surface of the turntable, particularly the area around the needle assembly, before and after the replacement process.
Once you have gathered all these tools, you are ready to move on to the next step of the needle replacement process. Remember to double-check that you have everything you need for a smooth and successful needle replacement.
Step 2: Power Off and Disconnect the Turntable
Before you begin the process of changing the needle on your Technics Quartz Direct Drive Automatic Turntable SL Q2, it is crucial to power off and disconnect the turntable from any power source. This step ensures your safety and prevents any accidental damage to the turntable or yourself.
Follow these steps to power off and disconnect the turntable:
- Power off the Turntable: Look for the power switch or button on your turntable and switch it off. It is usually located on the front or side of the turntable. Make sure the turntable is completely powered off before proceeding.
- Unplug the Power Cord: Locate the power cord that is connected to the turntable. It is typically a detachable cord that plugs into a power outlet or a power supply unit. Gently unplug the power cord from its power source.
- Disconnect any Audio Cables: If your turntable is connected to a receiver, amplifier, or any other audio equipment, disconnect the audio cables from the turntable. This will ensure that there are no electrical connections while you work on the needle replacement.
Once you have powered off and disconnected the turntable, you can proceed to the next step of removing the platter. Taking the necessary precautions to ensure the turntable is disconnected will make the needle replacement process safer and more convenient.
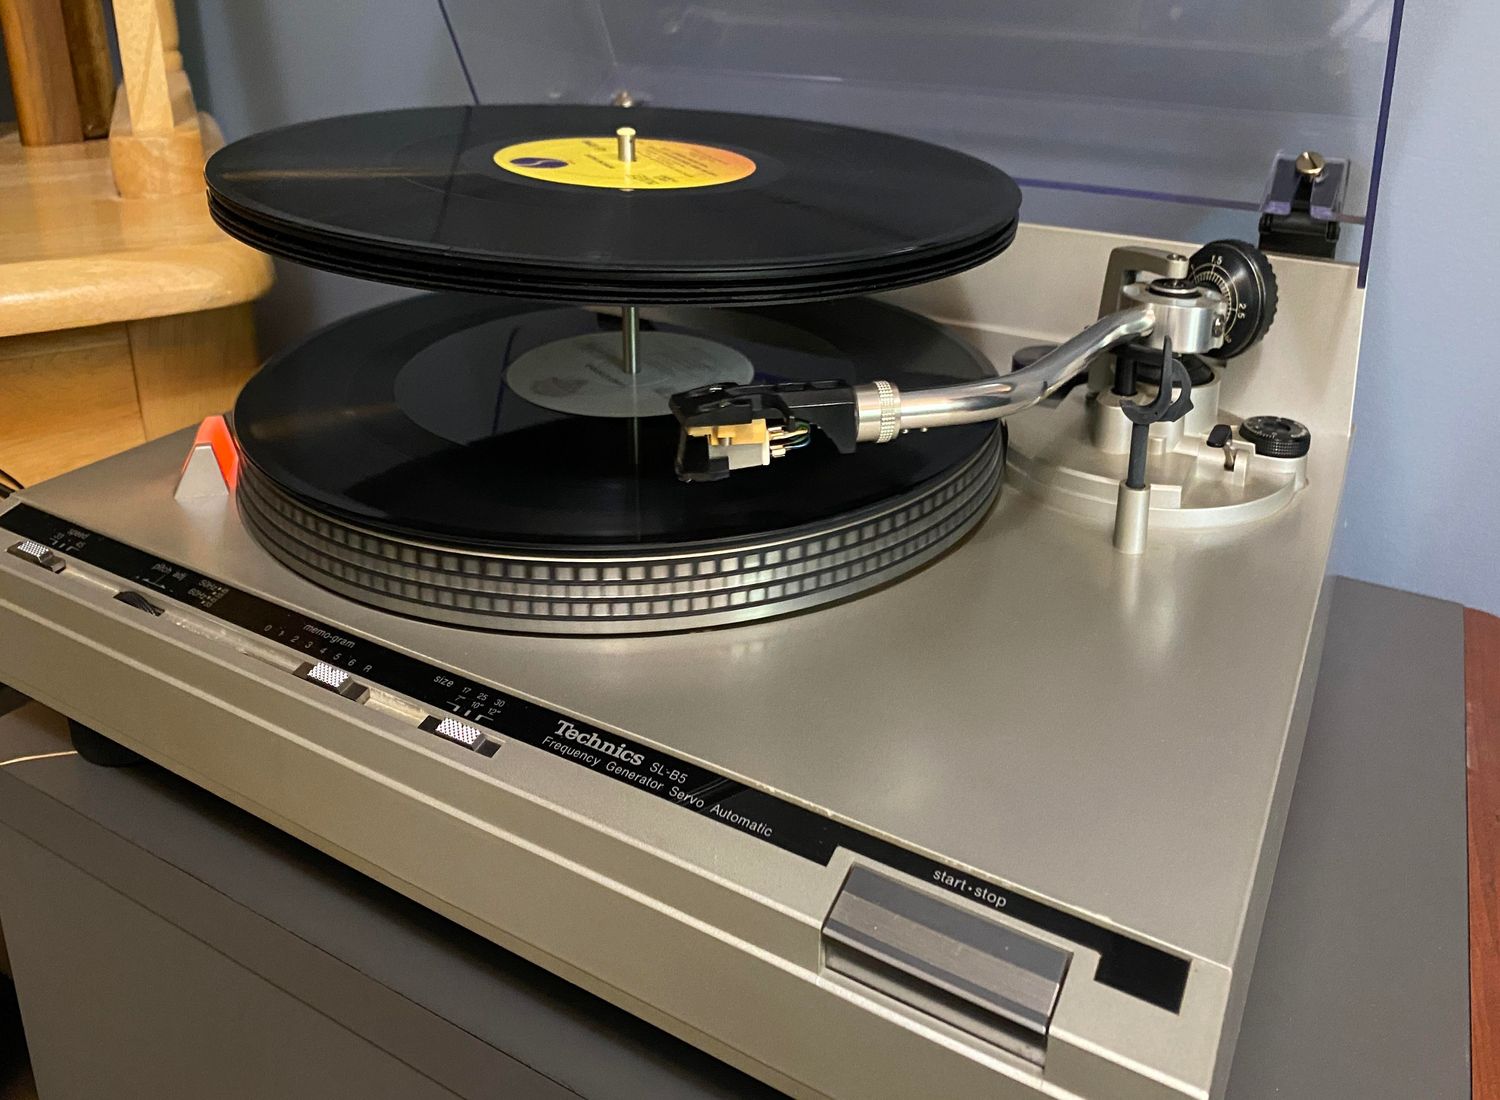
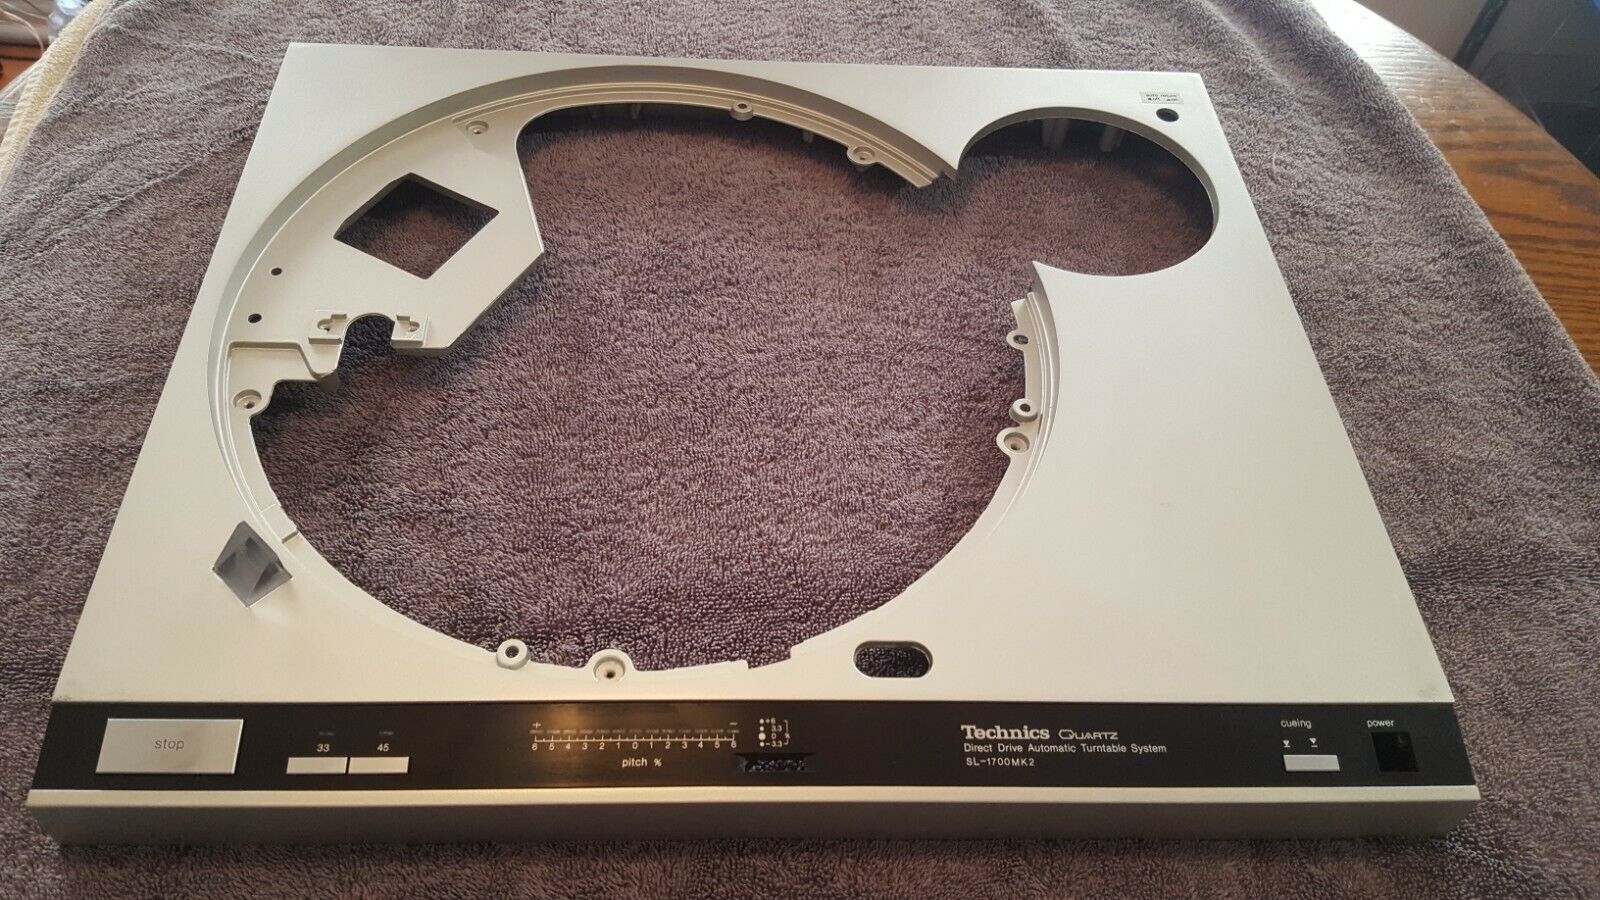
Step 3: Remove the Platter
With the turntable safely powered off and disconnected, it’s time to remove the platter. The platter is the spinning component of the turntable that holds the record. Removing the platter will give you access to the needle assembly and allow you to replace the old needle.
Follow these steps to remove the platter:
- Locate the Platter: The platter is typically the largest component of the turntable and is situated above the motor. It sits on top of the plinth, which is the base of the turntable. Identify the platter and take note of any locking mechanisms or screws holding it in place.
- Remove Any Dust Cover: If your turntable has a dust cover or lid, remove it to prevent any interference during the platter removal process. This will give you a clear view of the platter and make it easier to remove.
- Check for Locking Mechanisms or Screws: Some turntables have locking mechanisms or screws that secure the platter in place. Look for any visible locking mechanisms or screws around the center spindle of the turntable. If you find any, use the appropriate tool (e.g., screwdriver) to loosen or remove them.
- Gently Lift the Platter: Once any locking mechanisms or screws are removed, place your hands on opposite sides of the platter and gently lift it straight up. Be cautious not to apply too much force or pressure to prevent damaging the turntable.
After removing the platter, set it aside in a safe place. You will now have clear access to the needle assembly and can proceed to the next step of removing the old needle from your Technics SL Q2 turntable.
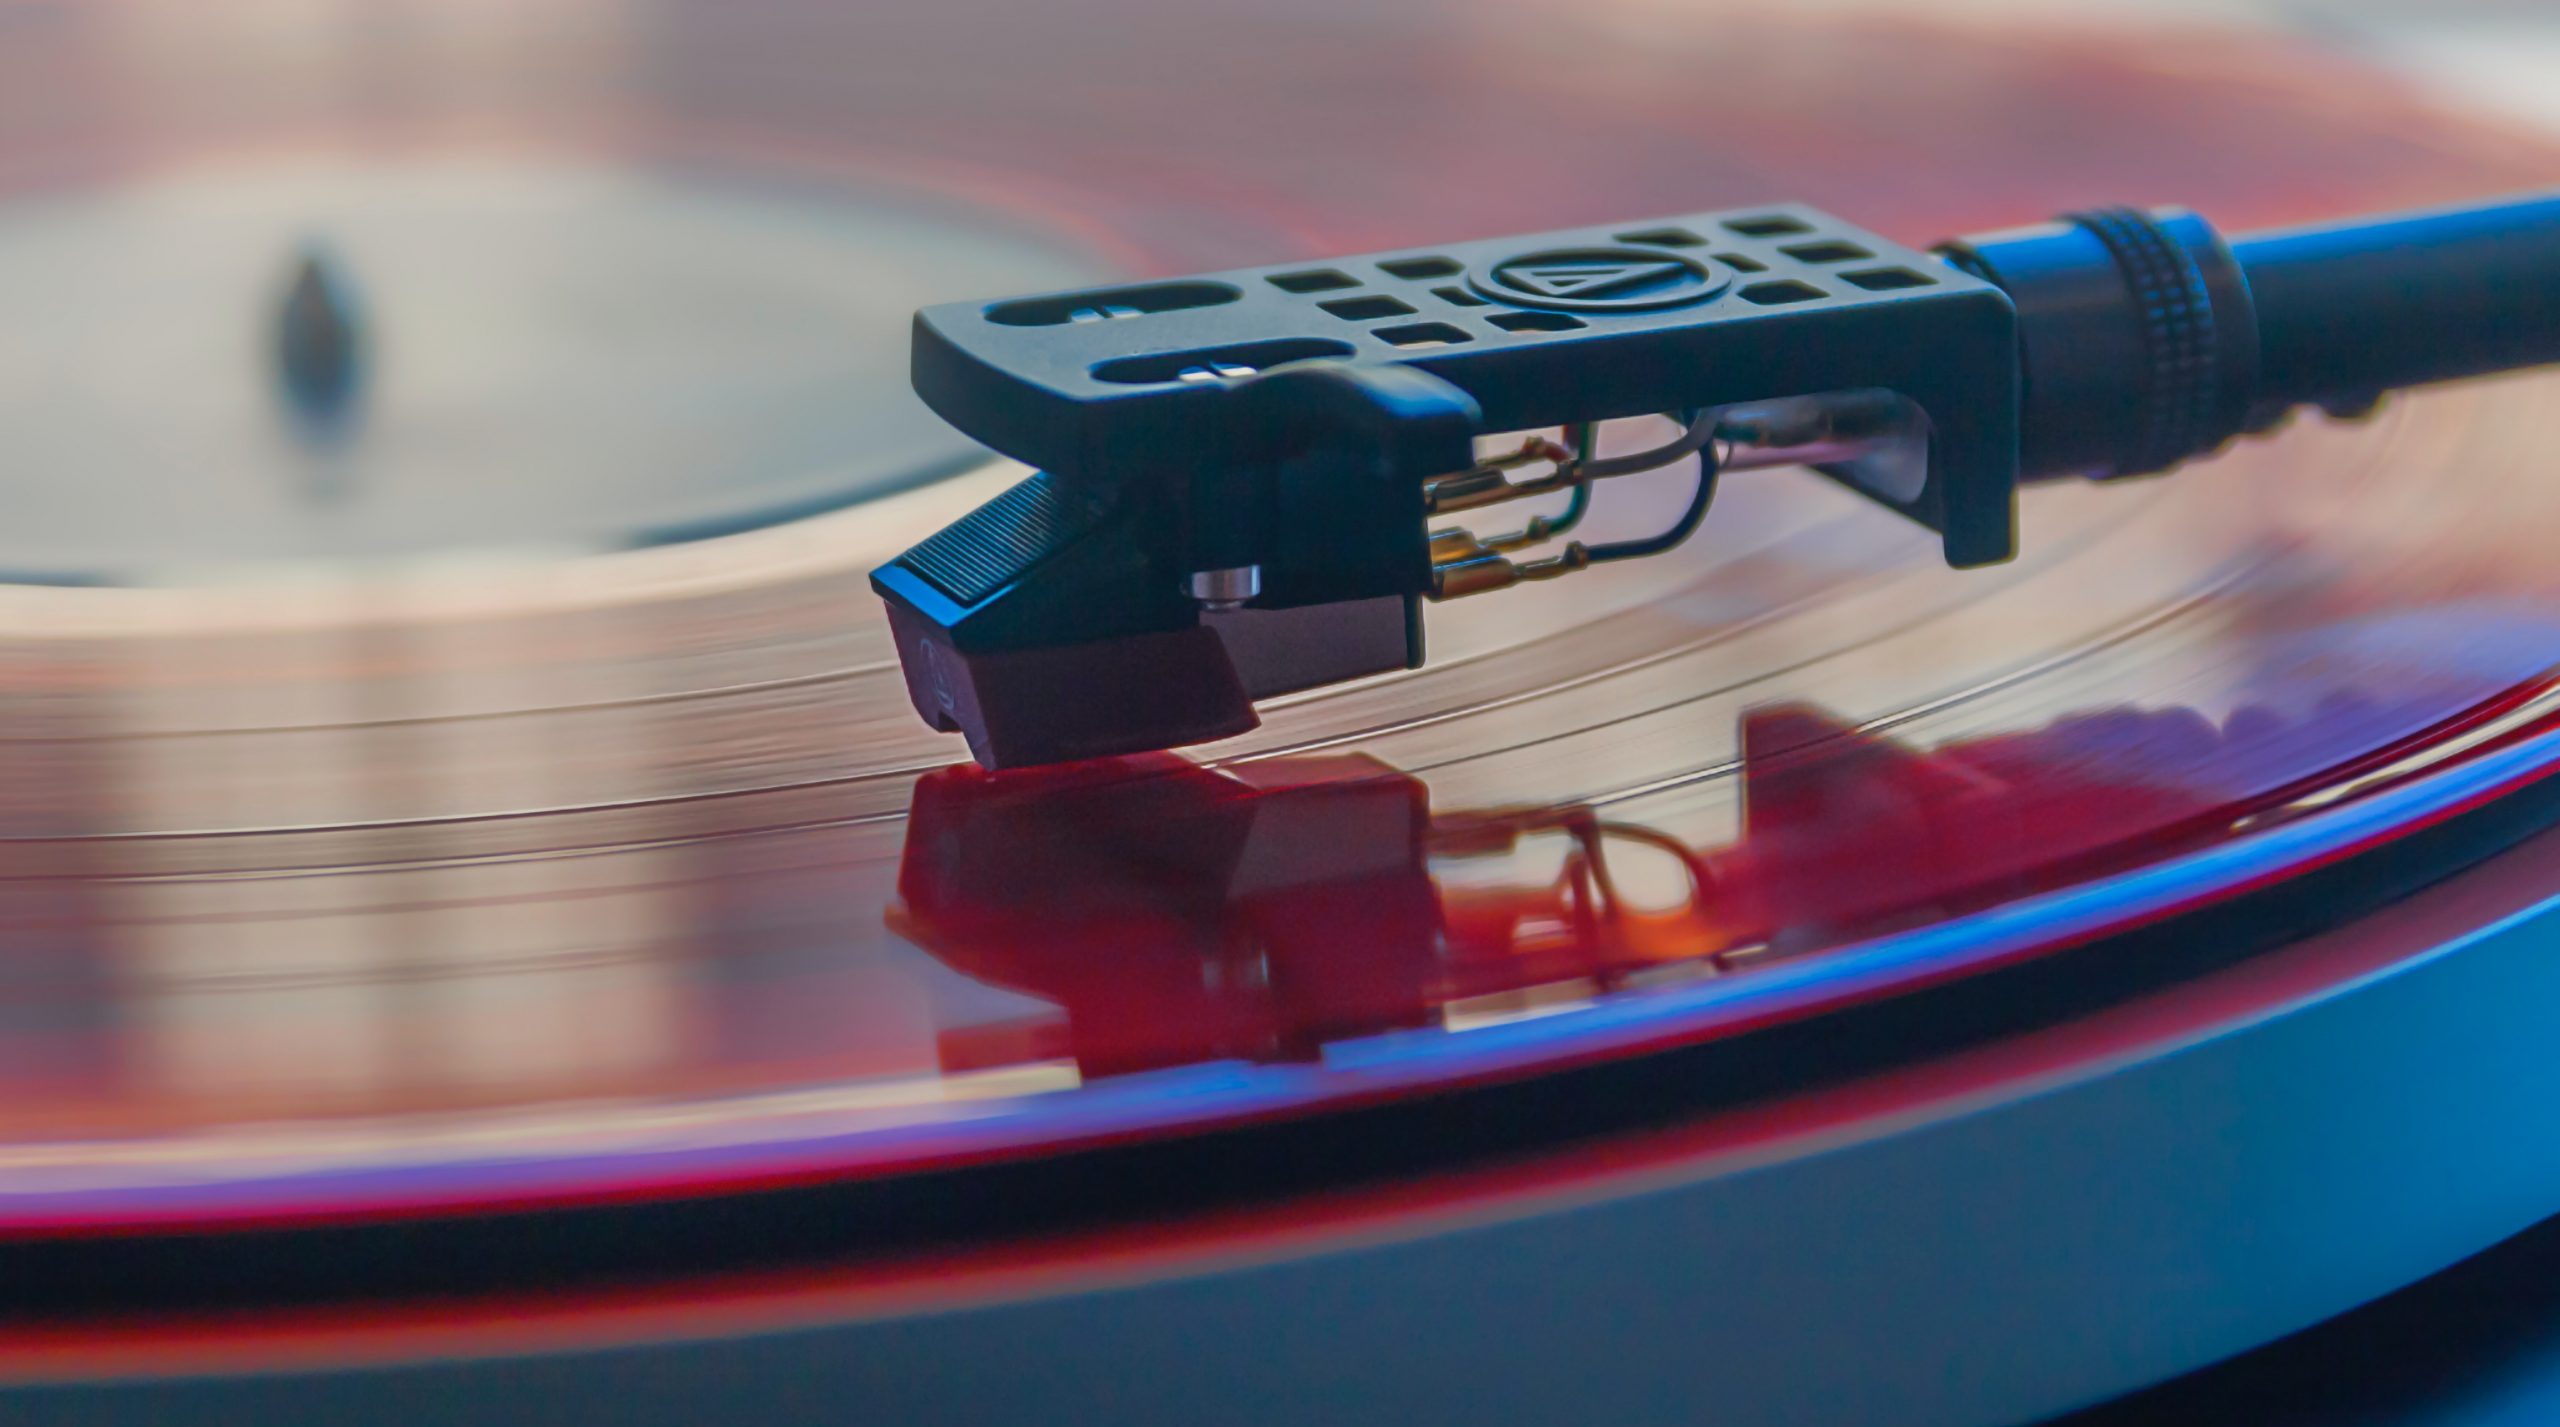
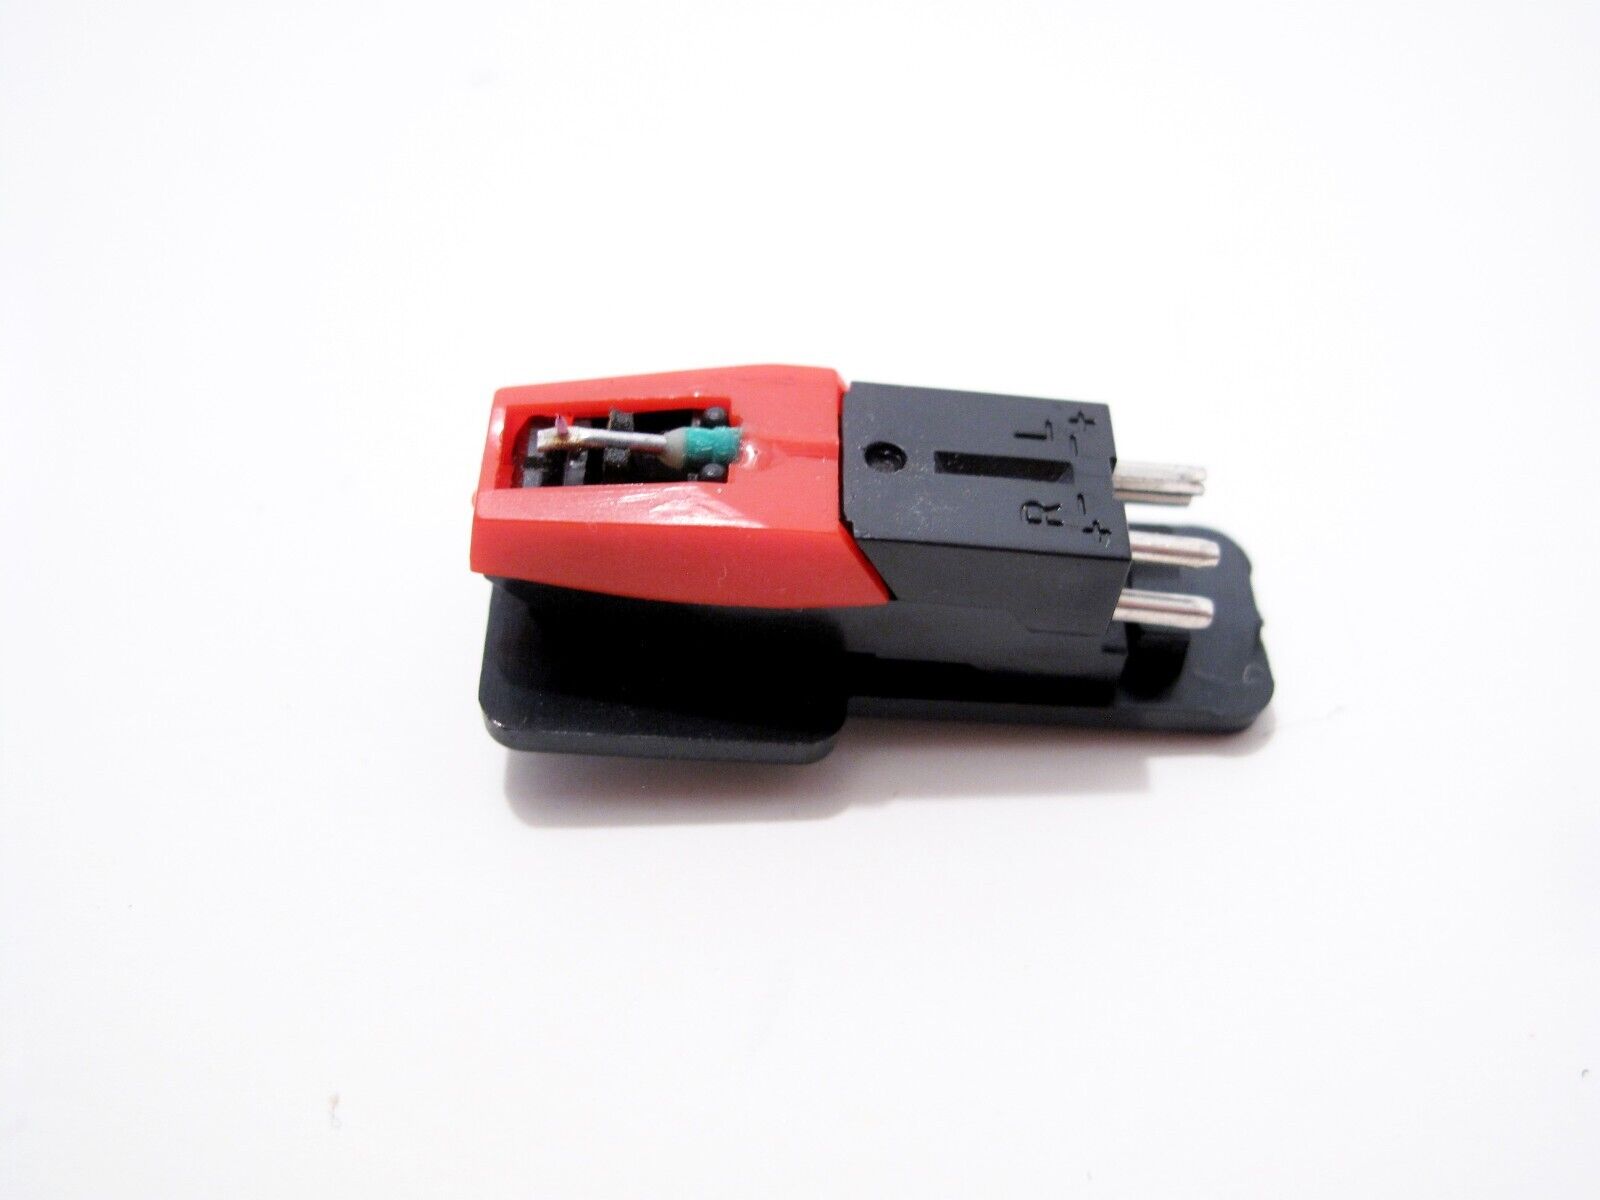
Step 4: Locate the Needle Assembly
Now that you have removed the platter, it’s time to locate the needle assembly on your Technics Quartz Direct Drive Automatic Turntable SL Q2. The needle assembly consists of the cartridge and the stylus, which houses the actual needle responsible for reading the grooves on your vinyl records.
Follow these steps to locate the needle assembly:
- Identify the Cartridge: The cartridge is the housing that holds the stylus and is responsible for converting the vibrations from the stylus into electrical signals. It is usually located at the end of the tonearm. Take a moment to familiarize yourself with the cartridge’s appearance and how it is positioned on your turntable.
- Observe the Stylus: Look closely at the cartridge and locate the stylus. The stylus is the small, diamond-tipped needle that directly comes into contact with the record’s grooves. It is crucial to handle the stylus with care to prevent any damage.
- Inspect the Connection: Take note of how the stylus connects to the cartridge. It may be a simple click-on design or require a specific alignment and attachment method. Understanding this connection will help you correctly remove the old needle and insert the new one.
By finding the needle assembly, you are one step closer to replacing the old needle on your Technics SL Q2 turntable. Take your time to familiarize yourself with the cartridge and stylus, as this will ensure a smooth and successful needle replacement process.
Step 5: Remove the Old Needle
With the needle assembly located, it’s time to remove the old needle from your Technics Quartz Direct Drive Automatic Turntable SL Q2. Removing the old needle is a delicate process, and it’s important to take your time and handle the needle with care to avoid damage.
Follow these steps to remove the old needle:
- Identify the Needle Attachment: Take a close look at how the old needle is attached to the cartridge. It may be secured with a clip, screws, or a similar mechanism. Make sure to understand the attachment method before proceeding.
- Safely Release the Old Needle: Depending on the attachment method, carefully detach the old needle from the cartridge. If there is a clip or screws, use the appropriate tools to safely release the old needle. Ensure that you have a firm grip on the needle and handle it gently to avoid any accidental damage.
- Inspect the Needle: Once you have successfully removed the old needle, take a moment to inspect its condition. Look for signs of wear, damage, or significant degradation of the stylus tip. If the needle shows signs of significant wear or damage, it is a good indication that it needs to be replaced.
It’s important to note that if you are unsure about removing the old needle, refer to the turntable’s manual or consult a professional for guidance. Mishandling the needle can lead to irreparable damage to your turntable and diminish the sound quality of your vinyl records.
With the old needle removed, you’re ready to move on to the next step of inserting the new needle into your Technics SL Q2 turntable.
Step 6: Insert the New Needle
Now that you have successfully removed the old needle, it’s time to insert the new needle into your Technics Quartz Direct Drive Automatic Turntable SL Q2. Properly inserting the new needle ensures optimal sound quality and performance from your vinyl records.
Follow these steps to insert the new needle:
- Prepare the New Needle/Stylus: Make sure you have the correct replacement needle/stylus for your Technics SL Q2 turntable. Carefully remove the new needle from its packaging, taking care not to touch the tip. It’s important to handle the new needle with clean hands or wear antistatic gloves to avoid any damage.
- Align the New Needle: Take a close look at the needle assembly and identify the correct orientation for inserting the new needle. Some cartridges have specific alignment markings or indicators that guide the proper alignment. Align the new needle accordingly to ensure accurate sound reproduction.
- Attach the New Needle: Carefully attach the new needle to the cartridge following the attachment method you observed when removing the old needle. If there is a clip, screws, or a similar mechanism, secure the new needle in place ensuring it is firmly attached.
- Gently Test the Alignment: Once the new needle is attached, gently test the alignment by moving the tonearm across the turntable platter. The new needle should track smoothly in the grooves without any noticeable skipping or distortion. If you detect any issues, recheck the alignment and attachment of the new needle.
It’s important to note that inserting the new needle correctly is crucial for optimal performance and to avoid any damage to your turntable or vinyl records. If you are uncertain about the process, refer to the turntable’s manual or seek assistance from a professional.
With the new needle successfully inserted, you’re now ready to move on to securing the needle assembly in the next step of the needle replacement process.
Step 7: Secure the Needle Assembly
After inserting the new needle into your Technics Quartz Direct Drive Automatic Turntable SL Q2, it’s important to securely fasten the needle assembly. This step ensures that the needle remains in place during playback, avoiding any potential damage to both the needle and your vinyl records.
Follow these steps to secure the needle assembly:
- Check the Alignment: Before securing the needle assembly, double-check the alignment of the new needle/stylus. Ensure that it is correctly aligned with the cartridge and positioned to provide accurate tracking of the record grooves.
- Inspect the Attachment Mechanism: Examine the attachment mechanism of your turntable’s needle assembly. It may involve clips, screws, or a locking mechanism. Make sure to understand how the mechanism works and how it secures the needle in place.
- Secure the Needle Assembly: Using the appropriate tools or method, secure the needle assembly in place. If there are clips, ensure they are tightly fastened. If screws are involved, use the correct size screwdriver to tighten them securely.
- Verify Stability: After securing the needle assembly, gently wiggle or move the tonearm to confirm that everything is stable. The needle should remain firmly in the cartridge, and there should be no excessive play or movement in the assembly.
By properly securing the needle assembly, you ensure that it stays in the correct position during playback, delivering optimal sound quality and tracking performance. It’s essential to take your time and be meticulous in this step to avoid any issues during playback.
Once the needle assembly is secure, you’re ready to reassemble the platter in the next step of the needle replacement process.
Step 8: Reassemble the Platter
Now that the needle assembly is securely in place, it’s time to reassemble the platter of your Technics Quartz Direct Drive Automatic Turntable SL Q2. Properly reassembling the platter ensures that it sits correctly on the turntable and allows for smooth and accurate playback of your vinyl records.
Follow these steps to reassemble the platter:
- Clean the Platter and Spindle: Before reassembling the platter, take a moment to wipe the platter and the spindle with a clean, dry cloth. This helps remove any dust or debris that may have accumulated during the needle replacement process.
- Position the Platter: Carefully place the platter back onto the turntable, ensuring that it is centered properly. The spindle should fit snugly into the hole at the center of the platter.
- Align any Locking Mechanisms: If your turntable has any locking mechanisms or screws that secure the platter in place, align them accordingly. Make sure they are properly aligned with their respective holes or slots on the turntable and tighten them securely.
- Test the Platter: Once the platter is reassembled, give it a gentle spin to ensure that it rotates smoothly and freely. Pay attention to any unusual noises or vibrations, as these may indicate improper alignment or a loose connection.
By carefully reassembling the platter, you ensure that it sits correctly on the turntable and provides stable rotation for accurate vinyl playback. Take your time and make any necessary adjustments to align the platter properly before moving on to the next step.
With the platter successfully reassembled, you’re ready to move on to the final step of the needle replacement process: powering on the turntable and testing the newly replaced needle!
Step 9: Power On and Test the Turntable
After reassembling the platter, it’s time to power on your Technics Quartz Direct Drive Automatic Turntable SL Q2 and test the functionality of the newly replaced needle. This final step ensures that everything is working correctly and that your turntable is ready to deliver high-quality sound once again.
Follow these steps to power on and test the turntable:
- Connect the Power Cord: Plug the power cord back into the turntable and connect it to a power outlet or power supply unit. Ensure that the power connection is secure.
- Connect the Audio Cables: If you had disconnected any audio cables in Step 2, reconnect them to the appropriate audio equipment, such as a receiver or amplifier. Double-check that the connections are properly seated.
- Power on the Turntable: Locate the power switch or button on your turntable and switch it on. You should see or hear indicators that the turntable is receiving power.
- Place a Record on the Platter: Select a vinyl record and carefully place it onto the platter. Ensure that the record sits flat and centered on the platter.
- Start Playback: Lift the tonearm and use the cueing lever to carefully lower it onto the desired starting point of the record. The needle should make contact with the grooves, and the turntable should start spinning the record.
- Listen for Sound Quality: As the record plays, listen for the sound quality. Pay attention to any distortions, skipping, or other abnormalities that may indicate an issue with the needle replacement. If you notice any problems, stop the playback and double-check the alignment and attachment of the needle.
By following these steps, you ensure that your Technics SL Q2 turntable is properly powered on and that the newly replaced needle is functioning correctly. Take your time to listen closely to the sound quality and make any necessary adjustments to the needle or cartridge settings to achieve optimal playback performance.
Congratulations! You have successfully changed the needle in your Technics Quartz Direct Drive Automatic Turntable SL Q2. Enjoy your vinyl collection with confidence, knowing that your turntable is in top condition.
Conclusion
Changing the needle in your Technics Quartz Direct Drive Automatic Turntable SL Q2 is an essential skill for any vinyl enthusiast or turntable owner. By following the step-by-step process outlined in this guide, you can confidently replace the old needle with a new one, ensuring optimal sound quality and performance.
We started by gathering the necessary tools, including a replacement needle/stylus, a small screwdriver, antistatic gloves, a soft cloth, and isopropyl alcohol. These tools help make the needle replacement process smoother and safer.
We then proceeded to power off and disconnect the turntable to ensure our safety and prevent any accidental damage. Removing the platter gave us access to the needle assembly, where we located and removed the old needle, taking care to handle it gently to avoid any damage.
After that, we inserted the new needle into the cartridge, aligning and attaching it securely. Ensuring proper alignment and attachment is crucial for optimal sound reproduction and tracking. We then secured the needle assembly, double-checking its stability and making any necessary adjustments.
Reassembling the platter properly allowed for smooth rotation and accurate vinyl playback. Finally, we powered on the turntable, tested the functionality of the newly replaced needle, and listened for sound quality and any potential issues.
By following these steps, you have successfully transformed your Technics SL Q2 turntable, ensuring it continues to provide you with countless hours of high-quality vinyl listening pleasure.
Remember, if you ever feel unsure or uncomfortable during the needle replacement process, it’s always a good idea to consult a professional. Mishandling the needle or other delicate turntable components can lead to irreparable damage.
Now, sit back, relax, and enjoy the crisp and clear audio from your Technics Quartz Direct Drive Automatic Turntable SL Q2, knowing that you have mastered the art of needle replacement. Happy listening!