Home>Instruments>Drums>How To Fix Rock Band Drums

Drums
How To Fix Rock Band Drums
Published: February 8, 2024
Learn how to fix rock band drums and get back to your rhythm with our comprehensive guide. Fixing drums made easy!
(Many of the links in this article redirect to a specific reviewed product. Your purchase of these products through affiliate links helps to generate commission for AudioLover.com, at no extra cost. Learn more)
Table of Contents
Introduction
Introduction
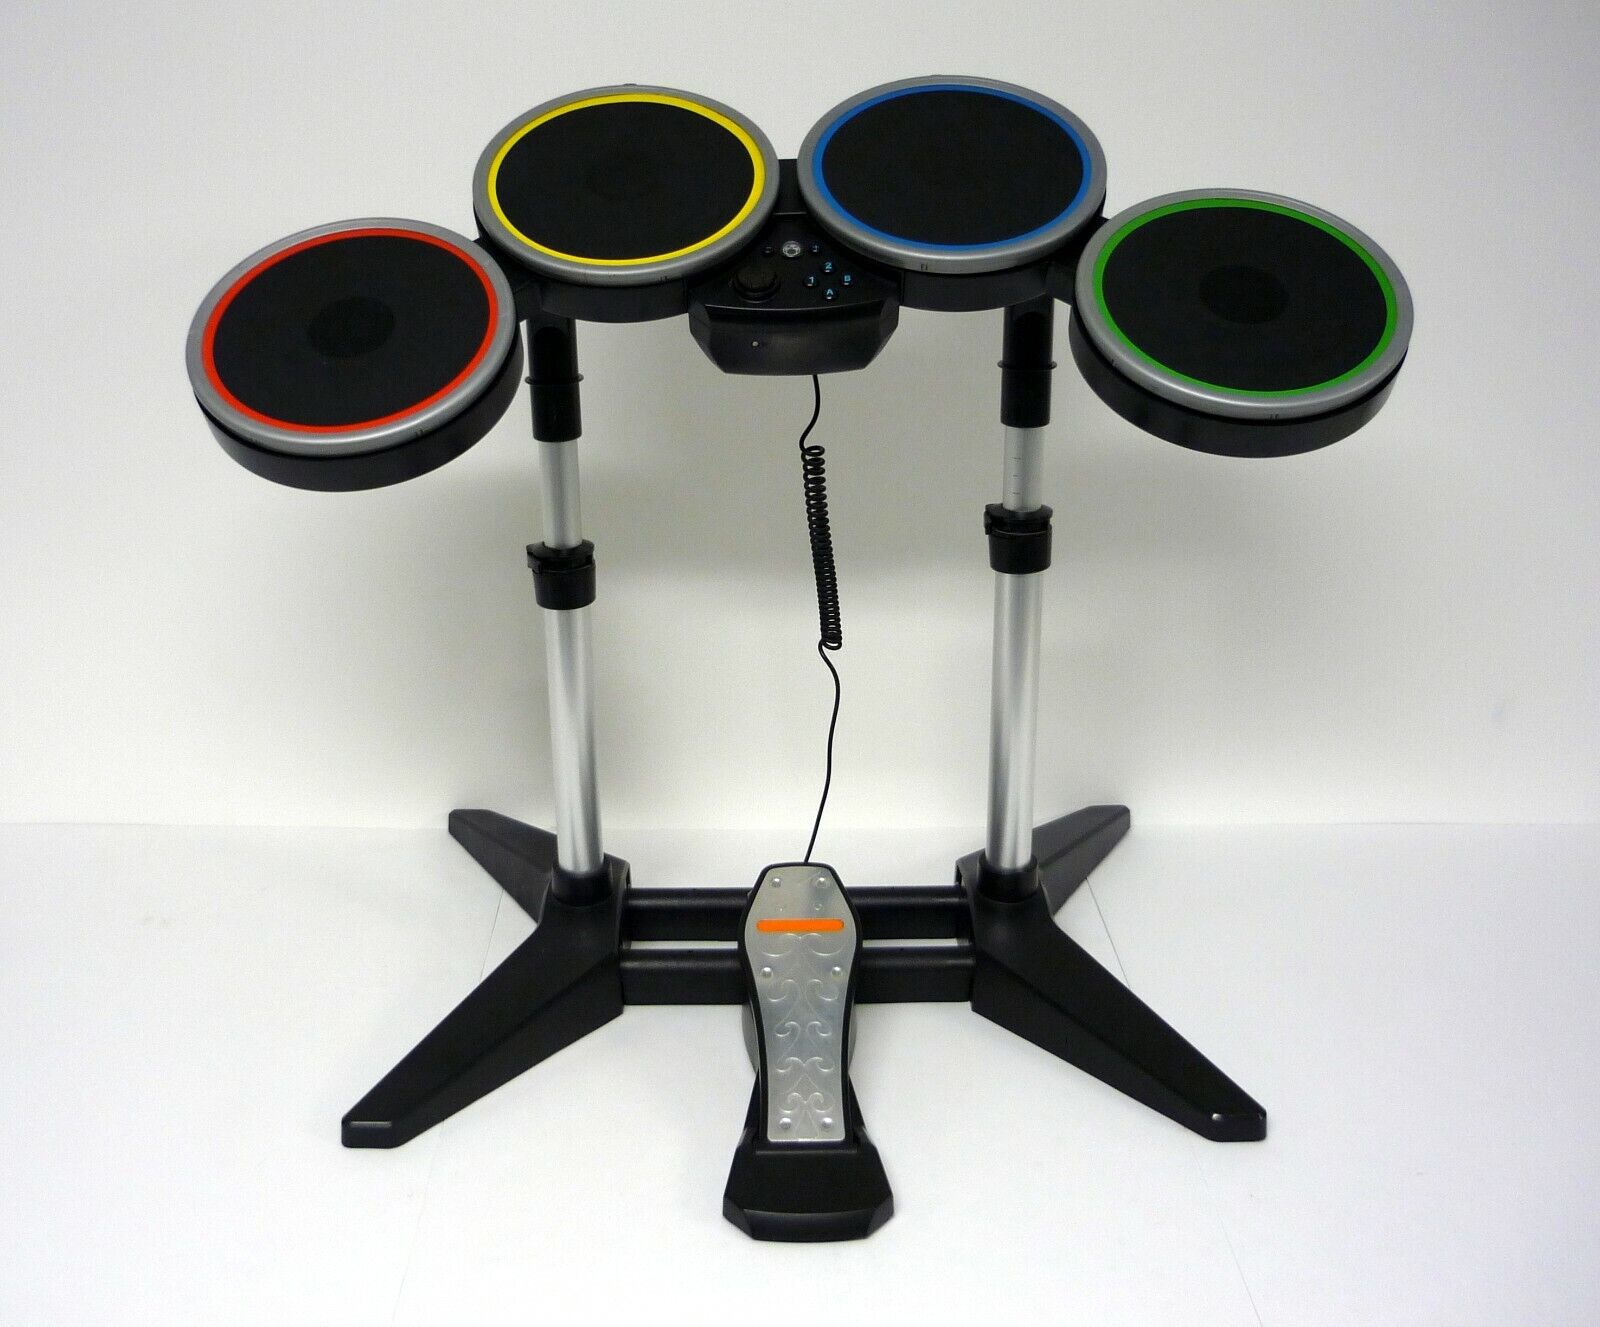
Rock Band drums are an integral part of the immersive music gaming experience, allowing players to unleash their inner rhythm and feel like genuine rock stars. However, just like any electronic device, these drum kits can encounter issues over time, hampering the gameplay and enjoyment. Whether it's unresponsive drum pads, connectivity problems, or calibration issues, troubleshooting and fixing these issues can revitalize the drum kit and reignite the excitement of playing Rock Band.
In this comprehensive guide, we will delve into the various troubleshooting steps and solutions to address common problems with Rock Band drums. From assessing the initial issue to checking connections, adjusting and replacing drum pads, troubleshooting the drum module, and calibrating the drums, we will walk you through the process of restoring your Rock Band drums to their optimal functionality.
By following the steps outlined in this guide, you can breathe new life into your Rock Band drums, ensuring that they deliver a seamless and exhilarating gaming experience. So, grab your drumsticks, roll up your sleeves, and let's embark on this journey to rejuvenate your Rock Band drums!
Assessing the Issue
Before diving into the troubleshooting process, it’s essential to assess the specific issue plaguing your Rock Band drums. Identifying the nature of the problem will guide the subsequent steps, enabling you to pinpoint the root cause and apply the most effective solution.
Start by observing the behavior of the drum kit during gameplay. Are certain drum pads unresponsive or intermittently registering hits? Is there a delay between striking a pad and hearing the corresponding sound from the game? Additionally, check if any error messages are displayed on the game console or if the drum module’s indicator lights exhibit unusual patterns.
Physical inspection is equally crucial. Examine the drum pads for signs of wear and tear, such as fraying edges or visible damage. Ensure that the drumsticks are in good condition, as worn-out or damaged drumsticks can impact the responsiveness of the pads.
If the issue seems to stem from connectivity problems, inspect the cables and connections between the drum pads and the drum module. Loose or damaged cables can impede the transmission of signals, leading to erratic drum pad behavior.
Furthermore, consider the environment in which the drum kit is used. Excessive humidity or dust accumulation can affect the drum pads’ sensitivity and responsiveness. Similarly, ensure that the drum kit is placed on a stable surface, as wobbling or movement during gameplay can disrupt the drumming experience.
By thoroughly assessing the issue, you can gain valuable insights into the underlying cause of the drum kit’s malfunction. Armed with this information, you’ll be better equipped to proceed with the subsequent troubleshooting steps, effectively addressing the specific issue at hand.
Checking the Connections
One of the primary culprits behind malfunctioning Rock Band drums is faulty or compromised connections. Ensuring that all the cables and connections are secure and free from damage is crucial in maintaining the optimal functionality of the drum kit.
Begin by inspecting the cables that link the drum pads to the drum module. Look for any visible signs of wear, such as fraying or exposed wires, and replace any compromised cables to eliminate potential connectivity issues. Additionally, firmly reseat the connections to guarantee a snug and stable fit.
Verify that the drum module’s connection to the game console is secure. If the drum module utilizes a wireless connection, check the batteries in the wireless transmitter and the drum module itself. Weak or depleted batteries can lead to intermittent connectivity problems, impacting the responsiveness of the drum kit during gameplay.
For wired drum kits, ensure that the USB or MIDI cable connecting the drum module to the game console is firmly plugged in. If the drum module features additional input/output ports, such as MIDI out or foot pedal inputs, inspect these connections as well, as loose or damaged connections can disrupt the overall functionality of the drum kit.
Once the physical connections are validated, access the game console’s settings to confirm that the drum kit is recognized and properly configured. Some games feature specific calibration and setup procedures for the drum kit, so consult the game’s manual or in-game instructions to ensure that the drum kit is correctly configured within the game’s settings.
By meticulously checking and securing the connections, you can eliminate potential sources of connectivity issues and ensure that the drum kit operates seamlessly during gameplay. This proactive approach to maintaining robust connections is fundamental in preserving the immersive and responsive nature of Rock Band drums.
Adjusting the Drum Pads
When encountering unresponsive or inconsistently triggering drum pads, making adjustments to the pad sensitivity and positioning can often remedy the issue, revitalizing the drumming experience and restoring the pads’ responsiveness.
Many electronic drum kits, including Rock Band drums, offer the flexibility to customize the sensitivity of individual drum pads. Access the drum module’s settings or configuration menu to adjust the sensitivity levels for each pad. Increasing the sensitivity can address issues related to pads failing to register hits, while decreasing sensitivity can prevent unintended double triggering or overly sensitive responses.
Furthermore, ensure that the drum pads are positioned optimally to accommodate your drumming technique. Center the pads within your striking range and angle them to align with your natural drumming motion. This alignment can enhance the accuracy and consistency of pad strikes, minimizing the occurrence of missed or ghost notes during gameplay.
Inspect the drumsticks as well, as their condition and material can impact the pads’ responsiveness. Worn-out or damaged drumsticks can dampen the impact force, leading to reduced pad sensitivity. Consider using drumsticks with nylon tips, as they can provide a more consistent and reliable striking surface compared to traditional wooden tips.
Additionally, ensure that the drum pads are free from debris and dust accumulation. Periodically clean the pads using a soft, dry cloth to remove any contaminants that may hinder their responsiveness. Avoid using cleaning agents or abrasive materials, as these can damage the pad surfaces and compromise their sensitivity.
By fine-tuning the sensitivity settings, optimizing the pad positioning, and maintaining clean and suitable drumsticks, you can significantly improve the responsiveness and accuracy of the drum pads, elevating the overall gaming experience and enabling seamless and precise drumming during Rock Band sessions.
Replacing the Drum Pads
Over time, the drum pads on Rock Band drum kits may succumb to wear and tear, leading to diminished responsiveness and accuracy during gameplay. When adjusting the sensitivity and positioning fails to rectify the pad-related issues, replacing the drum pads can breathe new life into the drum kit, restoring its optimal functionality.
Before replacing the drum pads, it’s essential to source compatible replacement pads designed specifically for the Rock Band drum kit model in use. These replacement pads are typically available through authorized retailers or online stores, ensuring compatibility and seamless integration with the existing drum module.
To begin the replacement process, power off the drum kit and disconnect it from the game console. Using the appropriate tools, such as screwdrivers or Allen wrenches, carefully remove the existing drum pads from the drum rack or mounting plate. Take note of the pad’s orientation and the arrangement of internal components to facilitate the installation of the replacement pads.
Inspect the internal sensors and wiring harnesses connected to the drum pads. Ensure that these components are undamaged and free from debris. Clean the sensor surfaces using a soft, dry cloth to eliminate any contaminants that may impede the new pads’ functionality.
Align the replacement pads with the mounting points on the drum rack and secure them in place according to the manufacturer’s instructions. Take care to connect the wiring harnesses securely, ensuring proper alignment and engagement to guarantee the pads’ responsiveness during gameplay.
Once the replacement pads are installed, power on the drum kit and test the functionality of each pad. Verify that the newly installed pads register hits accurately and consistently, addressing the issues that prompted the replacement process.
By replacing worn or malfunctioning drum pads with genuine, compatible replacements, you can revitalize the drum kit, restoring its responsiveness and ensuring a captivating and immersive drumming experience during Rock Band sessions.
Troubleshooting the Drum Module
When encountering persistent issues with Rock Band drums, the drum module, which serves as the central control unit for the drum kit, warrants thorough troubleshooting to identify and address potential malfunctions or irregularities that may be impeding the kit’s performance.
Begin by inspecting the drum module for visible signs of damage, such as cracks, dents, or exposed wiring. Ensure that the module’s housing is intact and free from physical defects that could compromise its internal components. Additionally, check for loose knobs, buttons, or input/output jacks that may affect the module’s functionality.
Access the drum module’s settings and configuration menu to verify that it is operating on the latest firmware or software version. Manufacturers often release updates to address performance issues and enhance compatibility with gaming consoles, so updating the module’s firmware can rectify underlying software-related issues that may be impacting its functionality.
If the drum module features adjustable settings for threshold, cross-talk, or dynamic range, consider resetting these parameters to their default values. This can mitigate erratic pad behavior and ensure that the module’s processing of pad signals is optimized for consistent and accurate drumming responses.
Inspect the drum module’s input/output ports, such as MIDI connections or auxiliary inputs, to ensure that they are free from debris and damage. Clean the ports using compressed air or gentle brushing to remove any contaminants that may impede signal transmission or reception.
For wireless drum modules, verify that the wireless transmitter and receiver are paired correctly and that they are operating on a clear and interference-free frequency. Interference from other wireless devices or electronic equipment can disrupt the communication between the drum pads and the module, leading to performance issues during gameplay.
If the troubleshooting steps fail to resolve the drum module-related issues, consider contacting the manufacturer’s support or seeking assistance from authorized service centers. Professional inspection and repair may be necessary to diagnose and rectify internal faults or component failures within the drum module.
By meticulously troubleshooting the drum module and addressing potential hardware or software-related issues, you can restore the optimal functionality of the drum kit, ensuring a seamless and captivating drumming experience during Rock Band sessions.
Calibrating the Drums
Calibrating the drums is a crucial step in optimizing the responsiveness and accuracy of Rock Band drum kits, ensuring that the pads register hits with precision and consistency during gameplay. Proper calibration enhances the immersive experience, allowing players to unleash their rhythmic prowess without encountering latency or misfiring issues.
Initiate the calibration process by accessing the drum kit’s settings or configuration menu, typically available within the game’s options or settings interface. Some games offer dedicated calibration modes, guiding players through the calibration process step by step, while others allow manual adjustment of timing and sensitivity parameters.
Before commencing the calibration, ensure that the drum kit is set up on a stable surface, free from any obstructions that may hinder the drumming motion. Position the drum kit at a comfortable height and angle, enabling natural and unhindered drumming movements during the calibration process.
Most calibration procedures involve aligning the visual and auditory cues with the physical act of striking the drum pads. This synchronization ensures that the game accurately interprets the timing of pad hits, resulting in seamless and accurate gameplay responses. Follow the on-screen instructions to strike each pad firmly and precisely in sync with the visual and auditory cues presented during the calibration process.
Adjust the calibration settings based on the responsiveness and accuracy of the pad hits. Fine-tune the timing and sensitivity parameters to eliminate any perceptible delay between striking a pad and hearing the corresponding sound in the game. Additionally, mitigate false triggers or double hits by optimizing the pad sensitivity to align with your drumming technique and force of strikes.
For wireless drum kits, ensure that the wireless connection between the drum module and the game console is stable and free from interference during the calibration process. Minimize the distance between the drum kit and the console to facilitate reliable signal transmission, enhancing the accuracy of calibration adjustments.
Periodically revisit the calibration settings to accommodate changes in environmental conditions or drum kit components. Factors such as temperature, humidity, and equipment placement can impact the drum kit’s responsiveness, necessitating recalibration to maintain optimal performance.
By meticulously calibrating the drums and fine-tuning the timing and sensitivity parameters, players can elevate their Rock Band drumming experience, enjoying seamless and precise gameplay responses that mirror their rhythmic prowess and drumming proficiency.
Conclusion
Reviving and maintaining the optimal functionality of Rock Band drums is essential for preserving the immersive and exhilarating music gaming experience. By navigating through the troubleshooting steps outlined in this guide, players can address a myriad of issues, ranging from unresponsive drum pads to connectivity problems and calibration discrepancies, ensuring that the drum kit operates seamlessly and responsively during gameplay.
From the initial assessment of the issue to meticulous checks of the connections, adjustments to drum pads, replacement of worn components, troubleshooting of the drum module, and precise calibration of the drums, this comprehensive guide equips players with the knowledge and techniques to breathe new life into their Rock Band drum kits.
By fostering an understanding of the drum kit’s internal components, connectivity mechanisms, and calibration intricacies, players can proactively troubleshoot and address performance issues, ultimately enhancing their gaming experience and rhythmic immersion.
Remember, regular maintenance and attentive troubleshooting are pivotal in preserving the longevity and performance of Rock Band drums. By investing time and care into the upkeep of the drum kit, players can relish countless sessions of captivating drumming, unleashing their musical flair and rhythmic creativity without hindrance.
So, embrace the journey of troubleshooting and rejuvenating your Rock Band drums, and let the resounding beats and electrifying rhythms propel you into the heart of the music gaming realm, where every strike of the drum pad resonates with precision and passion.


