Home>Instruments>Piano>How To Fix A Piano Key

Piano
How To Fix A Piano Key
Published: February 10, 2024
Learn how to fix a piano key and get your piano playing smoothly again with our step-by-step guide. Discover expert tips and techniques for piano maintenance.
(Many of the links in this article redirect to a specific reviewed product. Your purchase of these products through affiliate links helps to generate commission for AudioLover.com, at no extra cost. Learn more)
Table of Contents
**
Introduction
**
Pianos are magnificent instruments that have the power to evoke a wide range of emotions through their melodious tunes. However, like any mechanical device, pianos require maintenance to ensure they perform optimally. One common issue that piano owners may encounter is a malfunctioning key. When a piano key becomes unresponsive or produces an unusual sound, it can detract from the overall playing experience. Fortunately, with the right knowledge and tools, many piano key issues can be addressed effectively.
In this comprehensive guide, we will explore the process of fixing a piano key, providing step-by-step instructions and valuable insights to help you restore the functionality of your instrument. Whether you are a seasoned pianist or a novice enthusiast, understanding the intricacies of piano key repair can empower you to maintain your instrument and prolong its lifespan.
Throughout this guide, we will cover the essential tools and materials needed for the repair, the systematic process of assessing the problem, removing the key, cleaning and repairing it, reassembling the key, and finally, testing it to ensure that it functions as intended. By following these instructions, you can gain a deeper understanding of your piano's mechanics and develop the skills necessary to address common key issues.
Repairing a piano key can be a gratifying experience, allowing you to witness firsthand the inner workings of this remarkable instrument. Whether you are a DIY enthusiast or a professional technician, this guide will equip you with the knowledge and confidence to tackle piano key repairs with precision and care. Let's embark on this enriching journey to restore the harmony of your piano keys and reignite the joy of playing this timeless instrument.
Tools and Materials Needed
Before embarking on the journey of fixing a piano key, it is essential to gather the necessary tools and materials to ensure a smooth and efficient repair process. Here are the key items you will need:
Tools:
-
Screwdriver Set: A precision screwdriver set with various head types will be indispensable for disassembling the piano key mechanism.
-
Key Puller: This specialized tool is designed to safely remove piano keys without causing damage to the surrounding components.
-
Soft Brush: A soft-bristled brush is ideal for gently removing dust and debris from the key mechanism and surrounding areas.
-
Tweezers: Precision tweezers will aid in handling small components and navigating intricate spaces within the piano key assembly.
-
Lint-Free Cloths: These cloths are essential for cleaning and drying the key components without leaving behind lint or residue.
-
Rubber Wedges: Rubber wedges can be used to secure adjacent keys while working on a specific key, preventing accidental damage.
Materials:
-
Key Cleaning Solution: A mild key cleaning solution or a mixture of water and gentle soap will be used to clean the key surfaces and remove grime.
-
Replacement Parts (if necessary): Depending on the assessment of the key's condition, replacement parts such as key bushings, felts, or springs may be required.
-
Lubricant: A specialized piano key lubricant will be necessary for ensuring smooth and consistent key movement after the repair.
-
Adhesive: If any felts or components need to be reattached, a suitable adhesive designed for use in pianos will be essential.
By ensuring that you have these tools and materials at your disposal, you can approach the piano key repair process with confidence, knowing that you are equipped to address a variety of potential issues that may arise during the repair.
Assessing the Problem
Before diving into the repair process, it is crucial to conduct a thorough assessment of the piano key and its associated mechanisms. Identifying the specific nature of the problem will enable you to formulate an effective repair strategy and determine the extent of the required repairs. Here are the key steps involved in assessing the problem:
-
Observation: Carefully observe the behavior of the affected key. Note any irregularities in its movement, such as sticking, sluggishness, or unusual noise production. Additionally, assess the responsiveness of the key when pressed and released.
-
Visual Inspection: Gently remove the key cover, if applicable, to visually inspect the key and its surrounding components. Look for any visible damage, accumulation of debris, or signs of wear and tear on the key and its associated parts.
-
Key Movement Analysis: Press the key multiple times while paying attention to its vertical and lateral movement. Take note of any resistance, unevenness, or instability in the key’s motion, as these observations can provide valuable insights into the underlying issue.
-
Key Response Evaluation: Evaluate how the key responds in terms of sound production and the engagement of the hammer mechanism. Listen for any abnormal sounds or inconsistencies in the key’s ability to produce a clear and consistent tone.
By methodically assessing the problem through observation, visual inspection, key movement analysis, and key response evaluation, you can gain a comprehensive understanding of the issues affecting the piano key. This initial assessment serves as a foundation for the subsequent steps in the repair process, guiding your approach and ensuring that the specific concerns are addressed effectively.
Removing the Key
Once the problem has been assessed, and a repair strategy has been formulated, the next step in the process of fixing a piano key is to carefully remove the affected key. This task requires precision and attention to detail to avoid causing damage to the surrounding components. Here’s a systematic guide to removing the key:
-
Prepare the Workspace: Clear a flat, well-lit surface to work on and gather the necessary tools, including a screwdriver set, key puller, and rubber wedges. Ensure that the workspace provides ample room to maneuver the key removal process.
-
Secure Adjacent Keys: Use rubber wedges to secure the adjacent keys on both sides of the one being removed. This precaution prevents accidental movement or damage to neighboring keys during the removal process.
-
Use the Key Puller: Carefully position the key puller tool according to the manufacturer’s instructions, ensuring that it is securely attached to the key. Apply gentle and even pressure to lift the key from its resting position, taking care not to force or twist the key during the removal process.
-
Inspect and Store the Key: Once the key has been successfully removed, inspect it for any visible damage or accumulation of debris. Store the key in a safe and clean location to prevent any further harm while the repair process continues.
By following these steps, you can safely and effectively remove the piano key, setting the stage for the subsequent cleaning and repair procedures. It is important to exercise patience and precision during this process to avoid causing unintended damage to the key or its surrounding components.
Cleaning and Repairing the Key
Once the piano key has been carefully removed, the next crucial phase of the repair process involves cleaning and addressing any underlying issues that may have contributed to its malfunction. This comprehensive approach ensures that the key is restored to optimal functionality and performance. Here’s a detailed guide to cleaning and repairing the key:
-
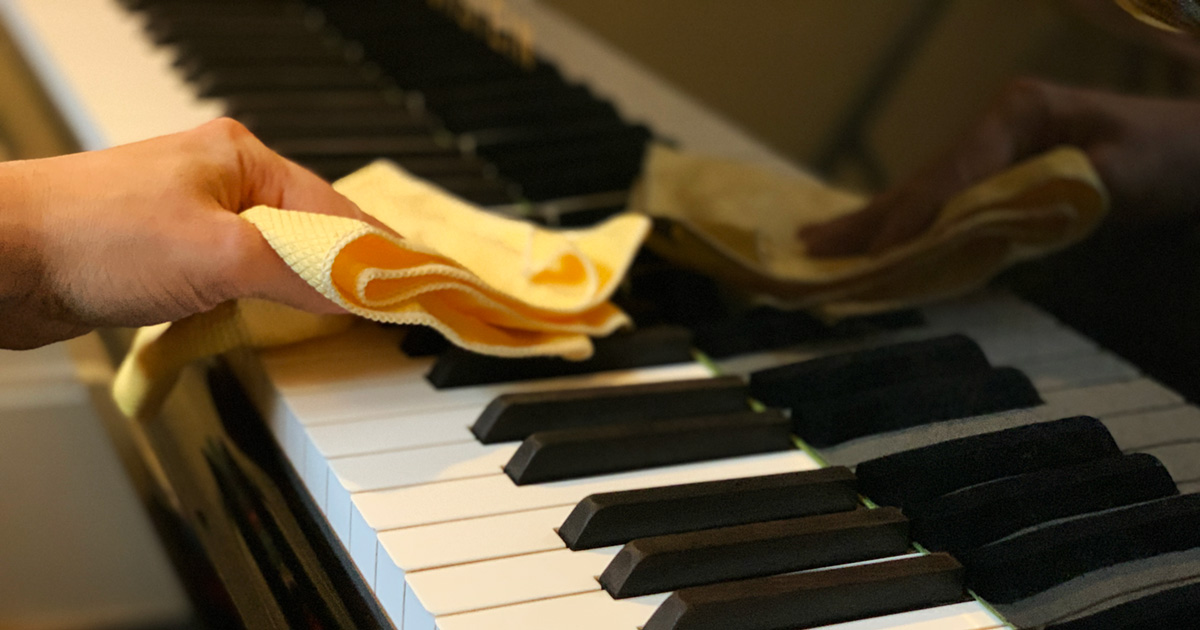
Cleaning the Key and Mechanism: Use a soft brush and a mild key cleaning solution to gently remove any accumulated dust, dirt, or debris from the key surfaces and the surrounding mechanism. Pay close attention to the key’s contact points and the areas where it interacts with the hammer and action components.
-
Inspecting for Wear and Damage: Thoroughly examine the key and its associated components for signs of wear, damage, or misalignment. Check for worn felts, broken springs, or misshapen key bushings that may impede the key’s proper function.
-
Replacing Worn Components: If any key components show signs of significant wear or damage, such as worn felts or broken springs, carefully replace them with suitable replacement parts. Ensure that the new components are compatible with the piano model and that they are installed with precision.
-
Lubricating the Key Mechanism: Apply a specialized piano key lubricant to the appropriate contact points and pivot areas of the key mechanism. This lubrication facilitates smooth and consistent key movement, enhancing the overall playability of the instrument.
-
Realigning and Adjusting Key Components: If necessary, realign any misaligned key components and make fine adjustments to ensure that the key moves with precision and stability. This step is crucial for eliminating any sources of friction or instability within the key mechanism.
By meticulously cleaning the key, inspecting for wear and damage, replacing worn components, lubricating the mechanism, and making necessary adjustments, you can effectively address the root causes of the key malfunction. This comprehensive approach aims to restore the key to its optimal condition, ensuring that it contributes to the harmonious and responsive performance of the piano.
Reassembling the Key
After the cleaning and repair processes have been completed, it is time to reassemble the piano key, ensuring that each component is reintegrated with precision and care. Proper reassembly is essential to guarantee the key’s smooth operation and seamless interaction with the piano’s action mechanism. Here’s a systematic guide to reassembling the key:
-
Prepare the Key and Components: Ensure that the key and all associated components are clean, dry, and free from any residual debris or cleaning solutions. Verify that any replacement parts have been securely installed and that the key is in optimal condition for reassembly.
-
Position the Key: Carefully position the key back into its original location within the keybed, taking care to align the key pivot points with the corresponding action mechanism components. Ensure that the key rests evenly and securely within the keybed assembly.
-
Engage the Action Mechanism: Gradually engage the key with the piano’s action mechanism, ensuring that each pivot point and hammer mechanism aligns correctly with the key’s movement. Verify that the key moves smoothly and consistently as it interacts with the action components.
-
Secure Key Components: Reattach any necessary components, such as key guides, felts, or springs, ensuring that they are securely fastened and contribute to the key’s stability and responsiveness. Check for proper alignment and functionality as each component is reattached.
-
Test the Key Movement: Press and release the key multiple times to test its movement and responsiveness. Ensure that the key moves smoothly, produces consistent tones, and engages the action mechanism without any signs of sticking or instability.
By following these steps, you can effectively reassemble the piano key, setting the stage for the final phase of the repair process: testing the key to ensure that it functions optimally and contributes to the overall playability of the instrument.
Testing the Key
With the piano key successfully reassembled, the final and critical step in the repair process is to thoroughly test its functionality and responsiveness. Testing the key ensures that the repair efforts have been effective and that the key operates optimally within the piano’s action mechanism. Here’s a detailed guide to testing the key:
-
Assessing Key Movement: Press the repaired key multiple times to assess its movement and responsiveness. Pay attention to the smoothness of the key’s action and its ability to engage with the action mechanism without any signs of sticking or resistance.
-
Sound Production Evaluation: Listen to the tones produced by the key to ensure that they are clear, consistent, and free from any unwanted noise or irregularities. Verify that the key’s interaction with the hammer mechanism results in the intended musical output.
-
Dynamic Playing Test: Perform dynamic playing exercises on the repaired key, including varying degrees of pressure and speed when pressing the key. Evaluate how the key responds to different playing techniques and ensure that it maintains its stability and tonal consistency.
-
Observing Key Alignment: Observe the alignment and movement of the repaired key in relation to the adjacent keys. Verify that the key’s alignment is consistent and that it integrates seamlessly with the surrounding keys within the keyboard assembly.
-
Repeating the Testing Process: Repeat the testing process multiple times to validate the key’s consistent performance and to ensure that any initial issues have been effectively resolved. Comprehensive testing provides confidence in the key’s functionality and reliability.
By meticulously testing the repaired key through assessments of key movement, sound production, dynamic playing, alignment, and repeated validation, you can ascertain that the repair process has been successful. Thorough testing is essential to confirm that the key operates optimally and contributes to the overall playability and musical expression of the piano.
Conclusion
Embarking on the journey of fixing a piano key is a rewarding endeavor that allows for a deeper understanding of the intricate mechanics that underpin this remarkable instrument. By following the systematic process outlined in this guide, you have gained valuable insights into the essential steps involved in repairing a malfunctioning piano key. From the initial assessment of the problem to the meticulous cleaning, repairing, reassembling, and testing phases, each step contributes to the restoration of the key’s functionality and playability.
As you engage in the repair process, it is essential to approach each task with patience, precision, and a commitment to excellence. The careful removal and reassembly of the key, coupled with thorough cleaning, inspection, and repair efforts, culminate in a comprehensive repair experience that can breathe new life into your piano’s keys.
By arming yourself with the necessary tools, materials, and knowledge, you have empowered yourself to address common piano key issues with confidence and skill. Whether you are a dedicated pianist, a DIY enthusiast, or a professional technician, the ability to fix a piano key is a valuable skill that enhances your connection with the instrument and ensures its continued performance and longevity.
As you celebrate the successful repair of the piano key, take pride in the craftsmanship and care that you have invested in your instrument. The harmonious melodies that emanate from the piano keys are a testament to your dedication to preserving the artistry and functionality of this timeless instrument.
May your piano continue to inspire and resonate with the beauty of music, enriched by the attentive maintenance and repair efforts that uphold its splendor for years to come.