Home>Production & Technology>Music Video>How To Film A Music Video On An IPhone

Music Video
How To Film A Music Video On An IPhone
Modified: January 26, 2024
Learn how to film a professional-looking music video using just your iPhone. Discover tips, techniques, and apps to create stunning visuals and capture the essence of your music.
(Many of the links in this article redirect to a specific reviewed product. Your purchase of these products through affiliate links helps to generate commission for AudioLover.com, at no extra cost. Learn more)
Table of Contents
Introduction
Music videos have become an integral part of the music industry, allowing artists to visually express their creativity and connect with their audience on a deeper level. In the past, filming a music video required expensive equipment and a dedicated production crew. However, with the advancements in technology, it is now possible to film a professional-looking music video using just your iPhone.
Thanks to the high-quality cameras and powerful video editing apps available on iPhones, aspiring musicians and music video enthusiasts can bring their vision to life without breaking the bank. In this article, we will guide you through the process of filming a music video using your iPhone, from choosing the right equipment to editing and sharing your final masterpiece.
So, whether you’re a music artist looking to create a promotional video for your latest single or a hobbyist who simply wants to experiment with filmmaking, this article will provide you with the necessary knowledge and techniques to create impressive music videos using your iPhone.
Before we dive into the details, it’s important to note that while filming a music video on an iPhone offers convenience and cost-effectiveness, it still requires careful planning, creativity, and attention to detail. So, let’s get started by exploring the essential equipment needed to kickstart your music video production on an iPhone.
Choosing the Right Equipment
When it comes to filming a music video on an iPhone, having the right equipment can make all the difference in achieving professional-looking results. Here are some essential tools and accessories to consider:
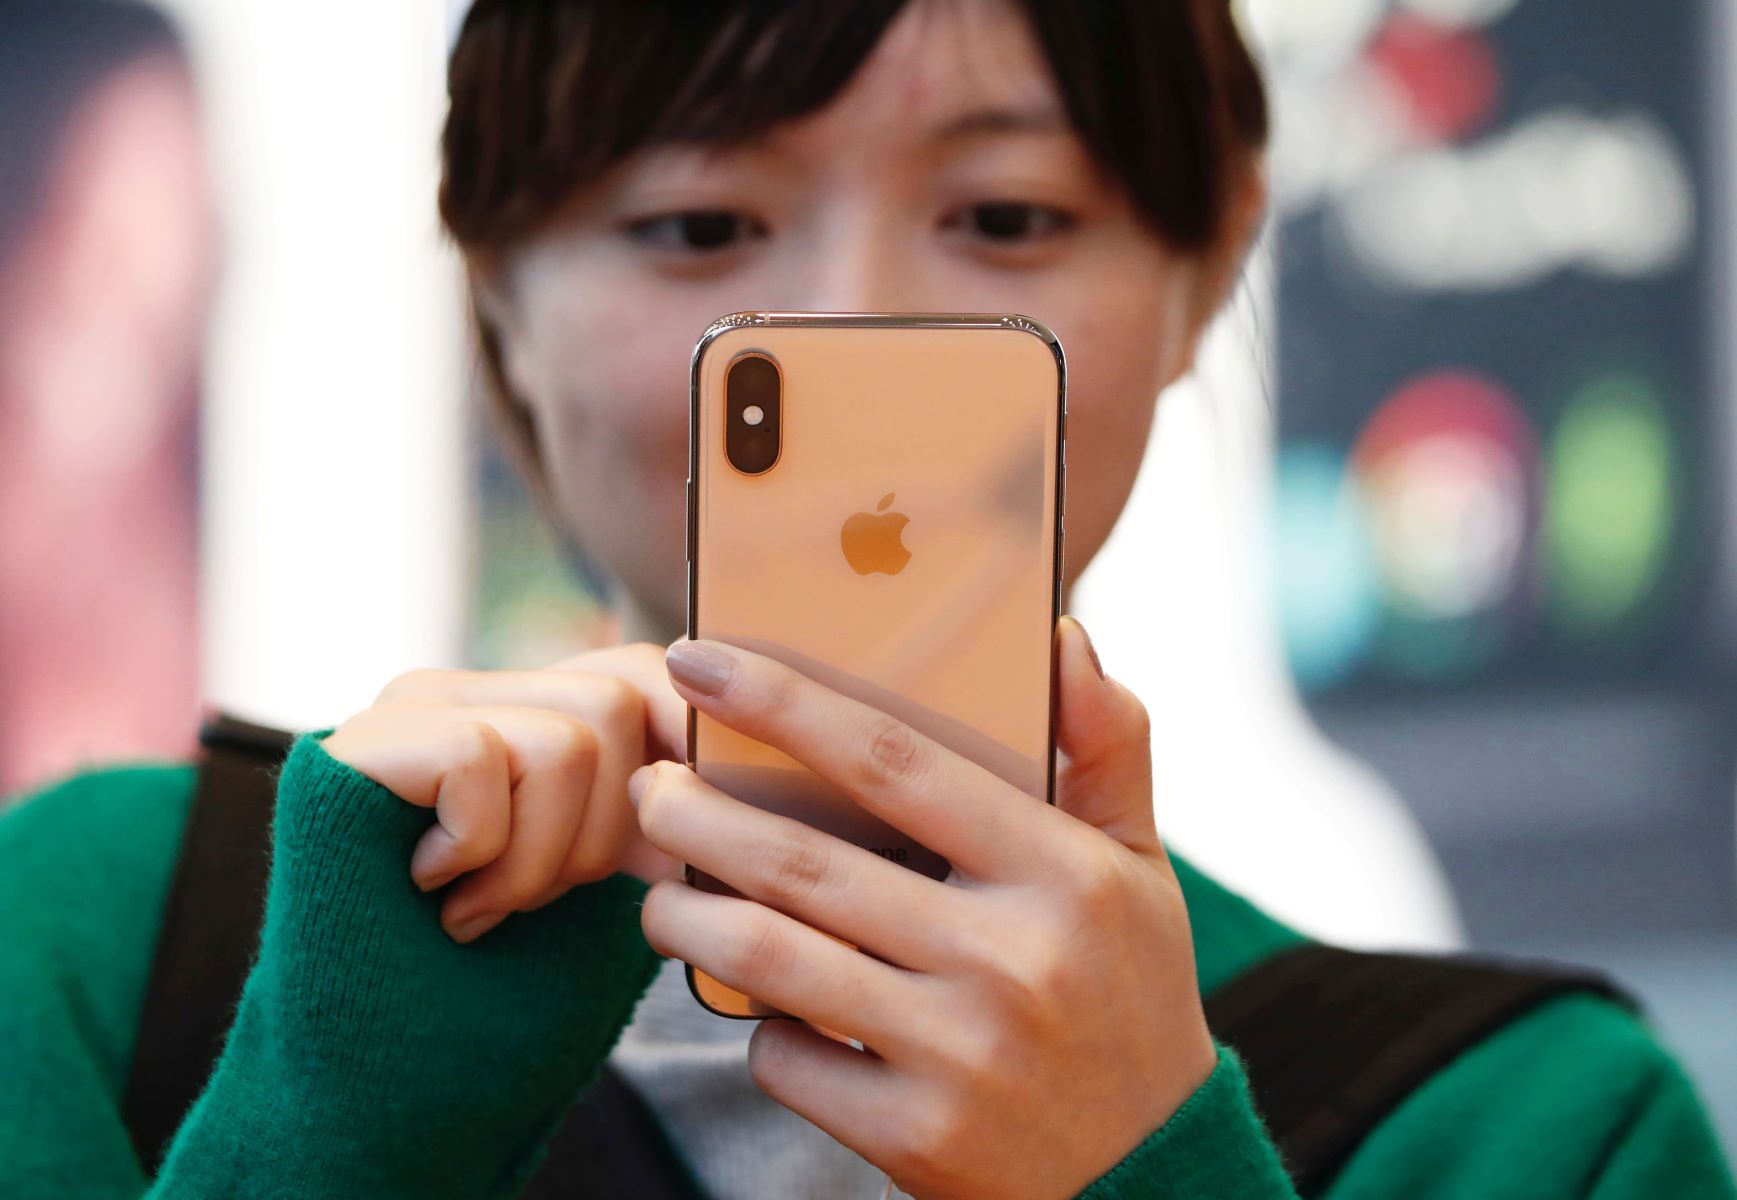
- iPhone: A recent model with a high-resolution camera, such as iPhone 11 or iPhone 12, is recommended for optimal video quality.
- Stabilization: Invest in a reliable smartphone gimbal or stabilizer to reduce shaky footage and create smoother, more professional-looking shots.
- External Microphone: While the built-in microphone on the iPhone is decent, for better audio quality, consider using an external microphone. Choose one that is compatible with your iPhone model and suitable for capturing vocals or instruments.
- Tripod: Using a tripod will help you maintain a steady shot and allow for more creative framing. Look for a sturdy tripod that is compatible with your iPhone.
- Lenses: Explore additional lens options to enhance your video’s visual appeal. Wide-angle lenses can capture a wider field of view, while macro lenses can capture intricate details. Make sure to choose lenses compatible with your iPhone model.
- Lighting: Good lighting is crucial for a well-lit and professional-looking video. Consider investing in portable LED lights or diffusers to control and enhance the lighting in your scenes.
- External Storage: Filming high-quality videos can quickly fill up your iPhone’s storage. To avoid running out of space, use external storage devices such as lightning-enabled USB drives or portable hard drives to store your footage.
While having the right equipment is important, it’s also essential to familiarize yourself with the capabilities of your iPhone’s camera and explore the settings and features it offers. Experiment with different shooting modes, such as slow-motion or time-lapse, and learn how to manually adjust settings like exposure and white balance to achieve the desired look for your music video.
Now that you have the right equipment, it’s time to move on to the pre-production stage to plan out your music video effectively.
Pre-production Planning
Before you start filming your music video on your iPhone, it’s important to have a clear plan in place. Pre-production planning helps ensure that you have a solid framework to work with, saving you time and allowing for a smoother production process. Here are some key steps to consider:
- Define the Concept: Start by brainstorming and defining the overall concept and theme of your music video. Consider the mood, storyline, and visuals you want to portray. This will serve as the foundation for all your creative decisions.
- Storyboarding: Create a storyboard to visually map out each scene and shot in your music video. Sketch out the composition, camera angles, and any specific actions or movements you want to capture. This will serve as your visual guide during filming.
- Create a Shot List: Break down your storyboard into a detailed shot list. Identify the specific shots you need to capture for each scene, including wide shots, close-ups, and any unique camera movements. This will ensure that you capture all the necessary footage during filming.
- Plan Your Locations: Determine the locations where you will be filming. Consider whether you need permits or permission to film in certain areas and plan accordingly. It’s also a good idea to visit the locations beforehand to familiarize yourself with the lighting conditions and potential obstacles.
- Arrange Cast and Crew: Decide whether you’ll be the sole performer in the music video or if you need additional actors or dancers. If you require assistance with filming or directing, assemble a small crew to support you during the production.
- Set a Budget: Determine a budget for your music video and allocate funds for any necessary equipment rentals, props, costumes, or additional resources you may need. Being mindful of your budget will help you make informed decisions throughout the production process.
- Create a Production Schedule: Plan out the shooting schedule, taking into consideration the availability of the cast, crew, and locations. Ensure you have allocated enough time for each scene and factor in any weather or lighting considerations.
By investing time in pre-production planning, you’ll have a clear vision for your music video and a roadmap to follow during the production phase. This will save you from unnecessary delays and make the filming process more efficient.
Location Scouting
Selecting the right locations for your music video can greatly enhance the overall visual impact and storytelling. Location scouting involves exploring various settings and finding the perfect spots that align with your concept and vision. Here are some tips for successful location scouting:
- Consider the Concept: Keep your music video concept in mind while scouting for locations. Look for settings that match the mood, tone, and narrative of your video. For example, a beach may be ideal for a sunny and upbeat song, while an abandoned warehouse may be suitable for a darker, edgier theme.
- Explore Different Options: Don’t limit yourself to the obvious choices. Think outside the box and consider locations that may not immediately come to mind. Look for unique, visually appealing spots that can add depth and interest to your music video.
- Assess Lighting Conditions: Pay attention to the lighting conditions at each potential location. Natural lighting can add a beautiful and authentic look to your video, so consider the time of day and how the sunlight interacts with the setting. If shooting indoors, evaluate the available artificial lighting options.
- Take Note of Accessibility: Ensure that the locations you choose are easily accessible for you, your crew, and any necessary equipment. Consider factors such as parking, permits, and any potential logistical challenges. Accessibility will contribute to a smoother and more efficient filming process.
- Look for Versatility: Find locations that offer a range of possible shots. Look for different angles, textures, and backgrounds that can add variety to your video. Versatile locations can help create a visually dynamic and engaging music video.
- Consider Noise and Distractions: While scouting, be mindful of any potential noise pollution or distractions that may affect your audio quality or disrupt your filming. Avoid locations near busy roads, construction sites, or other sources of unwanted noise.
- Permission and Permits: If you plan to film in public or private spaces that require permission, make sure to obtain the necessary permits and permissions in advance. This will help you avoid legal issues and ensure a smooth filming experience.
Remember, location scouting is an essential part of the creative process and can greatly contribute to the overall impact of your music video. Take the time to explore different options, evaluate their suitability, and envision how each location will enhance your visual storytelling.
Lighting and Composition
Lighting and composition play a vital role in capturing visually striking and professional-looking music videos. Properly utilizing lighting techniques and composing your shots can greatly enhance the mood, aesthetics, and overall impact of your video. Here are some tips for achieving effective lighting and composition:
- Natural Lighting: When possible, take advantage of natural lighting. Shoot during the golden hours of sunrise or sunset for a warm and soft glow. If filming indoors, position your subjects near windows to harness natural light.
- Artificial Lighting: If natural lighting is not sufficient or unavailable, invest in portable LED lights or other lighting equipment. Experiment with different lighting setups to create the desired mood and atmosphere for each scene.
- Three-Point Lighting: The three-point lighting technique is a fundamental approach used in videography. It includes key light, fill light, and backlight. This setup helps in creating depth, eliminating shadows, and highlighting important elements within the frame.
- Composition: Compose your shots thoughtfully to create visually pleasing frames. Use the rule of thirds to guide your placement of subjects and key elements. Experiment with different angles, lines, and perspectives to add interest and impact.
- Depth and Layers: Create depth in your shots by including foreground, middle ground, and background elements. This adds dimension to the frame and makes it feel more immersive. Incorporate objects or people in different planes to achieve this effect.
- Movement and Framing: Consider incorporating movement and dynamic framing techniques to engage viewers. Use techniques such as panning, tracking, or even handheld shots to add energy and flow to your video. Experiment with close-ups, wide shots, and artistic framing to capture different emotions and moments.
- Color and Contrast: Pay attention to color schemes and contrast within your video. This can be achieved through costume choices, set design, or lighting decisions. Use color combinations strategically to convey specific emotions or create visual impact.
- Experiment with Shadows: Shadows can add drama and depth to your shots. Embrace and experiment with different shadow patterns and intensities to create a visually striking atmosphere.
Remember, lighting and composition are artistic choices that can greatly enhance the quality and impact of your music video. Take the time to plan your lighting setups, experiment with different angles and techniques, and review your shots to ensure you capture the desired visual aesthetic.
Sound Recording
Sound recording is a crucial aspect of filming a music video on your iPhone. While the iPhone’s built-in microphone can capture decent audio, for optimal sound quality, it’s recommended to use an external microphone. Here are some tips to help you achieve high-quality sound for your music video:
- Choose the Right Microphone: Consider the type of audio you need to capture and select an external microphone accordingly. There are various options available, including lapel microphones for capturing vocals, shotgun microphones for ambient sound, and handheld microphones for instrument recordings. Choose a microphone that is compatible with your iPhone and suits your specific requirements.
- Position the Microphone: Proper microphone placement is essential for clear and balanced sound. Position the microphone close to the sound source, be it a person’s vocals or a musical instrument. Experiment with placement to find the sweet spot with optimal audio capture and minimal background noise.
- Control Background Noise: Minimize background noise as much as possible to ensure clarity in your audio recordings. Choose quiet locations for filming, turn off any unnecessary equipment or appliances, and consider using soundproofing materials or blankets to reduce echo and external noise interference.
- Monitor Audio Levels: Keep an eye on the audio levels while recording. Avoid clipping, which occurs when the audio levels are too high and result in distortion. Adjust the microphone sensitivity or distance from the sound source to maintain a balanced audio signal.
- Use a Windscreen: If you’re filming outdoors or in a windy environment, use a windscreen or a deadcat cover on your microphone to reduce wind noise. This helps in achieving clearer audio recordings, especially when capturing vocals or dialogue.
- Record Ambient Sound: Consider capturing ambient sound separately to add depth and realism to your music video. This can include ambient noises like street sounds, nature sounds, or unique environmental elements that enhance the overall atmosphere of your video.
- Perform Audio Tests: Before you start recording, perform audio tests to ensure your microphone is working properly and producing the desired sound quality. Test different settings and microphone positions to identify the best setup for your specific project.
- Invest in Post-Production Audio Editing: Once you have recorded your audio, take the time to edit and enhance it during post-production. Use audio editing software or apps to adjust levels, remove background noise, and apply any necessary audio effects to achieve a polished and professional sound.
Remember, capturing high-quality sound is essential for an engaging music video experience. Take the time to select the right microphone, monitor audio levels, control background noise, and invest in post-production audio editing to ensure your music video sounds as good as it looks.
Directing and Performance Tips
When filming a music video on your iPhone, effective directing and engaging performances are key to creating a compelling visual experience for your viewers. Here are some tips to help you direct and bring out the best performances in your music video:
- Communicate Your Vision: Clearly communicate your vision to your performers and crew. Share your concept, storyboard, and desired emotions for each scene. Ensure everyone involved understands the overall tone and narrative you want to convey.
- Establish a Connection: Connect with your performers on a personal level to build trust and rapport. Help them feel comfortable and confident in expressing themselves through their performances. Encourage open communication and collaboration to bring out their unique talents and creativity.
- Plan and Rehearse: Schedule rehearsals before the actual shoot to refine movements, timing, and choreography. Use this time to discuss blocking, camera angles, and any specific actions you want to capture. Rehearsing helps performers feel more comfortable and prepared on set.
- Capture Emotional Range: Encourage your performers to tap into a wide range of emotions that align with the song and the music video’s narrative. This will help create compelling and engaging performances that resonate with the audience.
- Use Visual Cues: Provide visual cues to guide performances. Use hand gestures, facial expressions, and body language to convey the desired emotions or actions. This can help your performers understand and execute the desired movements more effectively.
- Experiment with Different Takes: Encourage your performers to explore different interpretations and variations in their performances. Have them try out different expressions, movements, or delivery styles. This allows you to capture a range of options during filming and gives you more material to work with during editing.
- Pay Attention to Detail: Monitor and provide feedback on small details such as facial expressions, hand movements, and body positioning. These details contribute to the overall authenticity and impact of the performance. Make sure everyone is aligned on the desired performance nuances.
- Provide Feedback and Encouragement: Offer constructive feedback to your performers throughout the filming process. Highlight what is working well and provide suggestions for improvement. Remember to also recognize and praise exceptional performances to boost morale and motivation.
- Be Flexible and Adapt: Stay open to creative input and be willing to adapt your original vision based on the ideas and suggestions of your performers and crew. Embrace collaboration and allow space for improvisation and spontaneity during filming.
Directing and capturing captivating performances is integral to creating an impactful music video. By effectively communicating your vision, nurturing the talents of your performers, and paying attention to detail, you can guide and inspire your team to deliver outstanding performances that resonate with your audience.
Filming Techniques
When shooting a music video on your iPhone, employing various filming techniques can add visual interest and enhance the overall aesthetic appeal of your video. Here are some popular filming techniques you can use to create engaging visuals:
- Steady Shots: Use a tripod or stabilizer to capture steady shots. This technique ensures smooth movements and eliminates shakiness, allowing your audience to focus on the performance or action within the frame.
- Tracking Shots: Track your subject’s movements by following them with the camera. This technique adds a dynamic feel to the video and can create a sense of movement and energy.
- Panning Shots: Pan the camera horizontally to capture a wider view of the scene or to follow a moving subject. Panning shots can create a sense of space and reveal more of the environment.
- Tilt Shots: Tilt the camera vertically to capture dramatic or creative angles. Tilt shots can be used to emphasize a particular element or to create a unique visual perspective.
- Dolly Shots: Use a dolly or a handheld stabilizer to capture smooth tracking shots from a moving platform. This technique can add a cinematic quality and create a sense of depth and movement.
- Slow Motion: Utilize the slow-motion feature on your iPhone to capture dramatic or impactful moments. Slow-motion shots can emphasize emotions, movements, or visual details, adding a dynamic and artistic touch to your music video.
- Time-lapse: Create a time-lapse sequence by capturing photos or videos at intervals and combining them to showcase the passage of time. Time-lapse shots are great for showing transformations, changes in lighting, or fast-paced actions.
- Multiple Camera Angles: Shoot the same scene from different angles to add variety and visual interest. Incorporating multiple camera angles during editing provides flexibility and allows for more engaging storytelling.
- Point of View (POV) Shots: Film from the perspective of the performer or a character in the music video. POV shots immerse viewers in the action and create a sense of involvement.
- Overhead Shots: Capture footage from a high angle, looking down at the scene. Overhead shots provide a unique perspective and can be great for choreography, group performances, or highlighting interesting patterns or formations.
Experiment with these filming techniques to add visual variety and enhance the storytelling in your music video. Remember to choose techniques that complement the style and theme of your video and serve the overall vision you have for your project.
Editing on iPhone
One of the great advantages of filming a music video on your iPhone is the ability to edit it directly on the device. With powerful video editing apps available in the App Store, you can transform your footage into a polished and professional-looking music video. Here are some tips for editing on your iPhone:
- Choose a Video Editing App: Select a video editing app that suits your needs and preferences. Popular options include iMovie, Adobe Premiere Rush, and LumaFusion. These apps provide a range of features and effects that allow you to edit your video with precision.
- Import and Organize Footage: Import your video footage into the editing app and organize it in a logical order. Create bins or folders to keep your files organized and easily accessible.
- Trim and Arrange Clips: Start by trimming unnecessary footage and arranging the remaining clips in the desired sequence. Use the editing timeline to drag and drop clips into place, creating a coherent flow for your music video.
- Add Transitions: Enhance the visual flow between clips by adding transitions. Choose from a variety of transitions such as fade-ins, fade-outs, cross dissolves, and wipes to create seamless transitions between scenes.
- Apply Effects and Filters: Experiment with different effects and filters to enhance the look and mood of your music video. Adjust color settings, brightness, contrast, and saturation to achieve the desired visual style.
- Add Text and Titles: Use text and titles to display lyrics, artist names, or any other important information in your music video. Choose stylish fonts and customize their size, color, and position to ensure they are easily readable.
- Sync Music and Visuals: Sync your music track with the visuals to create a seamless and synchronized experience for the viewers. Ensure the key moments in the music align with the corresponding visual elements.
- Experiment with Multi-Layered Audio: Take advantage of the multiple audio tracks available in editing apps to mix your music track, additional sound effects, and ambient sound. Adjust the volume levels and timing to create a balanced audio experience.
- Add Transitions: Enhance the visual flow between clips by adding transitions. Choose from a variety of transitions such as fade-ins, fade-outs, cross dissolves, and wipes to create seamless transitions between scenes.
- Export and Share: Once you are satisfied with your edits, export your music video in the desired format and resolution. Popular options include uploading directly to social media platforms or saving the video to your Camera Roll for sharing or further distribution.
Remember, editing is where you can bring your creative vision to life. Experiment with different techniques, effects, and transitions to create a visually captivating and emotionally engaging music video.
Adding Effects and Graphics
Adding effects and graphics to your music video can elevate its visual appeal and create a unique and immersive experience for your viewers. With the editing capabilities of your iPhone, you can easily incorporate various effects, overlays, and graphics to enhance your video. Here are some tips for adding effects and graphics to your music video:
- Overlay Visual Effects: Apply visual effects such as color grading, stylized filters, or special effects to enhance the mood and atmosphere of your music video. Experiment with different effects to find a look that matches the tone and concept of your video.
- Green Screen: Utilize the green screen (chroma key) feature available in some video editing apps to replace the green background with any image or footage of your choice. This allows you to create visually stunning and immersive backgrounds for your performers or scenes.
- Animated Graphics: Use animated graphics, such as text animations, lower thirds, or animated logos, to add a professional touch to your music video. These graphics can provide information, highlight certain elements, or create a visually captivating look.
- Visualizers: Create dynamic and visually engaging visualizers that react to the music. These can range from simple pulsating bars to intricate, synchronized animations that immerse viewers in the music’s rhythm and energy.
- Subtitles and Lyrics: If your music video includes lyrics, consider adding subtitle overlays or lyric animations to ensure viewers can sing along or understand the message of the song. Use different fonts, sizes, and animations to make the lyrics visually appealing.
- Graphic Overlays: Integrate graphic overlays, such as shapes, lines, or textures, to add visual interest and depth to your music video. These overlays can be used to emphasize certain elements, create visual patterns, or provide visual transitions between scenes.
- Image or Video Inserts: Incorporate additional images or videos into your music video to enhance the storytelling or add visual context. This can include archival footage, cutaway shots, or thematic images that support the narrative of your video.
- Split-Screen: Utilize the split-screen effect to showcase multiple scenes or perspectives simultaneously. This technique adds visual interest and can be used to convey different emotions, actions, or parallel storylines within your music video.
- Slow Motion or Time-lapse: Use slow-motion or time-lapse effects on specific clips to create a dramatic or unique visual impact. Slow-motion shots can emphasize emotions or movements, while time-lapse can capture transformations or changes in a condensed timeframe.
- Custom Visual Effects: Experiment with custom visual effects or animations by combining different layers, adjusting blending modes, or using masking techniques. This allows you to create personalized and unique visual elements that align with your artistic vision.
Adding effects and graphics to your music video gives you the opportunity to showcase your creativity and enhance the visual storytelling. Remember to use these features judiciously and in a way that complements the overall tone and concept of your music video, ensuring that they enhance rather than distract from the main content of the video.
Finalizing and Sharing the Music Video
Once you have completed the editing process for your music video on your iPhone, it’s time to finalize and share your masterpiece. Here are some steps to ensure your music video is ready for distribution:
- Review and Fine-tune: Take the time to review your edited music video with fresh eyes. Pay attention to the pacing, transitions, and overall coherence. Fine-tune any areas that may need adjustments, such as audio levels, visual effects, or color grading.
- Color Correction and Grading: Apply color correction and grading techniques to ensure consistency and enhance the visual tone of your video. Adjust brightness, contrast, saturation, and color balance to achieve the desired look and mood.
- Audio Mixing and Mastering: Fine-tune the audio levels, balancing the music, vocals, and any additional audio elements to create a well-mixed and cohesive sound. Ensure that the audio quality is clear, with no distortion or unwanted noise.
- Export in Suitable Format: Export your final music video in a format that is compatible with various platforms and devices. Consider the resolution, aspect ratio, and file size to optimize the video for online streaming or sharing.
- Choose the Right Platforms: Determine which platforms you want to showcase your music video on. Popular choices include YouTube, Vimeo, and social media platforms like Instagram or TikTok. Ensure that you comply with each platform’s guidelines for uploading videos.
- Optimize for SEO: When uploading your video, include relevant keywords, tags, and a compelling description to optimize its discoverability in search engines. This helps attract a wider audience and increase the visibility of your music video.
- Create a Captivating Thumbnail: Design an eye-catching thumbnail image that represents your music video effectively. The thumbnail is often the first impression viewers have of your video, so make it enticing and reflective of the content.
- Promote and Share: Utilize your social media platforms, website, and email newsletters to promote and share your music video with your audience. Engage with your followers, encourage them to share the video, and consider collaborating with influencers or other artists for cross-promotion.
- Monitor and Respond to Feedback: Keep a close eye on the comments and feedback your music video receives. Engage with your viewers by responding to comments, answering questions, and showing appreciation for their support.
- Consider Submitting to Video Platforms and Music Blogs: Explore opportunities to submit your music video to video platforms or music blogs that may feature and promote independent artists. This can help increase your visibility and reach new audiences.
Remember that finalizing and sharing your music video is an exciting and important step in the process. Take pride in your creation, promote it passionately, and use the feedback to improve your future projects!
Conclusion
Filming a music video on your iPhone has never been more accessible and affordable. With the right equipment, pre-production planning, and creative execution, you can create professional-looking music videos that captivate your audience. From choosing the right equipment to finalizing and sharing your video, each step in the process plays a crucial role in ensuring a successful outcome.
By harnessing the power of your iPhone’s camera and utilizing video editing apps, you have the tools at your fingertips to bring your artistic vision to life. Take advantage of different filming techniques, employ effective lighting and composition, and enhance your video with effects, graphics, and captivating performances. The editing process allows you to fine-tune your video, create a seamless flow, and add the finishing touches that elevate your music video to the next level.
Once your music video is complete, don’t hesitate to share it with the world. Promote it through various platforms and engage with your audience. Keep an ear open to feedback, as it can provide valuable insights for future projects.
Remember, filming a music video on your iPhone is an opportunity to express yourself creatively and connect with your audience in a meaningful way. Embrace the possibilities, push your boundaries, and continue refining your skills. With dedication, passion, and the right approach, you can create music videos that leave a lasting impression and help you stand out in the competitive music industry.