Home>Production & Technology>Noise Cancellation>How To Enable Realtek Noise Cancellation
Noise Cancellation
How To Enable Realtek Noise Cancellation
Published: November 3, 2023
Learn how to enable Realtek noise cancellation to enhance audio quality on your device. Enhance your audio experience by reducing background noise and enjoying crystal clear sound.
(Many of the links in this article redirect to a specific reviewed product. Your purchase of these products through affiliate links helps to generate commission for AudioLover.com, at no extra cost. Learn more)
Table of Contents
- Introduction
- Understanding Realtek Noise Cancellation
- Requirements for Enabling Realtek Noise Cancellation
- Step 1: Checking Realtek Audio Driver Version
- Step 2: Downloading and Installing the Latest Realtek Audio Driver
- Step 3: Enabling Noise Cancellation Feature in Realtek Audio Console
- Step 4: Adjusting Noise Cancellation Settings
- Troubleshooting Common Issues
- Conclusion
Introduction
Noise cancellation technology has become increasingly important in our daily lives, especially as we rely on digital communication platforms for work, education, and entertainment. Whether you’re participating in virtual meetings, streaming content, or enjoying a gaming session, unwanted background noise can be distracting and hinder your overall experience.
If you’re using a device with Realtek audio drivers, you’re in luck. Realtek, a leading audio chipset manufacturer, provides a noise cancellation feature that can significantly reduce ambient sounds and enhance the clarity of your audio output. In this article, we’ll guide you through the process of enabling Realtek noise cancellation on your device to help you enjoy a more immersive and distraction-free experience.
Before we dive into the steps, it’s important to understand how Realtek noise cancellation works. This technology utilizes advanced algorithms to analyze incoming audio signals and identify unwanted noise. It then generates an inverse sound wave that cancels out the noise, resulting in cleaner and clearer audio playback.
Enabling Realtek noise cancellation is a straightforward process, but it requires a few key requirements to ensure compatibility and smooth functioning. Make sure you have the necessary elements in place before proceeding with the configuration steps.
Now, let’s discuss the requirements in the next section to ensure you’re well-prepared to enable Realtek noise cancellation on your device.
Understanding Realtek Noise Cancellation
Realtek noise cancellation is a feature designed to reduce background noise and improve the audio quality of your device. It is particularly useful in environments with high ambient noise levels, such as busy offices or public spaces.
The technology behind Realtek noise cancellation is based on advanced signal processing algorithms. When enabled, the system analyzes the audio input from the microphone and identifies unwanted noises, such as background chatter, keyboard clicks, or mechanical sounds. It then generates an opposite sound wave to cancel out these unwanted noises, resulting in clearer and more intelligible audio.
Realtek noise cancellation is not limited to a specific application or use case. It can be used during voice calls, online meetings, gaming, or any other activity where clear audio communication is essential. By reducing unwanted noise, it improves the overall listening experience and enables better communication and immersion.
It’s important to note that Realtek noise cancellation is not capable of completely eliminating all background noise. While it can significantly reduce ambient sounds, it may not be able to cancel out extremely loud or sudden noises. Additionally, its effectiveness can vary depending on the quality of the microphone and audio setup.
The Realtek noise cancellation feature is available through the Realtek Audio Console, a software utility that allows you to manage and customize your audio settings. It provides a user-friendly interface where you can adjust various parameters related to sound playback and recording, including the noise cancellation feature.
Now that we have a better understanding of what Realtek noise cancellation is and how it works, let’s move on to the requirements necessary for enabling this feature on your device.
Requirements for Enabling Realtek Noise Cancellation
Before you can enable Realtek noise cancellation on your device, there are a few requirements that need to be met. Ensuring that you have the necessary elements in place will help ensure a smooth and successful configuration process.
Here are the requirements for enabling Realtek noise cancellation:
- Realtek Audio Driver: Make sure your device has a compatible Realtek audio driver installed. This driver is responsible for managing your device’s audio hardware and enabling advanced features like noise cancellation. If you’re not sure whether your device has a Realtek audio driver, you can check the manufacturer’s website or consult your device’s documentation.
- Realtek Audio Console: The Realtek Audio Console is the software tool that allows you to configure and customize your audio settings, including enabling noise cancellation. Ensure that you have the Realtek Audio Console installed on your device. If you don’t have it installed, you can download it from the official Realtek website or your device manufacturer’s support page.
- Compatible Operating System: Realtek noise cancellation is supported on various operating systems, including Windows 10 and some versions of Linux. Make sure that your device is running a compatible operating system to enable and use the Realtek noise cancellation feature.
- Microphone: Realtek noise cancellation relies on the input from your device’s microphone to analyze and cancel out unwanted noises. Ensure that you have a functional microphone connected to your device. It can be an internal microphone on your laptop or an external microphone connected via USB or audio input jack.
By fulfilling these requirements, you’ll be ready to proceed with the steps for enabling Realtek noise cancellation. In the next section, we will guide you through the process of checking your Realtek audio driver version to ensure compatibility and update it if necessary.
Step 1: Checking Realtek Audio Driver Version
Before enabling Realtek noise cancellation, it’s crucial to ensure that you have the latest audio driver installed on your device. Checking the driver version will help you determine if an update is necessary for optimal performance.
Follow these steps to check your Realtek audio driver version:
- Open the Start menu on your computer and type “Device Manager” in the search bar. Click on the “Device Manager” option that appears in the search results.
- In the Device Manager window, expand the “Sound, video, and game controllers” category by clicking on the arrow next to it.
- Look for the entry that mentions “Realtek High Definition Audio” or something similar. Right-click on this entry and select “Properties” from the drop-down menu.
- In the Properties window, navigate to the “Driver” tab. Here, you will find the information about your Realtek audio driver version.
- Take note of the driver version number displayed. If it’s an older version, it’s recommended to update to the latest driver for better compatibility and performance.
Once you’ve checked your Realtek audio driver version, you’ll be able to determine if an update is needed. If you have an older driver version, proceed to the next step to download and install the latest Realtek audio driver.
Note: The steps for checking the driver version may vary slightly depending on your operating system version. However, the general process remains the same.
Step 2: Downloading and Installing the Latest Realtek Audio Driver
After checking your Realtek audio driver version and determining that an update is needed, it’s time to download and install the latest driver from the official Realtek website. This will ensure that you have the most up-to-date driver with all the necessary features, including the noise cancellation functionality.
Follow these steps to download and install the latest Realtek audio driver:
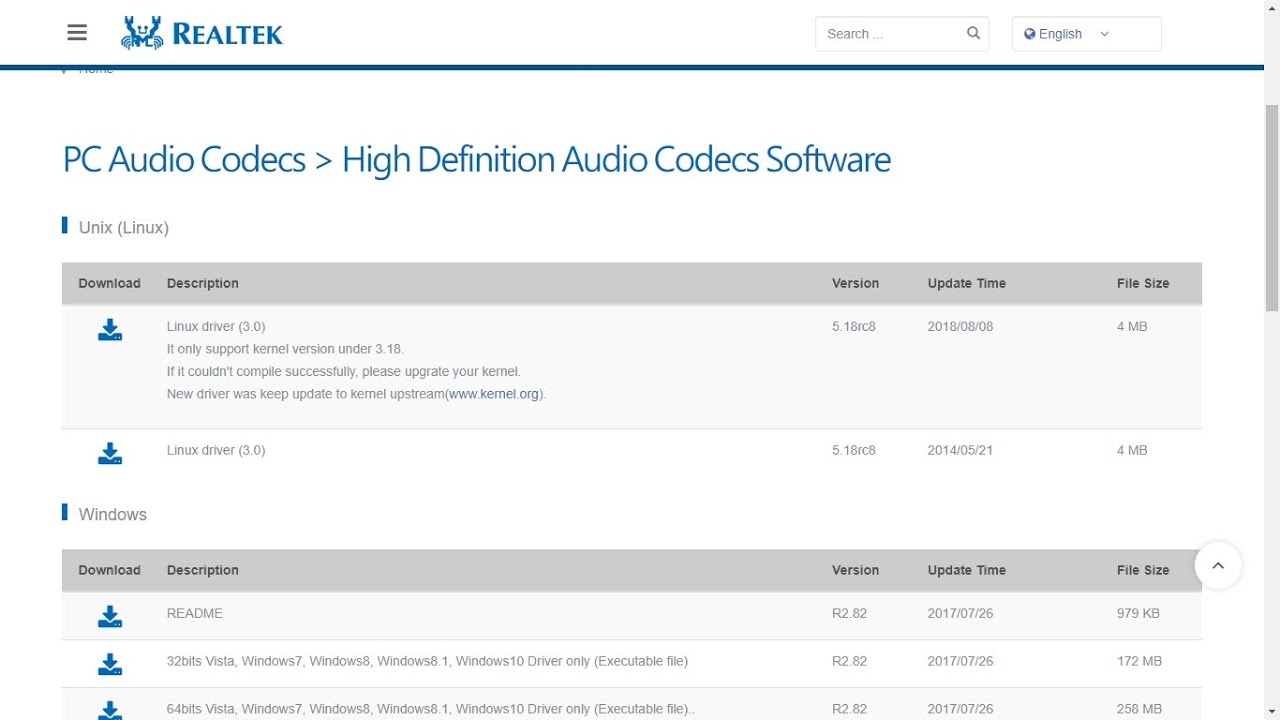
- Visit the official website of Realtek by opening your preferred web browser and navigating to www.realtek.com.
- Hover over the “Downloads” menu on the top navigation bar and click on the “Audio Codecs” option from the drop-down menu.
- In the “Audio Codecs” page, scroll down and find the section that corresponds to your operating system. Click on the link to access the available drivers for your operating system.
- Look for the latest version of the Realtek audio driver and click on the corresponding download link. Make sure to select the appropriate driver based on your system architecture (32-bit or 64-bit).
- Once the driver file is downloaded, locate the file on your computer and double-click on it to start the installation process. Follow the on-screen instructions to proceed with the installation.
- After the installation is complete, restart your computer to apply the changes.
Upon restarting your computer, the latest Realtek audio driver will be installed and ready to use. You can now move on to the next step, which involves enabling the noise cancellation feature in the Realtek Audio Console.
Note: It’s always recommended to download and install drivers from official sources, such as the Realtek website, to ensure that you’re getting genuine and compatible software.
Step 3: Enabling Noise Cancellation Feature in Realtek Audio Console
Once you have installed the latest Realtek audio driver, you can proceed to enable the noise cancellation feature in the Realtek Audio Console. The Realtek Audio Console is a software utility that provides you with various audio settings and customization options.
Follow these steps to enable the noise cancellation feature:
- Open the Realtek Audio Console. You can usually find it in the list of installed programs or by searching for “Realtek Audio Console” in the Start menu.
- Once the Realtek Audio Console is open, navigate to the “Microphone” tab. This tab is typically located at the top of the window or in the sidebar.
- In the “Microphone” tab, you will find various options and settings related to your microphone. Look for the “Noise Cancellation” or “Voice Enhancement” option.
- Toggle the switch or checkbox next to the “Noise Cancellation” or “Voice Enhancement” option to enable the feature. You may also have the option to adjust the level or intensity of the noise cancellation effect.
- Save the changes and exit the Realtek Audio Console.
Once you have enabled the noise cancellation feature in the Realtek Audio Console, it will start working to reduce background noise during audio playback or recording. You can further fine-tune the settings or experiment with different levels of noise cancellation to find the optimal balance for your specific needs.
It’s important to note that the availability and exact location of the “Noise Cancellation” or “Voice Enhancement” option may vary depending on the version of the Realtek Audio Console and the specific audio hardware on your device. If you are unable to find the option, refer to the user manual or documentation provided with your device for further guidance.
Now that you have successfully enabled the noise cancellation feature, you can proceed to the next step to learn how to adjust the noise cancellation settings to suit your preferences.
Step 4: Adjusting Noise Cancellation Settings
After enabling the noise cancellation feature in the Realtek Audio Console, you may want to adjust the settings to fine-tune the level of noise cancellation according to your preferences. The ability to customize the noise cancellation settings allows you to optimize the feature based on the specific environment and usage scenario.
Follow these steps to adjust the noise cancellation settings in the Realtek Audio Console:
- Open the Realtek Audio Console on your computer.
- Navigate to the “Microphone” tab, where you enabled the noise cancellation feature in the previous step.
- Look for the options or sliders that allow you to adjust the noise cancellation settings. These options may include parameters such as sensitivity, threshold, or strength.
- Experiment with different settings by moving the sliders or adjusting the values. You can increase the noise cancellation strength for environments with louder background noise, or decrease it if you want to allow more ambient sound to come through.
- Save the changes and exit the Realtek Audio Console.
By adjusting the noise cancellation settings, you can personalize the feature to match your audio preferences and the surrounding environment. It allows you to strike the right balance between noise reduction and maintaining the desired level of clarity in your audio output.
It’s worth noting that the specific noise cancellation settings available in the Realtek Audio Console may vary depending on the version of the software and your device’s audio hardware. Some consoles may offer more advanced customization options, such as different noise cancellation modes or adaptive algorithms. Take time to explore the settings and find the configuration that works best for you.
Congratulations! You have now successfully enabled and adjusted the Realtek noise cancellation feature. Enjoy a more immersive and distraction-free audio experience in your digital activities.
Troubleshooting Common Issues
While enabling and using Realtek noise cancellation can greatly improve your audio experience, you may encounter some common issues along the way. Here are some troubleshooting tips for resolving these issues:
- Noise cancellation not working: If you are unable to see the noise cancellation option in the Realtek Audio Console or if it is not functioning as expected, ensure that you have the latest Realtek audio driver installed. If you already have the latest driver, try reinstalling it to fix any potential software conflicts.
- Ineffective noise cancellation: If the noise cancellation feature is enabled but not effectively reducing the background noise, make sure that your microphone is properly positioned and functioning correctly. Consider adjusting the microphone sensitivity or threshold settings in the Realtek Audio Console to optimize the noise cancellation performance.
- Compatibility issues: In some cases, compatibility issues may arise between the Realtek audio driver and your operating system or other installed software. Check for any driver or software updates that may address compatibility issues and ensure that you are using the correct version for your operating system.
- Audio quality degradation: While noise cancellation can improve audio clarity, it may also result in a slight degradation of audio quality. If you notice a significant drop in audio quality, try adjusting the noise cancellation strength or other settings to strike a balance between noise reduction and audio fidelity.
- Unwanted artifacts: Occasionally, noise cancellation can introduce unwanted artifacts like metallic or robotic sounds in the audio output. In such cases, try reducing the noise cancellation strength or experimenting with different settings to minimize these artifacts.
If you encounter persistent issues or are unable to resolve them on your own, consider reaching out to Realtek support or seeking assistance from your device manufacturer. They can provide specific guidance and support tailored to your device and configuration.
Remember that the effectiveness of noise cancellation can also depend on external factors such as the quality of your microphone and the ambient noise level. Managing these factors alongside the Realtek noise cancellation feature can help you achieve the best possible audio experience.
Conclusion
Enabling Realtek noise cancellation can greatly enhance your audio experience and help you focus on what really matters. Whether you’re using your device for work, communication, or entertainment, the noise cancellation feature allows you to enjoy clearer audio and a more immersive environment.
In this article, we discussed the process of enabling Realtek noise cancellation, starting with checking your audio driver version, downloading and installing the latest driver, and enabling the noise cancellation feature in the Realtek Audio Console. We also covered how to adjust the noise cancellation settings to suit your preferences.
Remember to fulfill the requirements for enabling Realtek noise cancellation, such as having a compatible audio driver, the Realtek Audio Console installed, a compatible operating system, and a functional microphone. These prerequisites ensure a smooth configuration process.
If you encounter any issues along the way, refer to the troubleshooting tips provided in this article. They can help resolve common issues like ineffective noise cancellation or audio quality degradation.
By following the steps outlined in this article and customizing the noise cancellation settings to your liking, you can enjoy a more immersive audio experience, free from distracting background noises.
Now that you have the knowledge and tools to enable Realtek noise cancellation, why wait? Take control of your audio environment and enjoy crystal-clear sound during your digital activities.
Remember to periodically check for driver and software updates to ensure you have the latest features and improvements from Realtek. By staying up-to-date, you can continue to make the most of the noise cancellation technology and optimize your audio experience.