Home>Production & Technology>Soundproofing>How To Use Adhesive For Soundproofing Foam

Soundproofing
How To Use Adhesive For Soundproofing Foam
Published: January 26, 2024
Learn how to effectively use adhesive for soundproofing foam to reduce noise and create a quieter environment. Discover expert tips and techniques for maximizing your soundproofing efforts.
(Many of the links in this article redirect to a specific reviewed product. Your purchase of these products through affiliate links helps to generate commission for AudioLover.com, at no extra cost. Learn more)
Table of Contents
Introduction
When it comes to creating a peaceful and quiet environment, soundproofing foam is a popular choice. Whether you’re working from home, recording music, or simply trying to block out unwanted noises, soundproofing foam can significantly reduce sound transmission. However, to harness the full potential of soundproofing foam, it’s crucial to use the right adhesive during installation.
In this guide, we will explore the ins and outs of using adhesive for soundproofing foam. From understanding the different types of adhesives to proper installation techniques, we’ll provide you with all the information you need to effectively use adhesive for your soundproofing project.
With the help of adhesive, soundproofing foam can be securely attached to almost any surface, including walls, ceilings, and doors. The adhesive creates a strong bond, ensuring that the foam stays in place and effectively absorbs sound waves. Plus, using adhesive eliminates the need for additional mechanical fixings, offering a cleaner and more seamless aesthetic.
However, not all adhesives are created equal. The adhesive you choose should be specifically designed for soundproofing applications and compatible with both the foam material and the surface it will be applied to. Using the wrong adhesive can lead to poor adhesion or even damage to the foam or the surface, rendering your soundproofing efforts ineffective.
In the following sections, we will delve deeper into the process of selecting the right adhesive, preparing the surface, applying the adhesive to the soundproofing foam, and providing tips for optimal installation techniques. By the end of this guide, you’ll have all the knowledge necessary to use adhesive effectively with soundproofing foam and create a serene and peaceful environment in your space.
Understanding Adhesive for Soundproofing Foam
Adhesive plays a critical role in the successful installation of soundproofing foam. It is responsible for creating a strong and durable bond between the foam and the surface it is applied to. Understanding the different types of adhesives available for soundproofing foam is essential to ensure optimal performance and longevity of your soundproofing project.
One common type of adhesive used for soundproofing foam is a construction adhesive. These adhesives are typically strong, durable, and provide a secure bond between the foam and the surface. Construction adhesives come in various formulations, such as liquid, paste, or spray, and are designed to adhere to different surface materials, including wood, drywall, concrete, and metal.
Another type of adhesive commonly used for soundproofing foam is a contact adhesive. Contact adhesives are applied to both the foam and the surface, and after a short drying period, the two surfaces are pressed together, forming an immediate bond. Contact adhesives are known for their high strength and flexibility, making them suitable for applications where the foam may undergo movement or vibration.
It’s important to note that not all adhesives are suitable for soundproofing foam. Avoid using general-purpose adhesives, such as carpenter’s glue or super glue, as they may not provide the necessary strength or durability for a soundproofing project. Additionally, some adhesives contain solvents that can be harmful to the foam material. Always read the manufacturer’s instructions and choose an adhesive specifically designed for soundproofing applications.
When selecting an adhesive, consider the compatibility with the surface and the foam material. Some adhesives work better on certain surfaces, and certain foam types require specific adhesives for optimal bonding. Additionally, take into account any additional requirements, such as fire resistance or environmental friendliness, that may be necessary for your specific soundproofing project.
By understanding the different types of adhesives available and their compatibility with soundproofing foam, you can make an informed decision and ensure the adhesive you choose will provide a strong and durable bond, leading to effective soundproofing results.
Choosing the Right Adhesive
Choosing the right adhesive for soundproofing foam is crucial to ensure a successful and long-lasting installation. With a wide range of adhesive options available, it’s important to consider several factors when making your selection.
1. Compatibility: Ensure that the adhesive you choose is compatible with both the soundproofing foam material and the surface it will be applied to. Different foam materials may require specific adhesives for optimal bonding, so refer to the manufacturer’s recommendations to ensure compatibility.
2. Strength and Durability: Look for adhesives that provide a strong and durable bond. Consider the weight of the foam and the environmental conditions it will be subjected to. If the foam is heavy or will be exposed to moisture or temperature variations, opt for an adhesive with higher strength and durability properties.
3. Application Method: Consider the ease of application and the application method that suits your project. Adhesives are available in various forms, such as liquid, paste, or spray. Choose an application method that is convenient for you and ensures proper coverage and adhesion.
4. Drying Time: Take into account the drying time of the adhesive. Some adhesives require longer drying times, while others offer quick-drying properties. Consider your project timeline and select an adhesive that aligns with your needs.
5. Safety and Environmental Considerations: Pay attention to any safety precautions or environmental considerations associated with the adhesive. Some adhesives may contain harmful chemicals or emit strong fumes during application. Choose adhesives that are safe for both you and the environment.
6. Manufacturer’s Recommendations: Always refer to the manufacturer’s recommendations and instructions for the specific adhesive you are considering. They provide valuable information on the correct application techniques, surface preparation, and any other specific requirements.
By considering these factors, you can confidently choose the right adhesive for your soundproofing foam installation. Remember, using the correct adhesive will ensure a strong and durable bond, contributing to the overall effectiveness of your soundproofing efforts.
Preparing the Surface
Before applying adhesive to soundproofing foam, it’s essential to properly prepare the surface to ensure optimal adhesion. Proper surface preparation plays a significant role in the long-term success and durability of your soundproofing installation.
1. Clean the Surface: Start by thoroughly cleaning the surface where the soundproofing foam will be applied. Remove any dust, dirt, grease, or other contaminants that can hinder the adhesive’s bonding ability. Use a mild detergent or a surface cleaner and wipe the area clean with a lint-free cloth or sponge.
2. Smooth and Even Surface: Ensure that the surface is smooth, even, and free from any bumps, dents, or irregularities. If necessary, use sandpaper or a putty knife to smooth out imperfections and create a flat surface. This will help improve adhesion and prevent any gaps between the foam and the surface.
3. Remove Loose Paint or Wallpaper: If the surface has loose paint or wallpaper, it’s important to remove it before applying adhesive. Use a scraper or sandpaper to gently remove any loose or peeling paint or wallpaper, creating a clean and stable base for the adhesive and the foam.
4. Prime the Surface (if Necessary): In some cases, it may be necessary to prime the surface before applying adhesive. Priming helps improve adhesion and creates a better bond between the surface and the adhesive. Check the manufacturer’s instructions to determine if primer is recommended for your specific adhesive and surface.
5. Allow the Surface to Dry: After cleaning and priming (if required), allow the surface to thoroughly dry before applying adhesive. Moisture can compromise the adhesive’s effectiveness, so ensure that the surface is completely dry to ensure optimal bonding.
6. Temperature and Humidity: Consider the temperature and humidity conditions during surface preparation and adhesive application. Extreme temperatures and high humidity levels can affect the drying time and bonding properties of the adhesive. Ensure that the temperature and humidity are within the recommended range provided by the adhesive manufacturer.
By following these surface preparation steps, you will create an ideal foundation for applying adhesive and soundproofing foam. Properly preparing the surface will promote strong adhesion and enhance the overall effectiveness of your soundproofing efforts.
Applying Adhesive to Soundproofing Foam
Applying adhesive to soundproofing foam is a critical step in the installation process. Proper application ensures a secure bond between the foam and the surface, maximizing the soundproofing effectiveness. Here are some guidelines to follow when applying adhesive to soundproofing foam:
1. Gather Your Materials: Before you begin, gather all the necessary materials, including the adhesive, a foam applicator or brush, and any other tools recommended by the adhesive manufacturer.
2. Read the Manufacturer’s Instructions: Carefully read and follow the instructions provided by the adhesive manufacturer. Each adhesive may have specific application guidelines and drying times, so it’s important to adhere to the recommended methods to ensure proper bonding.
3. Apply Adhesive to the Foam: Apply the adhesive to the soundproofing foam according to the manufacturer’s instructions. Use a foam applicator or brush to evenly spread the adhesive on the backside of the foam. Be sure to cover the entire surface that will come into contact with the wall or surface where the foam will be applied.
4. Create a Thin and Even Layer: Apply the adhesive in a thin and even layer to avoid excessive buildup or clumping, which can affect the bond strength. This will also help ensure proper adhesion and prevent any gaps between the foam and the surface.
5. Follow the Open Time Recommendations: Open time refers to the recommended time between applying the adhesive and pressing the foam onto the surface. It allows the adhesive to partially dry and reach its tacky state, providing optimal bonding. Follow the manufacturer’s instructions regarding the open time to achieve the best results.
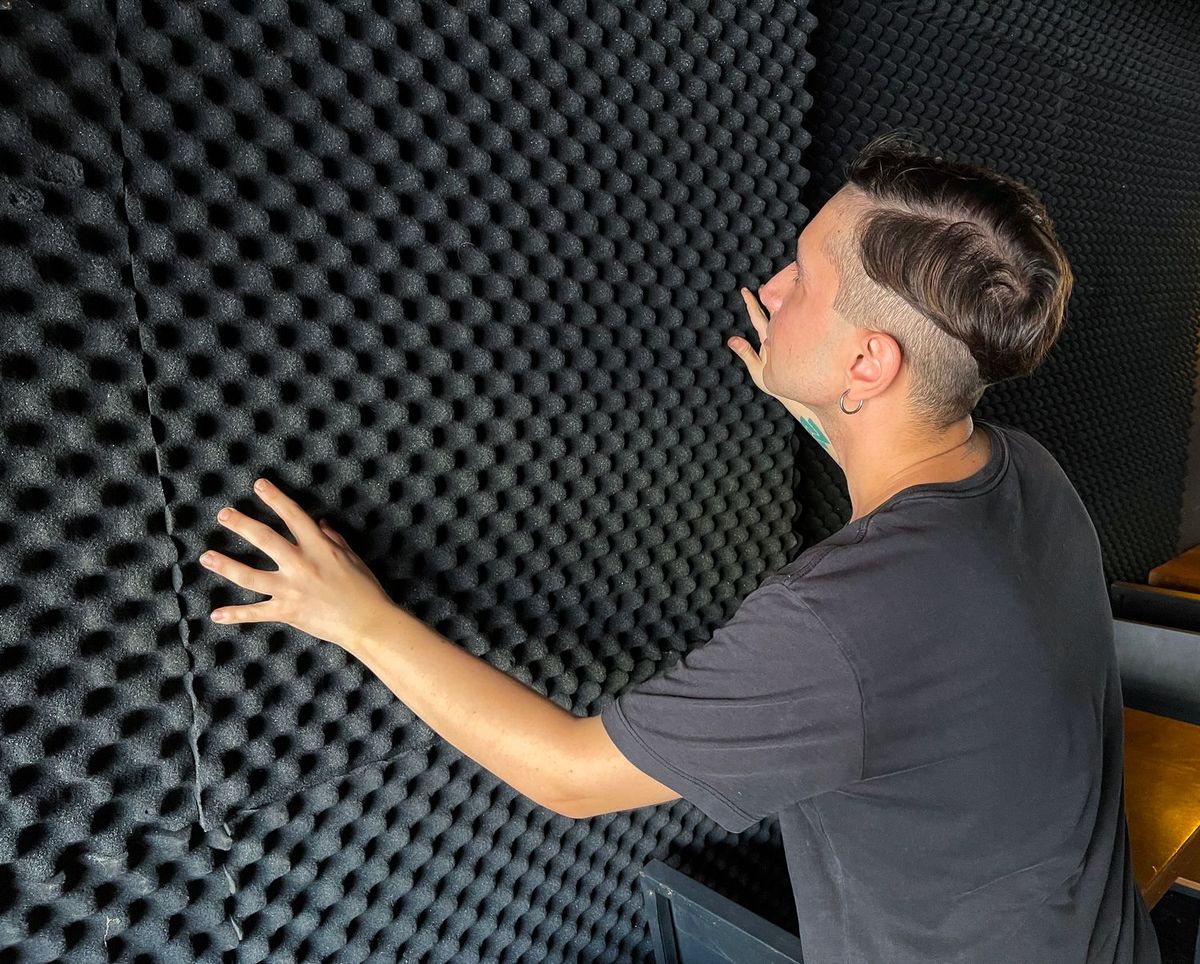
6. Press the Foam onto the Surface: After the open time has elapsed, carefully press the soundproofing foam onto the prepared surface. Apply firm and even pressure to ensure a secure bond. Check that the foam is firmly adhered to the surface, paying attention to the corners and edges.
7. Allow the Adhesive to Cure: After installing the foam, allow the adhesive to fully cure according to the drying time specified by the manufacturer. Avoid touching or moving the foam during this time to allow the adhesive to set properly and create a strong bond.
By following these steps, you can effectively apply adhesive to soundproofing foam, ensuring a secure and durable bond between the foam and the surface. Taking the time and care during this process will contribute to the success of your soundproofing project.
Proper Installation Techniques
Proper installation techniques are crucial for the effectiveness and longevity of your soundproofing foam. By following these techniques, you can ensure a secure, professional, and aesthetically pleasing installation.
1. Measure and Plan: Before you start installing the soundproofing foam, carefully measure your space and plan the layout. Consider the specific areas that require soundproofing and calculate the amount of foam needed. This will help you avoid wastage and ensure a precise fit.
2. Mark the Placement: Using a pencil or marker, mark the areas on the surface where the foam will be installed. This will serve as a guide during the adhesive application and foam placement process, ensuring accurate and consistent positioning.
3. Apply Adhesive Uniformly: When applying adhesive to the soundproofing foam, make sure to spread it uniformly. A consistent adhesive layer will ensure proper bonding and prevent any areas of weak adhesion. Use a foam applicator or brush to achieve an even and smooth layer of adhesive.
4. Align the Foam Correctly: When placing the foam onto the marked areas, ensure proper alignment. Press it firmly to achieve optimal contact with the adhesive and the surface. Check that the foam is aligned horizontally and vertically to maintain a neat and uniform appearance.
5. Trim Excess Foam: In some cases, you may need to trim the foam to fit specific areas or corners. Use a sharp utility knife or foam cutter to carefully trim any excess foam. Take care not to damage the foam or the surface underneath during the trimming process.
6. Secure the Foam Temporarily: While waiting for the adhesive to fully cure, you can use temporary methods to secure the foam in place. Some options include using low-tack masking tape or light clamps. These temporary securing techniques will ensure that the foam remains in place during the curing process, preventing any movement that may compromise the adhesive bond.
7. Inspect and Make Adjustments: Once the adhesive has cured, inspect the installed foam for any gaps, irregularities, or areas that may require additional adhesive. Make any necessary adjustments or touch-ups to ensure a seamless and complete installation.
By following these proper installation techniques, you can achieve a well-installed soundproofing foam application that not only enhances the acoustic performance but also adds a professional and polished look to your space.
Curing and Drying Time
The curing and drying time of the adhesive used for soundproofing foam is an important consideration to ensure a successful installation. Properly allowing the adhesive to cure and dry will contribute to the overall strength and effectiveness of the bond. Here’s what you need to know about curing and drying time:
1. Manufacturer’s Instructions: Always refer to the manufacturer’s instructions for the specific adhesive you are using. The manufacturer will provide recommendations regarding the optimal curing and drying time for the adhesive. These instructions may vary depending on the adhesive type, environmental conditions, and other factors.
2. Open Time and Tackiness: The open time refers to the period between applying the adhesive and pressing the soundproofing foam onto the surface. During this time, the adhesive starts to set and become tacky. It’s important to follow the open time guidelines provided by the manufacturer to ensure proper bonding. Pressing the foam onto the adhesive too soon or too late can compromise the bond strength.
3. Curing Time: Curing time refers to the length of time it takes for the adhesive to fully set and reach its maximum strength. It’s important to allow the adhesive sufficient curing time before subjecting it to any stress or movement. The curing time can vary depending on factors such as temperature, humidity, and adhesive formulation. Be patient and ensure that the adhesive has fully cured before considering the installation complete.
4. Drying Time: Drying time refers to the time it takes for the adhesive to dry on the surface. This is different from curing time, as drying time focuses on the evaporation of solvents or moisture in the adhesive. It’s important to allow the adhesive to dry completely before touching, applying pressure, or exposing it to any external factors.
5. Environmental Factors: Temperature, humidity, and ventilation can all affect the curing and drying time of adhesive. Follow the manufacturer’s recommendations regarding the ideal temperature and humidity range for optimal adhesive performance. Adequate ventilation can also help facilitate drying and curing processes.
6. Avoid Disturbing the Adhesive: During the curing and drying time, it’s crucial to avoid disturbing or putting any stress on the adhesive. Moving or manipulating the foam or applying excessive pressure can disrupt the bonding process and weaken the bond. Exercise caution and allow the adhesive sufficient time to set and dry undisturbed.
By understanding and adhering to the recommended curing and drying time provided by the adhesive manufacturer, you can ensure a strong and durable bond between the soundproofing foam and the surface. Patience and careful adherence to these guidelines will result in a successful soundproofing installation.
Additional Tips for Using Adhesive with Soundproofing Foam
When it comes to using adhesive with soundproofing foam, there are a few additional tips that can help you achieve the best results. Consider implementing these tips to enhance the overall effectiveness and longevity of your soundproofing installation:
1. Test the Adhesive Compatibility: Before applying adhesive to the entire soundproofing foam, it’s a good practice to test compatibility on a small, inconspicuous area. This will ensure that the adhesive does not cause any staining, discoloration, or damage to the foam material.
2. Use the Right Amount of Adhesive: Applying an excessive amount of adhesive can lead to messy installations or weaken the bond. On the other hand, using too little adhesive may result in poor adhesion. Follow the manufacturer’s guidelines to determine the correct amount of adhesive required for your specific foam and surface.
3. Apply Pressure after Placing the Foam: Once you have pressed the soundproofing foam onto the surface, apply firm and even pressure to ensure a strong bond. This can be done using your hands, a roller, or even a heavy object. Applying pressure helps the adhesive make optimal contact with both the foam and the surface, enhancing the adhesion process.
4. Allow Sufficient Ventilation: Ensure that the room or area where you are installing the soundproofing foam has proper ventilation. Adequate ventilation helps facilitate the drying and curing process of the adhesive. It also helps dissipate any fumes or odors emitted by the adhesive during the curing period.
5. Follow Safety Precautions: Adhesives may contain chemicals that can be harmful if mishandled or inhaled. It’s important to follow safety precautions, such as wearing gloves and working in a well-ventilated area, to protect yourself during the installation process. If needed, use a mask to prevent inhalation of any fumes or particles.
6. Consider Professional Installation: If you are unsure about the proper installation techniques or if your soundproofing project is large and complex, it may be worth considering hiring a professional. Experienced installers have the knowledge and expertise to ensure a smooth and effective installation, saving you time and ensuring optimal results.
7. Follow Maintenance Guidelines: Once the adhesive has fully cured, follow any recommended maintenance guidelines provided by the adhesive manufacturer. Proper maintenance, such as regular cleaning and inspections, can help prolong the lifespan of the adhesive bond and ensure continued soundproofing effectiveness.
By keeping these additional tips in mind, you can enhance the adhesive’s performance and achieve a successful soundproofing foam installation. Pay attention to the details, follow proper procedures, and prioritize safety to create a quiet and peaceful environment in your space.
Conclusion
Using adhesive for soundproofing foam is a key step in creating a peaceful and quiet environment. By understanding the different types of adhesives, choosing the right adhesive, and following proper installation techniques, you can ensure a successful soundproofing project.
When selecting an adhesive, consider compatibility with both the soundproofing foam material and the surface it will be applied to. Choose an adhesive that offers the necessary strength and durability for your specific soundproofing needs.
Proper surface preparation is essential to achieve optimal adhesion. Clean the surface thoroughly, remove any loose material, and create a smooth and even base for the adhesive and foam.
When applying adhesive to the soundproofing foam, spread it evenly and create a thin layer to avoid excessive buildup or clumping. Follow the manufacturer’s instructions regarding open time and ensure the foam is pressed firmly onto the surface for proper bonding.
Allow the adhesive to cure and dry fully before subjecting it to any stress or movement. Consider the recommended curing and drying time provided by the manufacturer, and take into account environmental factors such as temperature and humidity.
By following these guidelines and paying attention to additional tips, such as testing compatibility, using the right amount of adhesive, and following safety precautions, you can achieve a successful soundproofing foam installation.
Remember, every step of the process, from selecting the adhesive to properly applying it and allowing it to cure, contributes to the overall effectiveness of your soundproofing efforts. By taking the time and care to use adhesive correctly, you can create a quiet and peaceful space that is shielded from the unwanted noise of the outside world.


