Home>Devices & Equipment>Earbuds>How To Clean Foam Earbuds
Earbuds
How To Clean Foam Earbuds
Modified: January 22, 2024
Discover the best way to clean your foam earbuds and keep them in top condition. Follow our step-by-step guide for efficient earbud maintenance and hygiene.
(Many of the links in this article redirect to a specific reviewed product. Your purchase of these products through affiliate links helps to generate commission for AudioLover.com, at no extra cost. Learn more)
Table of Contents
Introduction
Earbuds have become an essential accessory for music lovers and avid podcast listeners. They provide a convenient and portable way to enjoy audio content on the go. While many people focus on finding the perfect pair of earbuds for their needs, they often overlook the importance of proper maintenance.
Cleaning your earbuds regularly is crucial not only for hygiene reasons but also for maintaining optimal sound quality. Over time, earwax, dirt, and debris can build up on the earbuds, affecting their performance and potentially causing discomfort or irritation when worn. This is especially true for foam earbuds, which tend to accumulate dirt more easily compared to their silicone or rubber counterparts.
Regularly cleaning your foam earbuds can help extend their lifespan and ensure that you continue to enjoy clear and crisp audio. However, it’s important to take precautions and use the correct cleaning methods to avoid damaging the delicate components of your earbuds.
This article will provide you with a step-by-step guide on how to properly clean foam earbuds and maintain their cleanliness. By following these instructions, you can ensure that your earbuds stay in top condition and provide you with the best listening experience possible.
Why Clean Foam Earbuds?
Regularly cleaning foam earbuds is essential for several reasons. Firstly, it helps maintain optimal sound quality. Over time, earwax, dirt, and debris can accumulate on the foam covers and earpiece of the earbuds, obstructing the sound and affecting the overall audio experience. By cleaning the foam covers and earpiece, you can remove any buildup and ensure that your earbuds deliver clear and accurate sound.
Secondly, cleaning foam earbuds is important for hygiene purposes. Our ears produce earwax, a sticky substance that can easily transfer onto the foam covers of the earbuds. This buildup of earwax, combined with sweat and dirt, creates a breeding ground for bacteria and can lead to ear infections or skin irritations. By regularly cleaning your foam earbuds, you can eliminate these bacteria and maintain good ear hygiene.
Furthermore, cleaning foam earbuds helps prolong their lifespan. The foam covers of the earbuds can deteriorate over time due to dirt and oils from our skin. Regularly cleaning them can prevent the foam from breaking down and ensure that the earbuds remain comfortable to wear and provide a secure fit.
Lastly, the appearance of your foam earbuds can be improved by cleaning them. Foam covers often become discolored or stained over time due to daily use. By cleaning them regularly, you can restore them to their original color and maintain their aesthetic appeal.
Overall, cleaning foam earbuds is necessary for maintaining optimal sound quality, preventing bacteria buildup, extending their lifespan, and keeping them looking their best. In the next sections, we will guide you through the proper steps to clean your foam earbuds effectively and safely.
Precautions Before Cleaning
Before diving into the cleaning process, it’s important to take some precautions to ensure that you don’t damage your foam earbuds. Here are a few things to keep in mind:
1. Disconnect your earbuds: Before you begin cleaning, make sure to disconnect your earbuds from any audio device or power source. This will prevent accidental damage to your earbuds or the device they are connected to.
2. Remove the foam covers: Foam covers are removable and can be taken off the earpiece. Remove them carefully to avoid tearing or damaging the foam material.
3. Check the manufacturer’s guidelines: Different earbuds may have specific cleaning instructions provided by the manufacturer. It’s a good idea to consult the user manual or visit the manufacturer’s website to ensure that you’re following their recommended cleaning methods.
4. Avoid using excessive moisture: While it’s important to clean your earbuds thoroughly, excessive moisture can damage the internal components. Avoid soaking your earbuds in water or using excessive amounts of liquid when cleaning.
5. Be gentle: Foam earbuds are delicate, so it’s crucial to handle them with care. Avoid using excessive force or rough materials that could cause damage, such as sharp objects or abrasive cleaning agents.
6. Let your earbuds dry completely: After cleaning, make sure your earbuds are completely dry before using them again. Moisture can compromise the electrical components of the earbuds and affect their performance.
By following these precautions, you can ensure that the cleaning process is safe and effective for your foam earbuds. Now that you’re aware of the necessary precautions, let’s move on to the materials you’ll need for cleaning.
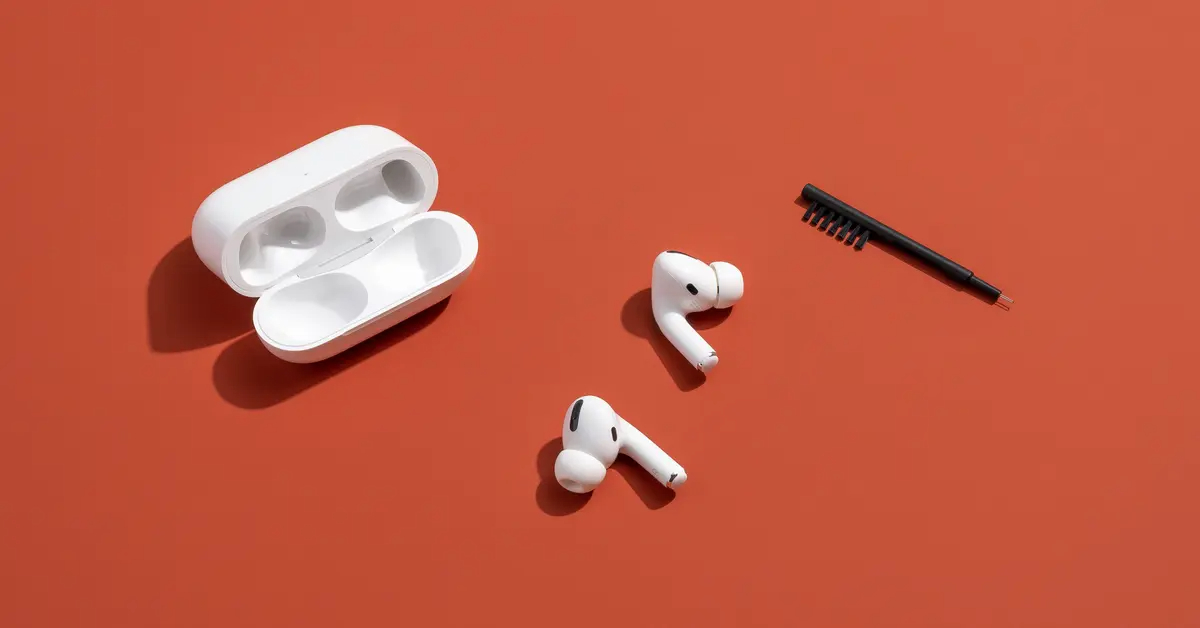
Materials Needed
Before you start cleaning your foam earbuds, it’s important to gather the necessary materials. Having these items on hand will make the cleaning process more efficient and effective. Here are the materials you’ll need:
- Mild soap or liquid detergent: Choose a gentle soap or liquid detergent that is suitable for cleaning delicate materials. Avoid using harsh chemicals or abrasive cleaners, as they can damage the foam or other components of your earbuds.
- Warm water: Fill a small bowl or basin with warm water. The water should be lukewarm, not hot, to avoid damaging the foam covers or earpiece.
- Soft cloth or microfiber towel: Use a soft cloth or microfiber towel to clean the foam covers and earpiece of your earbuds. Avoid using paper towels or rough materials that could leave fibers or scratches on the surface.
- Cotton swabs or toothpicks: You may need cotton swabs or toothpicks to remove stubborn dirt or debris from hard-to-reach areas of your earbuds. Be gentle when using these tools to avoid damaging the earbuds.
- Isopropyl alcohol (optional): If your foam covers are particularly dirty or have stubborn stains, you can use isopropyl alcohol to remove them. However, be cautious when using alcohol, as it can potentially damage the foam material. Test it on a small, inconspicuous area before applying it to the entire foam cover.
These are the basic materials you’ll need to clean your foam earbuds effectively. By having them ready, you’ll be able to carry out the cleaning process smoothly and without any interruptions. Now that you have everything you need, let’s proceed to the step-by-step guide on how to clean your foam earbuds.
Step-by-Step Guide to Clean Foam Earbuds
Now that you have gathered the necessary materials, let’s walk through the step-by-step process to clean your foam earbuds effectively:
- Remove the foam covers: Start by gently removing the foam covers from the earpiece of your earbuds. Take care not to apply too much force, as you don’t want to tear or damage the foam.
- Inspect the foam covers: Take a close look at the foam covers to assess their condition. If they are severely damaged or worn out, it may be time to replace them with new ones. If they are in good condition, proceed to the next step.
- Clean the foam covers: Fill a small bowl or basin with warm water and add a few drops of mild soap or liquid detergent. Gently swirl the foam covers in the soapy water, ensuring that they are fully immersed. Use your fingers to lightly rub the foam covers and remove any dirt or debris. For stubborn stains, you can use a cotton swab dampened with isopropyl alcohol. Once clean, rinse the foam covers thoroughly under running water.
- Clean the earpiece: Take a soft cloth or microfiber towel and dampen it with the soapy water. Gently wipe the earpiece of your earbuds, being careful not to let any excess moisture enter the openings. Use cotton swabs or toothpicks to clean any hard-to-reach areas or crevices. Avoid applying excessive pressure or using abrasive materials that could damage the earpiece.
- Rinse and dry: After cleaning the foam covers and earpiece, rinse them under running water to remove any soap residue. Shake off any excess water and gently pat them dry with a clean, dry cloth or paper towel. Allow the foam covers and earpiece to air dry completely before reattaching the foam covers.
- Reattach the foam covers: Once the foam covers and earpiece are fully dry, carefully reattach the foam covers to the earpiece. Make sure they are securely in place and fit snugly.
Following these steps will help you clean your foam earbuds thoroughly and maintain their hygiene and performance. Next, we will discuss how to clean the foam covers in more detail.
Cleaning the Foam Covers
The foam covers of your earbuds are prone to accumulating dirt, sweat, and oils from your skin. Cleaning them regularly is essential for maintaining their hygiene and preserving their functionality. Here’s a detailed guide on how to clean the foam covers:
- Remove the foam covers: Start by gently removing the foam covers from the earpiece. Be careful not to stretch or tear the foam material during this process.
- Inspect the foam covers: Take a close look at the foam covers to check for any visible stains, discoloration, or wear and tear. If they are severely damaged or discolored, it may be time to replace them.
- Prepare a cleaning solution: Fill a small bowl or basin with warm water and add a few drops of mild soap or liquid detergent. Mix the solution gently to create a soapy mixture.
- Soak the foam covers: Place the foam covers into the soapy water, making sure they are fully submerged. Gently swirl them around, allowing the soapy water to penetrate the foam material and remove any dirt or debris.
- Gently clean the foam covers: Use your fingers to lightly rub the foam covers, focusing on any areas with visible stains or buildup. Be gentle to avoid tearing the foam. If you notice stubborn stains, you can use a soft-bristled toothbrush or a cotton swab dampened with isopropyl alcohol to gently scrub the affected areas.
- Rinse the foam covers: Once you’re satisfied with the cleanliness of the foam covers, rinse them under running water to remove any soap residue. Squeeze out any excess water gently.
- Dry the foam covers: Place the foam covers on a clean, dry cloth or paper towel to absorb any remaining moisture. Gently pat them dry, being careful not to deform the foam shape. Allow them to air dry completely before reattaching them to the earpiece.
- Reattach the foam covers: Once the foam covers are fully dry, carefully reattach them to the earpiece. Make sure they are securely in place and fit snugly.
By regularly cleaning the foam covers of your earbuds using this step-by-step method, you can ensure that they remain free from dirt, oils, and bacteria. Now that you’ve cleaned the foam covers, let’s move on to cleaning the earpiece of the earbuds.
Cleaning the Earpiece
In addition to cleaning the foam covers, it’s important to clean the earpiece of your earbuds to remove any dirt, wax, or debris that may have accumulated. Here’s a step-by-step guide on how to clean the earpiece properly:
- Dampen a soft cloth or microfiber towel: Start by dampening a soft cloth or microfiber towel with warm water. Make sure the cloth is not dripping wet, as excessive moisture can damage the internal components of your earbuds.
- Gently wipe the earpiece: Use the damp cloth to gently wipe the earpiece of your earbuds. Pay attention to the exterior surface, as well as any areas where dirt or wax may have accumulated, such as the sound output ports or the edges of the earpiece.
- Use cotton swabs or toothpicks for hard-to-reach areas: For areas that are difficult to clean with a cloth, such as crevices or small openings, you can use cotton swabs or toothpicks. Be cautious and gentle when using these tools, as you don’t want to damage the earpiece or push any debris further inside.
- Remove stubborn dirt or wax: If you encounter stubborn dirt or wax buildup, you can dampen a cotton swab with a small amount of isopropyl alcohol. Carefully rub the affected area to dissolve and remove the buildup. However, be cautious not to let any excess alcohol enter the openings or damage the earpiece.
- Dry the earpiece: After cleaning, use a clean, dry cloth or paper towel to gently dry the earpiece. Make sure there is no moisture remaining on the surface before reattaching the foam covers.
Remember to be gentle while cleaning the earpiece to avoid causing any damage. Taking regular care of the earpiece will not only help maintain the cleanliness of your earbuds but also ensure optimal sound quality. Now that you’ve cleaned both the foam covers and the earpiece, it’s time to move on to the final step: drying your earbuds.
Drying the Earbuds
After cleaning your foam earbuds, it’s important to ensure that they are thoroughly dried before using them again. Excess moisture can lead to damage and affect the performance of your earbuds. Here’s how you can properly dry your earbuds:
- Gently shake off excess water: After cleaning, gently shake your earbuds to remove any excess water. This will help expedite the drying process.
- Pat dry with a cloth or paper towel: Take a clean, dry cloth or paper towel and gently pat the earbuds dry. Be careful not to apply excessive pressure or rub too harshly, as this can damage the sensitive components.
- Air dry: Once you have removed the excess moisture, place your earbuds in a well-ventilated area and allow them to air dry completely. Avoid using heat sources such as hairdryers or placing them in direct sunlight, as this can damage the earbuds.
- Avoid reattaching foam covers until dry: It’s important to wait until your earbuds are completely dry before reattaching the foam covers. Moisture trapped underneath the foam covers can cause mold or affect the sound quality.
The drying process may take a few hours, depending on the level of dampness and the environment. It’s crucial to be patient and make sure your earbuds are thoroughly dry before using them again. Now that your earbuds are clean and dry, let’s explore some tips to help you maintain their cleanliness for long-lasting use.
Tips for Maintaining Clean Foam Earbuds
To ensure that your foam earbuds stay clean and in optimal condition, here are some helpful tips for maintenance:
- Clean regularly: Make it a habit to clean your foam earbuds regularly, ideally once every two weeks or whenever you notice dirt or buildup. Regular cleaning prevents debris from accumulating and maintains the audio quality.
- Store properly: When not in use, store your earbuds in a clean and dry case or pouch. This protects them from dust, moisture, and potential damage. Avoid tossing them in pockets or bags where they can come into contact with dirt and lint.
- Avoid sharing earbuds: Sharing earbuds can transfer bacteria and oils, leading to hygiene and cleanliness concerns. Whenever possible, it’s best to use your own earbuds to maintain personal hygiene.
- Replace foam covers when necessary: Foam covers tend to wear out over time due to regular use and cleaning. If you notice significant deterioration, rips, or discoloration, it’s best to replace them with new ones. This ensures a comfortable fit and optimal sound quality.
- Avoid using harsh chemicals: Stick to mild soap or liquid detergent when cleaning your earbuds. Harsh chemicals can damage the foam material or other components of your earbuds, affecting their performance.
- Keep hands clean: Before using your earbuds, ensure that your hands are clean and free from oils, dirt, or lotions. This reduces the transfer of dirt and oils onto the foam covers and earpiece.
- Avoid using excessive force: When cleaning or handling your earbuds, be gentle. Excessive force can damage the delicate components of the earbuds or tear the foam covers.
- Inspect your earbuds: Regularly inspect your earbuds for any visible damage, loose connections, or signs of wear. Address any issues promptly to prevent further damage and maintain optimal performance.
- Take breaks: Giving your ears and earbuds a break from continuous use can help prevent excess moisture buildup and allow them to air out. Additionally, taking breaks can help reduce the risk of ear discomfort or infections.
By following these maintenance tips, you can ensure that your foam earbuds stay clean, hygienic, and provide you with a high-quality audio experience for a long time. Now that you’re equipped with the knowledge to properly care for your earbuds, you can enjoy your favorite music or podcasts with confidence.
Conclusion
Properly cleaning and maintaining your foam earbuds is essential for preserving their hygiene, sound quality, and longevity. By following the step-by-step guide and tips outlined in this article, you can ensure that your earbuds remain in optimal condition and provide you with an enjoyable listening experience.
Regularly cleaning the foam covers and earpiece of your earbuds helps remove dirt, wax, and bacteria that can accumulate over time. This not only improves the sound quality but also reduces the risk of ear infections and discomfort. Additionally, maintaining clean earbuds enhances their appearance and prolongs their lifespan.
Remember to take precautions before cleaning, use the necessary materials, and be gentle while handling your earbuds. Disconnect them from any devices, remove the foam covers, and consult the manufacturer’s guidelines if available. Use mild soap or liquid detergent, warm water, and soft cloth or microfiber towels for cleaning. Pay attention to drying your earbuds thoroughly before reattaching the foam covers.
By implementing these practices and incorporating regular maintenance into your routine, you can enjoy clean and well-maintained foam earbuds for years to come. So, take care of your earbuds, keep them clean, and enjoy your audio experience to the fullest.