Home>Production & Technology>Vinyl>How To Burn Music Onto Digital Vinyl
Vinyl
How To Burn Music Onto Digital Vinyl
Modified: March 2, 2024
Learn how to burn music onto digital vinyl and enjoy the authentic sound of your favorite songs. Step-by-step guide for vinyl enthusiasts.
(Many of the links in this article redirect to a specific reviewed product. Your purchase of these products through affiliate links helps to generate commission for AudioLover.com, at no extra cost. Learn more)
Table of Contents
Introduction
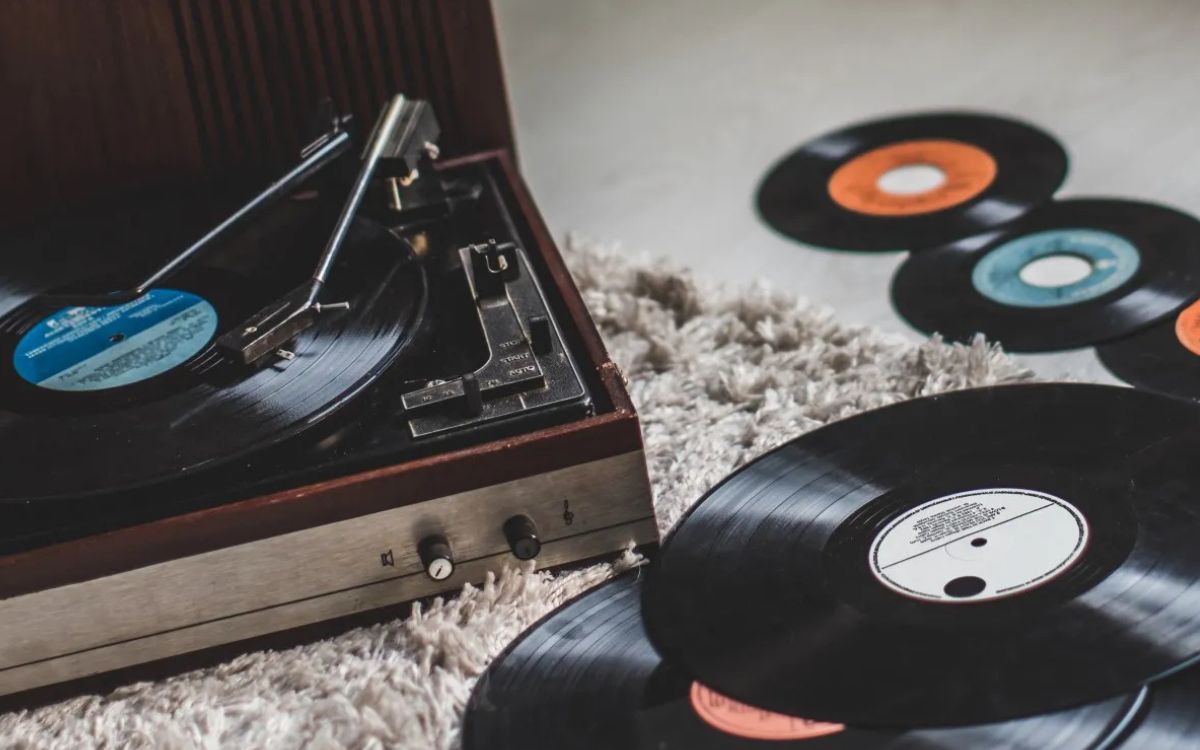
Welcome to the world of vinyl. Vinyl records have experienced a resurgence in popularity over the past decade, capturing the hearts of music enthusiasts with their warm, rich sound and nostalgic appeal. In a world dominated by digital music, vinyl offers a tangible experience that brings us closer to the music we love.
But what if you want to enjoy the vinyl experience while still having access to the convenience and portability of digital music? That’s where digital vinyl comes in. Digital vinyl combines the best of both worlds, allowing you to play vinyl records while digitally capturing and storing the music.
In this article, we’ll explore the world of digital vinyl and guide you through the process of burning music onto your own digital vinyl records. Whether you’re a seasoned vinyl enthusiast or new to the world of turntables, this guide will help you navigate the process with ease.
Before we dive into the details, it’s important to note that burning music onto digital vinyl requires some technical know-how and equipment. If you’re new to vinyl or don’t feel comfortable with the technical aspects, it’s always a good idea to consult with an expert or professional. With that said, let’s explore the wonderful world of digital vinyl and how you can bring your favorite music into the digital age.
Understanding Digital Vinyl
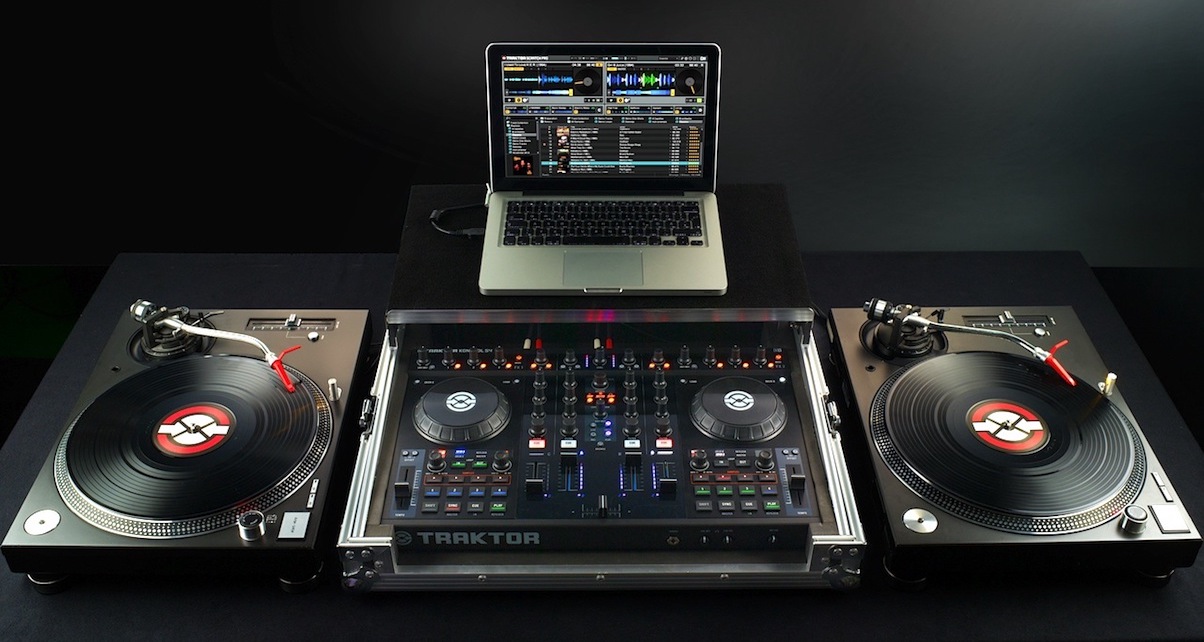
Digital vinyl, also known as DVS (Digital Vinyl System), is a technology that allows you to control digital music files using traditional vinyl records and a turntable. It combines the tactile and audio experience of vinyl with the convenience and flexibility of digital music.
The magic happens through a combination of hardware and software. The hardware includes a special vinyl record, commonly referred to as a control disk or timecode vinyl, and a compatible DJ turntable or controller. The control disk contains a timecode signal that is read by the turntable and sent to a computer or DJ software.
On the software side, you’ll need a digital vinyl system or DVS software. Popular DVS software includes Serato DJ, Traktor Scratch, and Virtual DJ. This software interprets the timecode signal from the control disk, allowing you to play and manipulate digital music files.
Here’s how it works: when you play a control disk on your turntable, the timecode signal is sent to your computer or DJ software via a USB or audio interface. The software then decodes the timecode signal and matches it to the corresponding digital music file in your library.
Once the timecode signal is matched, you can control the playback of the digital music file using the turntable. You can scratch, mix, and perform various DJ techniques, just as you would with traditional vinyl. The software translates your turntable movements into digital commands, allowing for seamless control over the music.
One of the key advantages of digital vinyl is the ability to access and manipulate a vast library of digital music files. You can store your entire music collection on a hard drive or laptop and have instant access to thousands of songs at your fingertips. This flexibility opens up endless possibilities for DJs, allowing for creative and dynamic performances.
It’s important to note that digital vinyl is not limited to DJs. Music enthusiasts and audiophiles can also enjoy the benefits of digital vinyl. It allows you to preserve your vinyl collection by making digital backups, reducing wear and tear on your precious records. Additionally, it allows for convenient digital playback without sacrificing the unique analog sound quality that vinyl records offer.
Now that we have a basic understanding of digital vinyl, let’s move on to choosing the right equipment for your setup.
Choosing the Right Equipment
When it comes to digital vinyl, choosing the right equipment is crucial for a seamless and enjoyable experience. Here’s a breakdown of the key components you’ll need:
1. Turntable: The heart of any vinyl setup is the turntable. Look for a turntable specifically designed for digital vinyl systems. These turntables often have built-in USB connectivity or come bundled with an audio interface. Popular options include the Technics SL-1200 series, Pioneer PLX-1000, and Numark NTX1000.
2. Control Vinyl: You’ll need control vinyl, also known as timecode vinyl, to control and interact with your digital music files. Each DVS software typically has its own branded control vinyl, so make sure to choose the one compatible with your software. It’s a good idea to have a few spare control vinyl records on hand in case of any issues.
3. Audio Interface: An audio interface is essential for converting the analog signal from your turntable into a digital signal that can be processed by your computer or DJ software. It connects to your turntable and computer via USB or other audio connections. Focus on getting an interface with low latency and high-quality audio conversion for optimal performance.
4. Computer: A capable computer is necessary for running the DVS software and handling the processing power required for playback and effects. Choose a computer with a fast processor, ample memory, and plenty of storage space for your music library. Laptops are a popular choice for portability, but desktops can offer more processing power and storage options.
5. DJ Software: Select the digital vinyl software that best suits your needs and workflow. Some popular options include Serato DJ, Traktor Scratch, Virtual DJ, and Rekordbox DJ. Consider factors such as ease of use, compatibility with your hardware, and the features and effects available in the software.
6. Sound System: To fully enjoy your digital vinyl setup, you’ll need a quality sound system. Invest in a pair of powered speakers or connect your setup to an amplifier and a set of passive speakers. Consider the size of your listening space and the power output you’ll need to ensure a balanced and immersive sound experience.
When choosing equipment, it’s important to consider your budget, your specific needs and preferences, and the compatibility between different components. Reading reviews, seeking recommendations from experienced users, and consulting with experts can all help in making informed decisions.
Now that we have the equipment covered, the next step is preparing your music files for digital vinyl playback. Let’s dive into that in the next section.
Preparing Your Music Files
Before you can start burning music onto digital vinyl, you’ll need to ensure that your music files are properly formatted and organized. Here are some essential steps to take:
1. Check File Formats: Make sure your music files are in a compatible format for your chosen DVS software. Most software supports popular formats like MP3, WAV, and AIFF. Check the software documentation or website for specific format requirements.
2. Organize Your Library: It’s crucial to have a well-organized music library to easily locate and access your tracks. Create folders and subfolders to categorize your music by genre, artist, or any other system that works for you. Use music management software like iTunes or dedicated DJ software to help organize and tag your files.
3. Tag Your Tracks: Properly tagging your tracks with artist names, track titles, and other metadata will make it easier to search and sort your library. This information is especially important when using DJ software that relies on metadata for various functions.
4. Set Cue Points and Loops: Take advantage of the features in your DVS software to set cue points and loops. These can be used for quick navigation, beat matching, and creating dynamic mixes. Spend some time familiarizing yourself with the software’s cue point and loop functions.
5. Analyze Your Tracks: Many DVS software programs have a feature that analyzes your tracks for key information, BPM (beats per minute), and other attributes. This analysis helps with beat matching and organizing your library. Take advantage of this feature to save time during your DJ sets.
6. Backup Your Music: Create a backup of your music library. Whether it’s an external hard drive, cloud storage, or a separate computer, having a backup ensures that your music files are safe in case of any unforeseen events.
By following these steps, you’ll have a well-organized and properly formatted music library, ready for burning onto your digital vinyl records. Now let’s move on to connecting and setting up your turntable in the next section.
Connecting and Setting Up Your Turntable
Now that you have your equipment ready and your music files prepared, it’s time to connect and set up your turntable for digital vinyl playback. Follow these steps to ensure a smooth setup process:
1. Connect the Turntable: Start by connecting your turntable to the audio interface using the appropriate cables. Most turntables have built-in phono preamps, but if your turntable doesn’t have one, make sure to connect it to an external phono preamp before connecting to the interface.
2. Configure the Audio Settings: Open your DVS software and configure the audio settings. Set the input source as your audio interface and select the proper audio channels. Make sure to set the audio settings to match the specifications of your equipment.
3. Set the Input and Output Routing: In the DVS software, set the input routing to the audio interface input where your turntable is connected. Set the output routing to the audio interface output that connects to your speakers or sound system.
4. Configure Timecode Control: In the software settings, enable timecode control and select the appropriate control vinyl type. Calibrate the control vinyl according to the software instructions to ensure accurate tracking and response.
5. Test the Setup: Before starting your DJ session, it’s essential to test the setup. Play a control vinyl record and check if the software registers the timecode signal correctly. Verify that you can control playback, scratch, and manipulate the music using your turntable.
6. Fine-tune Settings: Spend some time exploring the settings in your DVS software. Adjust the sensitivity settings, vinyl emulation mode, and any other customization options based on your preferences and the specific features of your software.
Remember to consult the user manual or online resources specific to your turntable and DVS software for detailed instructions and troubleshooting tips. Each hardware and software combination may have its own unique setup process, so it’s crucial to refer to the documentation provided by the manufacturers.
With your turntable connected and properly set up, you’re now ready to start burning music onto your digital vinyl records. In the next section, we’ll walk you through the process step by step.
Burning Music onto Digital Vinyl
Now that your turntable is set up and connected, it’s time to burn your music onto digital vinyl. Follow these steps to ensure a successful burning process:
1. Load the Control Vinyl: Place a control vinyl record onto the turntable. Make sure it is in good condition with no scratches or damage that could affect the tracking and accuracy of the timecode signal.
2. Open Your DVS Software: Launch your chosen DVS software on your computer. Ensure that it recognizes the control vinyl and is ready to receive the timecode signal.
3. Load and Prepare Your Music: Open your music library within the DVS software and select the tracks you want to burn onto digital vinyl. Analyze the tracks for BPM, key, and any other relevant information that will help in your mixing and performance.
4. Set Cue Points and Loops: Take advantage of the cue points and loop functions in your DVS software to prepare your tracks for mixing. Set cue points at specific parts of the song that you want to jump to, and set loops to create extended mixes or buildups.
5. Start the Burning Process: With the control vinyl spinning on the turntable, start the burning process in your DVS software. This process involves the software writing the digital audio data onto the control vinyl in real-time, creating a digital representation on the vinyl.
6. Monitor the Burning Process: Keep an eye on the software’s progress and ensure that the burning process is running smoothly. Monitor the signal levels, track timing, and any possible errors or glitches that may occur during the burning process.
7. Finalize the Burning: Once the burning process is complete, finalize the burn by saving the digital audio onto the control vinyl. This step ensures that the digital audio is accurately encoded on the vinyl, ready for playback on your turntable.
8. Test the Burned Vinyl: Take the newly burned digital vinyl record and play it on your turntable. Test the playback, scratching, and mixing capabilities to ensure that the burned tracks respond correctly to the turntable movements.
It’s important to note that burning music onto digital vinyl is a technical process that requires precision and attention to detail. Take your time, practice, and experiment with different settings and techniques to get the best results.
Now that you have successfully burned your music onto digital vinyl, let’s move on to troubleshooting common issues and exploring some additional tips and tricks in the next section.
Troubleshooting and Tips
While burning music onto digital vinyl can be a straightforward process, it’s not uncommon to encounter some challenges along the way. Here are some troubleshooting tips and additional pointers to help you overcome common issues and enhance your digital vinyl experience:
1. Calibration Issues: If you’re experiencing inaccurate tracking or poor response from the control vinyl, try recalibrating the control vinyl in your DVS software. Follow the software’s instructions for calibration and ensure that your turntable is properly set up.
2. Skipping or Skipping Needles: If you encounter skipping issues during playback, check for dust or debris on the control vinyl or in the turntable’s needle. Clean the vinyl and needle carefully and ensure that the tonearm is properly balanced and adjusted.
3. Audio Latency: If you notice a delay between your turntable movements and the response in the software, adjust the audio latency settings in your DVS software. Lowering the latency can help improve the timing and responsiveness of the control vinyl.
4. Backup Your Music Files: Regularly backup your music files to prevent any loss or corruption of your digital collection. Make sure to have a backup of your library on an external hard drive, cloud storage, or another computer to avoid losing your tracks.
5. Keep Your Control Vinyl in Good Condition: Properly care for your control vinyl records by storing them in protective sleeves and keeping them away from extreme temperatures and direct sunlight. Clean them regularly with an anti-static brush to prevent buildup and ensure accurate tracking.
6. Explore Advanced Features: Take the time to explore the advanced features of your DVS software. Play around with effects, filters, and looping capabilities. Experimenting with different techniques will help you expand your creativity and deliver unique performances.
7. Practice and Experiment: Like any skill, mastering the art of digital vinyl takes practice. Spend time honing your technique, experimenting with different mixing styles, and exploring new ways to manipulate the music. The more you practice, the more comfortable you’ll become with your digital vinyl setup.
8. Stay Updated with Software and Firmware: Keep your DVS software and hardware firmware up to date. Software updates often include bug fixes and performance improvements, while firmware updates for your turntable or audio interface can enhance compatibility and stability.
Remember, digital vinyl is a unique way to experience and interact with music. Embrace the learning process and enjoy the journey as you explore the possibilities and push the boundaries of your digital vinyl setup.
With this troubleshooting advice and helpful tips, you’re now equipped to overcome obstacles and make the most of your digital vinyl experience. Let’s wrap up the article by summarizing the key points covered and highlighting the benefits of embracing digital vinyl.
Conclusion
Congratulations! You’ve now gained a comprehensive understanding of digital vinyl and how to burn music onto your own digital vinyl records. With the right equipment, properly formatted music files, and a well-configured setup, you can enjoy the best of both the vinyl and digital worlds.
By embracing digital vinyl, you have the opportunity to preserve your vinyl collection, access a vast digital music library, and unleash your creativity as a DJ or music enthusiast. Digital vinyl allows you to enjoy the tactile experience of vinyl while harnessing the convenience and flexibility of digital music.
Throughout this article, you’ve learned how to choose the right equipment for your digital vinyl setup, prepare your music files, connect and set up your turntable, burn music onto digital vinyl, and troubleshoot common issues. Remember, practice and experimentation are key to mastering the art of digital vinyl.
As you dive into your digital vinyl journey, keep in mind the importance of caring for your control vinyl records, regularly backing up your music files, and staying updated with software and firmware updates. These steps will help ensure a smooth and enjoyable experience every time you step behind the turntable.
Whether you’re a DJ looking to elevate your performances or a music lover seeking a unique way to enjoy your vinyl collection, digital vinyl opens up a world of possibilities. Embrace the fusion of analog and digital, and let the sound of vinyl fill your ears as you experience the magic of music like never before.
So, what are you waiting for? Start exploring the world of digital vinyl and let your creativity soar. Happy spinning!