Home>Production & Technology>Digital>How To Convert Vinyl To Digital Music
Digital
How To Convert Vinyl To Digital Music
Published: March 10, 2024
Learn how to convert your vinyl collection to digital music with our step-by-step guide. Preserve your favorite tracks in high-quality digital format today!
(Many of the links in this article redirect to a specific reviewed product. Your purchase of these products through affiliate links helps to generate commission for AudioLover.com, at no extra cost. Learn more)
Table of Contents
Introduction
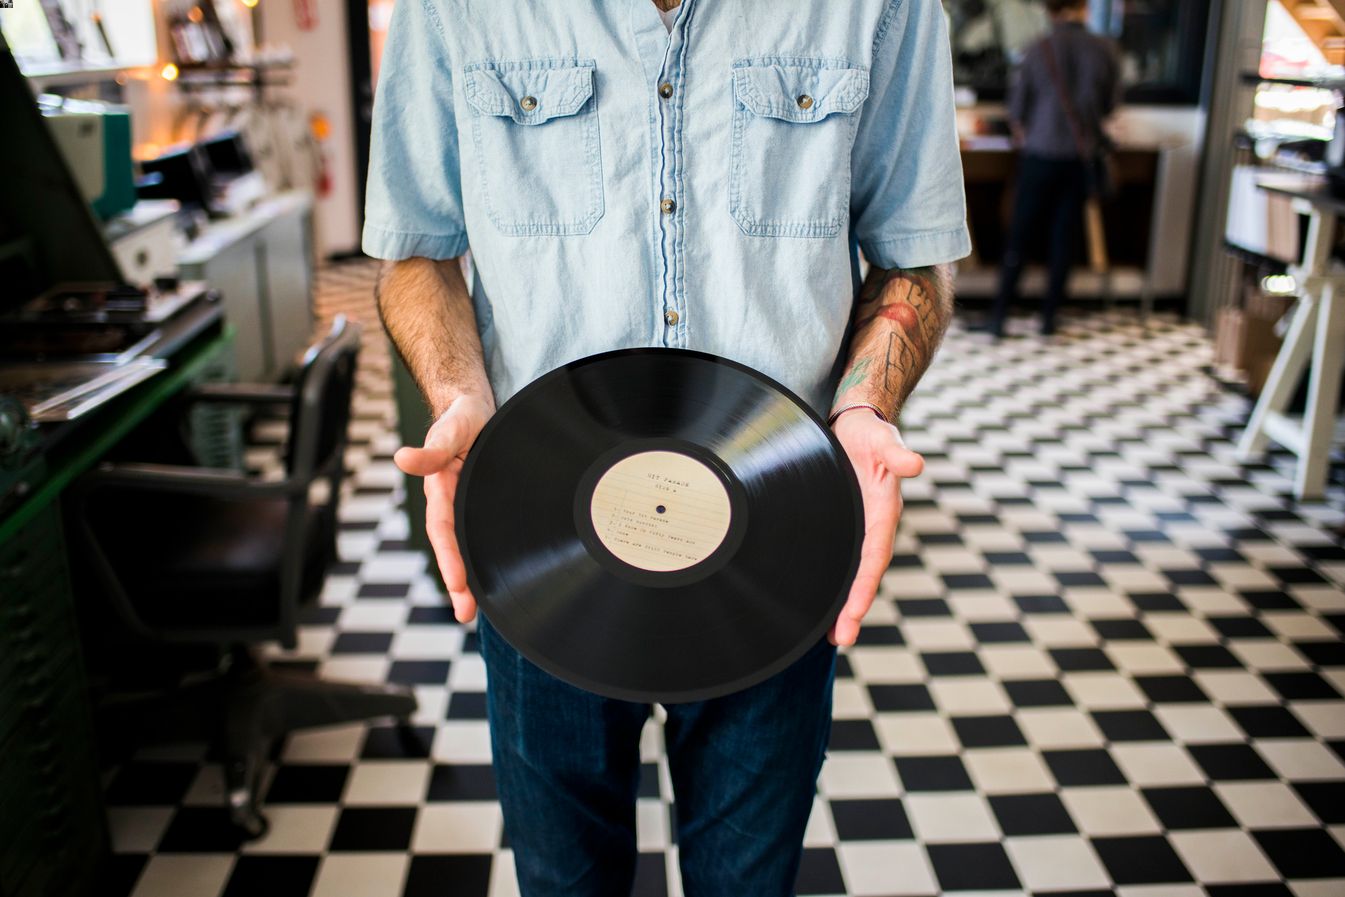
In today's digital age, the resurgence of vinyl records has sparked a renewed appreciation for the warm, authentic sound they produce. Many music enthusiasts are rediscovering the joy of collecting and listening to vinyl records, reveling in the tactile experience of handling album artwork and carefully placing the needle on the spinning disc. However, while vinyl records offer a nostalgic and immersive listening experience, they also present certain limitations, such as susceptibility to wear and tear over time.
To bridge the gap between the analog charm of vinyl and the convenience of digital music, many individuals are turning to the process of converting their cherished vinyl collections into digital audio files. This conversion not only preserves the timeless music encapsulated in vinyl records but also allows for easy playback and storage on modern devices. Whether you're a vinyl aficionado seeking to digitize your rare finds or a newcomer to the world of analog music, the process of converting vinyl to digital music offers a rewarding journey that combines technology with a deep appreciation for musical artistry.
In this comprehensive guide, we will explore the step-by-step process of converting vinyl to digital music, providing you with the knowledge and tools necessary to embark on this enriching endeavor. From gathering the essential equipment to fine-tuning your recording settings, each stage of the conversion process will be carefully outlined to ensure a seamless transition from analog to digital. By following these steps, you can unlock the potential of your vinyl collection, preserving its timeless melodies and allowing them to resonate across various digital platforms.
Embark on this transformative journey as we delve into the intricacies of vinyl-to-digital conversion, unlocking the potential to relive cherished musical moments and share them with a global audience. Let's embark on this musical odyssey, where the rich history of vinyl meets the boundless possibilities of digital music.
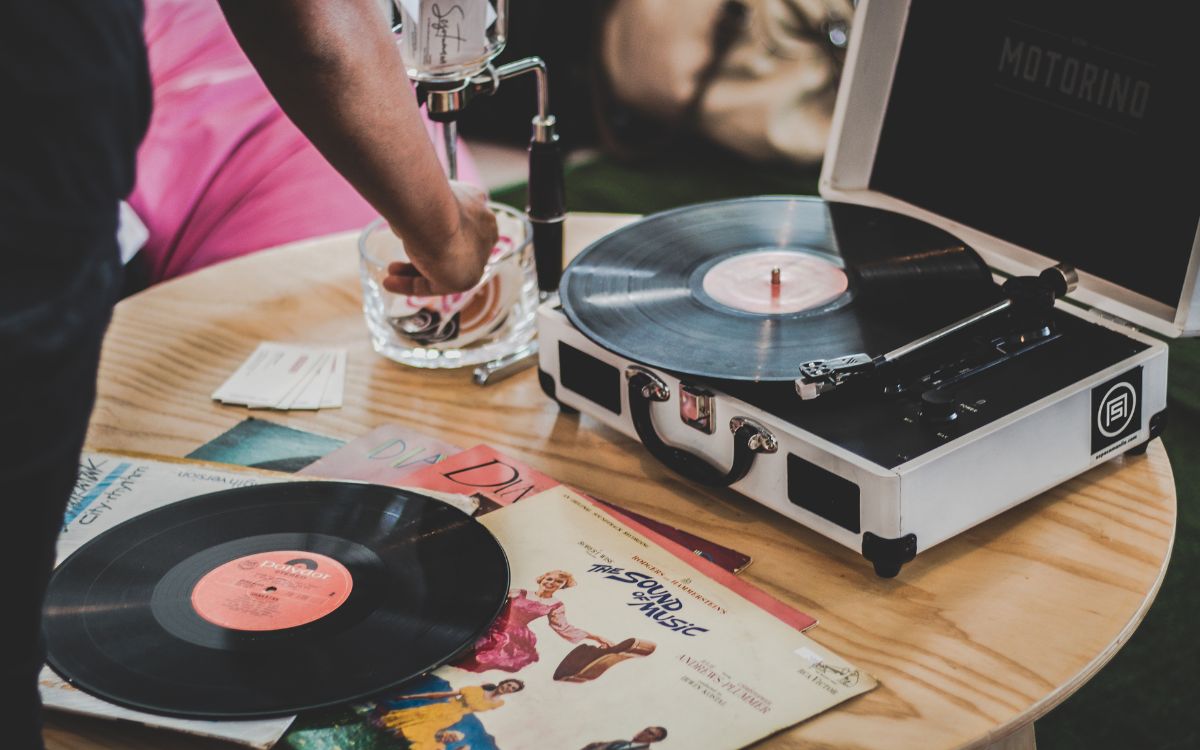
Step 1: Gather Your Equipment
Before embarking on the journey of converting your cherished vinyl records into digital music, it is essential to gather the necessary equipment to ensure a seamless and high-quality conversion process. The following items are crucial for capturing the rich analog sound of vinyl and transforming it into pristine digital audio files:
-
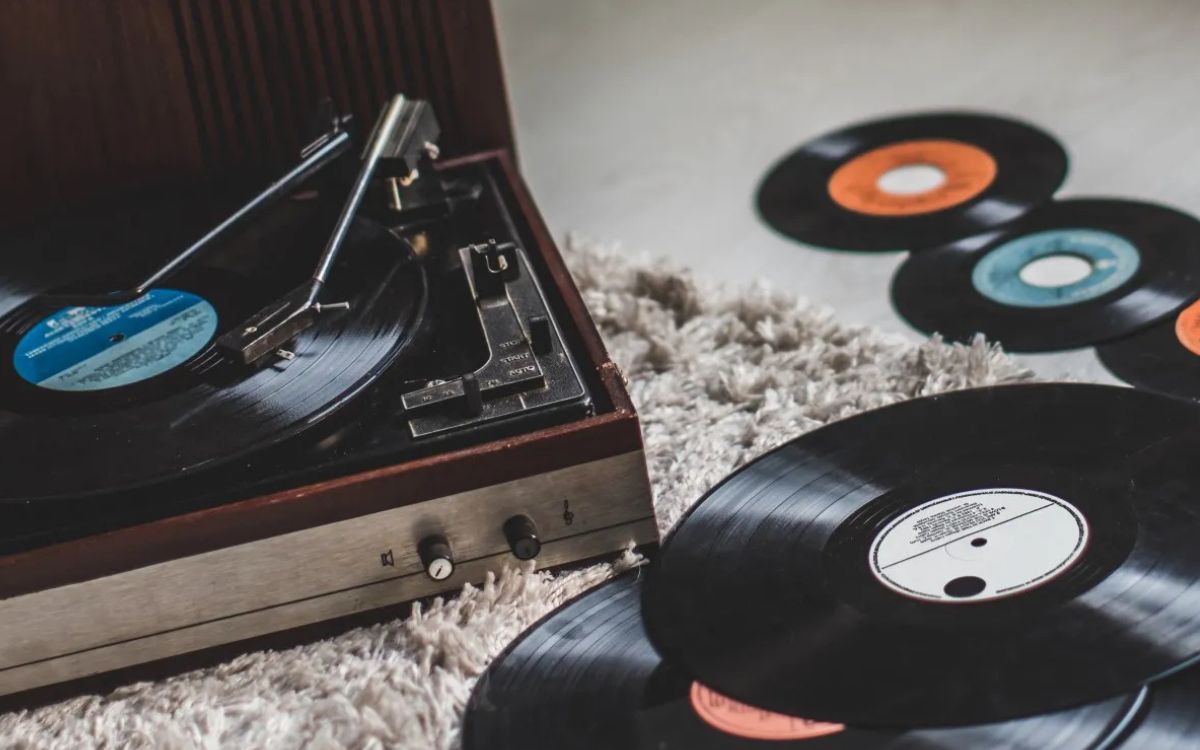
Turntable: The centerpiece of this endeavor, a high-quality turntable is essential for playing your vinyl records and extracting their audio content. Ensure that your turntable is in optimal working condition, with a well-calibrated tonearm and a clean, dust-free stylus to accurately capture the nuances of the vinyl grooves.
-
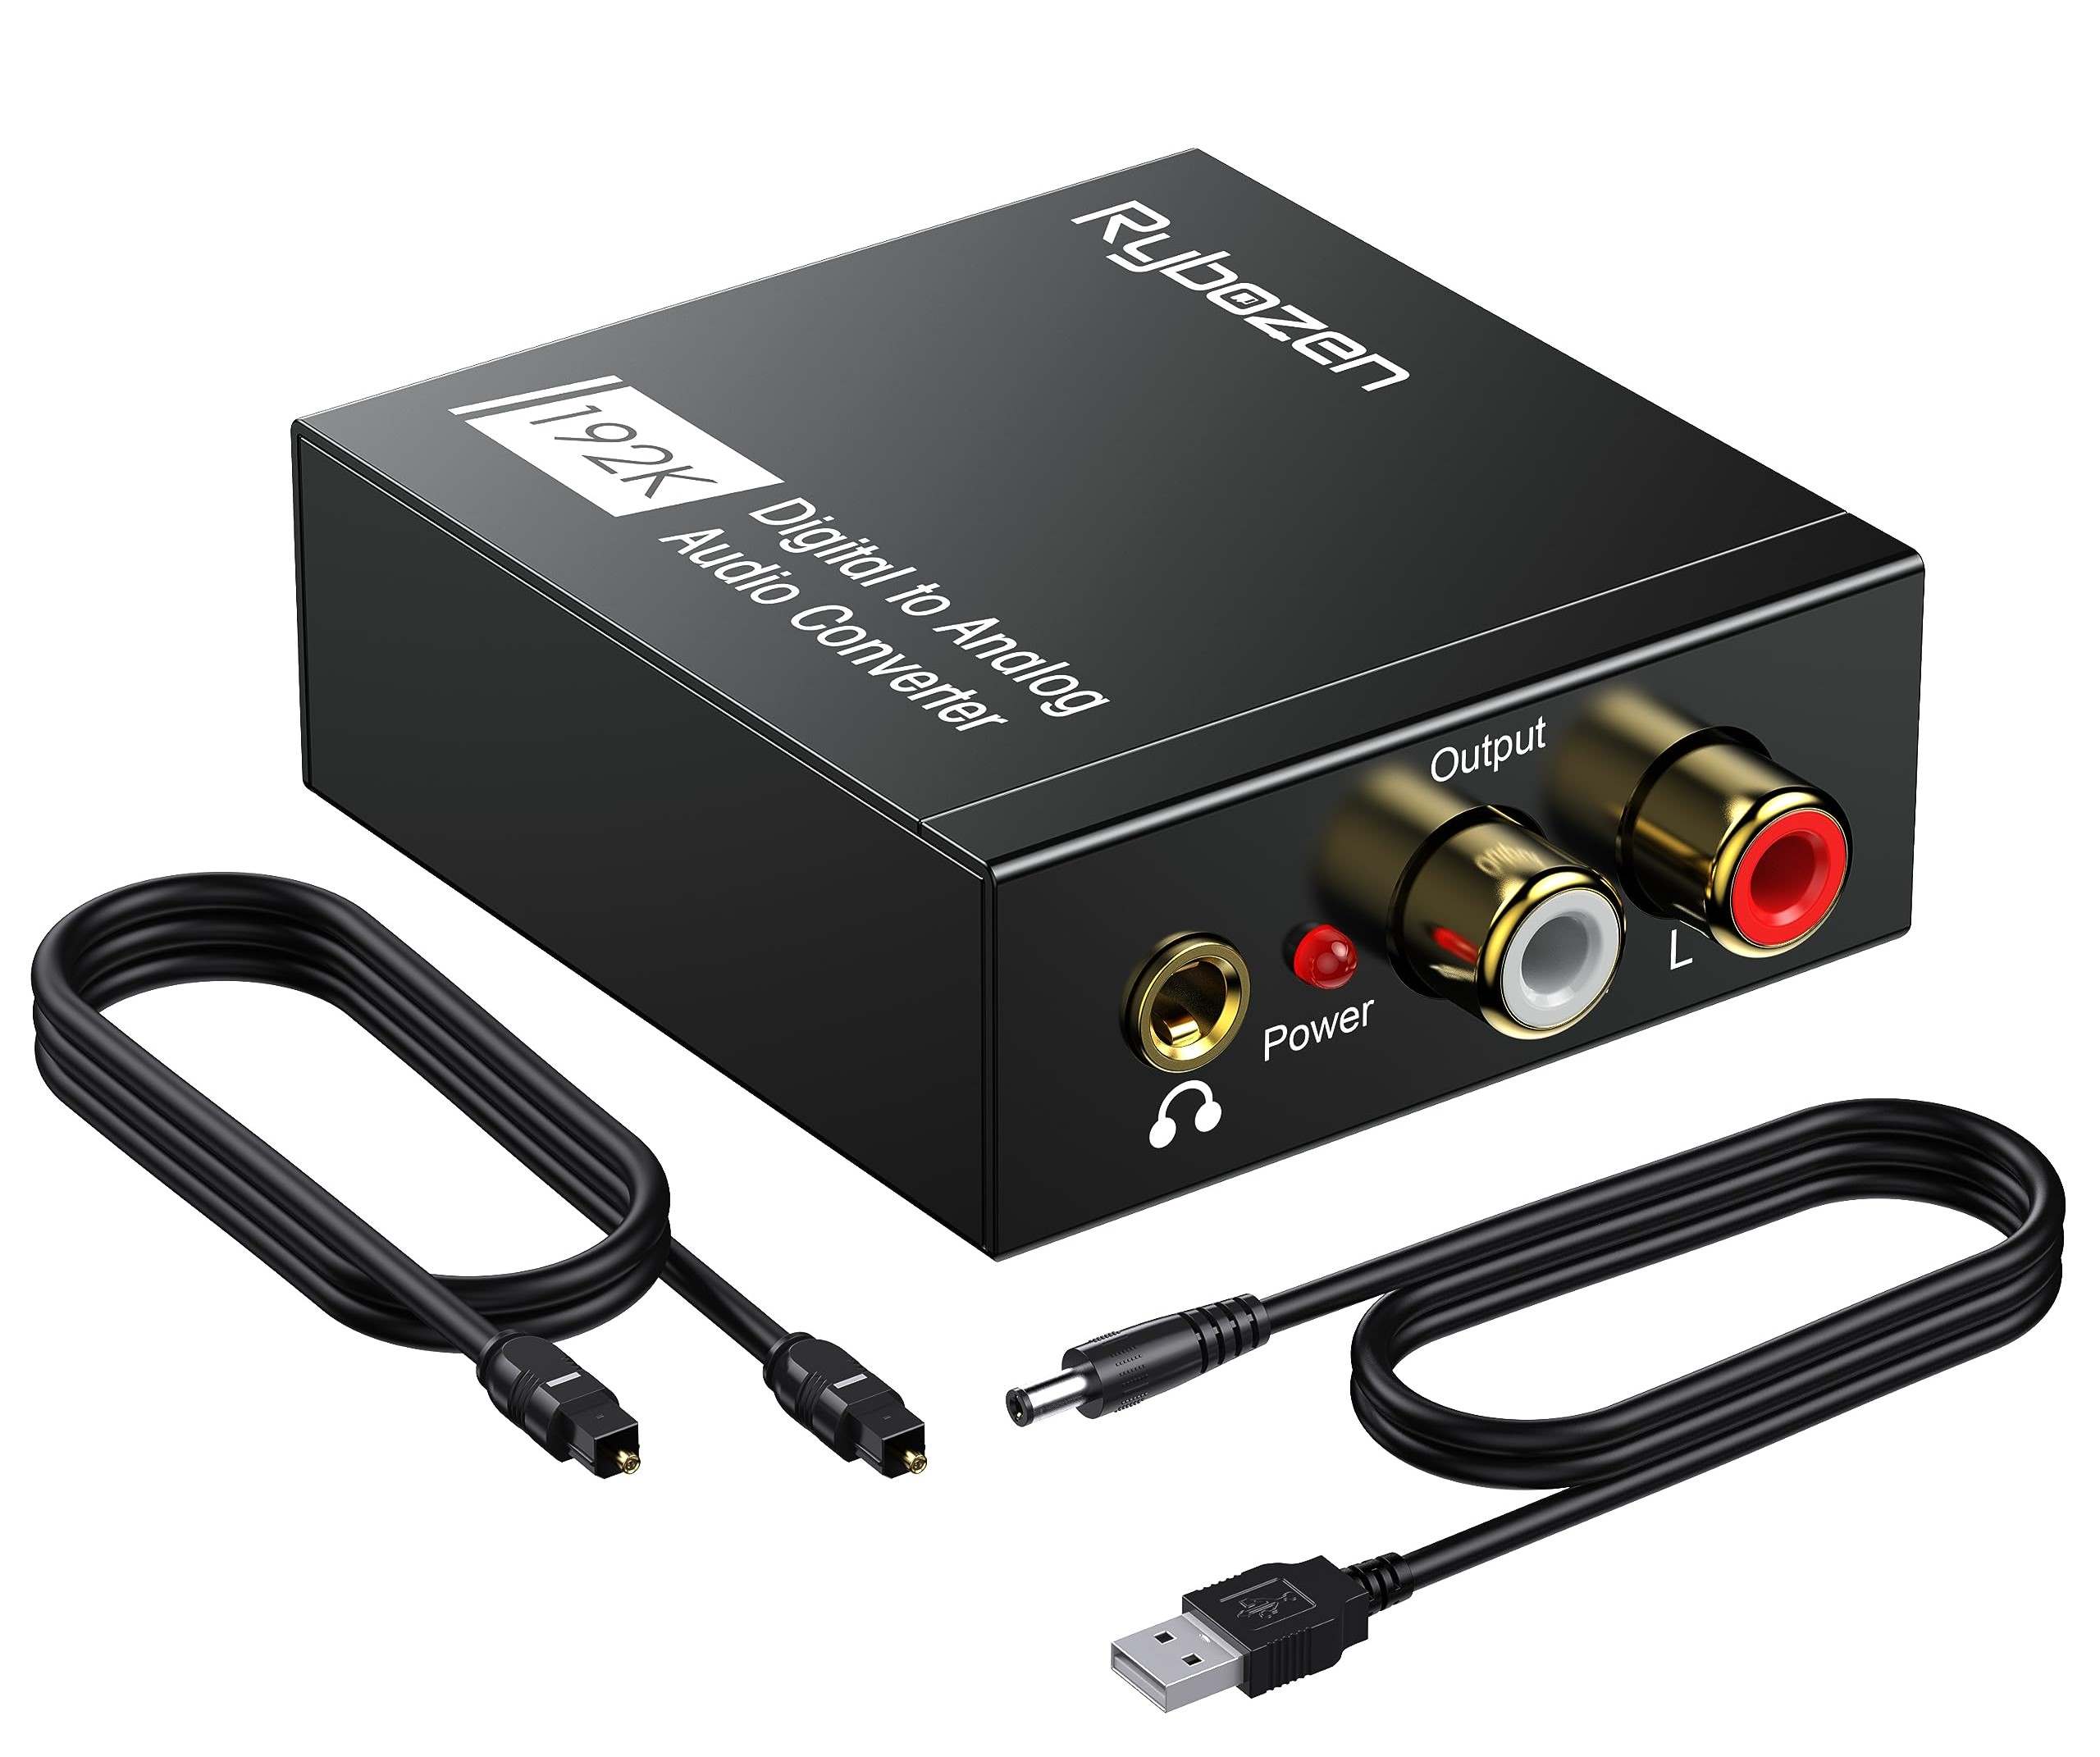
Phono Preamp: In most cases, turntables output a phono-level signal, which requires amplification and equalization to be compatible with standard audio inputs. A phono preamp, also known as a phono stage, serves this crucial function, preparing the signal from your turntable for further processing and recording.
-
Computer: A reliable computer with ample storage space and processing power is essential for capturing and storing the digital audio files generated from the vinyl records. Whether you prefer a desktop or laptop setup, ensure that your computer meets the necessary technical specifications to handle audio recording and editing tasks effectively.
-
Audio Interface: To facilitate the connection between your turntable setup and your computer, an audio interface serves as the bridge, converting analog audio signals into digital data that can be processed and stored. Look for an audio interface with suitable input options to accommodate the output from your turntable and phono preamp.
-
Recording Software: Selecting the right recording software is crucial for capturing and editing the audio from your vinyl records. Choose a reputable digital audio workstation (DAW) that offers intuitive recording and editing capabilities, allowing you to fine-tune the captured audio and save it in various digital formats.
-
Cables and Connectors: To establish seamless connections between your turntable, phono preamp, audio interface, and computer, ensure that you have the necessary cables and connectors, such as RCA cables, USB cables, and audio adapters. Opt for high-quality cables to minimize signal loss and interference during the recording process.
By assembling these essential components, you will lay a solid foundation for the vinyl-to-digital conversion process, setting the stage for capturing the timeless melodies and sonic nuances preserved within your vinyl collection. With the right equipment at your disposal, you are poised to embark on a transformative journey that celebrates the intersection of analog charm and digital innovation.
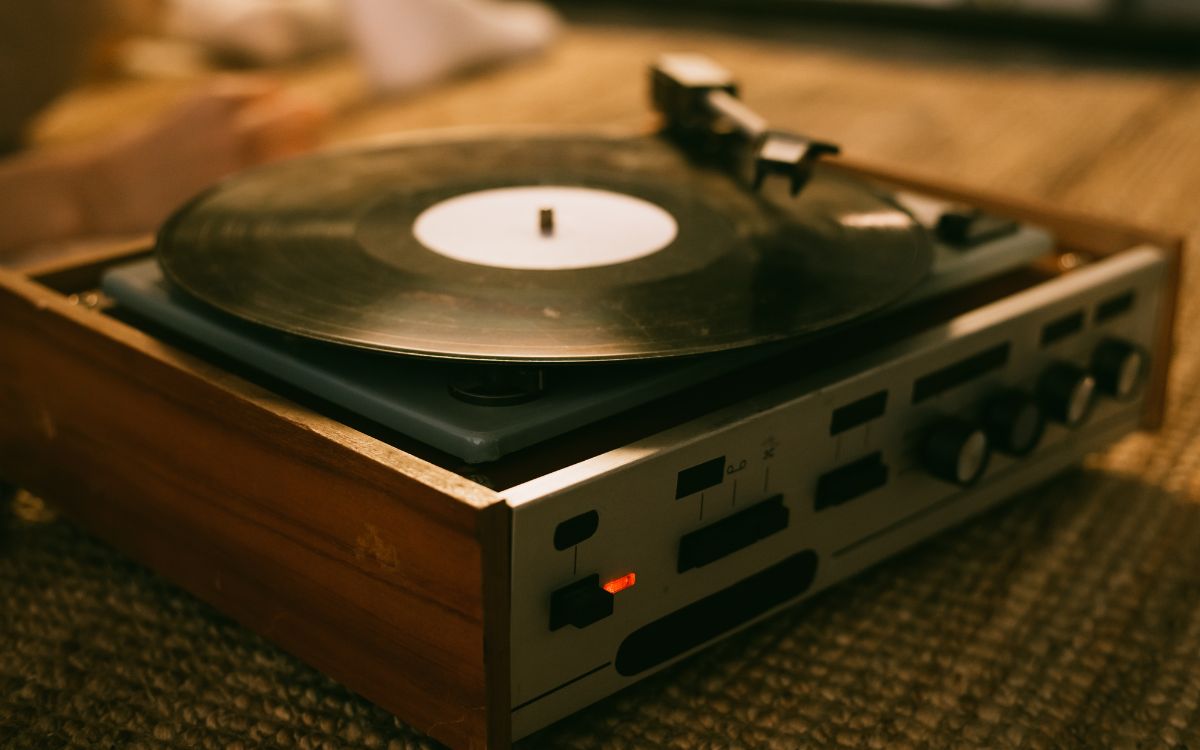
Step 2: Set Up Your Turntable
Setting up your turntable is a crucial initial step in the process of converting vinyl to digital music. Properly configuring and calibrating your turntable ensures that the audio signal extracted from the vinyl records is of the highest quality, capturing the nuances and warmth inherent in analog sound. Here's a detailed guide to setting up your turntable for the vinyl-to-digital conversion process:
1. Placement and Stability
Begin by selecting an appropriate location for your turntable. Opt for a stable surface that minimizes vibrations and external disturbances, as these factors can affect the playback and recording quality. Ensure that the turntable is positioned on a level surface to maintain the integrity of the vinyl records during playback.
2. Tonearm and Cartridge Alignment
Carefully align the tonearm and cartridge to guarantee optimal tracking and minimal distortion during playback. Refer to the manufacturer's instructions for precise alignment procedures, taking care to set the tracking force and anti-skate settings according to the specifications of your cartridge.
3. Stylus Inspection and Cleaning
Thoroughly inspect the stylus (needle) for any accumulated dust, debris, or wear. A clean and well-maintained stylus is essential for accurately tracing the grooves of the vinyl records, ensuring faithful reproduction of the audio content. Use a stylus brush or cleaning solution to delicately remove any contaminants, preserving the integrity of both the stylus and the vinyl records.
4. Platter and Belt Examination
If your turntable features a belt-drive mechanism, inspect the condition of the drive belt and the platter to ensure smooth and consistent rotation. Over time, belts may stretch or degrade, affecting the turntable's performance. Replace the belt if signs of wear or deterioration are evident, ensuring reliable and stable rotation of the platter during playback.
5. Anti-Skate and Vertical Tracking Angle (VTA) Adjustment
Fine-tune the anti-skate and VTA settings to achieve balanced and accurate tracking of the vinyl grooves. Proper anti-skate adjustment prevents the stylus from exerting excessive force on one side of the groove, while precise VTA adjustment maintains the correct angle of the cartridge, optimizing the fidelity of the audio signal.
By meticulously setting up your turntable according to these guidelines, you establish a solid foundation for capturing the rich and authentic sound of your vinyl records. This meticulous approach ensures that the analog-to-digital conversion process begins with the highest possible audio quality, preserving the essence of the original recordings as they are transformed into digital music files.
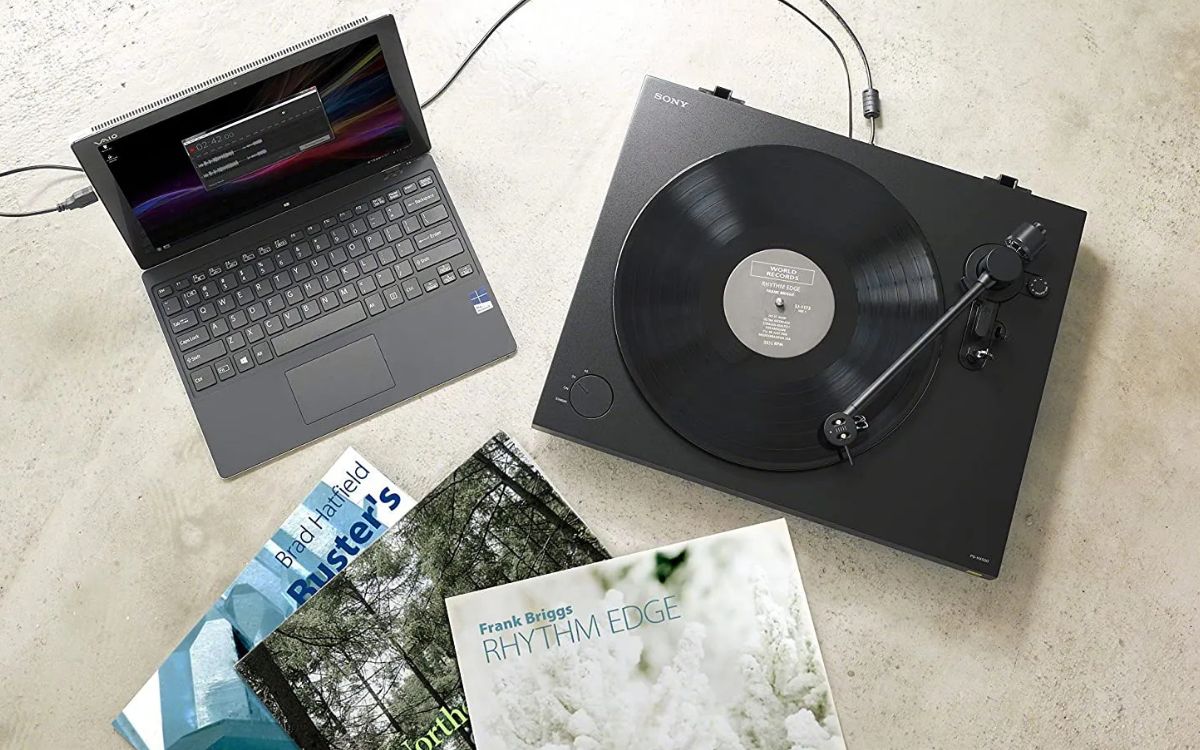
Step 3: Connect Your Turntable to Your Computer
Connecting your turntable to your computer is a pivotal stage in the process of converting vinyl to digital music, as it establishes the crucial link between the analog audio output of the turntable and the digital recording capabilities of the computer. By seamlessly integrating these components, you pave the way for capturing the timeless melodies encapsulated within your vinyl records and transforming them into pristine digital audio files. Here's a detailed guide to effectively connect your turntable to your computer, ensuring a smooth and reliable transition from analog to digital:
-
Select the Audio Interface: Begin by selecting an appropriate audio interface that accommodates the output from your turntable setup. Look for an audio interface with phono inputs or a dedicated phono preamp, as these features are essential for processing the phono-level signal generated by the turntable. Ensure that the audio interface is compatible with your computer and offers reliable connectivity options, such as USB or FireWire ports.
-
Establish the Connection: Using high-quality audio cables, connect the output of your turntable or phono preamp to the designated phono inputs on the audio interface. Take care to secure the connections and minimize signal interference, as clean and stable connections are essential for capturing the nuances of the vinyl audio with precision.
-
Connect the Audio Interface to Your Computer: Once the turntable setup is linked to the audio interface, connect the audio interface to your computer using the appropriate interface cable, such as USB or FireWire. Ensure that the audio interface is recognized by your computer and that the necessary drivers are installed to facilitate seamless communication between the turntable setup and the recording software.
-
Configure Input Settings: Access the audio input settings on your computer and select the audio interface as the input device for recording. Verify that the input levels are appropriately set to capture the audio signal from the turntable without distortion or clipping. Additionally, ensure that the sample rate and bit depth settings align with your recording preferences and the capabilities of your audio interface.
-
Test the Connection: Before proceeding with the recording process, conduct a brief test to verify the integrity of the connection between your turntable setup and the computer. Play a vinyl record on the turntable and monitor the input levels within the recording software to confirm that the audio signal is being accurately captured by the computer.
By meticulously following these steps, you establish a robust and reliable connection between your turntable and computer, laying the groundwork for capturing the rich analog sound of your vinyl records and transforming it into high-fidelity digital audio files. This seamless integration of analog and digital technologies sets the stage for a transformative journey that celebrates the enduring allure of vinyl music within the realm of digital innovation.
Step 4: Choose Your Recording Software
Selecting the right recording software is a pivotal decision in the process of converting vinyl to digital music. The recording software serves as the digital canvas upon which the analog audio from your vinyl records is captured, edited, and transformed into pristine digital audio files. When choosing your recording software, several key factors should be considered to ensure a seamless and efficient conversion process.
First and foremost, prioritize a digital audio workstation (DAW) that offers intuitive and user-friendly functionality. The software interface should be accessible and navigable, allowing you to effortlessly manage recording, editing, and exporting tasks without unnecessary complexity. Look for features such as waveform visualization, track management, and real-time audio monitoring to streamline the recording process and provide a clear overview of the captured audio content.
Additionally, consider the editing capabilities offered by the recording software. Opt for a DAW that provides comprehensive audio editing tools, including noise reduction, equalization, and dynamic processing. These features are essential for refining the captured audio from vinyl records, allowing you to enhance the sound quality, remove imperfections, and achieve a faithful representation of the original recordings in digital format.
Compatibility with various audio file formats is another crucial aspect to consider when choosing recording software. Ensure that the DAW supports common audio formats such as WAV, AIFF, and FLAC, as well as popular compressed formats like MP3 and AAC. This versatility enables you to save your digital audio files in formats that are compatible with a wide range of playback devices and platforms, ensuring accessibility and convenience for future listening.
Furthermore, seek recording software that offers robust file management and organization features. The ability to categorize, label, and archive your digital audio files within the software environment facilitates efficient post-recording tasks, such as cataloging your vinyl collection, creating playlists, and adding metadata to the digital files for easy identification and retrieval.
Lastly, consider the technical support and community resources available for the recording software. Opt for a DAW that is backed by responsive customer support and an active user community, providing access to tutorials, forums, and troubleshooting resources. This ensures that you can effectively navigate any challenges or inquiries that may arise during the vinyl-to-digital conversion process, maximizing the potential of the recording software.
By carefully evaluating these factors and selecting recording software that aligns with your specific needs and preferences, you lay a solid foundation for capturing the timeless melodies of your vinyl records and preserving them in the digital realm. The chosen recording software becomes a vital tool in the transformation of analog music into a versatile and enduring digital format, marking a significant milestone in the journey of vinyl-to-digital conversion.
Step 5: Adjust Your Recording Settings
Fine-tuning the recording settings is a critical phase in the process of converting vinyl to digital music, as it directly influences the quality and fidelity of the captured audio. By meticulously adjusting the recording settings, you can ensure that the nuances and intricacies of the vinyl records are faithfully preserved in the digital audio files, allowing for a seamless transition from analog to digital. Here's a detailed exploration of the essential recording settings that warrant careful attention:
1. Sample Rate and Bit Depth
The sample rate and bit depth settings determine the resolution and accuracy of the digital audio capture. When adjusting these settings, consider the balance between file size and audio quality. A higher sample rate (e.g., 44.1 kHz, 48 kHz, 96 kHz) and bit depth (e.g., 16-bit, 24-bit) yield greater fidelity but result in larger file sizes. Conversely, lower settings reduce file size but may compromise audio detail. Select sample rate and bit depth configurations that align with your preferences for audio quality and storage efficiency.
2. Input Levels and Gain Staging
Carefully calibrating the input levels during recording is crucial for capturing the vinyl audio signal without distortion or clipping. Adjust the input levels on your audio interface or recording software to ensure that the audio signal from the turntable setup is neither too quiet (resulting in a low signal-to-noise ratio) nor too loud (risking distortion). Additionally, consider the gain staging within your signal chain, optimizing the input levels at each stage to maintain a clean and balanced audio signal throughout the recording process.
3. Recording Format and Metadata
Select the desired recording format for your digital audio files, considering the compatibility with your playback devices and the intended use of the recordings. Common formats such as WAV, AIFF, and FLAC offer uncompressed audio quality, while compressed formats like MP3 and AAC prioritize file size efficiency. Furthermore, incorporate relevant metadata such as album title, artist name, track information, and genre to enrich the organizational and informational aspects of your digital music library.
4. Monitoring and Playback
Utilize the monitoring capabilities of your recording software or audio interface to ensure real-time assessment of the recorded audio. Monitor the playback of the vinyl records through your recording setup, verifying that the audio signal is accurately captured and free from anomalies. This real-time monitoring allows for immediate adjustments to recording settings, ensuring optimal audio capture throughout the vinyl-to-digital conversion process.
By meticulously adjusting these recording settings, you lay the groundwork for capturing the rich analog sound of your vinyl records with precision and fidelity. These settings empower you to tailor the digital audio capture to your specific preferences, balancing audio quality, file size, and organizational aspects to create a seamless and immersive digital music collection. As you navigate the intricacies of recording settings, you embark on a transformative journey that celebrates the timeless allure of vinyl music within the dynamic realm of digital innovation.
Step 6: Start Recording
With the foundational elements in place, the moment arrives to initiate the recording process, capturing the evocative melodies and sonic textures of your vinyl records in the digital domain. As you embark on this pivotal stage of the vinyl-to-digital conversion journey, meticulous attention to detail and a deep appreciation for the analog source material will guide your approach, ensuring that the essence of the original recordings is faithfully preserved in the digital realm.
Before commencing the recording, take a moment to center yourself in the musical experience that is about to unfold. Position the tonearm delicately over the lead-in groove of the vinyl record, poised to commence the sonic journey that will bridge the analog past with the digital present. As the stylus gently descends, the familiar crackle and warmth of the vinyl medium envelop the room, signaling the commencement of the recording process.
Within your chosen recording software, initiate the recording function with a deliberate click, marking the inception of the digital capture. As the stylus traverses the grooves of the vinyl, meticulously tracing the sonic landscapes etched into the record, the waveform visualization within the recording software comes to life, depicting the intricate contours of the analog audio as it is transformed into digital data.
Throughout the recording session, maintain a vigilant presence, attuned to the nuances and subtleties of the vinyl playback. Monitor the input levels within the recording software, ensuring that the audio signal is captured with optimal fidelity and dynamic range. As each track unfolds, from the gentle crackle of the lead-in to the crescendo of the final notes, the recording software becomes a conduit for preserving the ephemeral beauty of the vinyl experience in a timeless digital format.
Amidst the recording process, allow yourself to be immersed in the sonic tapestry emanating from the vinyl records, embracing the imperfections and idiosyncrasies that define the analog medium. Each pop, crackle, and imperceptible groove imperfection becomes a cherished artifact, encapsulating the authenticity and raw emotion embedded within the vinyl recordings.
As the final notes of the vinyl record fade into silence, gracefully lift the tonearm from the record surface, signifying the culmination of the recording process. With the digital audio files now captured and preserved, the essence of the vinyl records is immortalized in a format that transcends the limitations of physical media, ready to be shared, cherished, and perpetually enjoyed in the digital landscape.
In the act of recording, you have borne witness to the convergence of tradition and innovation, where the timeless allure of vinyl music is seamlessly transposed into the boundless possibilities of the digital realm. This transformative process celebrates the enduring legacy of vinyl records while embracing the accessibility and versatility of digital music, ensuring that the captivating melodies and cherished memories preserved within the vinyl medium continue to resonate across generations and technological epochs.
Step 7: Edit and Save Your Digital Files
With the digital audio files meticulously captured from your cherished vinyl records, the subsequent stage involves refining and organizing the recordings to ensure optimal playback quality and seamless integration into your digital music library. The process of editing and saving your digital files encompasses a series of essential tasks that elevate the captured audio to its full potential while preserving the authenticity of the original vinyl recordings.
1. Audio Editing and Enhancement
Upon completing the recording process, engage in comprehensive audio editing to refine the captured digital files. Utilize the editing capabilities of your recording software to address imperfections, such as clicks, pops, and surface noise inherent in vinyl records. Apply noise reduction techniques and equalization to enhance the overall clarity and fidelity of the audio, ensuring a pristine listening experience devoid of distracting artifacts.
2. Track Segmentation and Metadata
Divide the continuous audio capture into individual tracks, mirroring the structure of the original vinyl record. Implement precise track segmentation within the digital files, allowing for seamless navigation and playback of individual songs. Additionally, incorporate relevant metadata such as track titles, artist names, album information, and genre classifications to enrich the organizational aspects of your digital music library, facilitating effortless identification and categorization of the recordings.
3. File Format Selection and Archiving
Select the appropriate file format for your digital audio files, considering the balance between audio quality and storage efficiency. Opt for uncompressed formats such as WAV or AIFF to preserve the highest fidelity, or choose compressed formats like MP3 or AAC to minimize file size while maintaining acceptable audio quality. Establish a systematic archiving strategy for your digital files, organizing them within a coherent folder structure and implementing backup measures to safeguard against data loss or corruption.
4. Quality Assurance and Playback Verification
Conduct thorough quality assurance checks on the edited digital files, ensuring that the audio enhancements and metadata incorporation align with your expectations. Verify the playback integrity of the digital files across various media players and devices, confirming that the recordings retain their sonic integrity and organizational coherence. Address any discrepancies or anomalies through iterative refinement, ensuring that the final digital files reflect the essence and fidelity of the original vinyl recordings.
5. Storage and Accessibility
Establish a dedicated storage solution for your digital music library, whether it involves local storage on your computer, external hard drives, or cloud-based platforms. Prioritize accessibility and redundancy, ensuring that your digital files are readily available for playback across multiple devices and locations. Implement comprehensive backup protocols to safeguard against data loss, preserving the timeless musical treasures encapsulated within your digital music collection.
By meticulously navigating the intricacies of editing and saving your digital files, you elevate the captured audio from its analog origins to a refined and enduring digital format. This transformative process celebrates the enduring legacy of vinyl records while embracing the accessibility and versatility of digital music, ensuring that the captivating melodies and cherished memories preserved within the vinyl medium continue to resonate across generations and technological epochs.
Conclusion
In the culmination of this transformative journey, we have traversed the intersection of tradition and innovation, where the timeless allure of vinyl music converges with the boundless possibilities of the digital realm. The process of converting vinyl to digital music transcends mere technicality; it embodies a profound appreciation for the artistry and nostalgia encapsulated within vinyl records, while embracing the accessibility and versatility of digital audio.
As we reflect on the meticulous steps undertaken to convert vinyl records into pristine digital files, we are reminded of the enduring legacy and emotional resonance embedded within the analog medium. From the delicate calibration of turntable components to the seamless integration of analog and digital technologies, each stage of the conversion process has been imbued with a deep reverence for the intrinsic beauty of vinyl music.
The act of capturing the evocative melodies and sonic textures of vinyl records in the digital domain represents a harmonious convergence of past and present, where the authenticity of the analog source material is meticulously preserved while transcending the limitations of physical media. The crackle of the lead-in groove, the subtle imperfections of the vinyl surface, and the raw emotion embedded within each track have been immortalized in a format that transcends the constraints of time and space.
As the digital audio files, meticulously edited and organized, find their place within the digital music library, they become more than mere recordings; they are conduits for perpetuating cherished musical memories and sharing the timeless artistry of vinyl with a global audience. The seamless navigation and playback of individual tracks, enriched by meticulously incorporated metadata, ensure that the essence of the original vinyl experience is faithfully preserved in the digital landscape.
In the act of converting vinyl to digital music, we have not merely transposed analog sound into a digital format; we have preserved a cultural legacy, celebrated the enduring allure of vinyl records, and ensured that the captivating melodies and cherished memories encapsulated within the vinyl medium continue to resonate across generations and technological epochs.
As we conclude this transformative journey, we are reminded that the convergence of analog charm and digital innovation represents not just a technical process, but a profound celebration of musical artistry and a testament to the enduring legacy of vinyl records in the digital age. This journey has been a testament to the enduring legacy of vinyl records in the digital age, and a celebration of the timeless allure of vinyl music within the dynamic realm of digital innovation.