Home>Devices & Equipment>Radio>Why Does My Car Radio And Clock Keep Resetting
Radio
Why Does My Car Radio And Clock Keep Resetting
Modified: January 22, 2024
Discover the possible reasons why your car radio and clock keep resetting. Find out how to troubleshoot the issue and get it fixed quickly.
(Many of the links in this article redirect to a specific reviewed product. Your purchase of these products through affiliate links helps to generate commission for AudioLover.com, at no extra cost. Learn more)
Table of Contents
- Introduction
- Possible Causes
- Electrical Issues
- Faulty Wiring
- Battery Problems
- Insufficient Grounding
- Faulty Radio Unit
- Clock Malfunction
- Diagnosing the Problem
- Testing the Battery
- Checking the Wiring
- Examining the Radio Unit
- Troubleshooting Steps
- Resolving Electrical Issues
- Repairing Faulty Wiring
- Replacing the Battery
- Improving Grounding Connection
- Fixing the Radio Unit
- Fixing the Clock Malfunction
- Conclusion
Introduction
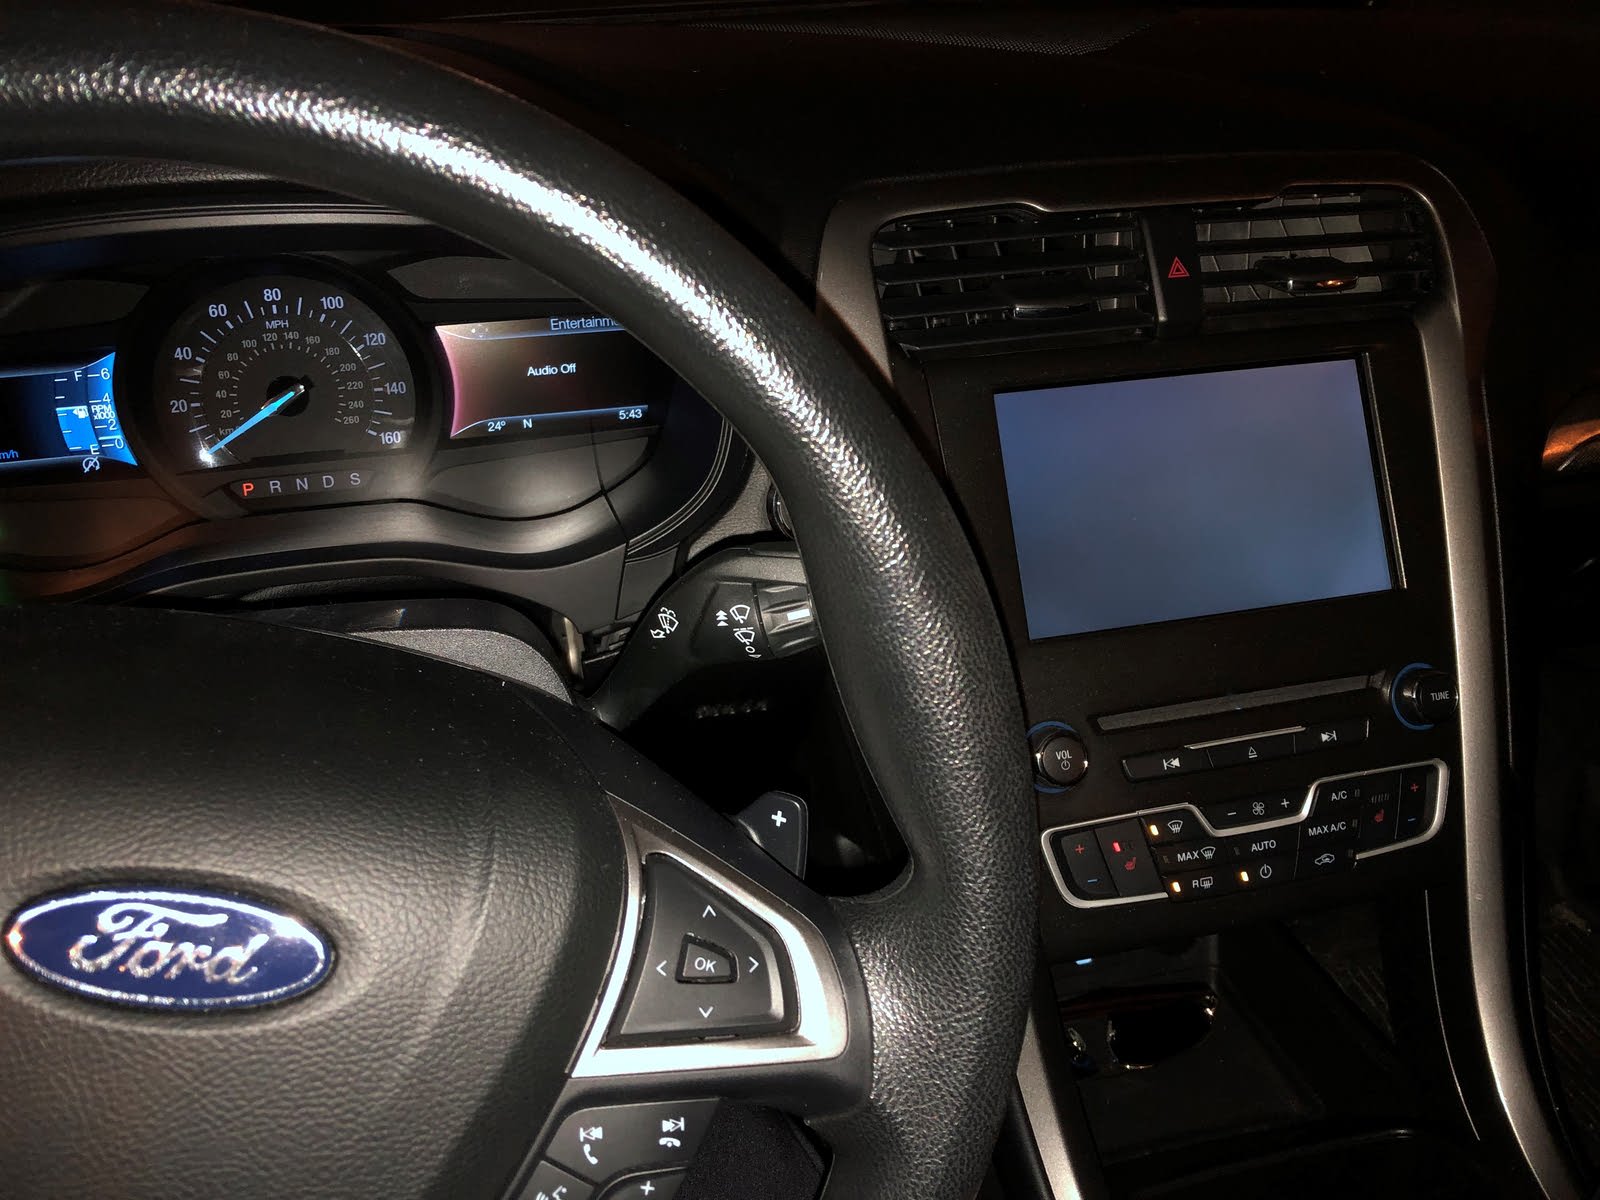
Have you ever experienced the frustration of getting into your car, only to find that your radio and clock have mysteriously reset? It’s a common issue that many car owners face, but what causes this annoying problem? In this article, we will explore the possible reasons behind why your car radio and clock keep resetting, and discuss potential solutions to help you get your car’s audio system back in order.
When your car radio and clock reset, it means that the electrical power to these components has been interrupted. This can be caused by a variety of factors, including electrical issues, faulty wiring, battery problems, insufficient grounding, or even a malfunctioning radio unit or clock itself. Understanding the root cause of the issue can help you determine the best course of action to resolve it.
In the following sections, we will dive deeper into each possible cause and explore the steps you can take to diagnose and fix the problem. It’s important to note that while some issues can be resolved with simple troubleshooting, others may require assistance from a professional car technician or electrician.
So, if you’re tired of constantly resetting your car radio and clock, keep reading to uncover the possible causes behind this frustrating issue and learn how you can resolve it effectively.
Possible Causes
When your car radio and clock keep resetting, there can be several potential causes for this issue. Here are some of the common culprits:
- Electrical Issues: One of the most common causes of a resetting car radio and clock is electrical issues. These issues can include power surges, voltage drops, or fluctuations in the electrical system of your vehicle. These fluctuations can disrupt the power supply to the radio and clock, causing them to reset.
- Faulty Wiring: Another possible cause is faulty wiring. Over time, the wiring in your car can wear out or become damaged, leading to inconsistent power delivery to the radio and clock. If there are any loose connections or frayed wires, it can result in frequent resetting of these components.
- Battery Problems: A weak or dying battery can also contribute to the resetting of the car radio and clock. If the battery is not providing a stable and consistent power supply, it can cause a reset every time the car is started or when there is an electrical demand on the system.
- Insufficient Grounding: Proper grounding is essential for the optimal functioning of the electrical components in your car. If there is a poor or inadequate ground connection, it can lead to voltage irregularities and cause the radio and clock to reset intermittently.
- Faulty Radio Unit: In some cases, the issue may lie with the radio unit itself. A malfunctioning radio can cause the clock and other settings to reset regularly. If other electrical components in your car are working fine, the problem may be isolated to the radio unit.
- Clock Malfunction: Lastly, it’s essential to consider the possibility of a clock malfunction. If the clock itself is faulty or has an internal issue, it can cause it to constantly reset or display incorrect time.
Now that we have an understanding of the possible causes behind your car radio and clock resetting, the next step is to diagnose the problem and implement the necessary solutions. In the following sections, we will explore how you can troubleshoot and resolve each potential cause effectively.
Electrical Issues
One of the primary causes of a resetting car radio and clock is electrical issues. These issues can disrupt the power supply to these components, causing them to reset. Here are some steps you can take to address electrical problems:
1. Check for Power Surges: Power surges can occur when there is a sudden increase in electrical voltage. This can happen due to various reasons such as faulty wiring, lightning strikes, or problems with the power supply. If you suspect power surges to be the cause of your radio and clock resetting, consider installing a voltage stabilizer or surge protector to regulate the electrical flow.
2. Test the Fuse: The radio and clock in your car are typically connected to a fuse. If this fuse is blown or damaged, it can cause power interruptions, resulting in resetting. Locate the fuse box in your car and check the fuse corresponding to the audio system. If you find a blown fuse, replace it with a new one of the same rating.
3. Inspect the Alternator: The alternator plays a crucial role in charging the car battery while the engine is running. A faulty alternator can result in inadequate power supply, causing the radio and clock to reset. Use a multimeter to check the voltage output of the alternator and ensure it is within the recommended range.
4. Address Battery Terminal Issues: Loose or corroded battery terminals can lead to unstable power flow, causing the radio and clock to reset. Ensure that the battery terminals are clean and tightly connected to the battery posts. If needed, clean the terminals and apply a corrosion-resistant coating.
5. Consult a Professional: If you are experiencing persistent electrical issues or are uncertain about performing the checks yourself, it is advisable to seek the assistance of a professional car electrician. They will have the expertise and tools to accurately diagnose and resolve any electrical problems that may be causing the resetting of your car radio and clock.
By addressing electrical issues promptly, you can stabilize the power supply to your car’s audio system and prevent frequent resets. In the next sections, we will explore other potential causes and their respective troubleshooting steps to help you get your radio and clock back on track.
Faulty Wiring
Faulty wiring is another potential cause of a resetting car radio and clock. Over time, the wiring in your car can deteriorate, leading to power inconsistencies and interruptions. Here are some steps you can take to address faulty wiring issues:
1. Visual Inspection: Start by visually inspecting the wiring in your car. Look for any signs of wear, fraying, or damage. Pay close attention to the wiring near the radio and clock. If you notice any issues, such as exposed wires or loose connections, it may be the cause of the resetting problem.
2. Check Connection Points: Ensure that all wiring connections are secure and properly attached. Loose connections can cause intermittent power supply, leading to resets. Gently tug on the wires to ensure they are firmly connected. If you identify any loose or disconnected wires, reconnect them properly.
3. Repair or Replace Damaged Wiring: If you find any damaged or frayed wires during the visual inspection, it’s crucial to repair or replace them. Cut out the damaged portion of the wire and use wire connectors or electrical tape to secure the connection. If the damage is extensive, consider replacing the entire wire with a new one.
4. Seek Professional Help: If you are not confident in your ability to address faulty wiring issues, or if you are unable to locate the source of the problem, it is best to consult a professional car electrician. They will have the expertise and specialized tools to diagnose and repair any wiring issues accurately.
Faulty wiring can be a frustrating issue, but by carefully inspecting and repairing any damaged or loose connections, you can rectify the problem and prevent your car radio and clock from resetting. In the next sections, we will explore other possible causes and their respective troubleshooting steps to help you resolve the issue effectively.
Battery Problems
Weak or faulty battery can contribute to the resetting of your car radio and clock. If the battery is not providing a stable and consistent power supply, it can lead to frequent resets. Here are some steps you can take to address battery problems:
1. Test the Battery Voltage: Use a digital multimeter to check the voltage of your car battery. A healthy battery should have a voltage reading of around 12.6 volts when the engine is off. If the voltage is significantly lower, it may indicate a weak or dying battery that needs to be replaced.
2. Check Battery Connections: Ensure that the battery terminals are clean and tightly connected. Loose or corroded connections can lead to inadequate power flow, resulting in resets. Clean any corrosion from the terminals using a mixture of baking soda and water, and tighten the terminals if needed.
3. Charge or Replace the Battery: If the battery voltage is low, you can try charging it with a battery charger. However, if the battery no longer holds a charge or is consistently causing resets, it may be necessary to replace it with a new one.
4. Inspect the Battery Cables: Examine the battery cables for any signs of damage or corrosion. Damaged cables can lead to voltage irregularities and affect the power supply to the radio and clock. If the cables are in poor condition, it’s recommended to replace them with new ones.
5. Address Parasitic Battery Drain: Parasitic battery drain refers to the continuous drain of power from the battery when the car is not in use. Excessive parasitic drain can lead to a weak or dead battery, causing resets. Consult a professional to identify and rectify any excessive battery drain issues.
6. Consider Using a Battery Maintenance Device: You can also invest in a battery maintenance device, such as a trickle charger or battery tender, to help keep your battery charged and in optimal condition. These devices can prevent battery drain and help prolong its lifespan.
By addressing battery problems promptly and ensuring a stable power supply, you can prevent the frequent resetting of your car radio and clock. In the next sections, we will explore other potential causes and their respective troubleshooting steps to help you resolve the issue effectively.
Insufficient Grounding
Insufficient grounding can contribute to the resetting of your car radio and clock. Proper grounding is crucial for the optimal functioning of the electrical components in your vehicle. Here are some steps you can take to address insufficient grounding:
1. Check Grounding Connections: Inspect the grounding connections of your car’s electrical system. Ensure that the ground cables are securely connected to the chassis or designated grounding points. Loose or corroded ground connections can result in voltage irregularities that cause the radio and clock to reset. Clean any corrosion and tighten the connections if needed.
2. Improve Grounding Path: In some cases, the factory grounding point may not provide sufficient grounding for the electrical components. Consider adding additional grounding wires from the radio and clock to a more solid and secure grounding point on the chassis. This can help improve the stability of the power supply and prevent resets.
3. Use Grounding Straps or Plates: Grounding straps or plates can be used to enhance the grounding connection. These are conductive metal strips or plates that can be attached to the radio and clock, providing a direct and reliable grounding path. Consult a professional or refer to your car’s manual for guidance on proper installation and placement of grounding straps or plates.
4. Seek Professional Assistance: If you are unsure about how to improve the grounding connection or if you have difficulty locating the grounding points in your vehicle, it is advisable to seek the help of a professional car electrician. They will have the necessary knowledge and expertise to ensure proper grounding and address any grounding-related issues effectively.
By improving the grounding connection for your car’s electrical system, you can stabilize the power supply to the radio and clock, preventing frequent resets. In the next sections, we will explore other possible causes and their respective troubleshooting steps to help you resolve the issue effectively.
Faulty Radio Unit
If you have ruled out electrical issues, faulty wiring, and battery problems as the causes of your car radio and clock resetting, it’s possible that the issue lies with the radio unit itself. A malfunctioning radio can cause frequent resets and disruptions in the audio system. Here are some steps you can take to address a faulty radio unit:
1. Check for Loose Connections: Ensure that all the connections to the radio unit, including power and ground, are secure. Loose connections can result in intermittent power supply and cause the radio and clock to reset. Gently push and wiggle the connectors to ensure they are properly seated.
2. Reset the Radio Unit: Many radio units have a reset function that can be accessed through the menu settings or by pressing a dedicated reset button. Follow the instructions in your car’s manual to perform a reset. This can help resolve minor software glitches that may be causing the resets.
3. Update or Reinstall Firmware: If your radio unit has firmware that can be updated, check for any available updates. Updating the firmware can address software bugs and improve the overall performance of the radio unit. If the radio unit does not have the option for firmware updates, consider reinstalling the factory firmware to rule out any software-related issues.
4. Seek Professional Repair: If the above steps do not resolve the issue, it may be necessary to seek professional repair for the radio unit. A professional car audio technician or the manufacturer’s authorized service center can diagnose and repair any internal faults or hardware issues with the radio unit.
5. Consider Replacement: If the radio unit is beyond repair or if the cost of repair is significantly high, you may consider replacing the unit with a new one. When purchasing a new radio unit, ensure compatibility with your car’s make and model, and consult a professional for proper installation.
It’s worth noting that if other electrical components in your car are working fine, and the radio unit is the only component experiencing issues, it is more likely that the problem lies with the radio unit itself. By addressing a faulty radio unit, you can restore the audio system’s functionality and prevent constant resets of the radio and clock.
In the next section, we will explore another potential cause and its troubleshooting steps to help you resolve the issue effectively.
Clock Malfunction
When your car radio and clock keep resetting, it’s essential to consider the possibility of a clock malfunction. If the clock itself is faulty or has an internal issue, it can cause constant resets or display incorrect time. Here are some steps you can take to address clock malfunctions:
1. Adjust the Clock Settings: Start by adjusting the clock settings in your car’s audio system. Make sure the time and date are set correctly. Sometimes, a simple adjustment can resolve minor malfunctions and prevent frequent resets.
2. Perform a Factory Reset or System Update: Some car audio systems allow you to perform a factory reset or system update that can address software-related issues. Check your car’s manual or consult the manufacturer’s website for instructions on how to perform a factory reset or update the audio system.
3. Check for Loose Connections: Inspect the connections of the clock display or control unit. Ensure that all cables and connectors are securely connected. Loose connections can cause intermittent functionality or resets. If you find any loose connections, gently push and wiggle the connectors to ensure a proper fit.
4. Replace the Clock Display or Control Unit: If the clock malfunctions persist, it may be necessary to replace the clock display or control unit. Consult a professional car audio technician or the manufacturer’s authorized service center to assist with the replacement. They can identify any hardware issues and recommend the appropriate replacement parts.
5. Consider an External Clock: If all else fails, you could consider using an external clock instead of relying on the built-in clock in your car’s audio system. External clocks, such as digital or analog car clocks, can be easily installed and provide an alternative solution for keeping time accurately in your vehicle.
It’s important to note that a clock malfunction is less common compared to other causes, such as electrical issues or faulty wiring. However, it’s worth investigating and addressing any potential clock-related problems to ensure accurate timekeeping and prevent the constant resetting of your car radio and clock.
In the next section, we will explore how to diagnose the problem and provide troubleshooting steps to help you resolve the issue effectively.
Diagnosing the Problem
When your car radio and clock keep resetting, it’s important to diagnose the problem accurately before implementing any solutions. Here are the steps you can take to diagnose the issue:
1. Assess the Pattern: Pay attention to when the resets occur. Do they happen randomly or only when you start the car? Are there any specific actions or events that seem to trigger the resets? Understanding the pattern can help narrow down the possible causes.
2. Check Other Electrical Components: Test other electrical components in your car, such as the lights, power windows, and dashboard display. If these components are also experiencing issues, it suggests a broader electrical problem. If they are functioning normally, the issue may be isolated to the radio and clock.
3. Test the Battery: Use a digital multimeter to check the voltage of your car battery. A weak or dying battery can cause resets in the radio and clock. If the battery voltage is significantly low, it may indicate a battery issue that needs to be addressed.
4. Inspect Wiring and Connections: Conduct a visual inspection of the wiring and connections related to the radio and clock. Look for any signs of damage, loose connections, or frayed wires. Ensure that all connections are secure and properly attached.
5. Consult a Professional: If you are unable to identify the cause of the resets or if you are unsure about performing diagnostic tests yourself, it is recommended to consult a professional car technician. They will have the expertise and tools to accurately diagnose the problem and recommend the appropriate solutions.
By diagnosing the problem correctly, you can target the root cause and implement the most effective solutions. In the following sections, we will explore troubleshooting steps for each potential cause we discussed earlier, allowing you to resolve the issue and enjoy uninterrupted usage of your car radio and clock.
Testing the Battery
One of the potential causes of a resetting car radio and clock is a weak or faulty battery. Testing the battery is a crucial step in diagnosing the issue. Here’s how you can test the battery in your car:
1. Gather the Required Tools: To test the battery, you will need a digital multimeter, also known as a voltmeter.
2. Prepare the Multimeter: Set the multimeter to the DC voltage mode and make sure it is set to the appropriate range for car batteries (usually 12 volts).
3. Check the Battery Voltage: Start by turning off all electrical components in the car, including the radio and lights. Attach the positive (+) probe of the multimeter to the positive terminal of the battery and the negative (-) probe to the negative terminal. Observe the voltage reading on the multimeter.
- If the voltage reading is between 12.4 and 12.7 volts, the battery is healthy and fully charged.
- If the voltage reading is below 12.4 volts, the battery may be weak and require charging.
- If the voltage reading is significantly lower than 12 volts, it indicates a battery that is discharged or failing and may need replacing.
4. Load Test the Battery: If the voltage reading is within the acceptable range, you can also perform a load test to assess the battery’s ability to deliver power under a load. This test can be done using a specialized load tester or by turning on the headlights and measuring the voltage drop across the battery terminals.
5. Interpret the Results: Based on the voltage readings and load test results, you can determine if the battery is in good condition, needs charging, or requires replacement.
If the battery is weak or failing, it can cause intermittent resets of the car radio and clock. In such cases, charging the battery or replacing it with a new one may be necessary to resolve the issue.
Remember that if you are unsure about performing the battery test yourself or if you don’t have access to a multimeter, it is recommended to seek assistance from a professional car technician. They will have the necessary tools and expertise to accurately test and diagnose any battery-related problems.
In the following sections, we will explore other troubleshooting steps for different potential causes to help you resolve the issue with your car radio and clock effectively.
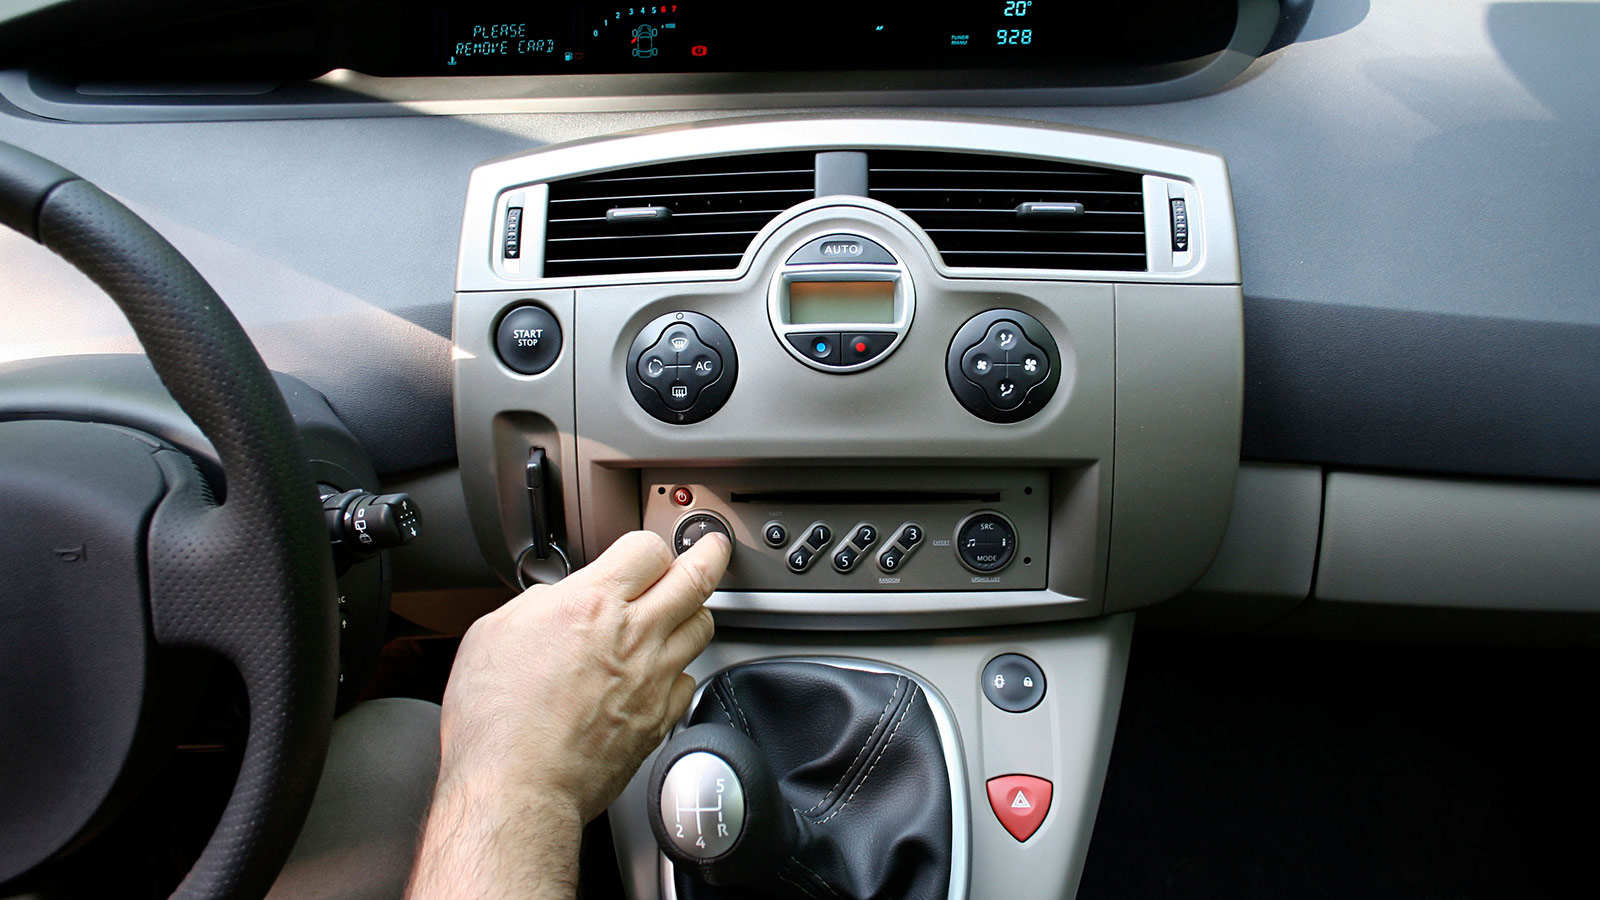
Checking the Wiring
Faulty wiring is a potential cause of a resetting car radio and clock. To address this issue, it’s important to check the wiring in your vehicle. Here are the steps to check the wiring:
1. Visual Inspection: Begin by visually inspecting the wiring in and around the radio and clock area. Look for any signs of damage, such as frayed wires, exposed conductors, or loose connections.
2. Check Connection Points: Ensure that all wiring connections are secure and tightly connected. Start by checking the connections at the radio and clock itself. Gently tug on the wires to ensure they are firmly connected. If you find any loose or disconnected wires, reconnect them properly.
3. Verify Ground Connections: Check the grounding connections of the radio and clock. Ensure that the ground cable is securely connected to the vehicle’s chassis or designated grounding points. A poor ground connection can result in voltage irregularities and cause resets. Clean any corrosion from the grounding point and ensure a tight and clean connection.
4. Look for Wiring Damage: Inspect the wiring for any noticeable damage, such as cuts, abrasions, or burns. Damaged wiring can lead to inconsistent power delivery and cause resets. If you find any damaged wires, they will need to be repaired or replaced.
5. Test Wire Continuity: Using a multimeter, you can test the continuity of the wires. Set the multimeter to the continuity or resistance mode and probe the wires at different connection points. A reading of “0” or very low resistance indicates that the wire is intact and properly connected. If you encounter a high resistance or an open circuit, it indicates a break in the wire and will require repair or replacement.
6. Seek Professional Assistance: If you are unsure about checking the wiring yourself or if you are unable to locate the source of the problem, it is recommended to consult a professional car electrician. They have the expertise and specialized tools to accurately diagnose and repair any wiring issues.
By thoroughly checking the wiring, you can identify any faults or loose connections that may be causing the resetting of your car radio and clock. Addressing these wiring issues promptly can help restore proper functionality to your audio system.
In the following sections, we will explore more troubleshooting steps for other potential causes to help you resolve the issue effectively.
Examining the Radio Unit
If you have ruled out electrical issues and faulty wiring as the cause of your car radio and clock resetting, it’s time to examine the radio unit itself. A malfunctioning radio can be a potential culprit. Here are the steps to examine the radio unit:
1. Verify All Connections: Ensure that all connections to the radio unit are secure and properly attached. Check the power, ground, and antenna connections to ensure they are tightly connected. Loose connections can lead to intermittent power supply and cause resets.
2. Assess the Display: Check the display of the radio unit for any obvious signs of malfunction. Look for flickering, distorted characters, or a dim display. If the display is not functioning properly, it may indicate an internal issue with the radio unit.
3. Test Other Functions: Operate all the functions of the radio unit, such as tuning, volume control, and CD player (if applicable). Make note of any abnormal behavior, such as static, skipping, or erratic behavior. This information can help in identifying potential faults.
4. Reset the Radio Unit: Many radio units have a reset function that can be accessed through the menu settings or by pressing a dedicated reset button. Performing a reset can help resolve software glitches or temporary malfunctions that may be causing the resets. Follow the instructions in your car’s manual to perform a reset.
5. Update the Firmware: Check if there are any firmware updates available for your radio unit. Manufacturers sometimes release firmware updates that address known issues and improve the overall performance of the unit. If updates are available, follow the manufacturer’s instructions to update the firmware.
6. Consult a Professional: If the above steps do not resolve the issue, it may be necessary to seek professional assistance. A professional car audio technician or the manufacturer’s authorized service center can diagnose and repair any internal faults or hardware issues with the radio unit.
Remember, a malfunctioning radio unit is less common compared to other causes, but it’s important to examine this component to rule out any internal issues that may be causing the resetting of your car radio and clock.
In the next section, we will explore more troubleshooting steps for another potential cause to help you resolve the issue effectively.
Troubleshooting Steps
When your car radio and clock keep resetting, troubleshooting the issue can help identify the root cause and guide you towards finding a solution. Here are some general troubleshooting steps you can follow:
1. Verify Power Supply: Ensure that the car’s electrical system is providing a stable and adequate power supply to the radio and clock. Check for any blown fuses, loose connections, or other electrical issues that may disrupt power delivery.
2. Perform System Resets: Reset the radio unit and the clock to their factory settings. This can help address software glitches and restore proper functionality. Refer to the user manual for instructions on resetting the specific models of your radio unit and clock.
3. Disconnect and Reconnect Battery: Disconnect the car battery for a few minutes and then reconnect it. This can help reset the electrical system and may resolve minor glitches that are causing resets.
4. Check for Interference: External factors such as nearby electrical devices, electromagnetic interference, or poor antenna connections can cause disruptions to the radio and clock. Ensure that there are no sources of interference and check the antenna connections for any issues.
5. Inspect the Fuse Box: Check the fuse box in your car for any blown fuses related to the radio or clock. Replace any blown fuses with new ones of the appropriate rating. This can restore the power supply and prevent resets.
6. Consult the User Manual: Refer to the user manuals for your car’s audio system and clock for specific troubleshooting steps and tips provided by the manufacturer. The manuals may have additional information regarding common issues and their resolutions.
7. Seek Professional Assistance: If you have exhausted the troubleshooting steps and are still unable to resolve the issue, it is recommended to consult a professional car technician or an authorized service center. They have the expertise and specialized equipment to diagnose and repair complex electrical and audio system problems.
It’s important to note that the specific troubleshooting steps may vary depending on your car’s make, model, and audio system. Always refer to the appropriate user manuals and seek professional help when necessary.
By following these troubleshooting steps, you can narrow down the potential causes and hopefully identify a solution to the issue of your car radio and clock resetting.
Resolving Electrical Issues
Electrical issues can be a major cause of a resetting car radio and clock. Resolving these issues is crucial to restore proper functionality. Here are some steps you can take to address electrical problems:
1. Install a Voltage Stabilizer or Surge Protector: To protect against power surges or fluctuations, consider installing a voltage stabilizer or surge protector. These devices regulate and stabilize the electrical flow, preventing sudden spikes or drops that can cause resets.
2. Replace Blown Fuses: If you find any blown fuses related to the radio or clock, replace them with new ones of the correct rating. Blown fuses can disrupt the power supply and cause frequent resets. Regularly check and replace blown fuses to maintain a reliable power source.
3. Inspect the Alternator: The alternator plays a critical role in charging the car battery while the engine is running. A faulty alternator can result in insufficient power supply, leading to resets. Test the alternator’s voltage output to ensure it is within the recommended range. If necessary, have a professional check and repair the alternator.
4. Address Battery Terminal Issues: Loose or corroded battery terminals can cause unstable power flow, resulting in radio and clock resets. Clean the battery terminals using a mixture of baking soda and water, and tighten them securely. Consider using anti-corrosion products to prevent future corrosion.
5. Check Battery Health: Test the battery voltage using a multimeter to verify its health. If the battery is weak or not holding a charge, it may need to be replaced. Ensure the replacement battery has the correct specifications for your vehicle to maintain proper power supply.
6. Install an Upgraded Grounding Kit: Enhance the grounding connection by installing an upgraded grounding kit. These kits provide additional grounding points and improve the stability of the electrical system. Follow the manufacturer’s instructions for proper installation and connection.
7. Fix Loose or Damaged Wiring: Inspect the wiring connected to the radio and clock. If you find any loose or damaged wiring, repair or replace it as needed. Ensure all connections are secure and properly attached. Consider using electrical tape or wire connectors to secure connections.
If you are unsure or uncomfortable with performing any of these tasks, it is advisable to seek assistance from a professional car technician or electrician. They can accurately diagnose and resolve the electrical issues causing the resetting of your car radio and clock.
By resolving electrical issues, you can stabilize the power supply to your vehicle’s audio system and prevent the constant resetting of the radio and clock.
In the next section, we will explore troubleshooting steps for another potential cause to help you resolve the issue effectively.
Repairing Faulty Wiring
If faulty wiring is identified as the cause of your car radio and clock resetting, it is crucial to address the issue promptly. Here are the steps you can take to repair faulty wiring:
1. Gather the Necessary Tools: Before starting the repair, collect the tools you’ll need, such as wire strippers, electrical tape, wire connectors, and a digital multimeter for testing.
2. Disconnect the Battery: To ensure safety, disconnect the car battery before working on the wiring. This prevents any accidental short circuits or electrical shock.
3. Identify the Faulty Wiring: Using a visual inspection, trace the wiring related to the radio and clock. Look for any signs of damage, such as frayed insulation, burn marks, or loose connections.
4. Cut Out Damaged Sections: If you identify damaged wiring, carefully cut out the affected sections using wire strippers. Ensure that you remove enough of the damaged wire to have a clean, fresh section to work with.
5. Strip the Wire Ends: Strip the insulation from the wire ends using the wire strippers, exposing a small section of bare wire on each end. Make sure not to strip off too much insulation or damage the wire strands.
6. Connect the Wires: Use wire connectors or electrical tape to reconnect the wires. If using wire connectors, twist the corresponding wire ends together and insert them into the connector. Follow the manufacturer’s instructions for properly securing the wire connectors. If using electrical tape, wrap it tightly around the exposed wire ends, ensuring proper insulation.
7. Test the Connections: Once the repairs are complete, use a digital multimeter to test the continuity of the repaired wires. Set the multimeter to the continuity mode and touch the probe ends to the corresponding wire ends. A reading of “0” or low resistance indicates a successful and properly connected repair.
8. Reconnect the Battery: After verifying the repairs, reconnect the car battery and ensure that all wiring connections are secure. Double-check the connections and make sure they are tight and properly insulated to prevent future issues.
If you are unsure about repairing the faulty wiring yourself or if you encounter difficulties, it is recommended to seek assistance from a professional car electrician. They have the experience and knowledge to accurately diagnose and repair wiring issues.
By effectively repairing faulty wiring, you can prevent the constant resetting of your car radio and clock, ensuring a stable and reliable electrical connection.
In the next section, we will explore troubleshooting steps for another potential cause to help you resolve the issue effectively.
Replacing the Battery
If testing has indicated that a weak or faulty battery is causing your car radio and clock to reset, replacing the battery may be necessary. Here are the steps to replace the battery:
1. Ensure Safety: Before replacing the battery, make sure to turn off the engine and any electrical components in the car. Wear protective gloves and eye protection to prevent any acid or battery-related injuries.
2. Disconnect the Negative Terminal: Start by disconnecting the negative (-) terminal of the battery. Loosen the clamp nut with a wrench, then carefully remove the terminal from the battery post. Set it aside, ensuring it does not come into contact with the battery.
3. Disconnect the Positive Terminal: Next, disconnect the positive (+) terminal in the same manner as the negative terminal. Place the terminal away from the battery to avoid accidental contact.
4. Remove the Old Battery: Remove any holding brackets or clamps securing the battery in place. Gently lift the old battery out of the battery tray, taking care not to tip it or spill any battery acid.
5. Clean the Battery Tray: Inspect the battery tray for any corrosion or dirt. Use a mixture of baking soda and water or a battery terminal cleaner to clean the tray and eliminate any residue. Dry the tray thoroughly before proceeding.
6. Install the New Battery: Carefully place the new battery into the battery tray, ensuring it is oriented in the correct position. Secure the battery with any holding brackets or clamps that were removed earlier.
7. Connect the Positive Terminal: Attach the positive terminal (+) to the positive battery post. Tighten the clamp nut with a wrench to ensure a secure connection. Be cautious not to overtighten and damage the battery post.
8. Connect the Negative Terminal: Attach the negative terminal (-) to the negative battery post. Tighten the clamp nut to establish a secure connection. Again, avoid overtightening.
9. Test the Connections: Once the connections are secure, give them a slight tug to ensure they are properly fastened to the battery posts. A loose connection can lead to electrical issues and resets.
10. Turn on the Engine and Test: Start the engine and check that the car radio and clock function correctly without resetting. Monitor them for any further issues or resets over the following days.
If you are uncertain about performing the battery replacement yourself, it is recommended to seek assistance from a professional. They can ensure the battery replacement is done safely and efficiently.
By replacing the battery, you can provide a stable power source to your car’s electrical system, including the radio and clock, alleviating the resetting issue.
In the next section, we will explore troubleshooting steps for another potential cause to help you resolve the issue effectively.
Improving Grounding Connection
Insufficient grounding can lead to the resetting of your car radio and clock. To address this issue, it’s important to improve the grounding connection in your vehicle. Follow these steps to enhance the grounding connection:
1. Locate Existing Grounding Points: Identify the existing grounding points in your car. These are typically metal points on the chassis or body of the vehicle where electrical components are grounded.
2. Clean Grounding Points: Clean the grounding points using a wire brush or sandpaper. Remove any dirt, rust, or corrosion that may hinder the conductivity of the grounding connection. Ensure the surfaces are clean and shiny.
3. Attach Grounding Straps or Wires: Install additional grounding straps or wires to improve the grounding connection. These conductive metal straps or wires should be connected to the radio and clock and secured to a reliable grounding point. Use appropriate screws, bolts, or clamps to fasten the straps securely.
4. Consider Using Grounding Plates: Grounding plates are flat metal plates that can be used to create a direct and reliable grounding path. Attach grounding plates near the radio and clock and connect the grounding wires to them. Consult a professional or refer to your car’s manual for guidance on proper installation and placement.
5. Ensure Proper Contact: Check that all grounding connections are secure and making proper contact with the metal surface. Tighten screws or bolts as needed to ensure a tight fit. A poor connection can lead to voltage irregularities and cause resets.
6. Test the Grounding: Use a multimeter to test the grounding connection. Set the multimeter to the resistance or continuity mode and touch the probes to the grounding points and the grounding wires. A reading of zero or low resistance indicates a good grounding connection.
7. Seek Professional Help if Needed: If you are unsure about improving the grounding connection or if you encounter difficulties, it is advisable to seek assistance from a professional car electrician. They have the knowledge and expertise to ensure proper grounding and address any grounding-related issues effectively.
Enhancing the grounding connection in your car can help improve the stability of the electrical system, preventing frequent resets of the radio and clock. By following these steps, you can ensure a solid grounding connection and reduce the chances of electrical issues in your vehicle.
In the next section, we will explore troubleshooting steps for another potential cause to help you resolve the issue effectively.
Fixing the Radio Unit
If you have determined that the radio unit itself is the cause of your car radio and clock resetting, there are steps you can take to fix the issue. Here’s what you can do:
1. Check for Loose Connections: Ensure all connections to the radio unit are secure and properly attached. Inspect the power, ground, and antenna connections to ensure they are tightly connected. Loose connections can lead to intermittent power supply and cause resets.
2. Reset the Radio Unit: Many radio units have a reset function that can be accessed through the menu settings or by pressing a dedicated reset button. Performing a reset can help address software glitches or temporary malfunctions that may be causing the resets. Refer to the user manual for instructions on resetting your specific radio unit.
3. Update the Firmware: Check if there are any firmware updates available for your radio unit. Manufacturers sometimes release firmware updates that address known issues and improve the overall performance of the unit. If updates are available, follow the manufacturer’s instructions to update the firmware.
4. Consult the User Manual: Refer to the user manual for your radio unit to troubleshoot specific issues. The manual may provide troubleshooting steps, error codes, or common problems with their corresponding solutions. It may also guide you on how to perform advanced diagnostics to pinpoint the exact cause of the resets.
5. Seek Professional Repair: If the above steps do not resolve the issue, it may be necessary to seek professional repair for the radio unit. A professional car audio technician or the manufacturer’s authorized service center can diagnose and repair any internal faults or hardware issues with the radio unit.
6. Consider Replacing the Radio Unit: In situations where the radio unit cannot be repaired or the cost of repair is too high, you may consider replacing the unit with a new one. When purchasing a new radio unit, ensure compatibility with your car’s make and model, and consult a professional for proper installation.
Fixing the radio unit may require different approaches depending on the specific make and model. Always refer to the user manual for guidance or seek professional advice when needed.
In the next section, we will explore troubleshooting steps for another potential cause to help you resolve the issue effectively.
Fixing the Clock Malfunction
If you have identified a clock malfunction as the cause of your car radio and clock resetting, there are steps you can take to fix the issue. Here’s what you can do:
1. Adjust the Clock Settings: Start by adjusting the clock settings in your car’s audio system. Make sure the time and date are set correctly. Sometimes, a simple adjustment can resolve minor malfunctions and prevent frequent resets.
2. Perform a System Reset or Update: Many car audio systems allow for a factory reset or system update. Performing a reset can clear any internal glitches or software bugs causing the clock malfunction. Consult the user manual or the manufacturer’s website for instructions on how to perform a reset or update your specific car audio system.
3. Check for Loose Connections: Inspect the connections of the clock display or control unit. Ensure that all cables and connectors are securely connected. Loose connections can cause intermittent functionality or resets. If you find any loose or disconnected wires, reconnect them properly.
4. Test the Clock Functionality: Use the controls on the car’s audio system to manually adjust and set the clock. Verify if the clock maintains the correct time without resetting after setting it. Monitor the clock over a period of time to ensure it remains accurate and does not display any erratic behavior.
5. Consult the User Manual: Refer to the user manual for your car’s audio system and clock for specific troubleshooting steps and tips provided by the manufacturer. The manual may have additional information regarding common clock issues and their resolutions.
6. Seek Professional Assistance: If the clock malfunction persists or you are unable to resolve the issue on your own, it is recommended to seek the help of a professional car audio technician or the manufacturer’s authorized service center. They have the expertise and specialized tools to diagnose and repair any internal faults with the clock or the audio system.
Fixing a clock malfunction may involve performing software updates, adjusting settings, or inspecting connections. Always refer to the user manual for guidance or seek professional assistance if needed.
In the next section, we will conclude the article and summarize the potential causes and troubleshooting steps discussed to resolve the issue of a resetting car radio and clock.
Conclusion
Dealing with a resetting car radio and clock can be frustrating, but understanding the potential causes and following the appropriate troubleshooting steps can help you resolve the issue effectively. Throughout this article, we’ve explored several possible causes of the problem, including electrical issues, faulty wiring, battery problems, insufficient grounding, faulty radio unit, and clock malfunctions.
To address electrical issues, it’s important to ensure a stable power supply, check for blown fuses, inspect the alternator, address battery terminal issues, and improve grounding connections. In the case of faulty wiring, a thorough visual inspection, repairing or replacing damaged wiring, and ensuring secure connections are necessary.
Battery problems can be resolved by testing the battery, replacing it if necessary, and maintaining proper battery terminal connections. Insufficient grounding can be improved by cleaning existing grounding points, installing additional grounding straps or wires, and using grounding plates.
When dealing with a faulty radio unit, it’s crucial to check for loose connections, perform resets, update firmware, consult the user manual, and seek professional repair if needed. For clock malfunctions, adjusting settings, performing system resets, checking connections, and referring to the user manual are important troubleshooting steps.
Remember, each car and audio system may have specific quirks or requirements, so always consult the user manual or seek professional guidance for your specific situation. When necessary, do not hesitate to reach out to a professional car technician or an authorized service center for assistance.
By following the troubleshooting steps and addressing the underlying causes, you can restore the functionality of your car radio and clock, providing a smooth and uninterrupted audio experience during your drives.
Always stay alert while performing any repairs or maintenance on your vehicle, ensuring your safety and the proper functioning of your car’s electrical system. With patience and the appropriate measures, you can successfully resolve the issue of a resetting car radio and clock.