Home>Devices & Equipment>Subwoofer>How To Connect JBL 2.1 Subwoofer To Soundbar
Subwoofer
How To Connect JBL 2.1 Subwoofer To Soundbar
Published: January 22, 2024
Learn how to easily connect a JBL 2.1 subwoofer to your soundbar and elevate your audio experience. Find step-by-step instructions and troubleshooting tips for a seamless setup.
(Many of the links in this article redirect to a specific reviewed product. Your purchase of these products through affiliate links helps to generate commission for AudioLover.com, at no extra cost. Learn more)
Table of Contents
Introduction
Welcome to the exciting world of subwoofers! Whether you’re a music enthusiast, a gaming fanatic, or a movie lover, a subwoofer plays a crucial role in delivering deep, powerful bass that intensifies your audio experience. In this article, we will explore the intricacies of connecting a JBL 2.1 subwoofer to a soundbar, allowing you to unleash the full potential of your audio setup.
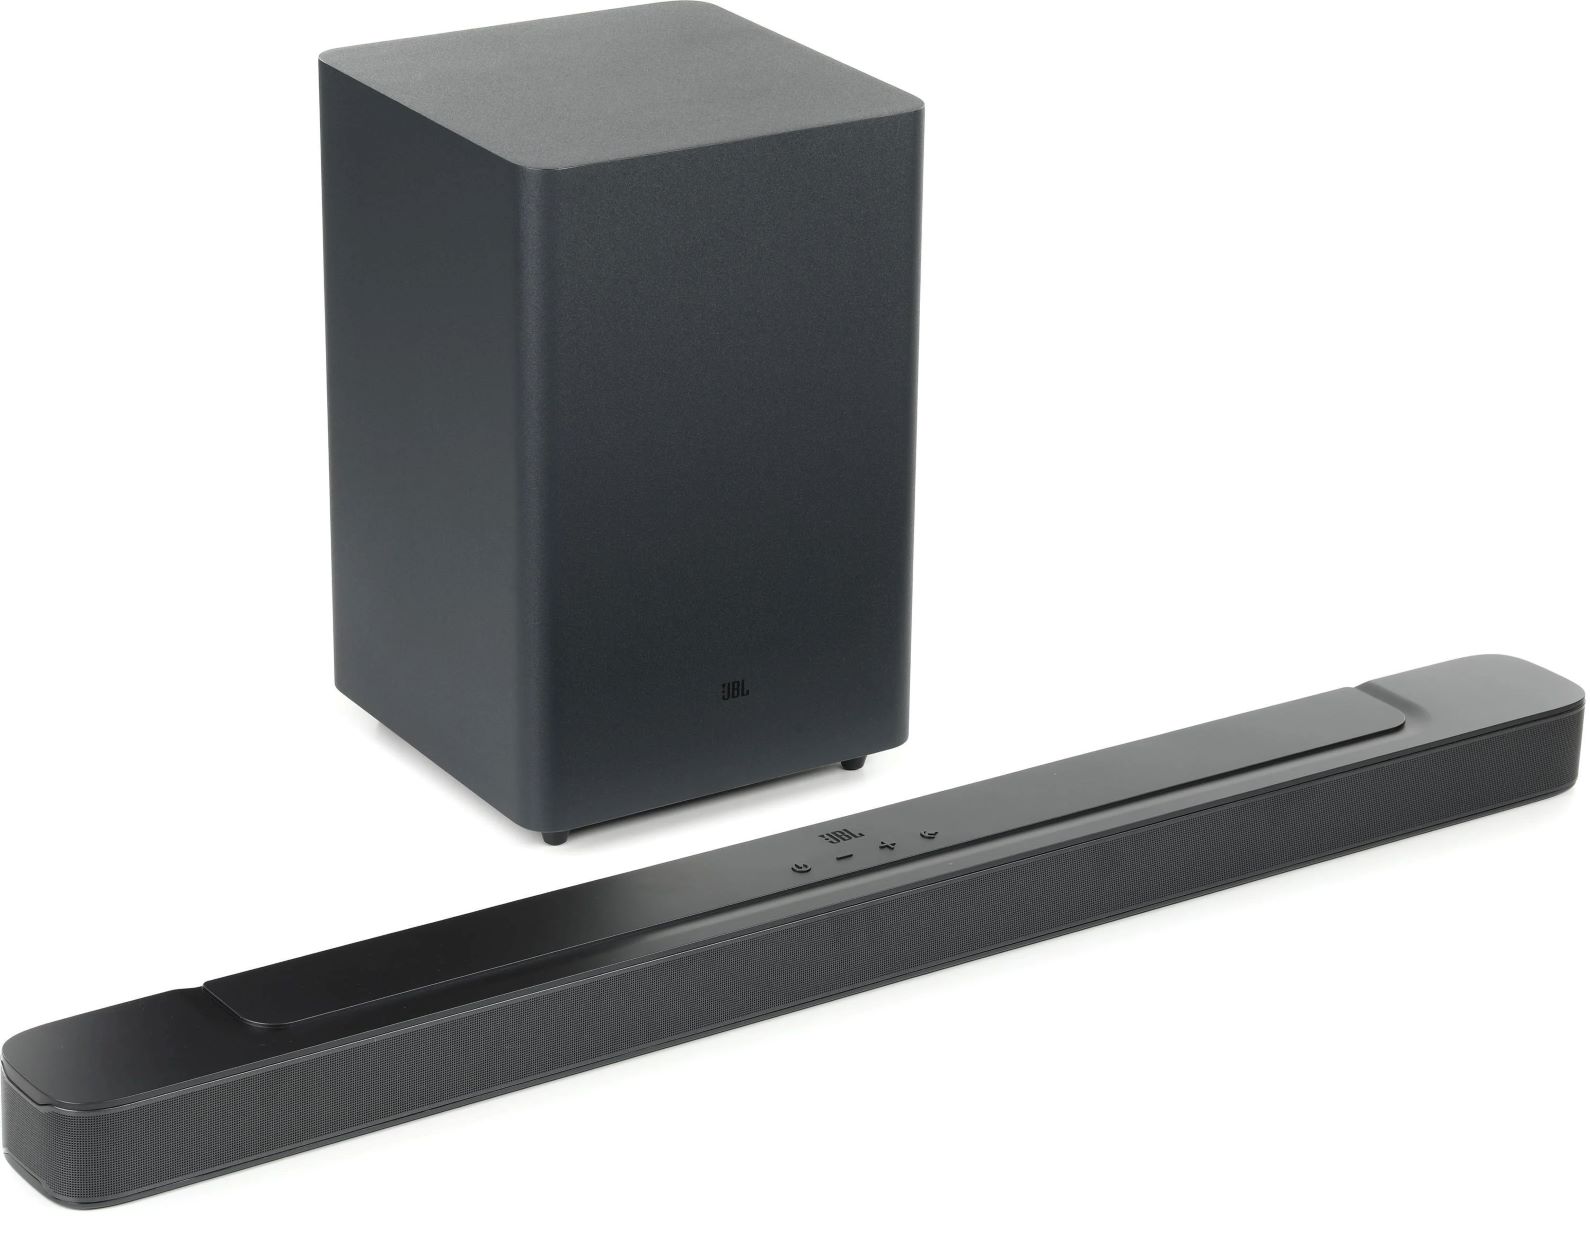
The JBL 2.1 subwoofer is known for its outstanding performance and reliability. It seamlessly integrates with JBL soundbars to produce immersive soundscapes, making you feel like you’re right in the heart of the action. By properly connecting your subwoofer to your soundbar, you can create a cinematic audio experience in the comfort of your own home.
Before we dive into the connection process, it’s important to check the compatibility of your JBL 2.1 subwoofer and soundbar. Make sure that both devices are from the same manufacturer and designed to work together. This ensures optimal compatibility and minimizes any potential issues during the setup.
To establish a successful connection, you’ll need a few essential cables. These cables will vary depending on the specific model of JBL soundbar and subwoofer you own. Here are the commonly required cables:
- Power Cable: This cable is used to provide power to both the subwoofer and soundbar.
- Audio Cable: Depending on your soundbar and subwoofer models, you may need an RCA, optical, or HDMI cable to transmit audio signals between the two devices.
- Subwoofer Cable: This cable is typically included with your JBL 2.1 subwoofer and is used to connect it to the soundbar specifically.
Now that you have a basic understanding of the equipment needed, let’s move on to the step-by-step process of connecting your JBL 2.1 subwoofer to your soundbar. So, grab your cables and let’s get started!
Compatibility
When it comes to connecting a subwoofer to a soundbar, ensuring compatibility between the two devices is crucial. Not all subwoofers and soundbars are designed to work together seamlessly, so it’s important to check for compatibility before attempting to connect them.
The JBL 2.1 subwoofer is specifically designed to be paired with JBL soundbars, ensuring optimal performance and compatibility. By using a JBL soundbar and subwoofer together, you can enjoy a seamless audio experience without any compatibility issues.
Before purchasing a JBL 2.1 subwoofer, make sure to check the compatibility with your existing or planned JBL soundbar model. JBL provides detailed specifications and compatibility information for their subwoofers and soundbars, so be sure to consult the manufacturer’s website or documentation for the specific models you own or are interested in.
If you already have a JBL soundbar, check whether it is compatible with the JBL 2.1 subwoofer. Generally, JBL soundbars that have a dedicated subwoofer output or support wireless subwoofer connectivity will be compatible with the JBL 2.1 subwoofer. However, it is always recommended to confirm compatibility using the manufacturer’s guidelines.
It’s worth noting that using a subwoofer from a different manufacturer may not provide the same level of compatibility and performance. Different brands may have varying technical specifications and communication protocols that could result in compatibility issues. To ensure a seamless setup, it is best to stick with subwoofers and soundbars from the same manufacturer or those explicitly stated as compatible by the manufacturer.
Additionally, double-check the power requirements of both the subwoofer and soundbar. Ensure that the subwoofer and soundbar are compatible with the power outlets in your home. Some subwoofers may require a separate power outlet, while others can be powered directly through the soundbar.
By ensuring compatibility between the JBL 2.1 subwoofer and your JBL soundbar, you can avoid any potential connectivity problems and enjoy a hassle-free audio experience. Now that you have confirmed compatibility, it’s time to gather the necessary cables for the connection process.
Required Cables
Before connecting your JBL 2.1 subwoofer to your soundbar, it’s important to gather the necessary cables to establish the connection. The specific cables required may vary depending on the models of your JBL subwoofer and soundbar, so it’s essential to check the documentation provided with your devices. Here are some commonly used cables for connecting the subwoofer to the soundbar:
- Power Cable: This cable is used to provide power to both the subwoofer and soundbar. Check the power requirements for both devices and ensure that the power cable matches the necessary specifications.
- Audio Cable: Depending on the available ports on your subwoofer and soundbar, you may need an audio cable to transmit the audio signals. The type of cable required could be RCA, optical, or HDMI, depending on the specific connections available on your devices. Make sure to use a high-quality cable to ensure optimal sound quality.
- Subwoofer Cable: In most cases, the JBL 2.1 subwoofer comes with a dedicated subwoofer cable. This cable is designed to connect the subwoofer to the soundbar specifically. It ensures a secure and reliable connection, allowing the soundbar to send low-frequency audio signals to the subwoofer for enhanced bass performance.
- Wireless Adapter (if applicable): Some JBL subwoofers offer wireless connectivity options. If your subwoofer includes a wireless adapter, ensure that it is properly connected and functioning. Refer to the manufacturer’s instructions for the correct setup and pairing process.
It’s crucial to use high-quality cables that are suited for audio purposes. This helps to minimize signal loss or interference and ensures that you get the best possible audio performance from your JBL 2.1 subwoofer and soundbar.
Before purchasing any additional cables, carefully review the documentation provided with your JBL subwoofer and soundbar. It will specify the exact cables you need for the connection process. If you’re unsure or have any questions, don’t hesitate to reach out to JBL’s customer support for expert assistance.
Now that you have the necessary cables ready, let’s move on to the step-by-step process of connecting your JBL 2.1 subwoofer to your soundbar and creating an immersive audio experience.
Connecting the Subwoofer to the Soundbar
Now that you have your JBL 2.1 subwoofer and soundbar ready, along with the required cables, it’s time to connect the subwoofer to the soundbar. Follow these step-by-step instructions to establish a successful connection:
- Ensure that both the subwoofer and soundbar are powered off and unplugged from the power source.
- Locate the subwoofer output port on the soundbar. This is typically labeled as “Sub Out” or “Subwoofer Out.”
- Connect one end of the subwoofer cable to the subwoofer output port on the soundbar.
- Locate the corresponding input port on the subwoofer itself. This is usually labeled as “Sub In” or “Subwoofer In.”
- Connect the other end of the subwoofer cable to the subwoofer input port on the subwoofer.
- Double-check that all connections are securely and properly made, ensuring a tight fit.
- Plug both the subwoofer and soundbar into a power outlet using their respective power cables.
- Power on the soundbar and subwoofer, either via the power buttons on the devices or using any included remotes.
- Once both devices are powered on, they should automatically recognize each other and establish a connection. The subwoofer will receive audio signals from the soundbar to produce deep bass.
It’s important to note that some JBL 2.1 subwoofers may offer wireless connectivity options. If your subwoofer supports wireless connection, refer to the manufacturer’s instructions on how to pair it with the soundbar. This eliminates the need for a physical subwoofer cable and provides more flexibility in positioning the subwoofer within your room.
After successfully connecting the subwoofer to the soundbar, take a moment to ensure everything is working correctly. Test the audio output and listen for the enhanced bass coming from the subwoofer. You can play some music, watch a movie, or even run a sound test to fully experience the immersive sound created by your JBL 2.1 setup.
If you encounter any issues during the connection process or the subwoofer is not producing sound, refer to the troubleshooting section of this article for possible solutions. Additionally, consult the user manual or contact JBL support for further assistance.
Now that you have connected your JBL 2.1 subwoofer to your soundbar, it’s time to fine-tune the settings to optimize the audio output. We will explore this in the next section.
Adjusting the Settings
After successfully connecting your JBL 2.1 subwoofer to your soundbar, it’s essential to adjust the settings to ensure optimal audio performance. By fine-tuning the settings, you can customize the sound to your preferences and create the perfect audio experience. Here’s how to adjust the settings:
- Access the settings menu on your JBL soundbar. This can typically be done using the remote control that came with your soundbar.
- Explore the sound settings options and locate the subwoofer settings. The specific location may vary depending on the model of your soundbar.
- Adjust the subwoofer volume to your liking. This controls the level of bass produced by the subwoofer. Experiment with different levels until you find a balance that suits your listening preferences.
- Some soundbars may offer additional settings for bass enhancement or equalizer adjustments. Explore these options to further fine-tune the audio output to your liking.
- If your JBL 2.1 subwoofer supports wireless connectivity, check the wireless settings to ensure a stable and reliable connection between the subwoofer and soundbar. Follow any instructions provided by the manufacturer to optimize the wireless performance.
- Make sure to save the settings once you’re satisfied with the adjustments. This ensures that your preferred settings are applied every time you power on the soundbar.
While adjusting the settings, it’s important to maintain a balanced audio output. Excessive bass can overpower the other frequencies and distort the sound. Experiment with different settings, but keep in mind the overall audio balance for the best listening experience.
If you’re unsure about the settings or want to achieve a specific sound profile, consult the user manual or reach out to JBL support for guidance. They can provide recommendations based on your specific soundbar and subwoofer models.
Once you have adjusted the settings to your liking, it’s time to test the connection and enjoy the immersive sound experience created by your JBL 2.1 subwoofer and soundbar setup.
In the next section, we will cover some tips for testing the connection and troubleshooting any potential issues that may arise.
Testing the Connection
After connecting your JBL 2.1 subwoofer to your soundbar and adjusting the settings, it’s crucial to test the connection to ensure everything is working as it should. By testing the connection, you can verify the audio output and make any necessary adjustments for an optimal audio experience. Follow these steps to test the connection:
- Select a piece of audio content that includes a range of frequencies, such as a movie with action scenes or a music track with deep bass.
- Play the audio content on your soundbar and listen carefully for the presence of the subwoofer. If everything is connected correctly, you should hear deep, rich bass coming from the subwoofer, enhancing the overall audio experience.
- Pay attention to the balance between the soundbar and subwoofer. The bass should seamlessly integrate with the soundbar’s output and complement the audio content without overpowering other frequencies.
- If the bass seems weak or is absent, increase the subwoofer volume in the sound settings. Conversely, if the bass is overwhelming or distorting the audio, decrease the subwoofer volume.
- Continue listening to different types of audio content, such as music, movies, and games, to get a comprehensive understanding of how the subwoofer performs across various genres.
- Adjust any additional sound settings available on your soundbar, such as equalizer settings or bass-enhancement features, to further fine-tune the audio output.
During the testing phase, it’s also important to consider the positioning of your subwoofer. Experiment with different placements to find the spot that offers the best bass response in your room. Keep in mind that placing the subwoofer in a corner or near a wall can enhance bass performance by utilizing room acoustics.
If you notice any issues or inconsistencies with the subwoofer’s performance, refer to the troubleshooting tips in the following section to troubleshoot and resolve common problems that may arise.
By testing the connection, adjusting the settings, and fine-tuning the audio output, you can fully enjoy the immersive sound experience delivered by your JBL 2.1 subwoofer and soundbar setup.
Now let’s move on to the next section, where we will explore some troubleshooting tips to help you address common issues you may encounter.
Troubleshooting Tips
While setting up and using your JBL 2.1 subwoofer with your soundbar, you may encounter certain issues or challenges. Here are some troubleshooting tips to help you address common problems and ensure a smooth audio experience:
- No sound from the subwoofer: Double-check all cable connections to ensure they are securely plugged in. Make sure the subwoofer is powered on and the volume is set appropriately. Check the settings on your soundbar to confirm that the subwoofer is enabled and the volume is not set to zero.
- Weak or distorted bass: Adjust the subwoofer volume in the sound settings of your soundbar. Increase the volume if the bass is weak and decrease it if the bass is overwhelming or causing distortion.
- Wireless connectivity issues (if applicable): If your JBL 2.1 subwoofer supports wireless connectivity and you experience a loss of connection or irregular performance, try repositioning the subwoofer and soundbar closer to each other. Ensure there are no obstructions blocking the wireless signal between the devices. If the issue persists, refer to the manufacturer’s instructions for troubleshooting wireless connectivity.
- Audio sync issues: If you notice a delay or discrepancy between the audio coming from the soundbar and the subwoofer, check the settings on your soundbar for any audio delay or sync settings. Adjust these settings to align the audio output from both devices.
- Interference or buzzing noises: If you experience interference or buzzing noises coming from the subwoofer, check for any nearby electronics or devices that may be causing interference. Move the subwoofer away from possible sources of interference, such as Wi-Fi routers, other speakers, or power outlets with multiple devices plugged in.
- Software updates: Check for any available software updates for your JBL soundbar and subwoofer. Updating the firmware can address known issues and improve the overall performance and compatibility of your devices.
If you have tried all the troubleshooting tips and are still experiencing issues with your JBL 2.1 subwoofer and soundbar, it is recommended to reach out to JBL’s customer support. They can provide further assistance and guidance specific to your model and help resolve any lingering problems.
Remember, troubleshooting can involve a bit of trial and error. Be patient and persistent, and don’t hesitate to seek professional help if needed. With the right troubleshooting steps, you can overcome any challenges and enjoy the immersive audio experience offered by your JBL 2.1 subwoofer and soundbar setup.
Now that you’re equipped with troubleshooting knowledge, you should be able to address any issues that may arise. In the concluding section, we will summarize the key points and wrap up our discussion about connecting a JBL 2.1 subwoofer to a soundbar.
Conclusion
Congratulations on successfully connecting your JBL 2.1 subwoofer to your soundbar! By following the steps outlined in this article, you have unlocked the power of immersive audio and enhanced your listening experience. The combination of the JBL 2.1 subwoofer and soundbar offers deep bass and rich sound that brings your favorite music, movies, and games to life.
We began by emphasizing the importance of compatibility between your subwoofer and soundbar. Ensuring that both devices are from the same manufacturer and designed to work together is crucial for seamless integration and optimal performance.
Next, we discussed the required cables for connecting the subwoofer to the soundbar. Power cables, audio cables, and the dedicated subwoofer cable are essential for establishing a reliable connection. It’s critical to use high-quality cables to minimize signal loss and ensure the best audio quality.
We then walked through the step-by-step process of connecting the subwoofer to the soundbar. By carefully following the instructions and double-checking the connections, you can create a solid connection and enjoy the immersive capabilities of your JBL 2.1 setup.
After connecting, we explored how to adjust the settings to optimize the audio output. Making adjustments to the subwoofer volume and exploring additional sound settings allows you to personalize the sound to your liking and achieve the perfect audio balance.
To ensure everything is working properly, we tested the connection by playing various audio content. By listening for the presence of the subwoofer and assessing the bass performance, we can confirm that the connection is successful and make any necessary refinements.
Lastly, we provided troubleshooting tips to help address common issues that may arise during the setup or while using the JBL 2.1 subwoofer and soundbar. By following these tips and seeking further assistance if needed, you can overcome any challenges and enjoy uninterrupted audio bliss.
Now that you’re familiar with connecting and optimizing the JBL 2.1 subwoofer and soundbar, it’s time to sit back, relax, and immerse yourself in the breathtaking audio experience that they provide.
Enjoy the power of deep, rumbling bass and the richness of sound that your JBL 2.1 subwoofer and soundbar have to offer. Happy listening!