Home>Devices & Equipment>Subwoofer>How To Hook Up A Line Output Converter For Subwoofer
Subwoofer
How To Hook Up A Line Output Converter For Subwoofer
Published: January 22, 2024
Learn how to easily hook up a line output converter for your subwoofer and enhance your audio experience with powerful bass.
(Many of the links in this article redirect to a specific reviewed product. Your purchase of these products through affiliate links helps to generate commission for AudioLover.com, at no extra cost. Learn more)
Table of Contents
- Introduction
- What is a Line Output Converter?
- Why Use a Line Output Converter for Subwoofers?
- Tools and Materials Needed
- Step 1: Identify the Factory Stereo’s Wiring
- Step 2: Disconnect the Car Battery
- Step 3: Connect the Line Output Converter
- Step 4: Connect the RCA Cables
- Step 5: Connect the Power Wire
- Step 6: Reconnect the Car Battery
- Step 7: Test the Subwoofer
- Conclusion
Introduction
Are you looking to enhance the audio experience in your car? One way to achieve a deeper and more impactful bass is by adding a subwoofer. However, installing a subwoofer in your vehicle may require some additional equipment, such as a line output converter (LOC). In this article, we will provide a comprehensive guide on how to hook up a line output converter for a subwoofer.
A line output converter, also known as an LOC, is a device that allows you to connect a subwoofer or an amplifier to a factory stereo system. Most factory stereos are not equipped with RCA outputs, which are necessary for connecting an aftermarket subwoofer or amplifier. A line output converter solves this problem by converting the speaker-level signals from the factory stereo into line-level signals that can be used by the subwoofer or amplifier.
Using a line output converter has several benefits. It allows you to add a subwoofer or amplifier to your car’s audio system without having to replace the factory stereo. This means you can enjoy improved bass response and overall audio quality while maintaining the original look and functionality of your car’s head unit. Additionally, a line output converter is a cost-effective solution compared to buying a new stereo system.
Now that you understand the importance of a line output converter, let’s dive into the step-by-step process of installing one for your subwoofer. But before we begin, make sure you have all the necessary tools and materials. Let’s get started!
What is a Line Output Converter?
A line output converter (LOC) is a device used to convert speaker-level audio signals from a factory stereo system into line-level signals. Line-level signals are the standard signals used by aftermarket amplifiers and subwoofers to produce high-quality audio.
Factory stereo systems typically do not have RCA outputs, which are necessary for connecting aftermarket audio components. Instead, they use speaker-level outputs to send audio signals directly to the car’s speakers. However, these speaker-level outputs are not compatible with most amplifiers and subwoofers, which require line-level inputs to work properly.
A line output converter solves this problem by intercepting the speaker-level signals and converting them into line-level signals that can be used by aftermarket audio components. The LOC acts as a bridge between the factory stereo system and the amplifier or subwoofer, allowing you to achieve better sound quality and increased bass response in your car audio system.
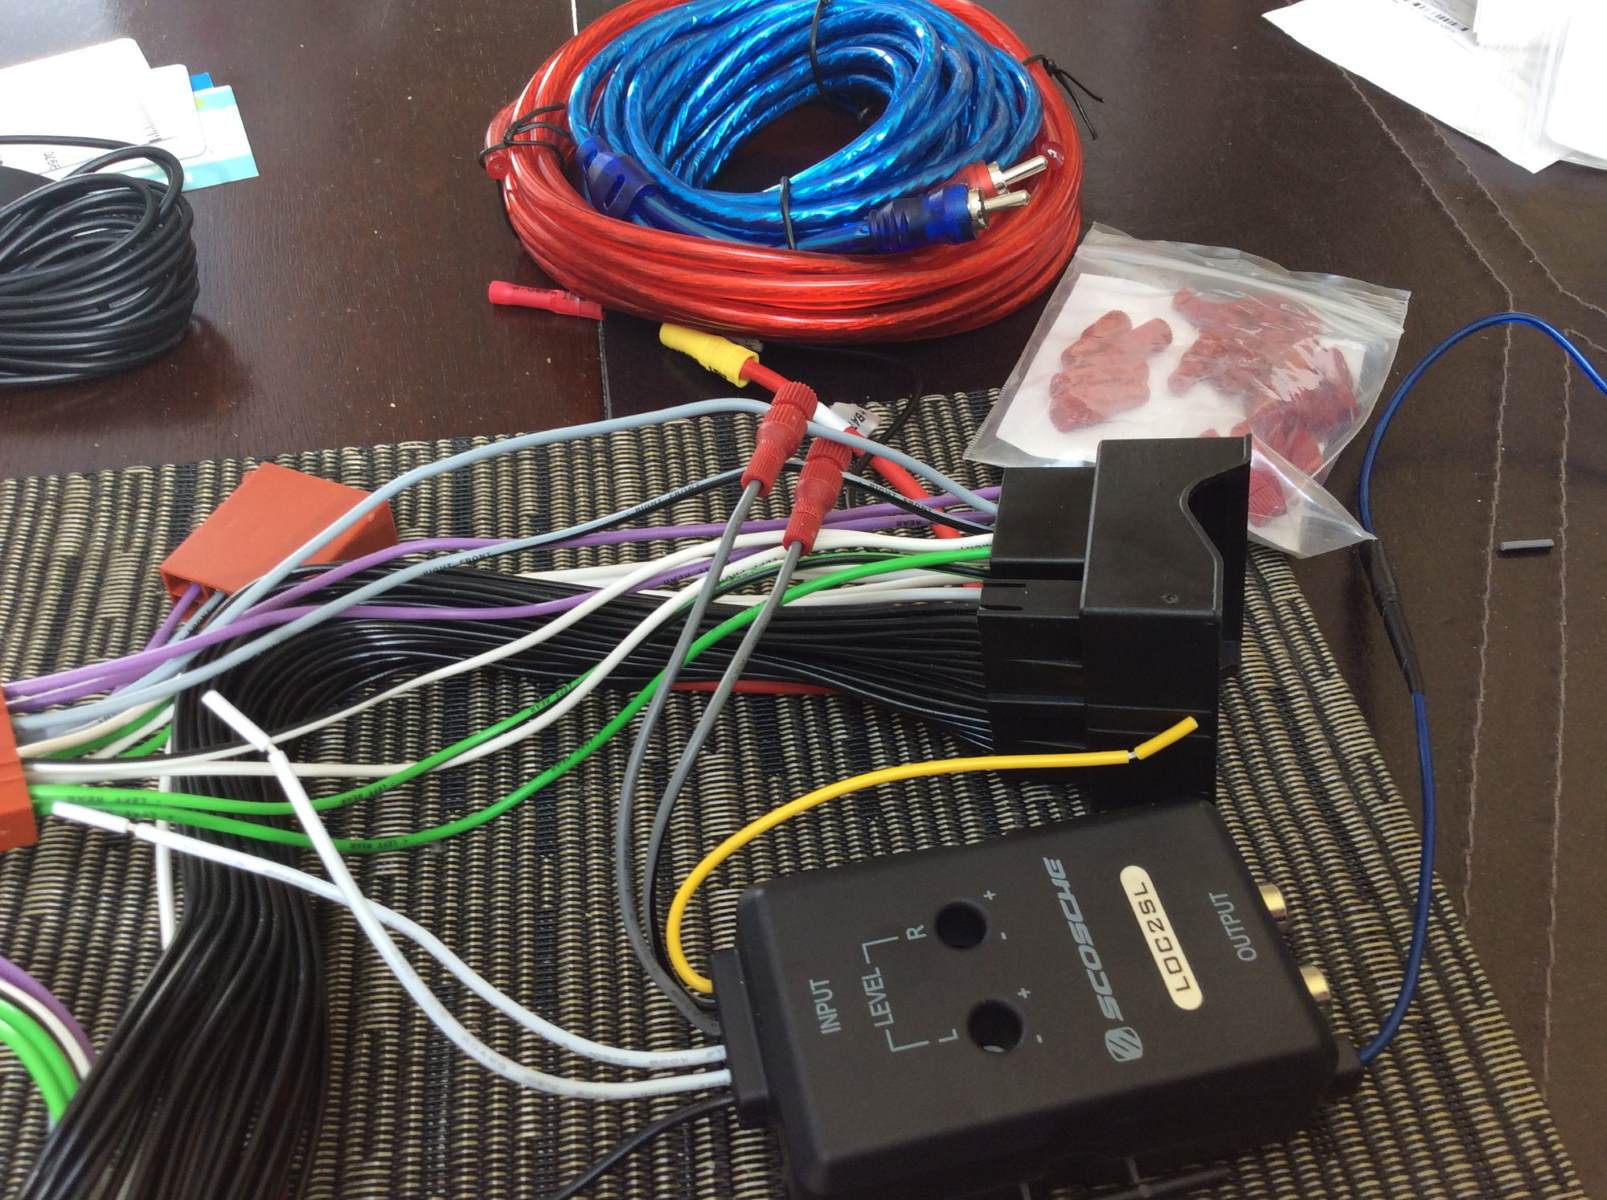
The line output converter typically features input wires that connect to the factory stereo’s speaker outputs and output wires that connect to the amplifier or subwoofer. It also includes a built-in transformer or amplifier circuitry to convert the high voltage speaker-level signals into low voltage line-level signals.
Line output converters come in various types and configurations, including passive and active converters. Passive converters are simple devices that do not require external power and are easy to install. They are suitable for most applications where the factory stereo’s power output is sufficient.
Active converters, on the other hand, require an external power source and offer additional features like signal adjustment and line driver capabilities. They are more versatile and can be used in situations where the factory stereo’s power output is limited.
Overall, a line output converter is a crucial component for integrating aftermarket audio equipment into a factory stereo system. It allows you to enjoy enhanced audio quality and a deeper bass response without needing to replace the entire audio system. Now that you understand the fundamentals of a line output converter, let’s proceed to the installation process.
Why Use a Line Output Converter for Subwoofers?
If you’re considering adding a subwoofer to your car audio system, using a line output converter (LOC) is essential. Let’s explore the reasons why a line output converter is necessary for connecting a subwoofer:
- Lack of RCA Outputs: Most factory car stereos do not have RCA outputs, which are needed to connect a subwoofer. RCA outputs provide a clean audio signal and are compatible with aftermarket amplifiers and subwoofers. By using a line output converter, you can convert the speaker-level outputs of your factory stereo into RCA outputs, allowing you to connect your subwoofer.
- Bypassing the Factory Amplifier: Some factory stereo systems have built-in amplifiers that are not optimized for powering a subwoofer. By using a line output converter, you can bypass the factory amplifier and connect the subwoofer directly to an aftermarket amplifier. This ensures that the subwoofer receives adequate power and delivers optimal bass performance.
- Preserving Factory Features: Installing a line output converter allows you to add a subwoofer to your car audio system without replacing the factory stereo. This means you can retain features such as Bluetooth connectivity, steering wheel controls, and integrated navigation systems. It’s an ideal solution if you want to maintain the original functionality of your car’s head unit.
- Improved Sound Quality: Factory car stereos often lack the power and low-frequency response needed to produce deep and impactful bass. By integrating a subwoofer using a line output converter, you can enhance the sound quality of your car audio system. The subwoofer adds depth and richness to the low-frequency range, allowing you to enjoy a more immersive audio experience.
- Flexibility and Customization: Using a line output converter provides flexibility in choosing the subwoofer and amplifier that best suit your preferences. You have the freedom to select the exact subwoofer size, power rating, and enclosure type that meets your specific audio goals. This customization allows you to tailor the bass response to your liking.
In summary, using a line output converter for subwoofers is necessary to overcome the limitations of factory car stereos and maximize the performance of your subwoofer. It enables you to add a subwoofer while preserving factory features, improving sound quality, and customizing your audio setup. Now that you understand the benefits of using a line output converter, let’s move on to the step-by-step installation process.
Tools and Materials Needed
Before you start installing a line output converter for your subwoofer, make sure you have the following tools and materials readily available:
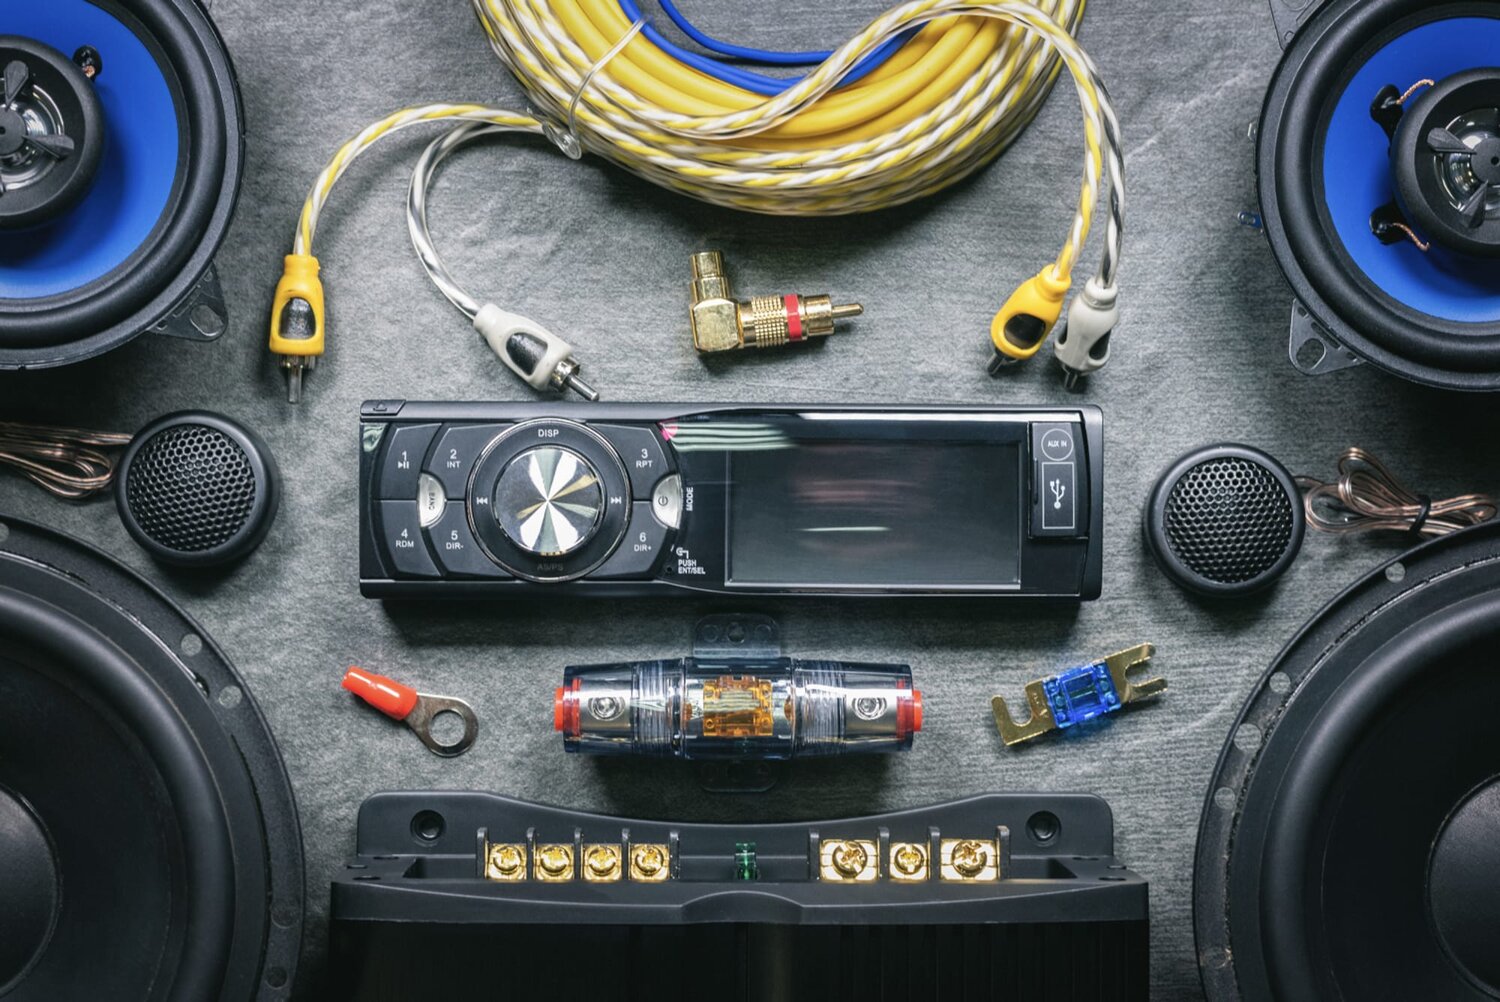
- Line Output Converter: Choose a line output converter that matches your audio system’s power requirements and features. There are various models available on the market, so select one that suits your specific needs.
- RCA Cables: Ensure you have high-quality RCA cables with the appropriate length to connect the line output converter to your amplifier or subwoofer. It’s recommended to use shielded cables to minimize interference and maximize audio quality.
- Wire Cutters and Strippers: These tools are necessary for cutting and stripping the wires during the installation process. Ensure that the wire cutters are suitable for cutting through the gauge of your car’s wiring.
- Electrical Tape: Electrical tape is essential for insulating and protecting the connections you make during the installation. Make sure you have enough electrical tape to secure the wiring properly.
- Wire Connectors: Wire connectors, such as butt connectors or crimp connectors, are needed to join wires together securely. These connectors ensure reliable electrical connections and help prevent any loose connections or electrical issues.
- Additional Wiring: Depending on your specific setup, you may need additional wiring such as power wire, ground wire, and remote turn-on wire for the amplifier. Ensure you have the appropriate gauge and length of wiring required for your installation.
- Screwdriver or Socket Set: Depending on your car’s configuration, you may need a screwdriver or socket set for removing panels or accessing the stereo. Make sure you have the necessary tools on hand.
- Test Tone Generator: While not essential, a test tone generator can be helpful for tuning your subwoofer and amplifier. It allows you to generate specific frequencies to calibrate your audio system accurately.
- Car Battery Wrench: Disconnecting the car battery is necessary during the installation process. Make sure you have a wrench or socket set suitable for disconnecting and reconnecting the battery terminals.
By gathering these tools and materials before you begin, you will be well-prepared for the installation process. Having everything ready will ensure a smooth and efficient installation of the line output converter for your subwoofer.
Step 1: Identify the Factory Stereo’s Wiring
Before you can begin installing a line output converter for your subwoofer, you need to identify the wiring of your factory stereo. This step is crucial for understanding how to properly connect the line output converter.
Here’s how to identify the factory stereo’s wiring:
- Refer to your vehicle’s owner’s manual or research online for wiring diagrams specific to your car make and model. These diagrams will provide detailed information on the color codes and functions of the wires.
- If you don’t have access to a wiring diagram, you can physically locate the speaker wires by removing the stereo unit from the dashboard. Use a screwdriver or socket set to remove any panels or trim that may be covering the stereo. Be careful not to damage any surrounding components.
- Once the stereo is exposed, locate the wire harness connected to the back of the stereo. This harness contains the speaker wires.
- Identify the wires that correspond to the left and right channels. These are typically color-coded, with white or gray representing the left channel and white with a black stripe or gray with a black stripe representing the right channel.
- Note the color and location of the positive (+) and negative (-) wires for each channel. This information will be needed when connecting the line output converter.
It’s important to remember that the wiring colors may vary depending on the vehicle manufacturer and stereo model. Therefore, always refer to a wiring diagram or consult a professional if you’re unsure about the wiring identification.
By thoroughly identifying the factory stereo’s wiring, you will have the necessary information to properly connect the line output converter in the next steps. This step ensures a precise and successful installation of the converter for your subwoofer.
Step 2: Disconnect the Car Battery
Before you begin the installation process of the line output converter, it is essential to disconnect the car battery. Disconnecting the car battery ensures your safety and prevents any accidental electrical damage during the installation.
Follow these steps to disconnect the car battery:
- Ensure that the car is turned off and the ignition key is removed.
- Locate the car’s battery, typically found under the hood. Refer to your vehicle’s owner’s manual if you’re unsure of the exact location.
- Using a wrench or socket set, loosen the nuts or bolts securing the negative (-) terminal of the battery.
- Once the negative terminal is loose, carefully remove it from the battery post. Position it in a way that it does not come into contact with the battery post during the installation process.
- Repeat the same process for the positive (+) terminal of the battery, loosening the nuts or bolts and removing the positive terminal.
- Ensure that both terminals are securely positioned away from the battery posts to prevent accidental contact.
By disconnecting the car battery, you eliminate the risk of electrical shocks or short circuits during the installation. This precautionary measure ensures a safe and smooth installation process for the line output converter and the subwoofer.
Once the installation is complete, you will reconnect the car battery in the final step to restore power to your vehicle’s electrical system.
Step 3: Connect the Line Output Converter
Now that you have identified the factory stereo’s wiring and disconnected the car battery, it’s time to connect the line output converter (LOC). This step is crucial as it establishes the connection between the factory stereo and the subwoofer or amplifier.
Follow these steps to connect the line output converter:
- Locate the speaker-level inputs on the line output converter. These are typically labeled as “+” and “-“. The positive (+) input receives the positive speaker wire from the factory stereo, and the negative (-) input receives the corresponding negative speaker wire.
- Using wire cutters and strippers, carefully cut and strip a small portion of the insulation from the positive and negative speaker wires from the factory stereo.
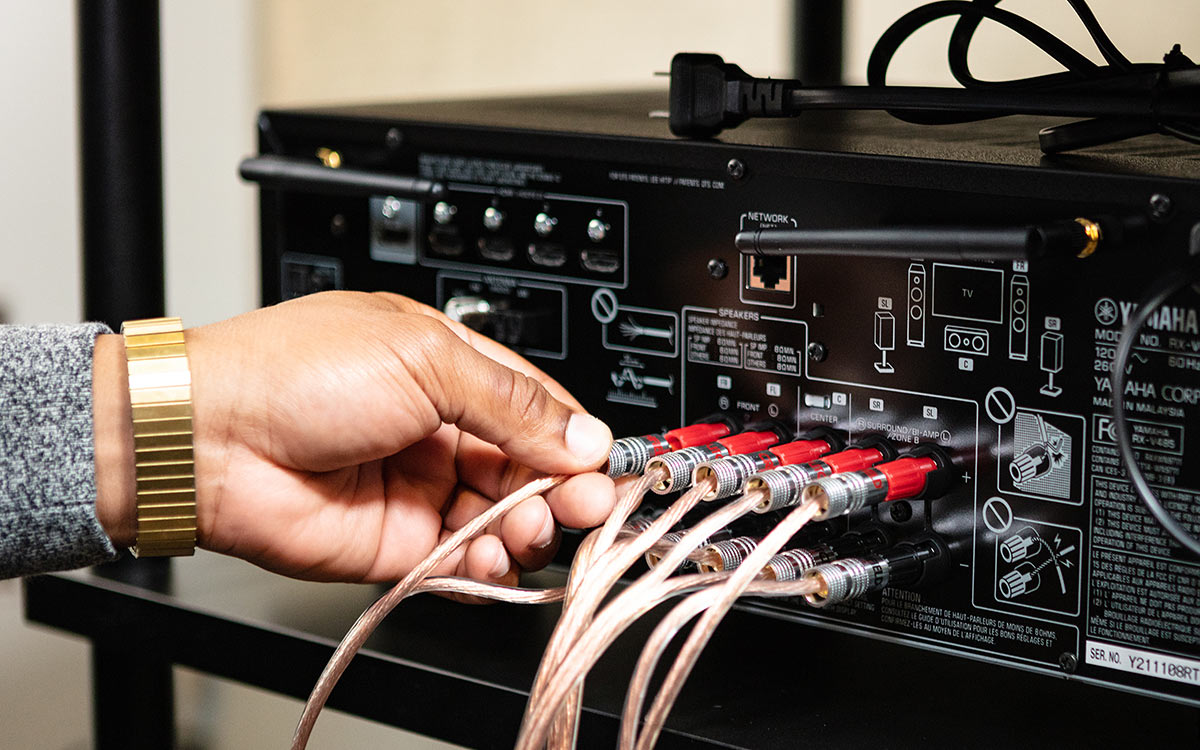
- Connect the positive speaker wire from the factory stereo to the positive (+) input on the line output converter. Use a wire connector, such as a butt connector or crimp connector, to securely join the wires together. Repeat this process for the negative speaker wire, connecting it to the negative (-) input on the line output converter.
- Ensure that the connections are secure by gently tugging on the wires. They should be firmly held in place and not come loose.
- Once the connections are made, position the line output converter in a suitable location, taking into consideration factors such as heat dissipation and accessibility for future adjustments or troubleshooting.
- Use zip ties or adhesive tape to secure any loose wiring and to prevent them from interfering with other components or moving parts in the car.
By connecting the line output converter to the factory stereo’s speaker-level inputs, you establish the necessary connection for the conversion of the audio signals. This step sets the foundation for the successful integration of the subwoofer or amplifier into your car’s audio system.
With the line output converter properly connected, you can now proceed to the next step, which involves connecting the RCA cables from the line output converter to the subwoofer or amplifier.
Step 4: Connect the RCA Cables
With the line output converter (LOC) properly connected to the factory stereo’s speaker wires, it’s time to connect the RCA cables. These cables will transmit the line-level audio signals from the LOC to the subwoofer or amplifier.
Follow these steps to connect the RCA cables:
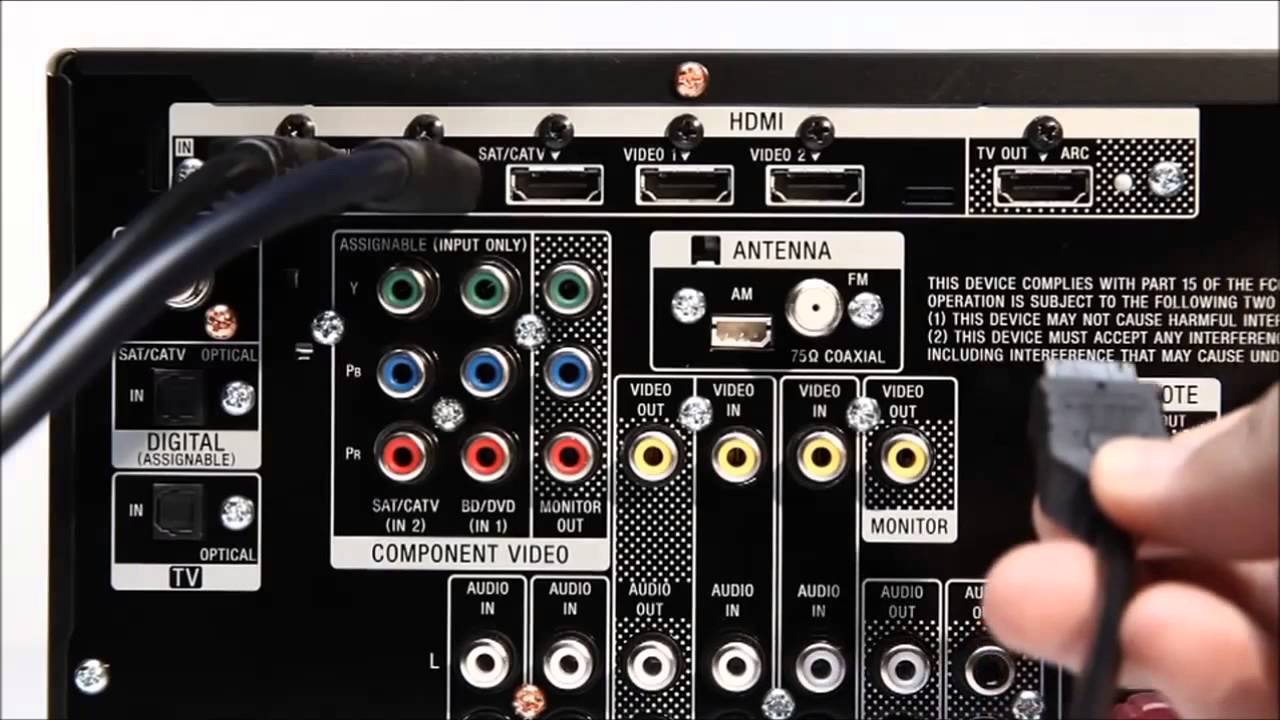
- Locate the RCA outputs on the line output converter. These are typically labeled as “R” for the right channel and “L” for the left channel.
- Take the RCA cables and connect the appropriate end to the RCA outputs on the line output converter. Ensure that the cables are firmly inserted into the RCA outputs to establish a secure connection.
- Route the RCA cables through the vehicle, ensuring they are away from any moving parts or sources of interference. It is recommended to pass them along the opposite side of the car from the power wires, if possible, to minimize the risk of interference.
- Connect the other end of the RCA cables to the corresponding RCA inputs on the subwoofer or amplifier. Ensure that the cables are securely connected to the RCA inputs, as loose connections can result in poor audio quality or intermittent signals.
- Double-check the connections and make any necessary adjustments. Ensure that all connections are secure and tight.
Once the RCA cables are properly connected, the line-level audio signals will be transmitted from the factory stereo to the subwoofer or amplifier. This step is crucial in ensuring that the audio signals are clear and uninterrupted, allowing for optimal performance of the subwoofer or amplifier.
With the RCA cables connected, you’re now ready to proceed to the next step, which involves connecting the power wire for the amplifier or subwoofer.
Step 5: Connect the Power Wire
Once the line output converter and RCA cables are properly connected, the next step is to connect the power wire for the amplifier or subwoofer. This step is crucial as it provides the necessary power to drive the audio equipment.
Follow these steps to connect the power wire:
- Locate a suitable location to connect the power wire to the vehicle’s battery. This location should be close to the battery and away from any moving parts or sources of heat.
- Measure and cut the power wire to the appropriate length, ensuring that it can reach from the amplifier or subwoofer to the battery. Use wire cutters and strippers to remove a small portion of the insulation from each end of the wire.
- If necessary, attach a fuse holder to one end of the power wire. This will provide protection in case of a power surge or electrical malfunction.
- Connect one end of the power wire to the positive (+) terminal of the vehicle’s battery. Use a wrench or socket set to tighten the connection securely.
- Route the power wire through the vehicle, keeping it away from any sources of interference or heat. Make sure to secure it using zip ties or adhesive tape to prevent it from moving or coming into contact with other components.
- If using an amplifier, locate the amplifier’s power input terminal and connect the other end of the power wire to it. Ensure that the connection is secure and tight.
- If using a subwoofer with a built-in amplifier, connect the power wire directly to the subwoofer’s power input terminal. Consult the subwoofer’s manual if you are unsure of the exact location.
Connecting the power wire properly ensures that the amplifier or subwoofer receives the necessary power to operate efficiently. It’s crucial to ensure that all connections are secure and tight to prevent any power issues or electrical problems during use.
With the power wire connected, you can now proceed to the next step, which involves reconnecting the car battery and testing the subwoofer or amplifier.
Step 6: Reconnect the Car Battery
After completing the necessary connections for the line output converter, RCA cables, and power wire, it’s time to reconnect the car battery. Reconnecting the car battery restores power to the vehicle’s electrical system and allows you to test the subwoofer or amplifier.
Follow these steps to reconnect the car battery:
- Ensure that all the connections for the line output converter, RCA cables, and power wire are secure and properly tightened.
- Locate the positive (+) terminal of the car battery.
- Position the positive terminal of the battery over the battery post, ensuring it aligns correctly.
- Tighten the nut or bolt on the positive terminal to secure it to the battery post. Ensure that it is tightened sufficiently to establish a solid electrical connection.
- Repeat the same process for the negative (-) terminal of the car battery. Position the negative terminal over the battery post and tighten the nut or bolt to secure the connection.
- Inspect all connections once more to ensure they are secure and properly tightened.
By reconnecting the car battery, you restore power to the vehicle’s electrical system and activate the subwoofer or amplifier. This step allows you to test the audio system and make any necessary adjustments before finalizing the installation.
Now that the car battery is reconnected, you can proceed to the final step, which involves testing the subwoofer or amplifier to ensure proper functionality and audio output.
Step 7: Test the Subwoofer
After completing the installation of the line output converter, connecting the RCA cables, and reestablishing power to the car battery, it’s time to test the subwoofer to ensure it is functioning correctly. This step allows you to verify that the audio signals are being properly transmitted and that the subwoofer is producing the desired bass response.
Follow these steps to test the subwoofer:
- Turn on the car’s ignition and power on the audio system. Ensure that the volume is set to a moderate level before testing.
- Play a music track or audio source that has a strong bass presence. This will help determine if the subwoofer is producing the desired low-frequency output.
- Listen carefully to the audio and evaluate the bass response. Pay attention to the depth, clarity, and impact of the bass notes.
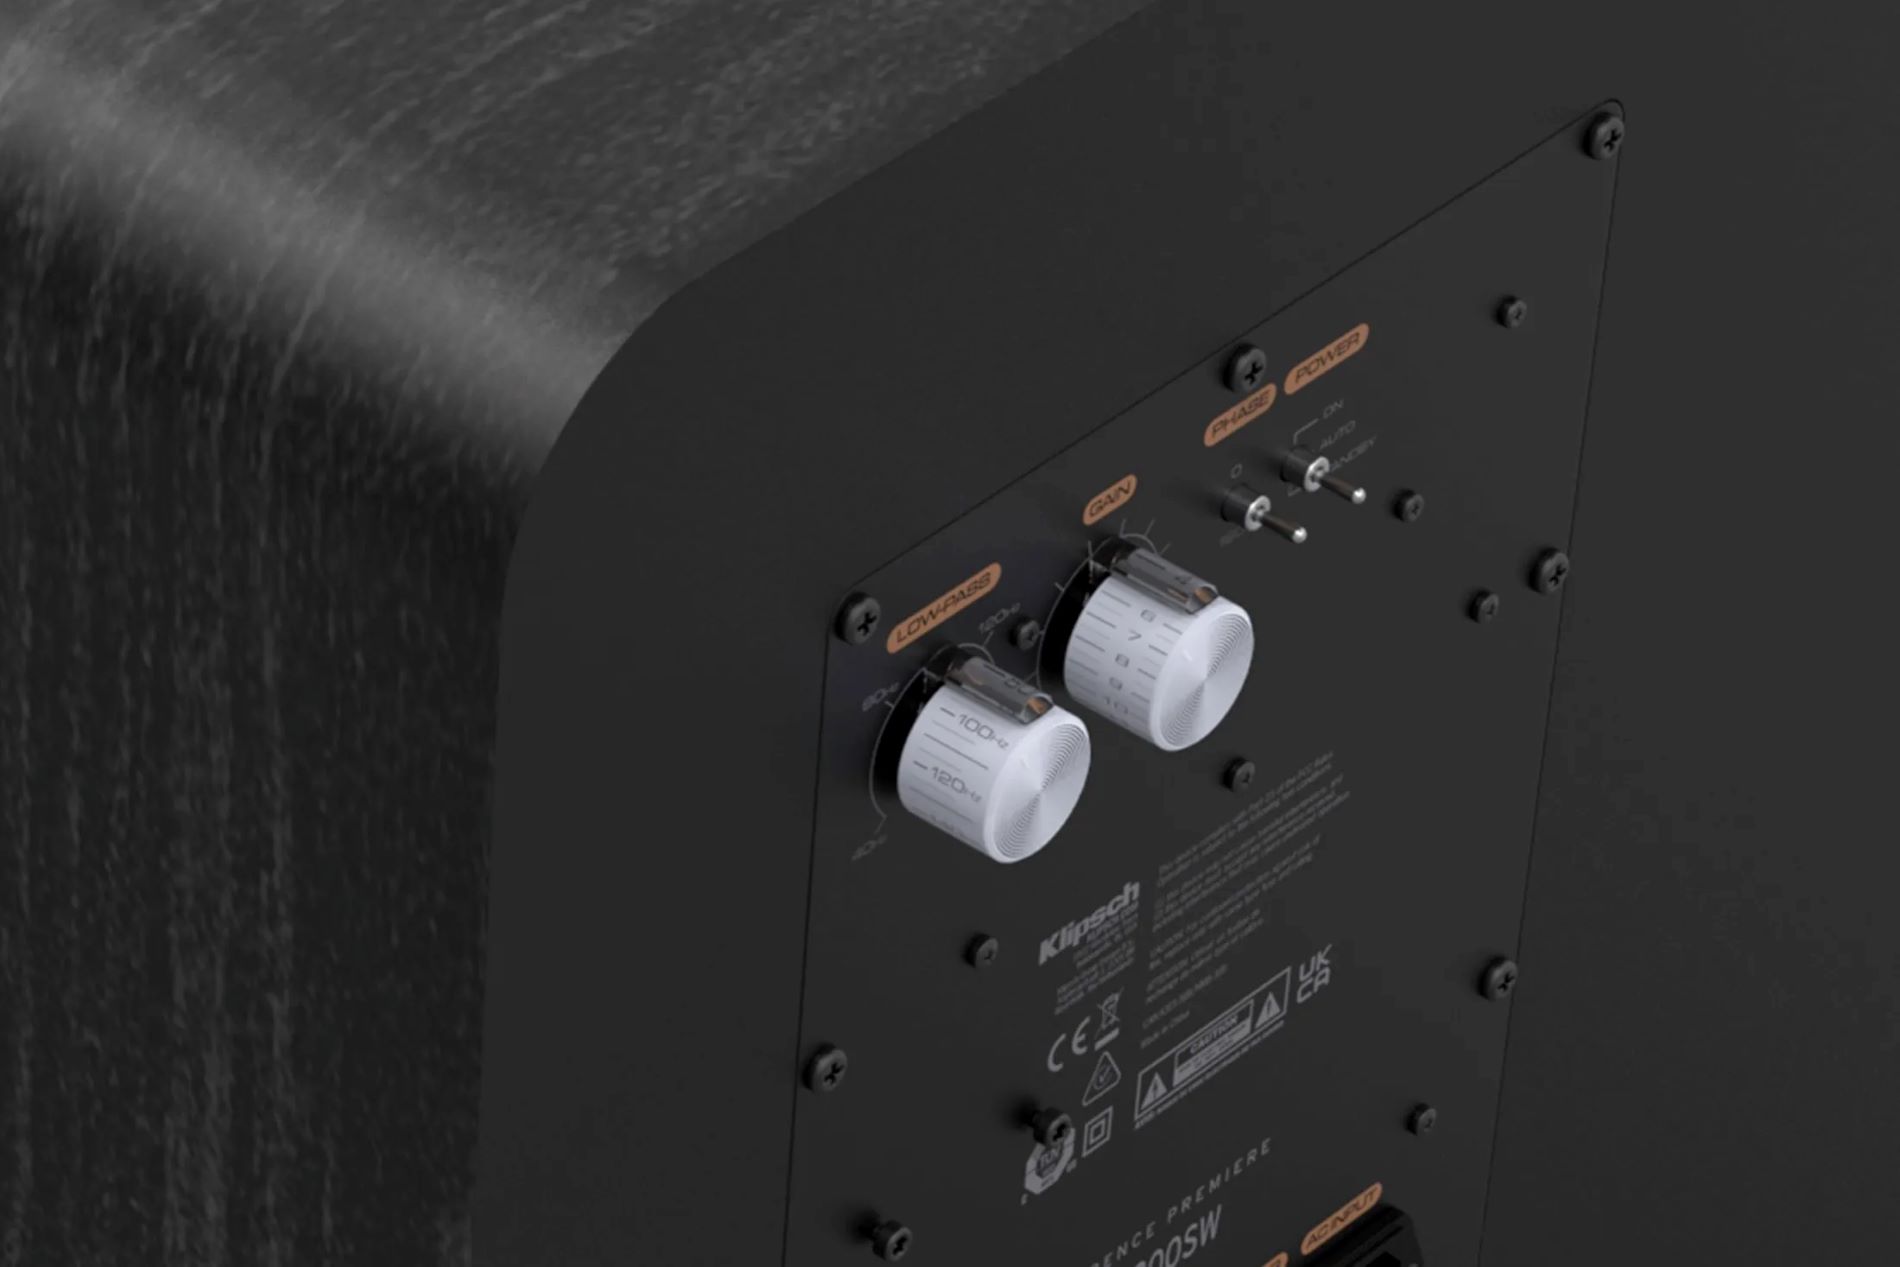
- If the bass response is not satisfactory, carefully adjust the settings on the subwoofer or amplifier, including the gain, crossover frequency, and phase, to achieve the desired bass output.
- Continue testing the subwoofer with different audio tracks to evaluate its performance across various genres of music.
- If necessary, consult the user manual for your subwoofer or amplifier to understand the recommended settings and adjustments for optimal performance.
Testing the subwoofer allows you to fine-tune the audio system to your preferences and ensure that it is delivering the desired bass response. By making any necessary adjustments and experimenting with different settings, you can achieve the best possible audio experience.
Congratulations! You have successfully installed and tested your subwoofer using a line output converter. Enjoy the enhanced audio quality and immersive bass experience in your car.
Conclusion
Adding a subwoofer to your car audio system can significantly enhance the bass response and overall audio quality. By using a line output converter (LOC), you can seamlessly integrate a subwoofer or amplifier into your factory stereo system without the need for extensive modifications or replacing the entire audio system. The installation process, outlined in this guide, ensures a successful setup that maximizes the performance of your subwoofer.
In this article, we covered the importance of a line output converter and its role in converting the speaker-level outputs of a factory stereo into line-level signals compatible with subwoofers and amplifiers. We discussed the benefits of using a line output converter, such as preserving factory features, improved sound quality, and customization options.
The step-by-step instructions provided valuable guidance, including identifying the factory stereo’s wiring, disconnecting and reconnecting the car battery, connecting the line output converter, and establishing the necessary connections using RCA cables and a power wire.
Once the installation was complete, we emphasized the importance of testing the subwoofer to ensure proper functionality and audio output. By following these steps and making any necessary adjustments, you can achieve the desired bass response and a more immersive audio experience.
Remember, it is essential to gather the necessary tools and materials before starting the installation process. Additionally, consult your vehicle’s owner’s manual and seek professional assistance if needed.
By successfully installing and integrating a subwoofer using a line output converter, you can enjoy crisp, deep bass and an enhanced in-car audio experience. Now, hit the road and enjoy your favorite music with the added punch and power of your newly installed subwoofer!