Home>Devices & Equipment>Subwoofer>How To Mount Subwoofer Box In Trunk

Subwoofer
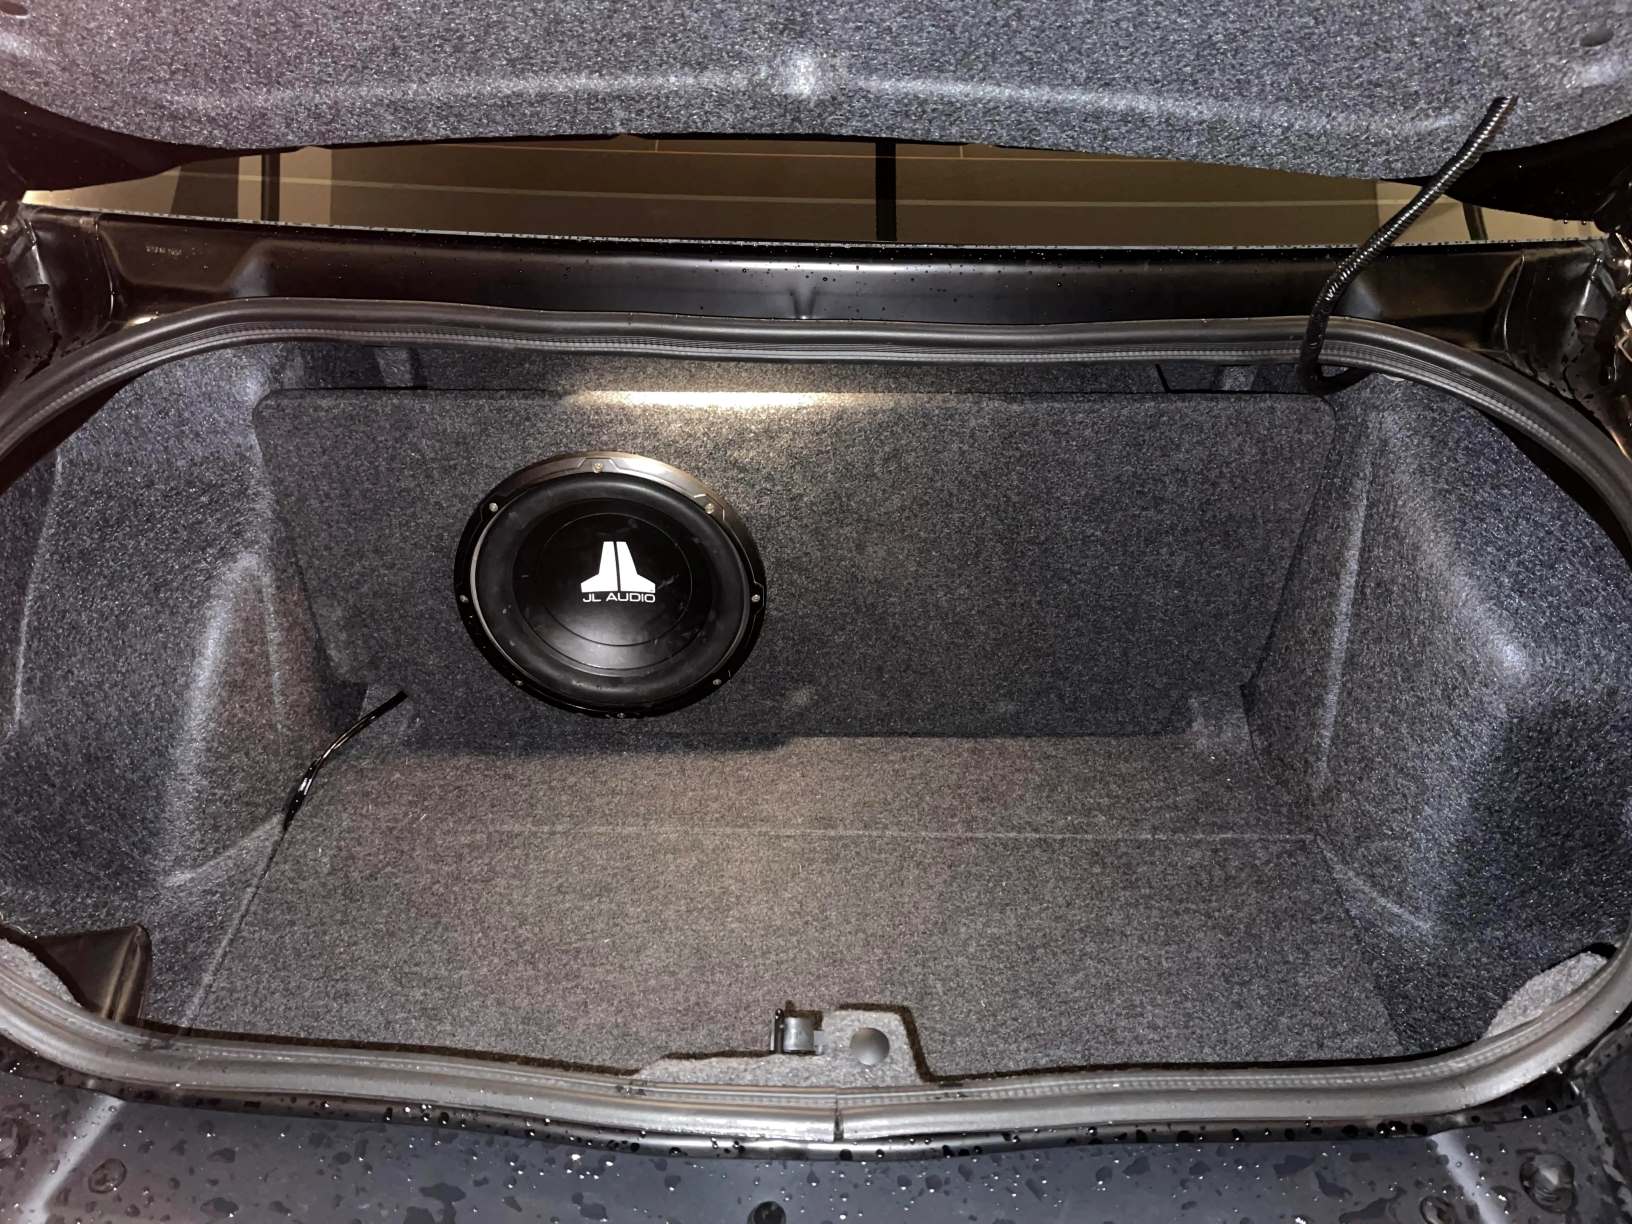
How To Mount Subwoofer Box In Trunk
Published: January 22, 2024
Learn how to mount a subwoofer box in your trunk and enhance your car's sound system with our step-by-step guide. Find tips and tricks to optimize subwoofer installation and enjoy powerful bass.
(Many of the links in this article redirect to a specific reviewed product. Your purchase of these products through affiliate links helps to generate commission for AudioLover.com, at no extra cost. Learn more)
Table of Contents
- Introduction
- Step 1: Determine the Ideal Location for the Subwoofer Box in the Trunk
- Step 2: Prepare the Trunk for Installation
- Step 3: Measure and Mark the Mounting Points on the Trunk Floor
- Step 4: Attach the Subwoofer Box to the Mounting Points
- Step 5: Secure the Subwoofer Box in Place
- Step 6: Connect the Subwoofer to the Car’s Audio System
- Step 7: Test the Subwoofer’s Functionality
- Conclusion
Introduction
When it comes to car audio systems, a subwoofer plays a crucial role in delivering powerful and deep bass. Whether you are a music enthusiast or simply enjoy the immersive experience of a well-rounded audio setup, adding a subwoofer to your car’s sound system can make a significant difference in the overall audio quality. However, to fully enjoy the benefits of a subwoofer, it’s essential to ensure that it is properly mounted in the trunk.
In this article, we will guide you through the process of mounting a subwoofer box in your trunk. By following these steps, you can ensure that the subwoofer remains secure and delivers optimal performance.
Before we delve into the details, it’s important to note that the specific steps may vary depending on the make and model of your car and the type of subwoofer box you have. Always consult the manufacturer’s instructions and guidelines for your particular subwoofer to ensure proper installation.
Now, let’s get started on transforming your car’s audio system by mounting your subwoofer box in the trunk.
Step 1: Determine the Ideal Location for the Subwoofer Box in the Trunk
Before you begin the installation process, it’s crucial to decide on the best location for your subwoofer box within the trunk. This will ensure optimal sound quality and minimize any potential interference or damage to other components in your car.
Here are a few factors to consider when determining the ideal location:
- Space availability: Assess the amount of space available in your trunk and choose a location that allows for easy installation and doesn’t obstruct the functionality of other trunk components.
- Subwoofer type and size: Take into account the size and dimensions of your subwoofer box. Some subwoofers are designed to be mounted vertically, while others can be mounted horizontally. Ensure that there is sufficient space to accommodate your subwoofer without any clearance issues.
- Weight distribution: Consider the weight distribution of your vehicle. Placing the subwoofer box closer to the rear of the car can help balance the weight and prevent any negative impact on the handling of your vehicle.
- Accessibility: Choose a location that allows for easy access to the subwoofer box. This will facilitate any future adjustments, maintenance, or repairs that may be required.
Once you have considered these factors, you can proceed to determine the specific location within the trunk. This might involve removing any existing components or rearranging items to create space. It’s important to note that the ideal location may vary depending on personal preference and the layout of your vehicle.
Keep in mind that while it may be tempting to place the subwoofer box in the corners of the trunk, this can cause the bass response to be uneven. Instead, aim for a location that allows for even distribution of sound and provides the best acoustic performance.
By taking the time to carefully choose the location for your subwoofer box, you can ensure that you get the most out of your car audio system and enjoy a well-balanced and immersive audio experience.
Step 2: Prepare the Trunk for Installation
Once you have determined the ideal location for your subwoofer box, the next step is to prepare the trunk for installation. Proper preparation will ensure a secure and stable mounting surface, allowing your subwoofer to perform at its best. Follow these steps to prepare your trunk:
- Clean out the trunk: Remove any items from the trunk to create a clear space. This will make it easier to work and avoid any obstacles during the installation process.
- Inspect the trunk floor: Take a close look at the trunk floor to ensure that it is free from any debris, loose parts, or irregularities. Smooth out any rough surfaces or remove any loose objects that could interfere with the installation.
- Consider sound deadening: If you want to enhance the audio quality and reduce any rattling or vibrations, you may want to consider installing sound deadening materials on the trunk floor. These materials help absorb unwanted noise and improve sound insulation.
- Double-check for spare tire or fuel tank access: Confirm that the chosen location for the subwoofer box does not obstruct access to the spare tire compartment or the fuel tank. It’s essential to maintain easy access to these areas for any future maintenance or emergencies.
- Secure loose cables and wiring: If you have any loose cables or wiring in the trunk, take the time to secure them properly. Use zip ties or cable organizers to prevent any tangling or interference with the subwoofer installation.
By properly preparing the trunk, you create an optimal environment for mounting and ensure that your subwoofer box is installed on a clean and stable surface. Taking these steps will help maximize the performance and longevity of your subwoofer while providing a neat and organized trunk space.
Step 3: Measure and Mark the Mounting Points on the Trunk Floor
Once you have prepared the trunk, it’s time to measure and mark the mounting points on the trunk floor. Proper measurements and placement are crucial to ensure a secure and stable installation of your subwoofer box. Follow these steps:
- Position the subwoofer box: Place the subwoofer box in the desired location within the trunk, ensuring it is centered and aligned with your chosen mounting points.
- Measure the dimensions: Use a measuring tape to carefully measure the dimensions of the subwoofer box. Take note of the width, length, and height of the box. These measurements will help you accurately mark the mounting points on the trunk floor.
- Mark the positions: With a marker or chalk, mark the points on the trunk floor where the mounting brackets or screws will be positioned. It’s important to ensure that the markings are visible and accurate.
- Consider subwoofer orientation: Depending on the type of subwoofer box you have, you may need to mark additional points for securing the box in a specific orientation. For example, if your subwoofer box is designed to be mounted vertically, you will need to mark points to secure it in that position.
- Double-check measurements: Before moving on to the next step, double-check your measurements and markings to ensure their accuracy. This will help avoid any misalignments or issues during the actual mounting process.
By taking precise measurements and marking the mounting points, you can ensure that the subwoofer box is properly positioned and aligned in the trunk. This is crucial for maintaining a stable and secure installation, allowing your subwoofer to perform at its best and deliver the desired bass response.
Step 4: Attach the Subwoofer Box to the Mounting Points
With the mounting points marked on the trunk floor, you are now ready to attach the subwoofer box. Proper attachment is essential to ensure a secure and stable installation that withstands the vibrations and movements of your vehicle. Follow these steps:
- Position the subwoofer box: Carefully lift the subwoofer box and align it with the marked mounting points on the trunk floor. Take your time to ensure it is properly positioned before moving to the next step.
- Attach the mounting brackets: If your subwoofer box comes with mounting brackets, use the appropriate screws or bolts to secure them to the marked mounting points. Follow the manufacturer’s instructions for the specific type of brackets provided with your subwoofer.
- Align the subwoofer box: Once the mounting brackets are in place, align the subwoofer box with the brackets and ensure a snug fit. Adjust the position if necessary to achieve proper alignment and symmetry.
- Secure the subwoofer box: With the subwoofer box properly aligned, use the provided screws or bolts to secure the box to the mounting brackets. Ensure that the screws are tightened securely, but be careful not to over-tighten and risk damaging the subwoofer box.
- Inspect the installation: After securing the subwoofer box, visually inspect the installation to ensure everything is properly aligned and securely fastened. Double-check that all screws are tightened and that there are no loose or unstable components.
By following these steps, you can securely attach the subwoofer box to the mounting points, ensuring a stable and reliable installation. This will minimize any vibrations or movements that could affect the performance of your subwoofer and ensure that it functions at its optimal capacity.
Step 5: Secure the Subwoofer Box in Place
After attaching the subwoofer box to the mounting points, the next step is to secure it in place to ensure it remains stable and doesn’t shift during car movement. This is crucial to maintain optimal sound quality and prevent any potential damage to the subwoofer or other components in your trunk. Follow these steps to secure the subwoofer box:
- Test stability: Before securing the subwoofer box, give it a gentle shake or push to check for any excessive movement. If it feels loose or unstable, adjust the mounting brackets or screws to achieve a more secure fit.
- Use additional support: If desired or necessary, you can reinforce the stability of the subwoofer box by using additional support. This can include using straps, bungee cords, or brackets to fasten the subwoofer box to other anchor points in the trunk or to secure it against the trunk walls.
- Consider vibration damping: To further minimize any vibrations or rattling, you can use vibration-damping materials such as foam or rubber pads. Place these pads between the subwoofer box and the trunk floor or any other surface where contact is made, reducing unwanted vibrations and ensuring a quieter, more enjoyable listening experience.
- Recheck all connections: Take a final look at all the connections and fasteners to make sure they are secure and properly tightened. This includes the screws or brackets used to attach the subwoofer box to the mounting points, as well as any additional support or damping materials.
By taking the time to secure the subwoofer box in place, you will prevent it from shifting or vibrating excessively, resulting in a more stable and reliable installation. This not only enhances the audio quality but also protects the subwoofer and other components in your trunk from potential damage caused by movement or friction.
Step 6: Connect the Subwoofer to the Car’s Audio System
Now that the subwoofer box is securely in place, it’s time to connect it to your car’s audio system. This step ensures that the subwoofer receives the necessary power and audio signal to deliver the deep bass you desire. Follow these steps to connect the subwoofer:
- Locate the subwoofer output: Identify the subwoofer output on your car’s head unit or amplifier. It is typically labeled as “subwoofer output” or “sub out.” If you are using an aftermarket amplifier, locate the dedicated subwoofer RCA input.
- Prepare the wires: Cut a length of appropriate gauge speaker wire to connect the subwoofer to the subwoofer output or amplifier. Strip about half an inch of insulation from each end of the wire for better connectivity.
- Connect the wires to the subwoofer box: On the back of the subwoofer box, locate the speaker wire terminals or binding posts. Connect the positive (+) wire from the subwoofer output or amplifier to the positive terminal on the subwoofer box, and do the same for the negative (-) wire.
- Secure the connections: Ensure that the wire connections are tight and secure by tightening any terminal screws or using appropriate connectors. Loose connections can lead to poor sound quality or intermittent performance.
- Configure the audio settings: Access your car’s audio system settings or amplifier controls and adjust the subwoofer output level. This allows you to fine-tune the bass response according to your preferences and the characteristics of the subwoofer.
- Test the subwoofer: Play some music or a bass-heavy track and listen for the sound coming from the subwoofer. If the subwoofer is not producing any sound or if the sound is distorted, check the connections and ensure everything is properly connected and configured.
By connecting the subwoofer to your car’s audio system, you complete the installation process and bring the deep bass to your music or audio experience. Make sure to double-check all connections and settings to ensure a seamless and powerful audio performance from your newly installed subwoofer.
Step 7: Test the Subwoofer’s Functionality
After connecting the subwoofer to your car’s audio system, it’s important to test its functionality to ensure that it is performing as expected. Testing allows you to fine-tune the settings and make any necessary adjustments for optimal sound quality. Follow these steps to test the subwoofer’s functionality:
- Select an appropriate audio source: Choose a bass-heavy track or a piece of music that you are familiar with. This will help you gauge the performance and effectiveness of the subwoofer.
- Gradually increase the volume: Start by playing the audio at a low volume and gradually increase it to a comfortable listening level. This allows you to monitor the subwoofer’s output and ensure it is producing the desired bass response without any distortion or rattling.
- Listen for balanced bass: Pay attention to the quality and balance of the bass. The subwoofer should seamlessly integrate with your car’s audio system, enhancing the low-frequency range without overpowering or overwhelming the other speakers.
- Adjust the subwoofer settings: Take note of any settings available on your car’s audio system or amplifier that allow you to adjust the subwoofer’s output level, crossover frequency, or other relevant parameters. Make adjustments as needed to achieve the desired bass response.
- Verify proper operation: Ensure that the subwoofer is operating without any abnormal noises, vibrations, or performance issues. If you detect any problems, double-check the connections and settings, and consult the manufacturer’s instructions or seek professional assistance if necessary.
- Fine-tune as needed: If you feel that the bass is too overpowering or lacking, make further adjustments to the subwoofer settings or placement as needed. Experiment with different audio sources and genres to get a better understanding of the subwoofer’s capabilities.
By testing the functionality of the subwoofer, you can ensure that it is performing optimally and delivering the desired bass response. Fine-tuning the settings and making adjustments based on your preferences will result in a customized and enhanced audio experience that truly complements your car’s sound system.
Conclusion
Mounting a subwoofer box in your car’s trunk is a rewarding process that can greatly enhance your audio experience. By following the steps outlined in this guide, you can ensure a secure and optimized installation.
Throughout the installation, it is vital to consider factors such as the ideal location for the subwoofer box, the preparation of the trunk, accurate measurements, secure attachment, and proper connection to the car’s audio system. Taking these steps will result in a well-mounted subwoofer that delivers powerful and deep bass, enhancing the overall sound quality of your car’s audio system.
After mounting the subwoofer box, don’t forget to test its functionality and make any necessary adjustments to achieve the desired bass response. This includes testing the sound output, ensuring balance in the audio mix, and verifying the absence of any abnormal noises or vibrations.
Remember, every car and subwoofer installation may have specific requirements, so always refer to the manufacturer’s instructions for specific guidelines. If you are uncertain or uncomfortable with any aspect of the installation process, it is recommended to seek professional assistance to ensure a safe and successful installation.
So, go ahead and enjoy the immersive experience of a well-mounted subwoofer. With the right location, secure attachment, and proper connection, you can transform your car’s audio system into a powerful and bass-driven sound machine.

