Home>Devices & Equipment>Subwoofer>How To Put A Subwoofer In 2014 Ford Focus

Subwoofer
How To Put A Subwoofer In 2014 Ford Focus
Published: January 23, 2024
Learn how to install a subwoofer in your 2014 Ford Focus with our step-by-step guide. Enhance your sound system and enjoy a powerful bass in your car.
(Many of the links in this article redirect to a specific reviewed product. Your purchase of these products through affiliate links helps to generate commission for AudioLover.com, at no extra cost. Learn more)
Table of Contents
- Introduction
- Step 1: Gather the necessary tools
- Step 2: Remove the panels and trim
- Step 3: Locate the ideal spot for the subwoofer
- Step 4: Prepare the wiring
- Step 5: Connect the subwoofer
- Step 6: Test and adjust the settings
- Step 7: Secure the subwoofer in place
- Step 8: Reinstall the panels and trim
- Conclusion
Introduction
Welcome to the world of subwoofers! If you’re looking to add some serious bass to your 2014 Ford Focus, you’ve come to the right place. A subwoofer is a specialized speaker designed to reproduce low-frequency sounds, providing a deep and powerful bass response. Whether you’re a music lover or audiophile, installing a subwoofer in your car can significantly enhance your audio experience.
In this guide, we will walk you through the step-by-step process of installing a subwoofer in your 2014 Ford Focus. We will cover everything from gathering the necessary tools to securing the subwoofer in place. By the end of this article, you’ll be well-equipped with the knowledge and skills to pump up the bass in your car.
Before we dive in, it’s important to note that installing a subwoofer may require some modification to your car’s interior. If you’re not comfortable with this level of DIY work, it’s always a good idea to seek professional help. Additionally, ensure that you have the proper knowledge of your car’s electrical system to avoid any damage.
Now, let’s roll up our sleeves and get started on transforming your car’s audio system into a bass powerhouse!
Step 1: Gather the necessary tools
Before you begin installing a subwoofer in your 2014 Ford Focus, make sure you have the following tools on hand:
- Subwoofer enclosure – This is where the subwoofer speaker will be housed. Choose an enclosure that fits your car’s available space and the specific subwoofer you’ll be using.
- Subwoofer speaker – Select a high-quality subwoofer that suits your desired bass preferences. Consider factors such as power handling, frequency response, and impedance.
- Amplifier – An amplifier is necessary to power the subwoofer. Choose an amplifier that matches the power requirements of your subwoofer.
- Wiring Kit – A wiring kit includes all the cables and connectors needed for the installation. Ensure it includes power cables, ground cables, speaker wire, fuse holder, and RCA cables.
- Socket wrench set – You’ll need this to remove the necessary panels and trim pieces in your car.
- Wire crimping tool – This will be used to securely connect the wiring components.
- Screwdriver set – Different screwdriver sizes and types may be required during the installation process.
- Wire stripper – This tool helps strip the insulation off the wires for a proper connection.
- Tape and zip ties – These will come in handy for securing and organizing the wiring.
It’s essential to have all the tools readily available to avoid any unnecessary delays during the installation process. Additionally, ensure that you have read the user manuals for the subwoofer, amplifier, and wiring kit, as they may contain specific instructions and recommendations for installation.
Once you have gathered all the necessary tools, you’re now ready to move on to the next step: removing the panels and trim from your 2014 Ford Focus.
Step 2: Remove the panels and trim
Before you can install a subwoofer in your 2014 Ford Focus, you’ll need to remove the panels and trim to access the necessary installation points. Follow these steps:
- Start by disconnecting the negative terminal of your car battery. This step is crucial to prevent any electrical mishaps during the installation process.
- Identify the panels and trim that need to be removed. Typically, you’ll need to remove the rear seat bottom cushion and the side panels in the trunk area. Refer to your car’s manual or consult online resources for specific instructions on panel removal.
- Using a socket wrench set, remove the bolts or screws that secure the panels and trim in place. Take note of the location of each fastener as you remove them for easier reinstallation later.
- Gently pry the panels and trim away from the car’s body using a trim removal tool or a flathead screwdriver wrapped in a soft cloth to avoid scratching the interior surfaces.
- Continue removing the panels and trim until you have clear access to the areas where you’ll be installing the subwoofer and running the wiring.
Take your time during this step to ensure that you remove the panels and trim pieces without causing any damage. It’s also a good idea to keep all the removed parts organized and in a safe place to avoid misplacing them.
Once you have successfully removed the necessary panels and trim, you’re ready to proceed to the next step: locating the ideal spot for the subwoofer in your 2014 Ford Focus.
Step 3: Locate the ideal spot for the subwoofer
When installing a subwoofer in your 2014 Ford Focus, finding the right location for optimal sound and fitment is crucial. Follow these steps to locate the ideal spot:
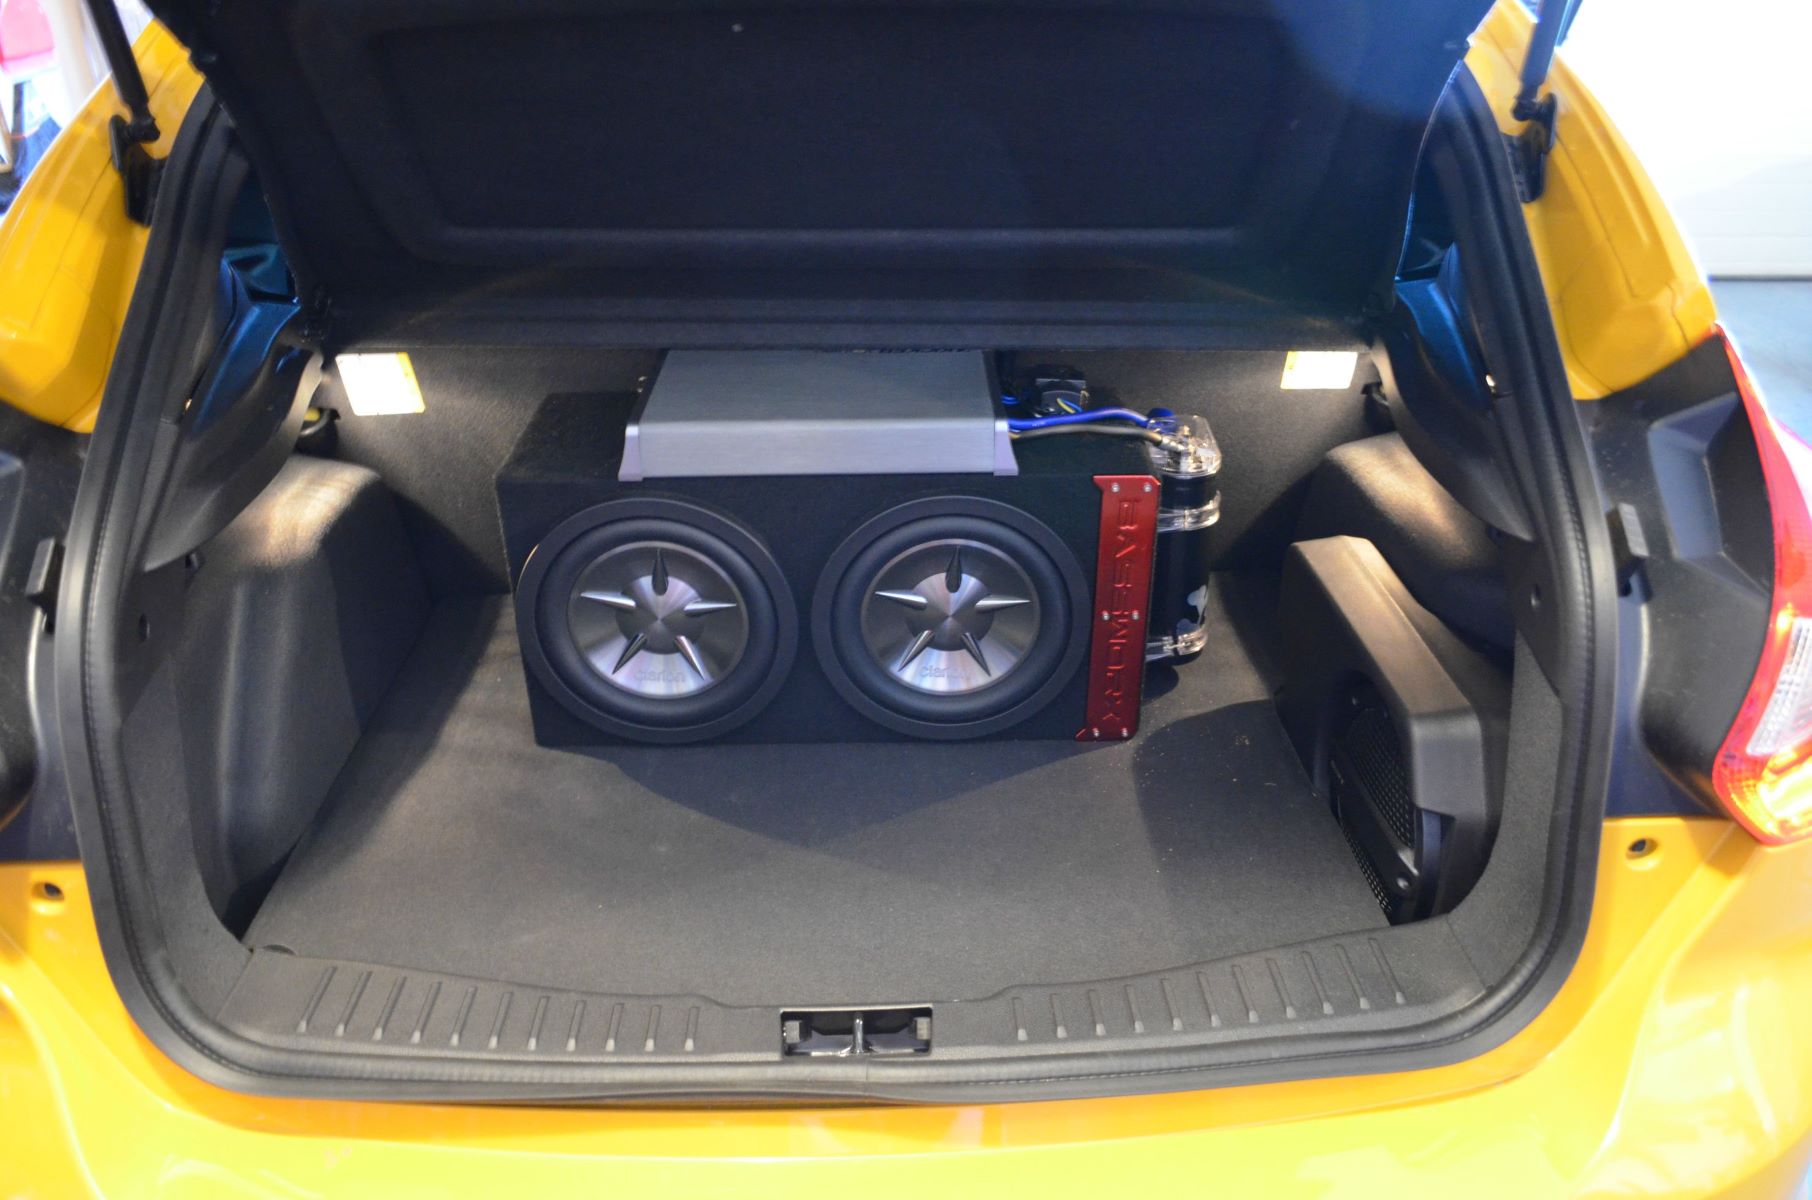
- Consider the available space in your car. The trunk area is a common location for subwoofer installations, as it provides ample space and allows for easy wiring and access.
- Take into account the size and type of subwoofer enclosure you have chosen. Ensure that the dimensions of the enclosure fit well in the selected spot without interfering with other components or compromising trunk space.
- Aim for a location that provides good air circulation around the subwoofer enclosure. This helps prevent overheating and ensures optimal performance.
- Choose a spot that minimizes vibrations and rattling. Avoid placing the subwoofer too close to metal panels or loose objects in the trunk, as this can result in unwanted noise.
- Consider the impact on trunk space and functionality. While it’s important to find an ideal location for the subwoofer, make sure it doesn’t compromise the usability of the trunk or obstruct access to the spare tire or other essential components.
Once you have identified the ideal spot, place the subwoofer enclosure in the selected location temporarily to check for clearance and fitment. Visualize how it will look and ensure that it doesn’t interfere with any other components or wiring in your car.
Take your time to evaluate and adjust the positioning of the subwoofer enclosure until you are satisfied with the fit and placement. Once you have determined the perfect spot, you’re ready to move on to the next step: preparing the wiring for the subwoofer installation.
Step 4: Prepare the wiring
Properly preparing the wiring is an essential step in installing a subwoofer in your 2014 Ford Focus. Here’s what you need to do:
- Start by measuring and cutting the power cable, ground cable, and speaker wire included in your wiring kit. Ensure that you have enough length to run the wires from the subwoofer location to the amplifier location.
- Locate a suitable entry point from the trunk to the engine bay for routing the power cable. Look for existing holes or grommets that can accommodate the cable without causing any damage or interfering with other components.
- Using a wire stripper, remove about half an inch of insulation from the ends of the power cable and ground cable. This will expose the copper wire for proper connection.
- Install an appropriate fuse holder on the power cable near the battery. This will protect the system in case of an electrical overload. Ensure that the fuse rating matches the power requirements of your subwoofer and amplifier.
- Connect the power cable to the positive terminal of the car battery. Secure the connection using a ring terminal and a socket wrench. Ensure that it is tight and secure.
- Connect the ground cable to a sturdy metal point in the car’s chassis. Remove any paint or rust from the metal surface before making the connection for better conductivity. Again, use a ring terminal and a socket wrench to secure the connection.
- If necessary, run the speaker wire from the subwoofer location to the amplifier location. Ensure that the wire is neatly hidden and secured along the way, using tape or zip ties. Avoid running the speaker wire near power cables or other sources of electrical interference.
- At the amplifier location, measure and cut the RCA cables included in your wiring kit. These cables will carry the audio signal from the head unit to the amplifier. Connect one end to the designated subwoofer output on the head unit and the other end to the corresponding input on the amplifier.
By properly preparing the wiring before the installation, you’ll ensure a clean and efficient connection for your subwoofer setup. With the wiring ready, you can now move on to the next step: connecting the subwoofer to the amplifier.
Step 5: Connect the subwoofer
Now that the wiring is prepared, it’s time to connect the subwoofer to the amplifier. Follow these steps to ensure a proper and secure connection:
- Locate the subwoofer output on your amplifier. This is usually labeled as “Sub Out” or “Subwoofer Pre-Out.”
- Take the speaker wire that you previously ran from the subwoofer location to the amplifier location and connect it to the corresponding subwoofer output on the amplifier. Ensure that you match the positive (+) and negative (-) terminals correctly.
- If your subwoofer requires a separate power connection, refer to the manufacturer’s instructions for the specific wiring requirements. Use the appropriate power cable from your wiring kit and connect it to the subwoofer’s power input terminal.
- Similarly, if your subwoofer has a separate ground connection, follow the manufacturer’s instructions to connect the ground cable from your wiring kit to the subwoofer’s ground terminal.
- Double-check all the connections to ensure they are secure and properly tightened. Loose connections can result in poor sound quality or even damage to your equipment.
Once all the connections are made, it’s a good idea to test the audio system to ensure that the subwoofer is functioning correctly. Reconnect the negative terminal of the car battery and turn on your car’s audio system.
Play a low-frequency test track or a song with prominent bass to hear if the subwoofer is producing sound. If you don’t hear anything, check the connections again and make sure the amplifier is properly powered. Adjust the settings on your head unit and amplifier as needed to achieve the desired bass response.
With the subwoofer successfully connected, you’re now ready to move on to the next step: testing and adjusting the settings to optimize the sound.
Step 6: Test and adjust the settings
Now that the subwoofer is connected, it’s time to fine-tune the audio settings to optimize the sound quality. Follow these steps to test and adjust the settings:
- Access the audio control settings on your head unit. Look for options such as “Bass,” “Subwoofer Level,” or “Equalizer.”
- Set the subwoofer level or bass level to a baseline setting. Start with a conservative level and gradually increase it until you achieve the desired bass response.
- Play various types of music, including songs that feature different genres and bass-heavy tracks, to evaluate the sound output. Listen for distortion, rattling, or overpowering bass that may indicate improper settings or speaker placement.
- Adjust the subwoofer crossover frequency. This setting determines the range of frequencies that the subwoofer will produce. Experiment with different crossover points to find the optimal balance between the subwoofer and the car’s main speakers.
- Fine-tune the equalizer settings to further adjust the sound to your preference. Depending on your head unit, you may have options to customize the bass, midrange, and treble frequencies.
- Continue making adjustments until you achieve the desired balance and overall audio experience. Take your time to fine-tune the settings, as it can greatly enhance the enjoyment of your music.
Don’t hesitate to consult the user manual for your head unit and amplifier to better understand the available settings. Additionally, consider seeking expert advice or referring to online tutorials to help you optimize the audio settings for your specific setup.
Remember to use your ears as the ultimate judge when adjusting the settings. Trust your instincts and make fine adjustments until you are completely satisfied with the sound quality.
With the audio settings dialed in, you’re now ready to move on to the next step: securing the subwoofer in place to ensure it stays in position during car rides.
Step 7: Secure the subwoofer in place
After testing and adjusting the sound settings, it’s crucial to secure the subwoofer in place to prevent it from moving or vibrating excessively during car rides. Follow these steps to ensure a secure installation:
- Check the mounting options available for your subwoofer enclosure. Some enclosures come with built-in mounting brackets or holes, while others may require additional mounting hardware.
- Position the subwoofer enclosure in the previously determined ideal spot. Ensure that it fits snugly and doesn’t interfere with any other components or wiring.
- If your subwoofer enclosure has built-in mounting brackets, use the appropriate screws or bolts to secure it to a stable part of the car’s structure. If additional mounting hardware is required, refer to the manufacturer’s instructions for the recommended installation method.
- Double-check all the connections and wiring to make sure they are secure and properly routed. Use tape or zip ties to secure and organize the wiring to avoid any loose or dangling wires.
- Give the subwoofer enclosure a gentle shake to ensure it is securely fastened. It shouldn’t move or rattle excessively. If you notice any vibrations, tighten the mounting hardware or add additional padding to eliminate the movement.
It’s essential to properly secure the subwoofer to maintain the sound quality and protect both the subwoofer and other components in your car. Loose or unsecured subwoofers can lead to distorted sound, rattling noises, or even damage to the equipment.
Take the time to ensure a secure installation, paying attention to any potential vibrations or rattling that may occur while driving. By doing so, you’ll maintain a consistent and enjoyable audio experience.
With the subwoofer securely in place, you’re ready to move on to the final step: reinstalling the panels and trim to restore the aesthetics of your car’s interior.
Step 8: Reinstall the panels and trim
Now that the subwoofer is installed and securely mounted, it’s time to reassemble the panels and trim pieces in your 2014 Ford Focus. Follow these steps to restore the aesthetics of your car’s interior:
- Begin by checking the panels and trim pieces you removed earlier. Inspect them for any damage or wear and ensure they are in good condition before reinstalling.
- Align each panel and trim piece with its corresponding location. Pay attention to any clips or fasteners that need to be aligned before gently pressing the panel into place.
- Reinsert the bolts or screws that secure the panels and trim pieces. Use a socket wrench set to tighten them to their original position. Be careful not to overtighten and damage the panel or strip the threads.
- Double-check the placement and alignment of each panel and trim piece. Make sure they fit flush and there are no gaps or misalignments.
- Test the functionality of any accessories or features affected by the installation, such as power windows, seat controls, or trunk release. Ensure that everything operates smoothly and without any issues.
During the reinstallation process, be patient and take your time to align and secure each panel properly. Rushing this step may result in damaged or misaligned trim pieces, compromising the overall appearance of your car’s interior.
Once you have reinstalled all the panels and trim pieces, step back and inspect the interior of your car. Ensure that it looks and feels as it did before the installation, with the added bonus of a powerful subwoofer system.
Congratulations! You have successfully installed a subwoofer in your 2014 Ford Focus. Now you can enjoy an enhanced audio experience with deep, rich bass. Take the time to fine-tune the audio settings and savor the impactful sound reproduction.
Remember, if you encounter any issues during the installation or are unsure about anything, it’s always wise to consult a professional car audio installer who can provide expertise and guidance. Enjoy your newfound audio bliss!
Conclusion
Congratulations on successfully installing a subwoofer in your 2014 Ford Focus! You’ve taken your car audio system to the next level by adding deep and powerful bass to your music listening experience. With the right tools, careful preparation, and attention to detail, you have transformed your car’s audio system into a bass powerhouse.
Throughout this guide, we covered the step-by-step process of installing a subwoofer, starting from gathering the necessary tools to securing the subwoofer in place. We discussed the importance of removing panels and trim, locating the ideal spot for the subwoofer, preparing the wiring, connecting the subwoofer, testing and adjusting the settings, and finally, reinstalling the panels and trim to restore the aesthetics of your car’s interior.
It’s worth mentioning that while this guide provides a comprehensive overview of the installation process, it’s essential to consider your own comfort level and skillset. If you ever feel uncertain or overwhelmed during the installation, it’s recommended to seek the assistance of a professional car audio installer for a seamless and worry-free experience.
Now, sit back, relax, and enjoy the immersive audio experience that the subwoofer adds to your driving journeys. Feel the rumbling bass and the musical depth that brings your favorite songs to life. Experience the impact and emotion in your music that only a well-installed subwoofer can provide.
Remember to periodically check the subwoofer and its connections to ensure they remain in good working condition. Additionally, take the time to fine-tune the audio settings to match your personal preferences and enjoy the full potential of your newly installed subwoofer.
Thank you for choosing our guide to install a subwoofer in your 2014 Ford Focus. We hope it has been informative and helpful in your car audio enhancement journey. Now, buckle up, turn up the bass, and enjoy the ride!


