Home>Instruments>Guitar>How To Put A String On A Guitar
Guitar
How To Put A String On A Guitar
Published: February 14, 2024
Learn how to put a string on a guitar with our step-by-step guide. Get expert tips for restringing your guitar and improving its sound.
(Many of the links in this article redirect to a specific reviewed product. Your purchase of these products through affiliate links helps to generate commission for AudioLover.com, at no extra cost. Learn more)
Table of Contents
How To Put A String On A Guitar
Introduction
So, you've decided it's time to change the strings on your guitar. Whether you're a beginner or a seasoned player, knowing how to put a new string on your guitar is a fundamental skill every guitarist should have. Not only does it keep your instrument sounding its best, but it also ensures that you're getting the most out of your playing experience.
Changing a guitar string may seem like a daunting task at first, but with the right guidance and a bit of practice, you'll soon be able to do it with ease. In this guide, we'll walk you through the step-by-step process of putting a new string on your guitar, from choosing the right string to tuning it to perfection. By the end of this article, you'll have the knowledge and confidence to tackle this essential aspect of guitar maintenance like a pro.
Before we dive into the practical steps, it's important to understand the significance of a fresh set of strings. Over time, guitar strings accumulate dirt, sweat, and oils from your fingers, leading to a gradual decline in tone and playability. By regularly changing your strings, you can revitalize your instrument's sound and responsiveness, ensuring that it continues to inspire you every time you pick it up.
Now, let's embark on this string-changing journey together and equip you with the skills to maintain your guitar in peak condition. Whether you play an acoustic, electric, or classical guitar, the following steps will apply to all types of guitars, so you're in the right place regardless of your instrument of choice. Get ready to breathe new life into your guitar as we explore the art of string replacement.
Step 1: Choosing the Right String
Before you begin the process of putting a new string on your guitar, it’s crucial to select the right string for your instrument. The type of guitar you have, whether it’s acoustic, electric, or classical, will determine the specific kind of strings you need. Additionally, your playing style and personal preferences will also influence your choice of strings.
Acoustic guitars typically use steel strings, which come in various thicknesses or gauges. Lighter gauge strings are easier to press down, making them ideal for beginners and players who prefer a more effortless playing experience. On the other hand, heavier gauge strings produce a richer, fuller tone and are favored by those who prioritize resonance and projection.
Electric guitars offer more flexibility in terms of string options. They can accommodate both nickel-wound and stainless steel strings, each imparting a distinct tonal character. Furthermore, electric guitarists often experiment with different string materials and coatings to achieve their desired sound, whether it’s a bright, articulate tone or a warm, mellow timbre.
Classical guitars, also known as nylon-string guitars, require specialized nylon strings. These strings are gentler on the fingers and produce a soft, velvety sound that’s well-suited for classical, flamenco, and fingerstyle playing. When selecting nylon strings, consider factors such as tension and material composition to find the perfect match for your playing style.
Once you’ve determined the appropriate type and gauge of string for your guitar, you may also want to explore various brands and models to discover the ideal set that complements your instrument’s unique characteristics. Keep in mind that the right string can significantly enhance your playing experience, so don’t hesitate to experiment and find the perfect fit for your musical expression.
By carefully choosing the right string for your guitar, you’re laying the foundation for a rewarding playing experience and ensuring that your instrument resonates with the sound you envision. With this crucial first step completed, you’re now ready to move on to the next stage of putting a new string on your guitar.
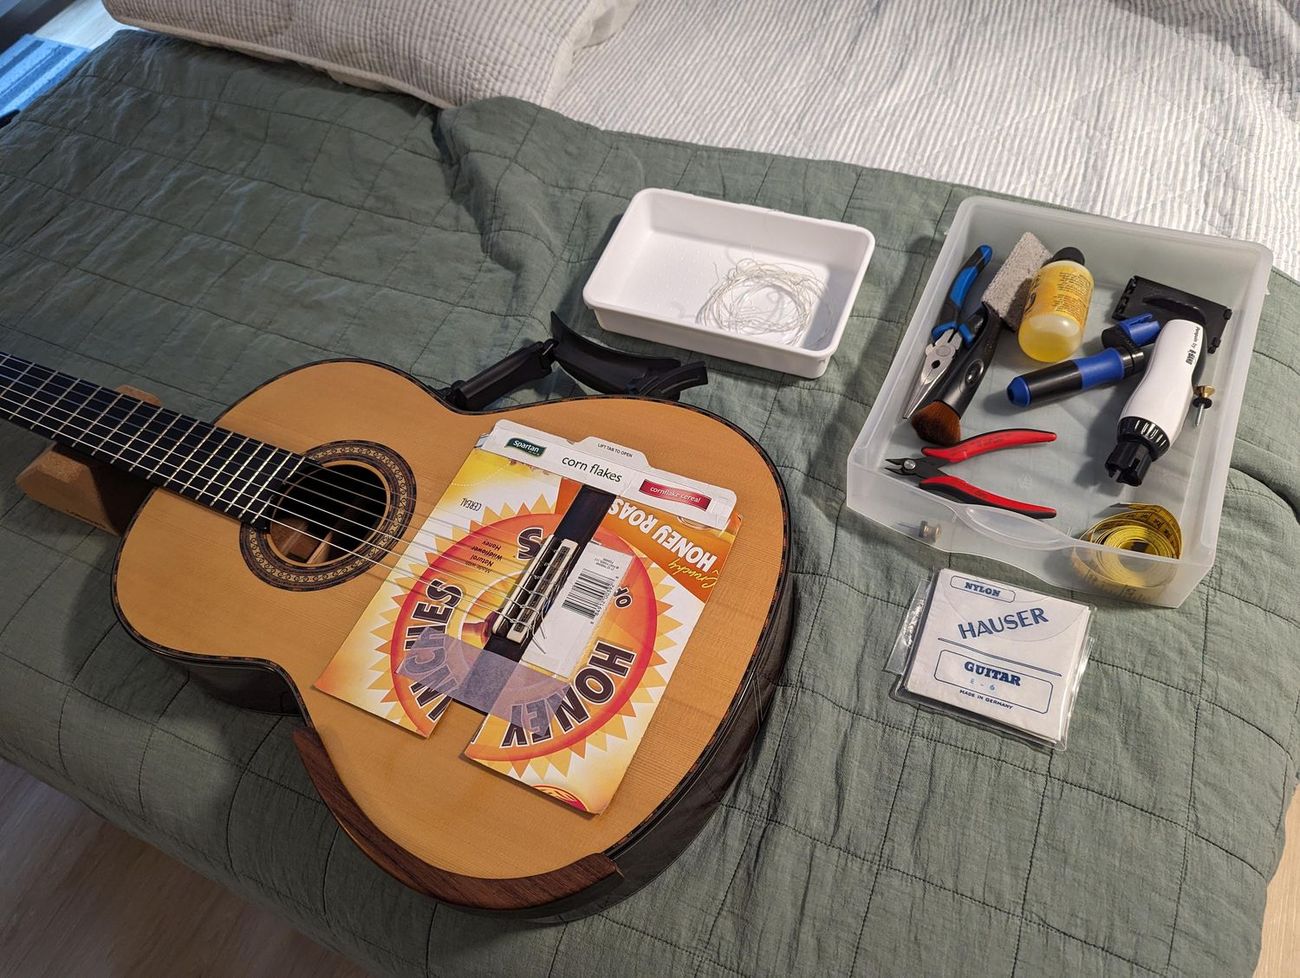
Step 2: Preparing the Guitar
Before you can put a new string on your guitar, it’s essential to prepare the instrument to receive the fresh addition. Start by removing the old string, if it’s still attached, by unwinding it from the tuning peg and detaching it from the bridge. Once the old string is off, take a moment to clean the areas where the string was in contact, such as the bridge and the nut, using a soft cloth. This simple maintenance step helps prevent dirt and residue from affecting the performance of your new string.
Next, inspect the condition of the bridge and the tuning pegs. Ensure that the bridge is free of any debris that could obstruct the placement of the new string. If your guitar has a bridge with bridge pins, make sure they are secure and properly seated to hold the new string in place. For guitars with a tremolo system, take note of any specific instructions for restringing to maintain the stability and functionality of the tremolo mechanism.
When it comes to the tuning pegs, check for any signs of wear or slippage that may affect the string’s ability to stay in tune. If you notice any issues with the tuning pegs, such as looseness or difficulty in turning, it may be a good idea to address these concerns before installing the new string. Proper maintenance of the tuning pegs contributes to the stability and accuracy of tuning, ensuring that your guitar stays in tune for extended periods.
Additionally, take this opportunity to examine the condition of the fretboard and frets. A clean fretboard not only enhances the aesthetic appeal of your guitar but also provides a smooth surface for the new string to make contact. If necessary, gently clean the fretboard with a specialized fretboard conditioner to remove any accumulated grime and maintain its optimal condition.
By preparing your guitar in this meticulous manner, you’re setting the stage for a seamless and effective string replacement process. With the instrument primed and ready to receive the new string, you’re now poised to move on to the next step of attaching the string to the bridge, bringing you closer to revitalizing your guitar’s tone and playability.
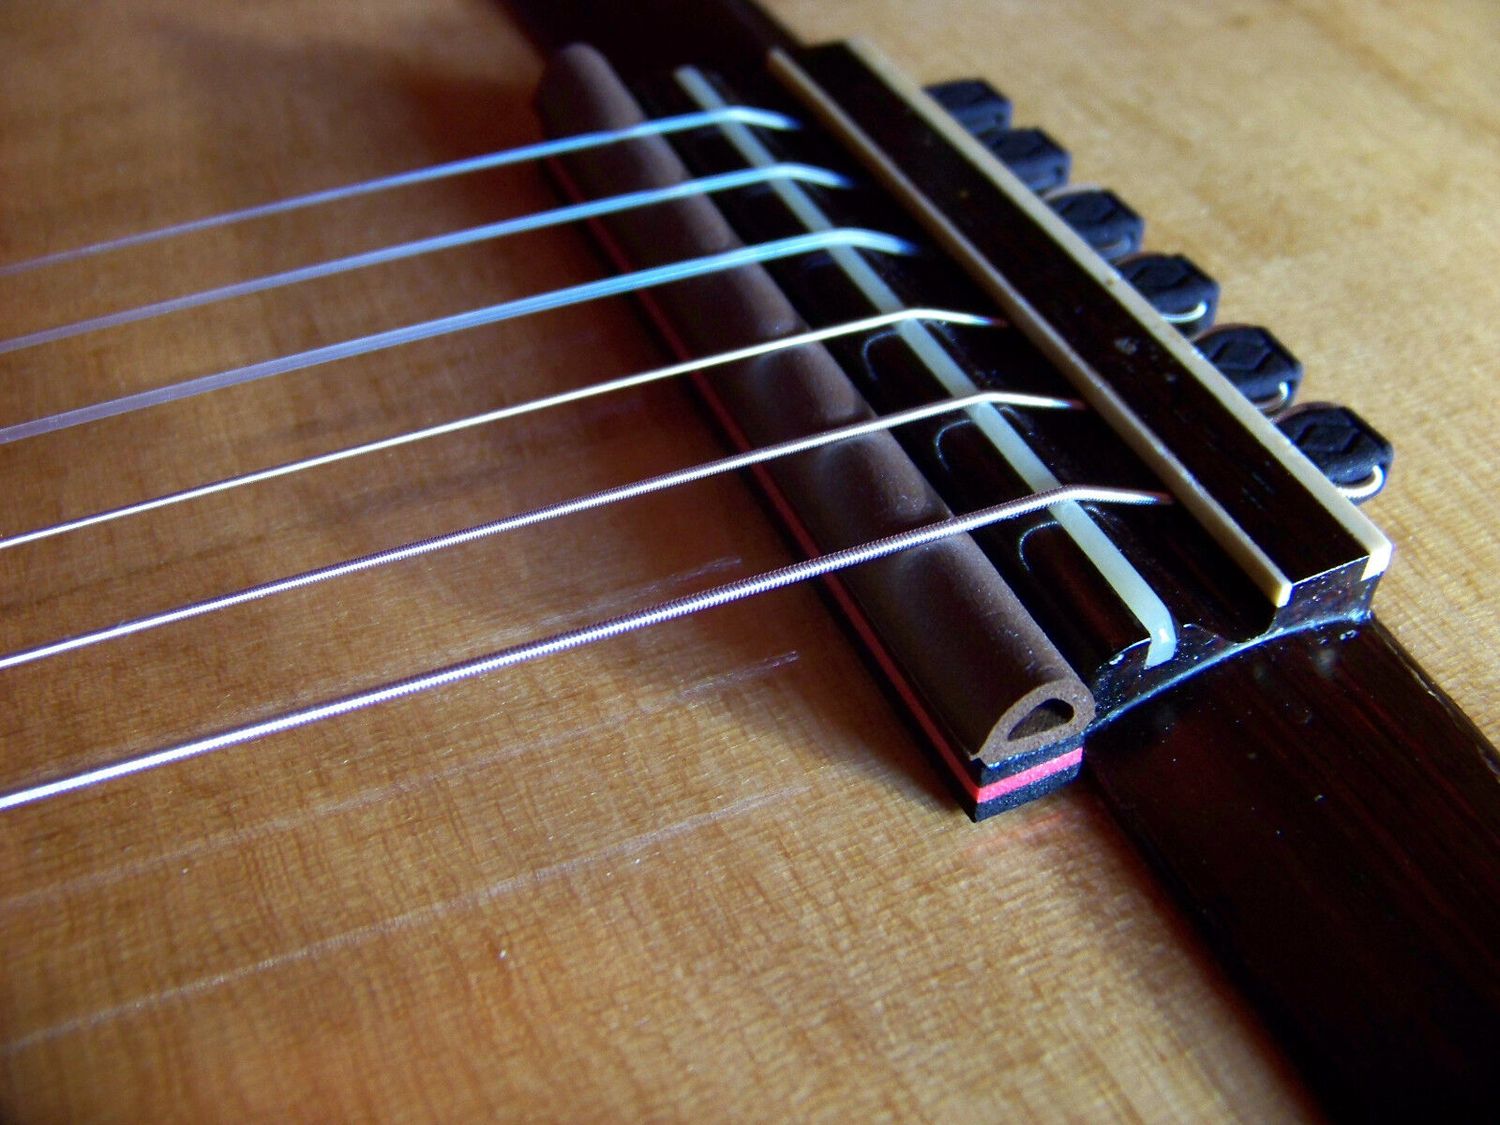
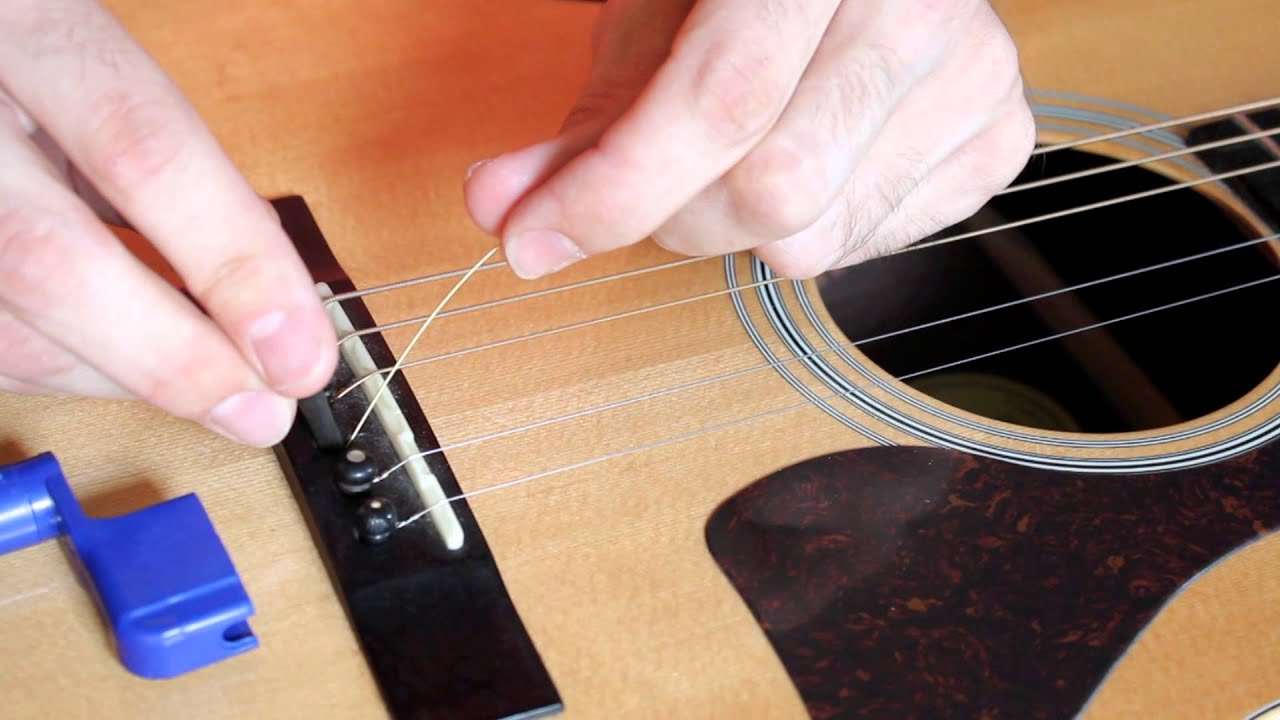
Step 3: Attaching the String to the Bridge
As you embark on the process of putting a new string on your guitar, the next crucial step is attaching the string to the bridge. The method of securing the string to the bridge varies depending on the type of guitar you have. For acoustic guitars, the bridge typically features bridge pins that hold the strings in place. To attach the string, insert one end of the string through the corresponding bridge pin hole, ensuring that it sits snugly against the bridge. If your acoustic guitar has a bridge with a slotted design, carefully guide the string through the slot, allowing it to rest securely in its position.
Electric guitars, on the other hand, often have a bridge with individual saddles for each string. Begin by threading the end of the string through the appropriate saddle, ensuring that it’s positioned correctly to achieve optimal intonation. Once the string is in place, you can proceed to the next step of winding it around the tuning peg.
For classical guitars, the process involves tying a simple knot near the bridge to secure the nylon string in place. This traditional method ensures that the string remains anchored while allowing for adjustments to achieve the desired tension and tone.
Regardless of the type of guitar you’re restringing, it’s essential to maintain proper tension and alignment as you attach the string to the bridge. This ensures that the string makes solid contact with the bridge, facilitating the transmission of vibrations and contributing to the overall resonance and sustain of the instrument.
As you complete this step, take a moment to verify that the string is correctly positioned and securely fastened to the bridge. This attention to detail sets the stage for the subsequent step of winding the string around the tuning peg, bringing you closer to the final stages of the string replacement process.
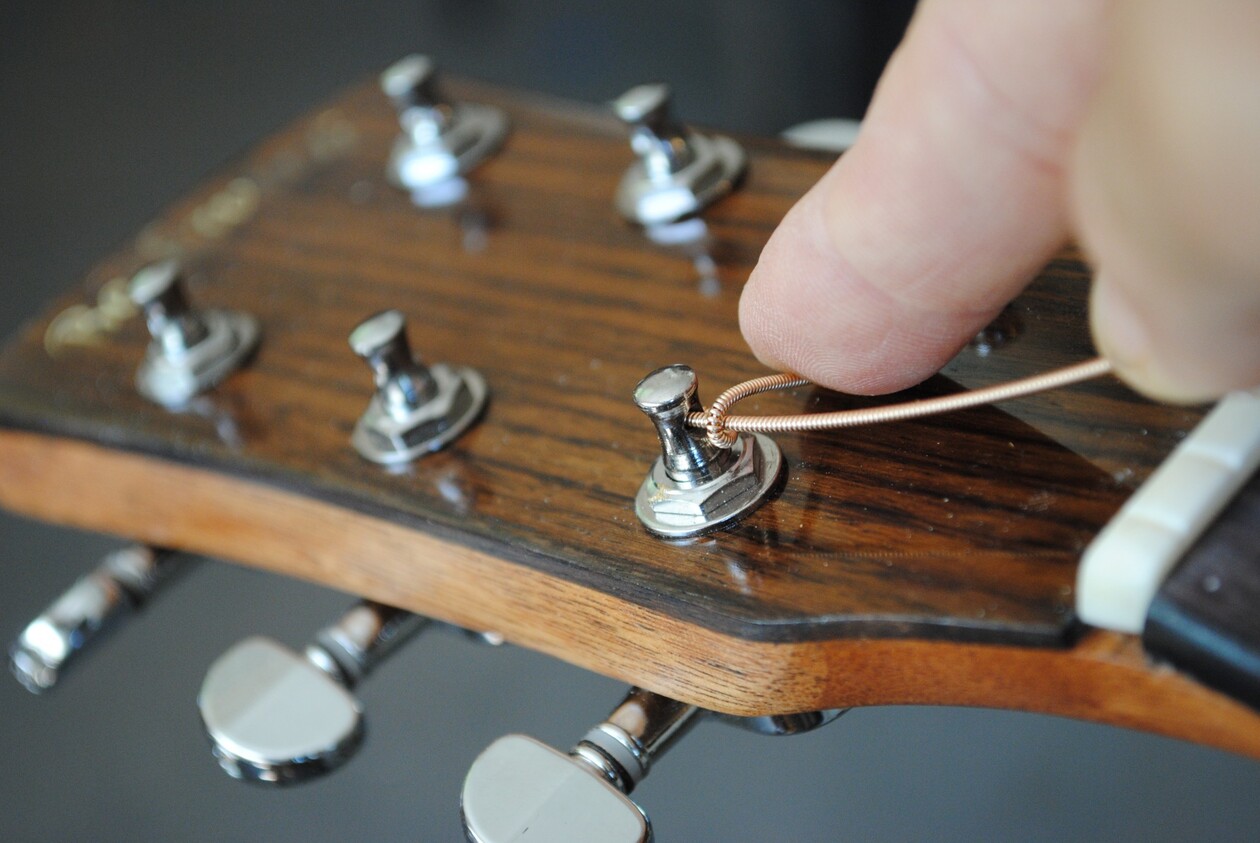
Step 4: Winding the String Around the Tuning Peg
With the string securely attached to the bridge, the next critical phase in putting a new string on your guitar is winding the string around the tuning peg. This step is pivotal in ensuring that the string is anchored firmly and can be tuned accurately to the desired pitch.
Begin by guiding the free end of the string through the corresponding tuning peg hole. Leave a sufficient length of slack to allow for several winds around the peg. As you start winding the string, ensure that each coil wraps neatly and uniformly around the peg. This organized winding not only enhances the string’s stability but also contributes to the overall aesthetics of your guitar.
As you wind the string, it’s essential to maintain tension and prevent any slack from accumulating between the tuning peg and the bridge. This tautness facilitates precise tuning and promotes optimal string resonance, essential for achieving a rich and vibrant tone.
For guitars with inline tuning pegs, the winding direction is crucial to ensure that the string wraps neatly and aligns with the nut. Typically, winds should progress downward from the top of the peg for the lower strings and upward from the bottom for the higher strings, promoting consistent string tension and alignment.
Once the string is securely wound around the tuning peg, take care to leave a sufficient amount of excess string to accommodate tuning adjustments. However, avoid excessive coiling, as this can lead to tuning instability and hinder the string’s ability to maintain its pitch.
As you complete the winding process, verify that the string is firmly secured to the tuning peg and that each coil is neatly arranged. This meticulous attention to detail sets the stage for the final step of tuning the string to its optimal pitch, bringing you one step closer to experiencing the rejuvenated sound and playability of your guitar.
Step 5: Tuning the String
As you near the culmination of the string replacement process, the final and crucial step is tuning the newly installed string to its optimal pitch. Whether you’re using an electronic tuner, a tuning app, or tuning by ear, achieving the correct pitch is essential to ensure that the string resonates harmoniously with the rest of the instrument.
Begin by gently tightening the string using the tuning peg, taking care to maintain even tension as you bring the string up to pitch. As the string approaches the desired pitch, listen for any indications of tuning instability, such as wavering or fluctuating tones. These subtle cues can guide your adjustments, allowing you to fine-tune the string to perfection.
If you’re using an electronic tuner, observe the tuner’s display to gauge the string’s pitch accuracy. Ensure that the tuner registers a steady and consistent reading, indicating that the string is precisely tuned. For those tuning by ear, compare the string’s pitch to a reference tone from another instrument or a tuning source to achieve the desired pitch.
As the string reaches its target pitch, test its stability by gently plucking it and listening for a clear, sustained tone. A well-tuned string will produce a resonant and unwavering sound, signifying that it’s ready to complement your playing with its vibrant and harmonious presence.
Once the string is accurately tuned and exhibits stability, verify that it’s properly seated at the nut and the bridge, ensuring that it makes solid contact with these critical points. This attention to detail guarantees that the string’s vibrations are efficiently transmitted through the guitar, contributing to an enhanced overall tonal quality and responsiveness.
By completing this final step, you’ve successfully put a new string on your guitar and fine-tuned it to deliver its optimal performance. Take a moment to appreciate the revitalized sound and playability of your instrument, knowing that your meticulous string replacement process has contributed to its continued resonance and musical expression.
Conclusion
Congratulations! You’ve successfully navigated the process of putting a new string on your guitar, equipping yourself with valuable skills that will enhance your playing experience and the overall performance of your instrument. By following the step-by-step guide outlined in this article, you’ve not only revitalized your guitar’s sound but also deepened your connection to the instrument through the maintenance and care you’ve provided.
Changing a guitar string is more than a routine maintenance task; it’s an opportunity to engage with your instrument on a deeper level, gaining insight into its mechanics and the impact of various elements on its tonal and playability characteristics. As you’ve experienced firsthand, the choice of string, meticulous preparation, and precise installation are all integral to achieving the best possible sound and performance from your guitar.
Moreover, the process of restringing your guitar offers a moment of reflection and appreciation for the instrument’s craftsmanship and the artistry it enables. As you carefully wind the string around the tuning peg and fine-tune it to perfection, you’re actively shaping the voice and personality of your guitar, contributing to its unique sonic identity.
By maintaining your guitar with regular string changes, you’re ensuring that it continues to inspire and resonate with your musical expression. The rejuvenated sound and responsiveness of your instrument serve as a testament to your dedication to preserving its integrity and optimizing its potential.
As you embark on your musical journey, remember that the process of putting a new string on your guitar is an art form in itself, requiring attention to detail, patience, and a deep appreciation for the instrument’s nuances. Embrace this ritual as an opportunity to connect with your guitar on a profound level, nurturing its sonic capabilities and honoring its role as a conduit for your creativity.
With the knowledge and expertise you’ve gained from this guide, you’re well-equipped to maintain your guitar’s peak performance, ensuring that it continues to inspire and accompany you on countless musical endeavors. As you cherish the rejuvenated sound of your instrument, let it serve as a reminder of the enduring bond between a guitarist and their beloved guitar.