Home>Events & Info>Playback>How To Blend Vocals With Playback Track
Playback
How To Blend Vocals With Playback Track
Modified: January 22, 2024
Looking to enhance your vocals with a playback track? Discover effective techniques for blending vocals seamlessly with playback to create a professional sound.
(Many of the links in this article redirect to a specific reviewed product. Your purchase of these products through affiliate links helps to generate commission for AudioLover.com, at no extra cost. Learn more)
Table of Contents
- Introduction
- Step 1: Importing the Vocals and Playback Track
- Step 2: Setting Up Your DAW
- Step 3: Adjusting Levels for Vocals and Playback Track
- Step 4: Applying EQ to the Vocals
- Step 5: Using Compression on the Vocals
- Step 6: Adding Reverb and Delay to the Vocals
- Step 7: Panning and Stereo Width for Vocals and Playback Track
- Step 8: Fine-tuning and Automation
- Conclusion
Introduction
Welcome to the world of blending vocals with a playback track! Whether you are a musician, audio engineer, or someone who simply loves creating music, knowing how to seamlessly integrate vocals with a backing track is a valuable skill to have. Playback tracks, also known as backing tracks or accompaniment tracks, are pre-recorded musical arrangements or instrumentals that serve as a support for live performances or studio recordings.
When it comes to blending vocals with a playback track, the goal is to create a polished and professional sound where the vocals are clear and well-balanced with the music. This process involves various techniques and tools, such as adjusting levels, applying EQ, using compression, adding effects like reverb and delay, and fine-tuning the overall mix.
In this article, we will guide you through the steps of blending vocals with a playback track, using industry-standard techniques and best practices. Whether you’re working in a digital audio workstation (DAW) like Pro Tools, Logic Pro, or Ableton Live, or using analog equipment, the concepts we will cover are applicable to any setup.
Before we dive into the technical aspects, it’s important to mention the importance of a well-recorded vocal performance. No matter how skilled you are at mixing, if the vocals are poorly recorded, it will be challenging to achieve a professional-sounding result. Make sure to capture a clean, clear, and expressive performance, using a high-quality microphone and a suitable recording environment.
Now, let’s take a closer look at the step-by-step process of blending vocals with a playback track, so you can bring your musical creations to life!
Step 1: Importing the Vocals and Playback Track
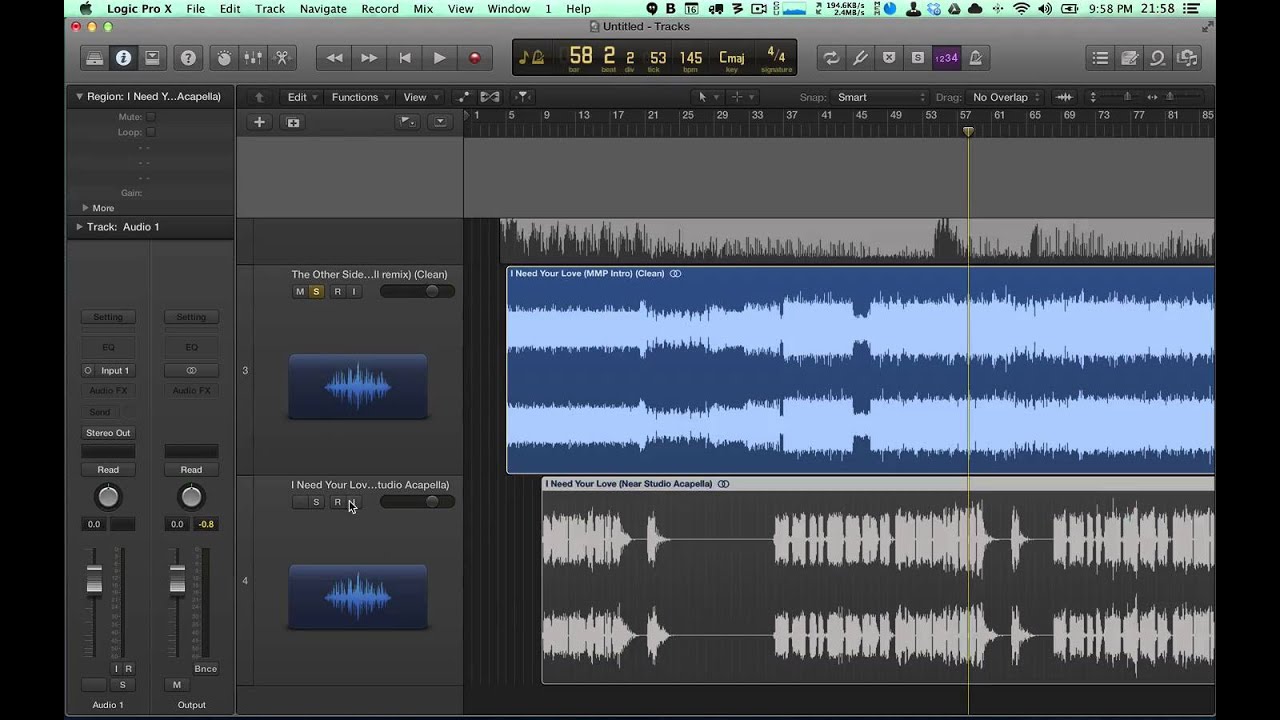
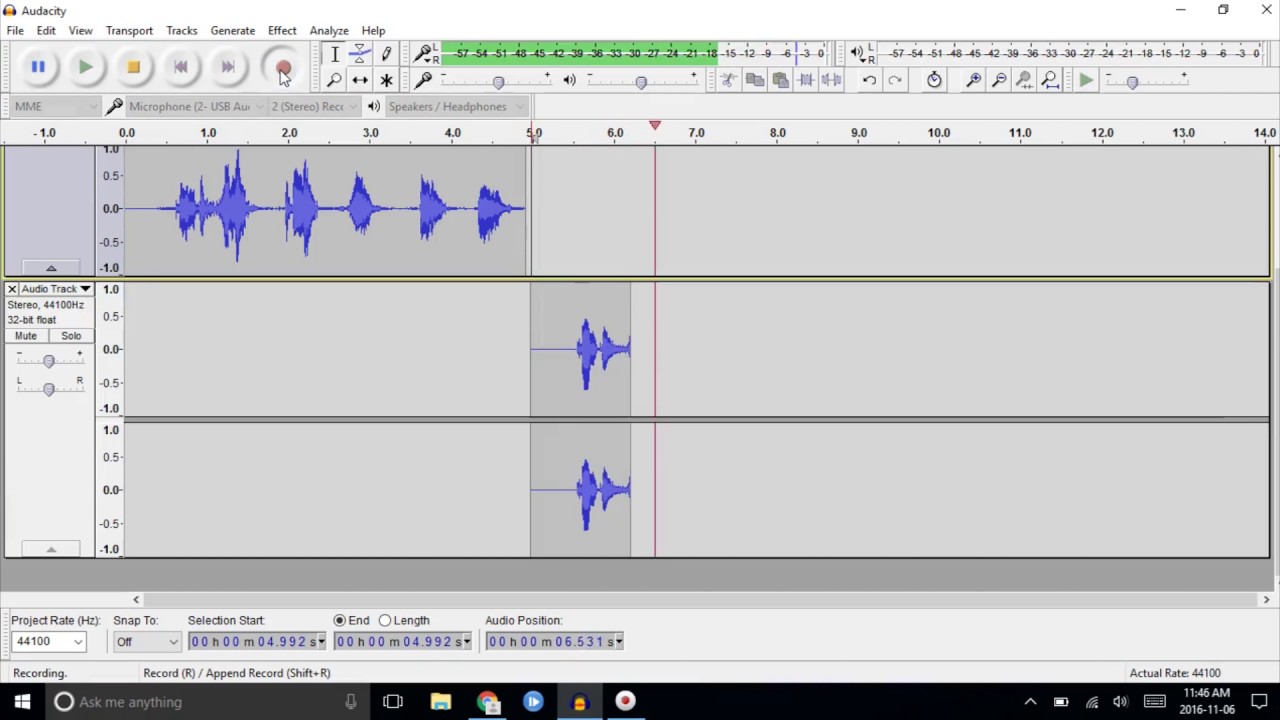
The first step in blending vocals with a playback track is to import both the vocals and the playback track into your digital audio workstation (DAW). Most DAWs have a simple drag-and-drop feature that allows you to easily import audio files.
Start by creating a new project or session in your DAW. Once you have your blank canvas, locate the audio files you want to import. Your vocals should be in a separate audio file, while the playback track can be a stereo audio file or multiple mono tracks.
In your DAW, navigate to the audio file browser or import menu. Select the vocals file and drag it into the tracks area of your DAW. You can create a new track specifically for vocals or use an existing track if it’s appropriate for the vocal recording.
Repeat the same process for the playback track. Drag and drop the playback track into the tracks area, either on a separate track or alongside the vocal track. Make sure the playback track is properly aligned with the vocal track so they start at the same point.
Once the vocals and playback track are imported, you can now move on to the next step of setting up your DAW for the blending process. This involves organizing the tracks, setting the session tempo, and ensuring the audio files are in sync.
Ensure that your DAW project is set to the desired session tempo. This is important, especially if you plan to apply time-based effects like reverb and delay, as they work in sync with the tempo. If your playback track has tempo information embedded, your DAW might automatically adjust the session tempo to match it. However, if it doesn’t, you can manually set the tempo in your DAW’s tempo or project settings.
Additionally, take a moment to organize the tracks within your DAW. Arrange them in a logical order, such as grouping all vocal-related tracks together and all playback track-related tracks together. This will make it easier to navigate and manipulate the different elements of your mix.
With the vocals and playback track imported, aligned, and properly set up in your DAW, you’re now ready to move on to the next step: adjusting the levels for the vocals and playback track.
Step 2: Setting Up Your DAW
Once you have imported the vocals and playback track into your digital audio workstation (DAW), it’s important to set up your session for optimal blending and mixing. This step involves various adjustments and configurations to ensure you have a solid foundation for the rest of the process.
First, take a look at your DAW’s mixer or channel strip. This is where you will control the levels, panning, and effects of each track in your project. Make sure that the mixer is visible and accessible, as you will be using it extensively during the blending process.
Next, examine the default settings of each track. By default, your DAW may apply certain effects or processing to the tracks you import. For the vocals, check if any unnecessary plugins or effects are enabled. Disable them if they are not needed, as you want to start with a clean and neutral vocal sound.
For the playback track, it’s a good idea to listen to it and make note of any potential issues, such as excessive low frequencies or harsh highs. These issues can be addressed later with EQ and other processing techniques, but being aware of them upfront will help you make informed decisions during the mixing process.
Another important consideration is the overall session setup. Ensure that the sample rate and bit depth of your project match the specifications of your audio files. This will prevent any potential loss of audio quality during the mixing process.
In addition, you might want to create a dedicated master fader or bus for your mix. This allows you to control the overall volume and apply mix bus processing, such as compression or saturation, to the entire blend of vocals and playback track. Routing all the tracks to a master fader or bus can help bring cohesiveness and balance to your mix.
Lastly, customize your workspace to suit your workflow. Arrange the tracks, mixer windows, and other elements of your DAW in a way that is comfortable and efficient for you. By personalizing your workspace, you can streamline your workflow and focus more on the music rather than searching for tools or controls.
Once your DAW is properly set up and optimized for blending vocals with a playback track, you can move on to the next step: adjusting the levels to ensure a balanced and cohesive mix.
Step 3: Adjusting Levels for Vocals and Playback Track
One of the crucial steps in blending vocals with a playback track is finding the right balance between the vocals and the music. This involves adjusting the levels of both the vocals and the playback track to achieve a cohesive and well-blended mix.
Start by soloing the vocal track and playing it back with the playback track muted. Listen carefully to the vocals and make note of their overall volume and clarity. Adjust the fader of the vocal track until the vocals are at a comfortable level, where they are clearly audible but not overpowering.
Next, unmute the playback track and listen to it in isolation. Pay attention to its volume and how it relates to the vocals. If the playback track is too quiet or too loud compared to the vocals, adjust the fader of the playback track accordingly. The goal is to have the playback track blend seamlessly with the vocals, creating a balanced and pleasant listening experience.
While adjusting the levels, keep in mind the dynamic range of the vocals and the playback track. The dynamic range refers to the difference between the quietest and loudest parts of a sound. You want to ensure that the vocals are not getting lost during the louder sections of the playback track, nor are they too overpowering during the quieter sections.
In addition to adjusting the faders, you can also use automation to fine-tune the levels throughout the song. Automation allows you to automate the volume changes of specific tracks at specific times, giving you greater control over the dynamics of the mix. Use automation to boost or lower the volume of the vocals or playback track when needed, to highlight certain sections or create a sense of musicality.
Remember to regularly toggle between soloing the vocals, the playback track, and listening to them together to ensure they are blending well. Use your ears as your most valuable tool and make small adjustments as necessary until you achieve a well-balanced mix.
Once you have adjusted the levels to your satisfaction, it’s time to move on to the next step: applying EQ to the vocals to enhance their tonal balance and clarity.
Step 4: Applying EQ to the Vocals
Equalization, or EQ, is a powerful tool when it comes to shaping the tonal balance and clarity of vocals. By using EQ, you can enhance certain frequencies and reduce unwanted ones, ensuring that the vocals sit well in the mix with the playback track.
Start by soloing the vocal track and listening to it carefully. Pay attention to any frequency areas that may need adjustment. For example, if the vocals sound muffled or lack presence, you may need to increase the high frequencies. Conversely, if the vocals sound harsh or sibilant, you may need to reduce the frequencies in the upper midrange or presence range.
Activate the EQ plugin or tool on the vocal track in your DAW. Most EQ plugins provide a visual representation of the frequency spectrum along with control knobs or sliders. Adjust the frequency, gain, and Q (bandwidth) of the EQ to sculpt the sound of the vocals.
When applying EQ to vocals, there are a few common techniques to keep in mind:
- High-pass filter: Use a high-pass filter to remove any unwanted low-frequency rumble or noise that may be present in the vocals. Set the cutoff frequency to a point where it doesn’t affect the natural tone of the vocals.
- Presence boost: To enhance the clarity and presence of vocals, consider boosting the frequencies in the upper midrange or presence range (around 3kHz to 6kHz) slightly. Be careful not to overdo it, as it can make the vocals sound harsh or piercing.
- De-essing: If the vocals have excessive sibilance or harsh “sss” sounds, use a de-esser plugin to tame those frequencies. A de-esser specifically targets and reduces the intensity of the sibilant frequencies without affecting the overall vocal sound.
- Frequency notching: If there are specific frequencies in the vocals that stand out or clash with other elements of the mix, consider using a narrow EQ band to notch or dip those frequencies. This can help create more space for other instruments or elements in the mix.
Remember to make subtle and precise adjustments when applying EQ to vocals. Small tweaks can go a long way in improving the overall sound and blending the vocals seamlessly with the playback track.
Once you are satisfied with the EQ adjustments on the vocal track, listen to the vocals in context with the playback track. Make any necessary fine-tuning to the EQ settings to ensure that the vocals sit well and shine through in the blend.
Now that you have applied EQ to the vocals, it’s time to move on to the next step: using compression to control the dynamics of the vocals and create a more polished sound.
Step 5: Using Compression on the Vocals
Compression is a powerful tool used in the music production process to control the dynamics of audio signals, including vocals. By applying compression to the vocals, you can ensure a more consistent and polished sound, smoothing out any peaks and valleys in the vocal performance.
Start by inserting a compressor plugin on the vocal track in your digital audio workstation (DAW). The compressor will have controls such as threshold, ratio, attack, release, and makeup gain. These controls allow you to shape the dynamics of the vocals.
Begin by setting the threshold of the compressor. The threshold determines at what level the compressor starts to reduce the volume of the vocals. Adjust the threshold until you begin to see a gain reduction on the compressor’s meter or display when the vocals exceed that threshold.
Next, set the ratio. The ratio determines the amount of gain reduction applied to the vocals once they exceed the threshold. A higher ratio, such as 4:1 or 6:1, will result in more aggressive compression, while a lower ratio, like 2:1, will have a more subtle effect.
Adjust the attack and release settings to control the timing of the compression. The attack determines how quickly the compressor reacts to the vocals exceeding the threshold, while the release determines how quickly the compression is released once the vocals fall below the threshold again. Experiment with different attack and release times to find the right balance for the vocals.
Use the makeup gain control to compensate for any volume loss caused by the compression. Increase the gain to bring the overall level of the compressed vocals back to a balanced level in the mix.
When using compression on vocals, it’s important to maintain a natural and transparent sound. Apply compression in moderation, avoiding excessive gain reduction that can make the vocals sound overly compressed or lifeless. The goal is to control dynamics while preserving the emotional and expressive qualities of the vocal performance.
It’s also worth noting that you can use additional techniques such as multiband compression or parallel compression if you need more control over specific frequency ranges or want to add more depth and thickness to the vocals. These techniques can help shape the vocals further and blend them even more effectively with the playback track.
After applying compression to the vocals, take a moment to listen to them in the context of the playback track. Make any necessary adjustments to the compressor settings to ensure that the vocals sit well in the mix and maintain a consistent volume throughout the song.
With the vocals now compressed and sounding polished, we can move on to the next step: adding reverb and delay effects to enhance the depth and space of the vocals.
Step 6: Adding Reverb and Delay to the Vocals
Reverb and delay are two commonly used effects in music production to add depth, space, and ambience to vocals. By applying these effects to the vocals, you can create a sense of immersion and enhance the overall sonic experience.
Start by inserting a reverb plugin on a send/auxiliary track in your digital audio workstation (DAW). Send a portion of the vocal signal to this reverb track by adjusting the send level or creating a pre-fader send. This allows you to have more control over the amount of reverb applied to the vocals.
Choose a reverb type that suits the style and mood of the song. Consider the size, decay time, and tonal characteristics of the reverb. A shorter decay time and brighter tonality might work well for a crisp and upfront vocal sound, while a longer decay time and darker tonality might be more suitable for creating a sense of depth and spaciousness.
Adjust the reverb parameters, such as decay time, pre-delay, and wet/dry mix, to achieve the desired reverb sound. The decay time controls how long the reverb tail lasts, the pre-delay determines the time between the dry vocal and the start of the reverb, and the wet/dry mix determines the balance between the dry and wet (reverberated) signal. Experiment with these settings to find the right balance for your vocals.
Next, add a delay effect to the vocals to create echoes or repeats. Insert a delay plugin on a separate send/auxiliary track and adjust the send level from the vocal track to this delay track. Consider the delay time, feedback, and wet/dry mix as well as any specific delay parameters provided by the plugin.
Choose a delay time that complements the rhythm and tempo of the song. A shorter delay time can create a more rhythmic effect, while a longer delay time can add a sense of spaciousness. Adjust the feedback to control the number of repeats and experiment with the wet/dry mix to find the perfect balance between the dry vocals and the delayed repeats.
Consider using different types of delays, such as tape delay, digital delay, or modulation delay, to add variation and texture to the vocals. Each type of delay has its own unique characteristics and can provide different sonic qualities to the vocals.
Remember to listen to the vocals in the context of the playback track while adjusting the reverb and delay effects. The goal is to enhance the vocals and create a sense of depth and space without overwhelming the mix.
It’s also important to use these effects tastefully and sparingly. Be mindful of the genre and style of the song and ensure that the reverb and delay enhance the vocals rather than detract from them. Sometimes, less can be more when it comes to effects.
After adding reverb and delay to the vocals, take the time to listen to the vocals in the full mix and make any necessary adjustments to the effects parameters. With the vocals now enriched with depth and ambience, we can move on to the next step: panning and stereo width adjustments for the vocals and the playback track.
Step 7: Panning and Stereo Width for Vocals and Playback Track
Panning and stereo width adjustments play a crucial role in creating a balanced and immersive mix. In this step, we will explore how to position the vocals and the playback track in the stereo field to enhance their clarity and separation.
Begin by focusing on the vocals. Panning the vocals can help create a sense of space and differentiate them from the other elements in the mix. By default, vocals are often panned to the center to ensure they are front and center. However, you can experiment with panning the vocals slightly to the left or right to provide a wider stereo image. Be mindful of the other instruments and elements in the mix, and ensure that the panning choices complement the overall balance and arrangement.
As for the playback track, it depends on the nature of the track and your artistic choices. For stereo playback tracks, you can leave them as they are or adjust the panning to create a wider stereo image. If the playback track consists of multiple mono tracks, you can spread them out in the stereo field to create a more immersive experience. Again, consider the other elements in the mix and the desired sonic aesthetic when making panning decisions.
In addition to panning, manipulating the stereo width can further enhance the blend between the vocals and the playback track. Stereo width adjustments can be particularly effective for widening and adding dimension to the vocals. However, be cautious not to overdo it, as excessive stereo widening can result in an unnatural or phase-related issues. Use tools like stereo width plugins or stereo imaging processors to adjust the width of the vocals and the playback track with subtlety and precision.
Remember, the key is to create a balanced and cohesive mix, so always listen critically to the changes you make in the stereo field. Use your ears as the ultimate guide and make adjustments as needed to achieve the desired spatial placement and separation of the vocals and the playback track.
Once you are satisfied with the panning and stereo width adjustments, it’s time to fine-tune the overall mix and consider automation for dynamic control and expression. This leads us to the final step: Step 8: Fine-tuning and Automation.
Step 8: Fine-tuning and Automation
In the final step of blending vocals with a playback track, it’s time to fine-tune the mix and consider automation to add dynamic control and expression to your vocals.
Start by revisiting the levels of the vocals and the playback track. Listen to the mix as a whole and make any necessary adjustments to ensure that everything sits well together. Pay attention to any areas where certain elements might be competing or clashing. Use subtle level adjustments or additional EQ tweaks, if needed, to create a balanced and cohesive mix.
At this stage, it’s also important to consider any additional processing that might enhance the vocals and the playback track. This could include using effects like chorus, saturation, or harmonic enhancement to add color and character to the vocals or the playback track. Experiment with different plugins or techniques to find the right balance of processing for your specific mix.
Automation is a powerful tool to add dynamics and expression to your vocals. You can automate the volume, panning, EQ, or any other parameter to create movement and variation throughout the song. For example, you might automate a gradual increase in volume during the chorus or pan the vocals from left to right to add interest. Automation gives you precise control over the mix and allows you to shape the music to your creative vision.
Take your time to listen to various sections of the song and identify the moments where automation can enhance the vocals and the playback track. Draw automation curves or use automation breakpoints in your DAW to create smooth transitions and dynamic changes. Don’t be afraid to experiment and trust your artistic instincts when it comes to automation.
Throughout the fine-tuning process, it’s crucial to regularly refer to reference tracks. Blending vocals with a playback track is not just about making the mix sound good on its own, but also ensuring that it holds up against professional productions in the same genre. Compare your mix with well-mixed songs and use them as a benchmark for making critical decisions.
Lastly, once you have fine-tuned the mix and automation, take the time to listen to it with fresh ears. Consider seeking feedback from trusted sources or fellow musicians to get a different perspective on the blend of vocals and playback track. This feedback can help you identify any areas that may need further adjustment or improvement.
With the fine-tuning and automation process complete, you have successfully blended the vocals with the playback track. The result is a well-balanced, polished, and professional-sounding mix that showcases the vocals while complementing the music. Congratulations on your achievement!
To conclude, blending vocals with a playback track requires careful attention to detail, technical knowledge, and a discerning ear. By following the steps outlined in this article, you can confidently produce outstanding blends that captivate listeners and bring your musical creations to life.
Conclusion
Blending vocals with a playback track is a critical step in creating a captivating and professional-sounding music production. By following the step-by-step process outlined in this article, you have learned how to seamlessly integrate vocals with a backing track, ensuring they are clear, balanced, and well-blended.
From importing the vocals and playback track into your DAW to fine-tuning the mix and considering automation, each step plays a crucial role in achieving a polished result. It’s important to pay attention to details such as adjusting levels, applying EQ and compression, adding reverb and delay, panning, and utilizing stereo width effectively.
Throughout the blending process, always trust your ears and make creative decisions based on what sounds best for the particular mix and genre. Remember to listen critically, compare your mix to reference tracks, and seek feedback from others to continuously improve your skills and achieve professional results.
Blending vocals with a playback track requires a balance of technical knowledge and artistic intuition. By experimenting with different techniques and tools, you can bring out the best in your vocals, while ensuring they harmoniously integrate with the music.
So, whether you are a musician, audio engineer, or someone passionate about creating music, mastering the art of blending vocals with a playback track opens up a world of possibilities. It allows you to unlock the full potential of your vocal recordings and create captivating musical experiences for your audience.
Take the knowledge you have gained from this article, practice, and continue to refine your skills. With time, dedication, and a passion for music, you will become adept at blending vocals with a playback track and achieving remarkable results in your productions.
Now, go forth and create music that not only showcases your vocal talents but also captivates listeners with its seamless blend of vocals and a well-crafted playback track. Happy blending!