Classical
How To Build A Classical Guitar
Modified: February 14, 2024
Learn how to build a classical guitar from scratch with our step-by-step guide. Discover the techniques and tools needed to create your own masterpiece.
(Many of the links in this article redirect to a specific reviewed product. Your purchase of these products through affiliate links helps to generate commission for AudioLover.com, at no extra cost. Learn more)
Table of Contents
Introduction
Building a classical guitar is an art form that requires craftsmanship, precision, and a deep knowledge of the instrument. Whether you’re a seasoned luthier or a passionate musician looking to embark on a new journey, constructing your own classical guitar can be a rewarding and fulfilling experience.
With its roots dating back centuries, the classical guitar holds a special place in the world of music. Its warm, rich tones and expressive capabilities make it a favorite among guitarists and enthusiasts alike. By building your own classical guitar, you have the opportunity to not only create an instrument that suits your unique style and playing preferences, but also to gain a deeper understanding of the instrument and its intricate mechanics.
Before diving into the process of building a classical guitar, it’s essential to have a solid plan in place. Selecting the right materials, understanding the various components, and following a systematic approach will all contribute to the success of your project. In this article, we will guide you through the step-by-step process of building a classical guitar, from selecting materials to final adjustments and tuning.
Whether you’re a novice or an experienced builder, building a classical guitar requires attention to detail and patience. It is a labor-intensive process that demands dedication and precision. However, the end result will be a unique and personal instrument that you can cherish for years to come.
So, if you’re ready to embark on this rewarding journey, let’s get started on the exciting process of building your own classical guitar.
Selecting Materials
When it comes to building a classical guitar, selecting the right materials is crucial for achieving the desired sound and overall quality of the instrument. Each component of the guitar, from the wood used for the soundboard to the types of strings, contributes to its tone, resonance, and playability. Therefore, it’s important to carefully consider each material choice to create a well-balanced and harmonious instrument.
The soundboard, also known as the top, is one of the most critical components of a classical guitar. Typically made from spruce or cedar, the soundboard needs to have a strong yet flexible structure to resonate and amplify the vibrations produced by the strings. Spruce is known for its bright and brilliant tone, while cedar offers a warmer and more mellow sound.
For the back and sides of the guitar, common timber choices include rosewood, mahogany, and maple. Rosewood is often favored for its rich and complex tonal qualities, while mahogany provides a balanced and warm sound. Maple, on the other hand, offers a bright and clear tone that is highly prized by some players.
The neck of the guitar is typically made from a sturdy and stable wood, such as mahogany or Spanish cedar. It needs to have sufficient strength to withstand the tension of the strings while providing a comfortable playing experience. When selecting the wood for the neck, it’s important to consider its grain orientation and stability.
The fingerboard, where the frets are located, is usually made from a dense and durable wood, such as ebony or rosewood. These materials provide a smooth surface for playing and enhance the overall aesthetics of the instrument.
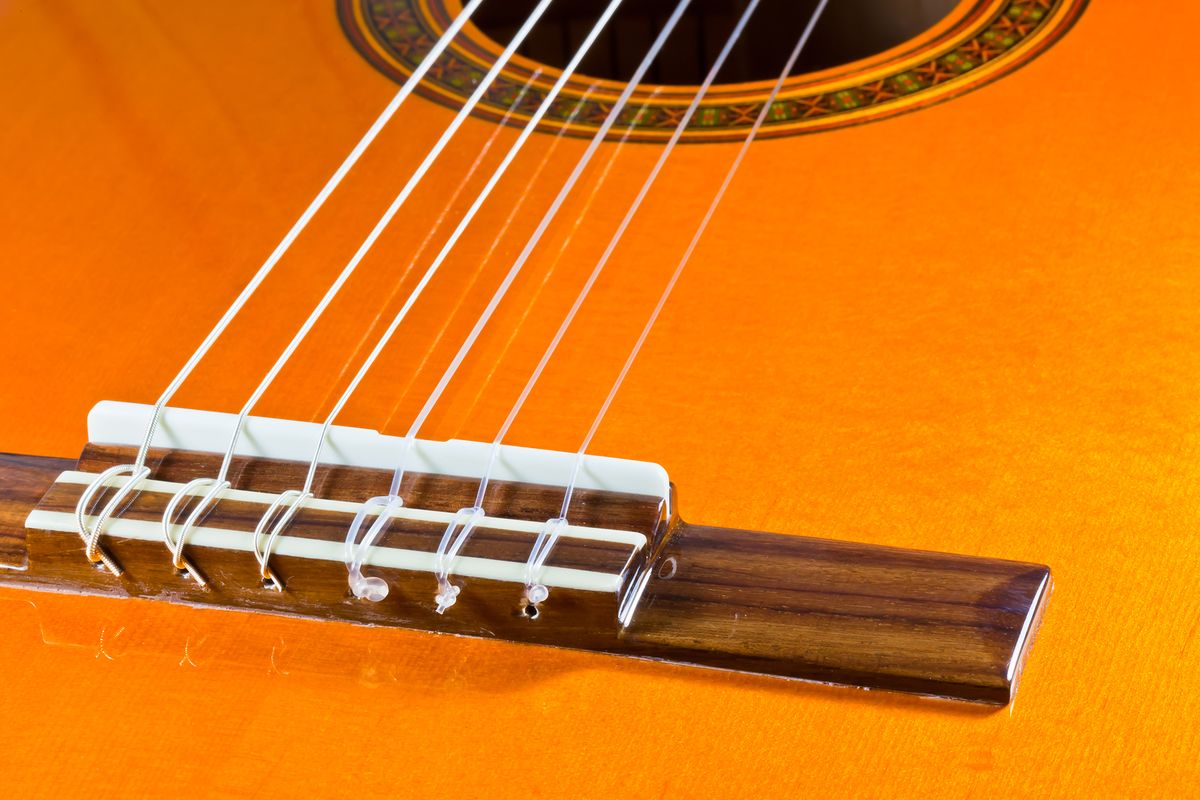
When it comes to the bridge, which holds the strings in place, it’s important to choose a material that offers both stability and good transmission of vibrations. Common choices include rosewood and ebony, which provide a solid base for the strings and contribute to the tonal characteristics of the guitar.
Lastly, the choice of strings can greatly impact the sound and playability of the classical guitar. Nylon strings are the most commonly used for classical guitars, offering a warm and balanced tone. There are also variations such as carbon composite strings, which provide improved projection and longevity.
Overall, the selection of materials for a classical guitar is a delicate balance between personal preference, desired tone, and the overall aesthetics of the instrument. By carefully considering each component and its characteristics, you can ensure that your guitar will deliver a beautiful sound and a satisfying playing experience.
Building the Neck
The neck of a classical guitar plays a crucial role in providing support, stability, and comfortable playability. Building the neck requires careful attention to detail and precision to ensure that it meets the necessary specifications. Here, we will guide you through the steps involved in constructing the neck of a classical guitar.
The first step in building the neck is selecting the appropriate wood for the neck blank. Typically, mahogany or Spanish cedar are preferred for their strength and stability. The wood should be free from knots or defects to ensure durability and structural integrity.
Once you have the neck blank, the next step is to shape it according to the desired specifications. This includes creating the tapering and contouring of the neck, as well as determining the width and thickness. The neck should be comfortable to hold, with appropriate dimensions for the player’s hand size and playing style.
To shape the neck, you can use a combination of hand tools such as rasps, files, and sandpaper. Take your time and work slowly, constantly checking the progress to ensure an accurate and comfortable shape. Pay attention to the transition from the neck to the headstock, ensuring a smooth and seamless connection.
Next, you will need to create the fretboard, which is typically made from a dense and durable wood such as ebony or rosewood. Measure and cut the fretboard to the appropriate length and width, ensuring it aligns with the neck properly. Use a radius sanding block to shape the fretboard to the desired curvature. Make sure to accurately position the fret slots, taking into account the scale length of the guitar.
Once the fretboard is ready, it can be glued to the neck using a high-quality wood glue. Apply even pressure and ensure a tight bond between the fretboard and the neck. After the glue has dried, file the fret ends flush with the edges of the fretboard and proceed to level, crown, and polish the frets for optimal playability.
Finally, attach the headstock to the neck using a strong and secure joint, such as a dowel or scarf joint. Shape the headstock to the desired design, taking care to ensure proper alignment with the neck. Install the tuning machines and nut to complete the construction of the neck.
Building the neck of a classical guitar is a meticulous process that requires precision and attention to detail. By carefully shaping and crafting the neck, you can create a comfortable and playable instrument that enhances your playing experience.
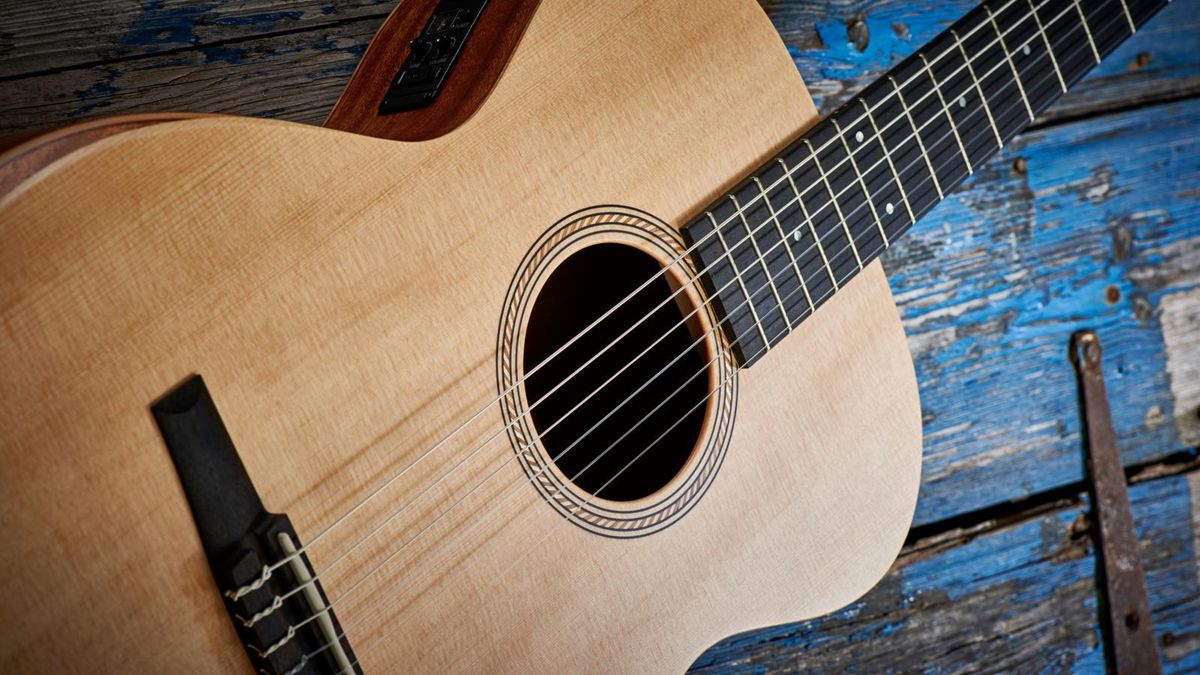
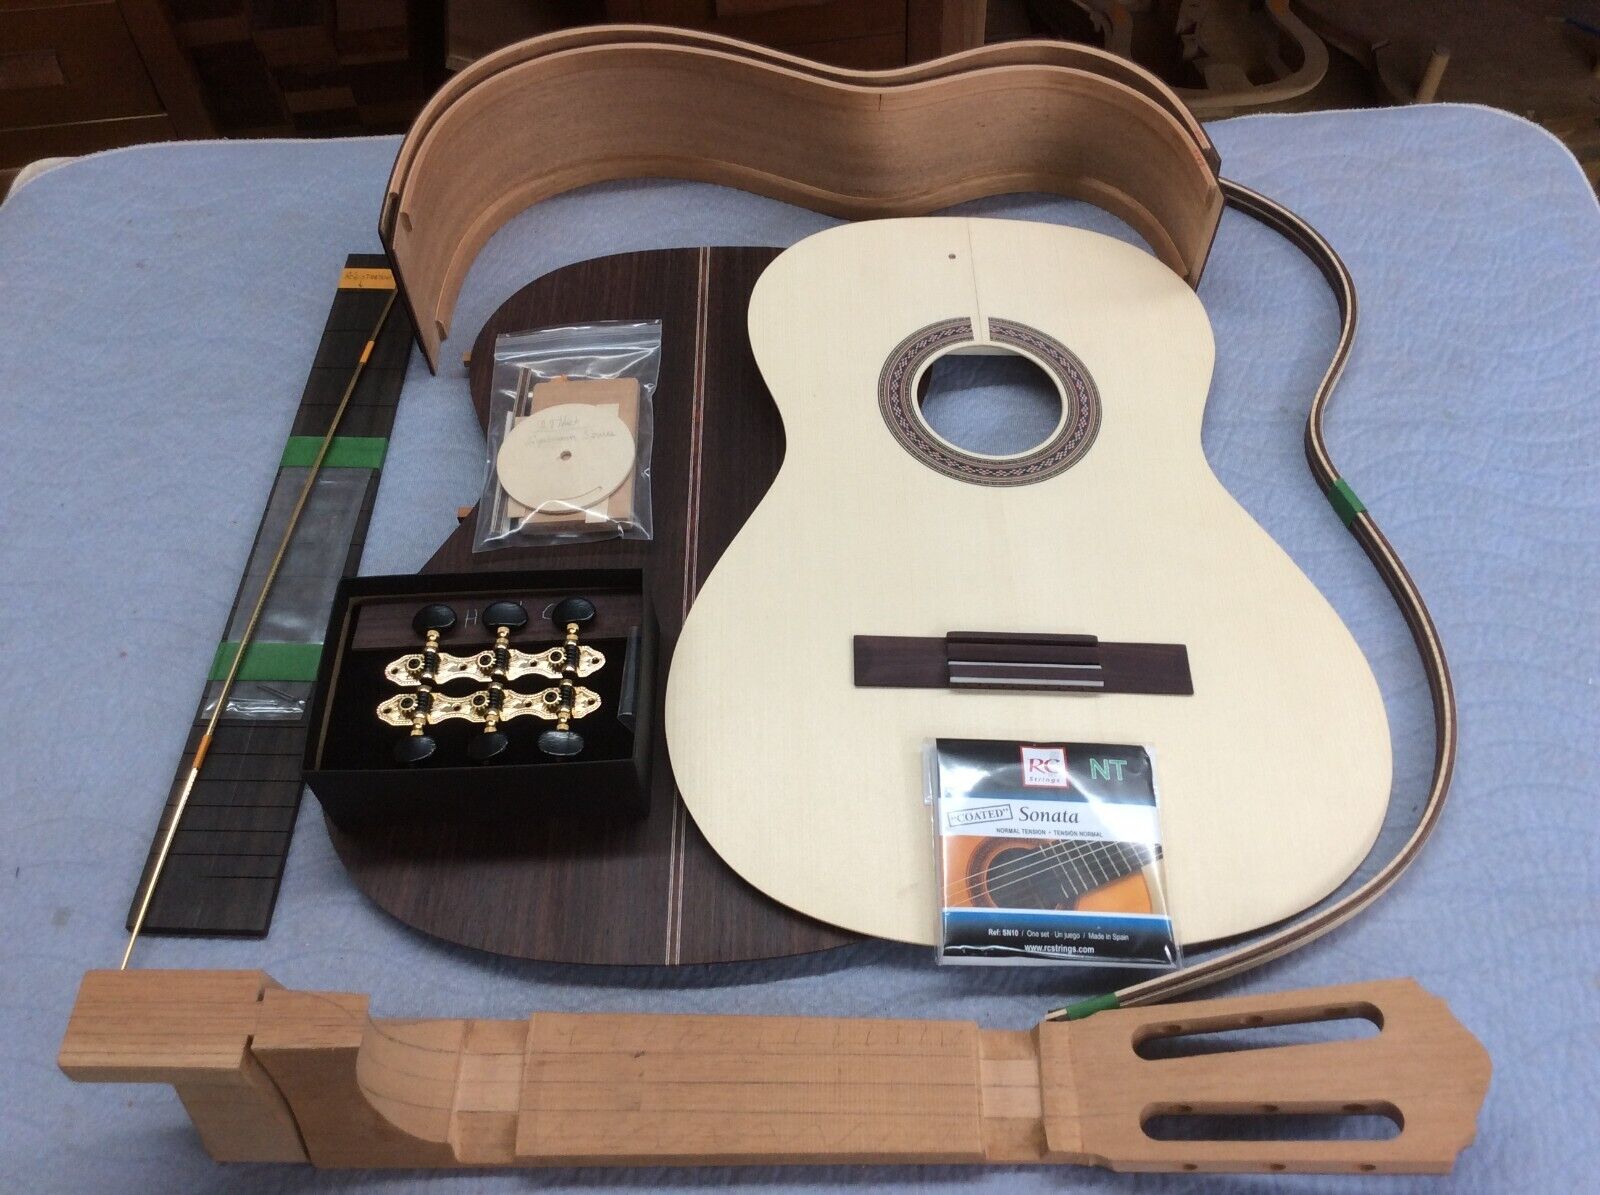
Constructing the Body
The body of a classical guitar is the heart of the instrument, responsible for producing the resonant and vibrant tones that define its sound. Constructing the body requires a combination of woodworking skills, careful planning, and an understanding of acoustics. In this section, we will guide you through the process of constructing the body of a classical guitar.
The first step in constructing the body is selecting the wood for the back and sides. Common choices include rosewood, mahogany, and maple, each offering unique tonal properties. Carefully examine the wood for any defects and ensure that it is properly seasoned to prevent warping or shrinking in the future.
Once you have the wood, you will need to thickness it to the appropriate dimensions. This can be done using a combination of hand planes, thickness sanders, or a drum sander. Ensure that the back and sides are uniform in thickness to promote balanced resonance and structural integrity.
Next, you will need to create the bracing system for the soundboard. This is crucial for distributing and controlling the vibrations produced by the strings. Using a combination of tone bars, fan braces, and other structural elements, adhere the bracing to the inner surface of the soundboard. Pay close attention to the placement and shaping of the braces to achieve the desired tonal characteristics.
After the bracing is in place, it’s time to join the back and sides of the guitar to the soundboard. Apply wood glue along the edges of the soundboard and carefully position the back and sides. Use clamps or bands to apply even pressure and allow the glue to dry. Ensure that all joints are tight and secure for optimal sound transmission.
Once the body is glued together, you can proceed to shape and contour the body. Use rasps, files, and sandpaper to give the body its final shape and curves. Take care to maintain symmetry and smooth transitions between different sections of the body.
After shaping the body, you will need to install the binding and purfling. These decorative elements not only enhance the aesthetics of the guitar but also serve as protection for the edges of the body. Carefully cut and install the binding and purfling, using wood glue and clamps to secure them in place.
Finally, you will need to create and install the soundhole rosette, which adds another visual element to the guitar’s design. This can be made from a variety of materials such as wood, abalone, or mother-of-pearl. Carefully cut and install the rosette, ensuring a snug fit and proper alignment with the soundhole.
Constructing the body of a classical guitar requires precision, patience, and attention to detail. By carefully selecting and working with the right materials, shaping the body, and adding decorative elements, you can create a visually striking and acoustically impressive instrument.
Assembling the Guitar
Once the neck and body of the classical guitar have been constructed, it’s time to assemble the various components to create a cohesive and playable instrument. The process of assembling the guitar involves installing the neck, attaching the bridge, and mounting the hardware. In this section, we will guide you through the steps involved in assembling a classical guitar.
The first step in the assembly process is attaching the neck to the body. This is typically done using a combination of a dovetail or mortise-and-tenon joint, along with wood glue. Ensure that the neck is properly aligned with the body and securely fastened in place. Use clamps or a vice to apply even pressure and allow the glue to dry thoroughly.
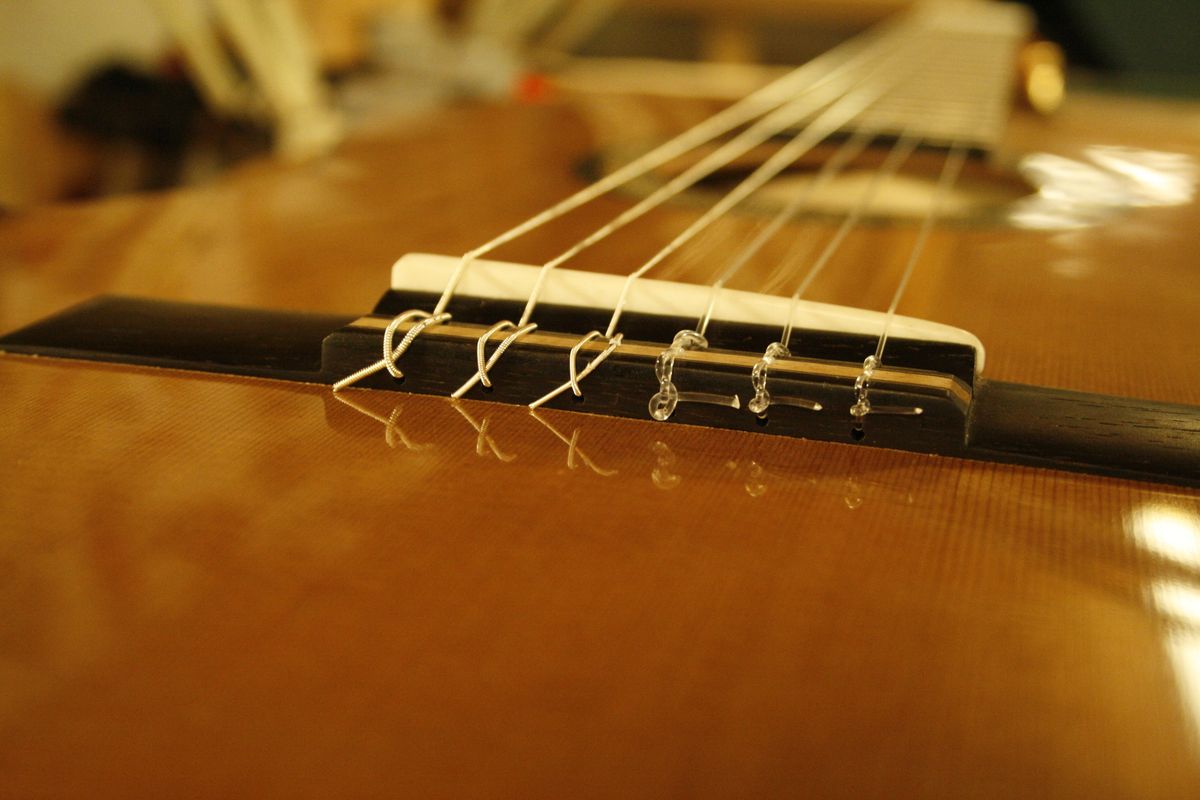
Once the neck is securely attached, it’s time to position and install the bridge. The bridge is responsible for transmitting the vibrations from the strings to the soundboard, so its placement is crucial. Measure and mark the exact location for the bridge, making sure it aligns with the scale length of the guitar. Use a small chisel to carefully carve out a recess for the bridge, then secure it in place with wood glue.
After the bridge is in place, you can proceed to install the hardware, including the tuning machines, nut, and saddle. Ensure that the tuning machines are positioned correctly and tightened securely, allowing for smooth and precise tuning. The nut and saddle should be made from a hard and dense material such as bone or synthetic materials, offering optimal string support and tone transfer.
As you assemble the guitar, it’s important to pay attention to the setup and adjustments. Check the alignment of the strings over the fretboard, ensuring they are properly spaced and parallel. Adjust the height of the nut and saddle to achieve the desired action, making sure the strings are neither too high nor too low. Fine-tune the intonation by adjusting the position of the saddle, ensuring each note rings true along the entire fretboard.
During the assembly process, it’s common to make small adjustments and refinements to optimize the playability and sound of the guitar. This may include sanding or shaping certain areas, adjusting the neck angle, or even making slight modifications to the bracing system. Take your time and make these adjustments methodically to achieve the best possible results.
Finally, give the assembled guitar a thorough inspection, checking for any loose joints, sharp edges, or other imperfections. Make any necessary corrections or refinements before proceeding to the next step. This attention to detail will ensure that the guitar is not only visually appealing but also comfortable and enjoyable to play.
By carefully assembling the various components of the classical guitar, you can create an instrument that is structurally sound, visually stunning, and a joy to play. The assembly process is the final step in bringing all the elements together to create a harmonious and functional guitar.
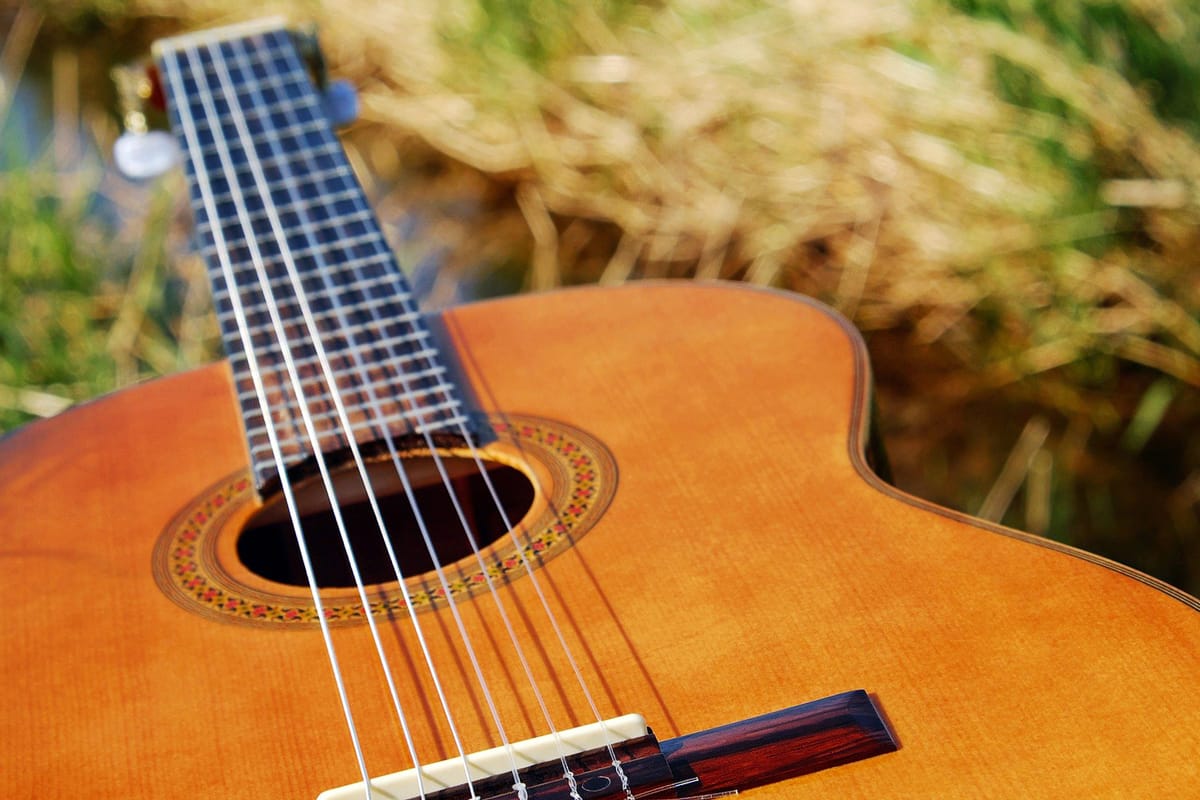
Fretting and Finishing
Once the classical guitar has been assembled, it’s time to focus on the final touches that will enhance its playability and aesthetics. Fretting and finishing are crucial steps in the construction process that involve installing the frets, applying a protective finish, and adding final details. In this section, we will guide you through the steps involved in fretting and finishing a classical guitar.
The first step in fretting is determining the placement and size of the frets. Measure and mark the locations for each fret along the fretboard, taking into account the scale length of the guitar. Use a fret saw to carefully cut slots for the fretwire, ensuring they are deep enough to securely hold the frets in place.
Next, install the fretwire into the slots. Cut lengths of fretwire to match the width of the fretboard and gently tap them into the slots using a fretting hammer or a rubber mallet. Make sure each fret is seated firmly and evenly along the fretboard. Once all the frets are installed, use a fret file to level and shape the ends, ensuring a smooth transition between each fret.
After fretting, it’s time to move on to the finishing process. Finishing the guitar not only provides a protective layer but also enhances the beauty of the wood. There are several options for finishing, including nitrocellulose lacquer, shellac, or various oil-based finishes. Apply the chosen finish in thin and even coats, allowing each layer to dry between applications. Use fine sandpaper or steel wool to smooth the surface, creating a satin or glossy finish depending on your preference.
While applying the finish, take care to avoid drips, runs, or uneven coverage. Work in a clean and well-ventilated area to ensure a smooth and professional finish. Additionally, consider adding a stain or dye to the wood before applying the finish to enhance its color and grain patterns.
Once the finish is complete, add final details such as decorative elements, binding, and inlay work. Install the bridge pins and saddle, using care to ensure proper string height and alignment. Complete the guitar by attaching the tuning machines and fitting the strings.
Throughout the fretting and finishing process, it’s important to continuously assess the playability and sound of the guitar. Make any necessary adjustments to the frets, nut, or saddle to optimize the instrument’s action and intonation. Strum the strings and listen carefully for any buzzing or unevenness, making further adjustments if needed.
Fretting and finishing a classical guitar requires attention to detail, patience, and a steady hand. By taking the time to carefully install the frets, apply a flawless finish, and add final details, you can transform a collection of raw materials into a beautiful and playable instrument.
Final Adjustments and Tuning
As you near the completion of building your classical guitar, there are a few final adjustments and tuning steps to ensure that the instrument performs at its best. These final tweaks will optimize playability, improve sound quality, and bring your guitar to life. In this section, we will guide you through the process of making final adjustments and tuning your classical guitar.
The first step in the final adjustments is to check the action of the strings. Action refers to the height of the strings above the fretboard. Use a ruler or feeler gauges to measure the distance between the strings and the frets at various points along the fretboard. Adjust the saddle height if needed to achieve the desired action. A lower action allows for easier fretting and faster playing, while a slightly higher action may provide more resonance and volume.
Next, check the intonation of the guitar. Intonation refers to the accuracy of each note as you move up the fretboard. Play each string open, then compare the pitch at the 12th fret with the harmonic at the 12th fret. Adjust the saddle position for each string, moving it slightly forward or backward as needed to obtain equal intonation across the fretboard. Continue to check and refine the intonation until each note rings true and in tune.
Once the action and intonation are adjusted, move on to the tuning of the guitar. Start by ensuring that the strings are properly stretched and settled. Tune each string to the desired pitch using a tuner or a reference pitch. Fine-tune the strings by comparing the sound of each string to the adjacent strings, making small adjustments with the tuning machines as necessary. Repeat the tuning process a few times to ensure stability and accuracy.
At this point, it’s a good idea to play the guitar and listen for any buzzing or unwanted noise. Check for any loose or rattling parts, such as the tuning machines or bridge pins, and tighten them if needed. Play each string individually and strum chords to evaluate the overall sound and resonance of the instrument.
Finally, take the time to clean and polish your classical guitar. Wipe down the body, neck, and fretboard to remove any residue or fingerprints. Use a guitar-specific polish to restore the shine and protect the finish. Additionally, maintain proper humidity levels to protect the wood from changes in temperature and humidity.
By making these final adjustments and ensuring a precise tuning, you can bring out the best in your classical guitar. Regular maintenance and periodic check-ups will help keep your instrument in optimal condition and allow you to enjoy its beautiful tones for years to come.
Conclusion
Building a classical guitar is a labor of love that requires skill, attention to detail, and a deep appreciation for the instrument. Throughout the process of selecting materials, constructing the neck and body, assembling the guitar, and making final adjustments, you have embarked on a journey of craftsmanship, creativity, and musical expression.
By building your own classical guitar, you have the opportunity to create an instrument that is tailored to your playing style and musical preferences. The choice of materials, such as the soundboard wood and the back and sides, contributes to the unique tone and character of your guitar. The construction of the neck and body ensures a comfortable and playable instrument that will resonate beautifully.
Assembling the guitar brings all the components together, culminating in a finished product that embodies your skill and dedication. The fretting and finishing stages add the final touches, not only improving playability but also enhancing the visual appeal of the instrument.
Final adjustments and tuning are essential to bring out the best in your classical guitar’s sound and performance. Through careful attention to action, intonation, and tuning, you can ensure that each note rings true and that your guitar is a joy to play.
Building a classical guitar is a rewarding experience that goes far beyond the mere construction of an instrument. It is an opportunity to delve into the rich history and tradition of the classical guitar, and to explore the craft and artistry that goes into making beautiful music.
As you complete your journey in building a classical guitar, take pride in the instrument you have created. Embrace it as a reflection of your passion and dedication to music. Whether you’re a beginner or an experienced player, your handmade classical guitar will accompany you on your musical journey, providing countless hours of joy and inspiration.
So, pick up your new classical guitar with pride, strum a chord, and let its beautiful, resonant tones create music that moves your soul and captivates those who listen.