Home>Instruments>Bass>How High Should Bass Action Be
Bass
How High Should Bass Action Be
Published: November 29, 2023
Optimal bass action height is crucial for a comfortable playing experience. Learn how to set the perfect bass action and improve your performance.
(Many of the links in this article redirect to a specific reviewed product. Your purchase of these products through affiliate links helps to generate commission for AudioLover.com, at no extra cost. Learn more)
Table of Contents
Introduction
When it comes to playing the bass guitar, one of the key aspects that greatly affects the playability and sound quality is the bass action. But what exactly is bass action? In simple terms, bass action refers to the height of the strings from the fretboard. It determines how easy or difficult it is to press down the strings and produce clean, clear notes.
Having the right bass action is crucial for a comfortable playing experience and optimal tone. If the action is too high, it can result in a significant amount of effort required to fret the strings, leading to fatigue and potential intonation issues. On the other hand, if the action is too low, it can cause unwanted string buzz and fretting out.
Setting the perfect bass action involves finding the ideal balance between playability and tone. This can vary depending on personal preference, playing style, and the type of music you play. In this article, we will explore the factors to consider when setting bass action, the recommended range, and provide a step-by-step guide to help you set up your bass action properly.
What is bass action?
Bass action refers to the distance between the strings of the bass guitar and the fretboard. It is typically measured at the 12th fret, where the string distance from the fretboard is the greatest. The bass action affects how easily you can press down the strings and produce sound.
When the action is set too high, the strings are positioned further away from the fretboard. This requires more finger strength and effort to press the strings down, resulting in a higher action. On the other hand, if the action is set too low, the strings are positioned closer to the fretboard, making it easier to press down the strings. However, very low action can cause the strings to buzz against the frets.
The ideal bass action depends on various factors, including personal preference, playing style, and the type of music you play. Some players prefer a higher action for more sustain and clearer note articulation, while others prefer a lower action for ease of playability and faster fretting.
It’s important to note that adjusting the bass action is not a one-size-fits-all approach. Each player may have different preferences and requirements. It’s all about finding the balance that works best for you.
Factors to consider when setting bass action
When adjusting the bass action, there are several factors to consider to achieve the optimal balance between playability and tone. Here are some important factors to keep in mind:
- Playing style: Different playing styles require different bass actions. For example, if you play with a heavy picking or slap technique, you may prefer a higher action to prevent unwanted string buzz. On the other hand, if you play with a lighter touch or use techniques like tapping, you might prefer a lower action for faster fretting.
- String gauge: The gauge of the strings you use can also affect the bass action. Heavier gauge strings may require a slightly higher action to prevent rattling against the frets, while lighter gauge strings may allow for a lower action.
- Musical genre: The type of music you play can influence your preferred bass action. For example, if you play jazz or genres that require a more articulated and precise tone, you may lean towards a higher action. For genres like funk or rock, a slightly lower action might be preferred for ease of playing faster passages.
- Neck relief: The curvature of the bass guitar’s neck, known as neck relief, can impact the bass action. If the neck has too much relief (a concave bow), it might require a higher action to prevent fret buzz. If the neck is too straight or has back bow, it may allow for a lower action.
- Personal preference: Ultimately, your personal preference plays a significant role in determining the bass action. Experiment with different action heights and find the sweet spot that feels comfortable for your playing style and produces the desired tone.
By considering these factors and finding the right balance, you can set the bass action that suits your playing needs and enhances your overall playing experience.
Recommended range for bass action
The ideal bass action can vary depending on personal preference, playing style, and the specific bass guitar you are using. However, there is a general recommended range that can serve as a starting point for setting your bass action.
For the bass action on the low (thick) E string, it is recommended to have a measurement ranging from 3mm to 4.5mm at the 12th fret. This provides enough clearance for comfortable playing and prevents unwanted string buzz.
On the high (thin) G string, the recommended bass action measurement at the 12th fret is slightly lower, ranging from 2mm to 3.5mm. This allows for a smoother and easier playing experience on the thinner string without compromising tone and note clarity.
As for the middle strings (A, D), you can follow a similar range as the low E string, gradually decreasing the measurement towards the G string. This ensures consistent playability across all strings and promotes a balanced sound.
Keep in mind that these measurements are simply guidelines and can be adjusted according to your personal preference. Some players prefer a slightly higher action for added sustain and clarity, while others prefer a lower action for speed and ease of playability.
It’s also important to note that these recommended ranges may differ depending on the bass guitar setup, including factors such as neck relief and string gauge. It’s always a good idea to consult with an experienced guitar technician or luthier who can assess your instrument and make adjustments that suit your specific needs.
Remember, the goal is to find the bass action that feels comfortable and allows you to play with ease while maintaining good intonation and proper string clearance.
Setting up bass action step-by-step
Setting up the bass action requires a systematic approach to ensure proper string clearance and optimal playability. Here is a step-by-step guide to help you set up your bass action:
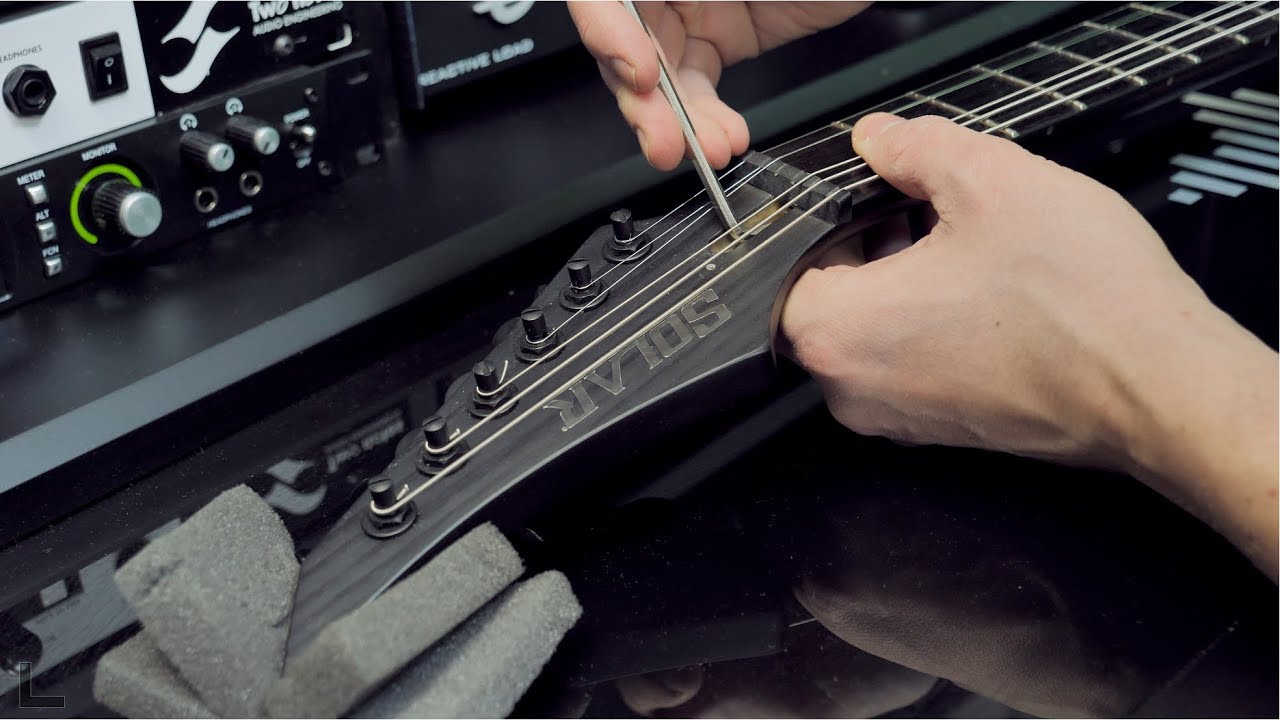
- Check neck relief: Use a straight edge or a specialized tool like a neck relief gauge to check the curvature of the neck. Adjust the truss rod if necessary to achieve the desired amount of neck relief.
- Measure the current action: Use a ruler or a specialized action gauge to measure the bass action at the 12th fret. Take note of the measurements for each string.
- Make adjustments at the bridge: Most bass guitars have individual saddle adjustments at the bridge. Use a screwdriver or an Allen wrench to raise or lower the saddles to achieve the desired action height. Make incremental adjustments and recheck the measurements as you go.
- Check for fret buzz and playability: After making adjustments, play each string at different positions and check for any unwanted buzzing or fretting out. Make further adjustments if necessary, balancing string height across all strings.
- Recheck neck relief: Once you are satisfied with the string action, double-check the neck relief. Sometimes, adjusting the action can affect the neck relief. Make minor truss rod adjustments if needed to maintain proper neck curvature.
- Retune and test: After completing the setup, retune your bass guitar and test it extensively. Play different scales, chords, and techniques to ensure the action feels comfortable and the tone is satisfactory.
Remember, patience is key when setting up your bass action. It may take some time and trial-and-error to achieve the perfect balance. If you’re unsure or uncomfortable with making adjustments, seeking assistance from a professional guitar technician or luthier is highly recommended.
By carefully following these steps and making necessary adjustments, you can achieve an optimal bass action that suits your playing style and preferences.
Testing and adjusting bass action
Once you have set up your bass action, it’s important to test and fine-tune it to ensure optimal playability and tone. Here are some steps you can follow to test and make further adjustments to your bass action:
- Playability test: Play your bass guitar across different frets and positions. Pay attention to how easy or difficult it is to fret the strings and whether there is any unwanted buzzing. If you encounter any issues, identify the specific strings and frets where the problem occurs.
- Identify problem areas: If you experience buzzing or difficulty in playing certain notes or strings, it may indicate areas where your bass action needs adjustment. Use a straight edge or ruler to check the string heights at those specific frets. Note down any areas of concern.
- Adjust individual saddle height: To address problem areas, make small adjustments to the saddle height at the bridge. Use a screwdriver or Allen wrench to raise or lower the saddles of the affected strings. Make incremental adjustments and retest the playability at the problem spots.
- Check overall balance: After making adjustments to specific areas, recheck the overall balance of the bass action. Play scales and chords across all strings and frets to ensure a consistent and comfortable playing experience.
- Recheck neck relief: Making adjustments to the bass action can sometimes affect the neck relief. Double-check the curvature of the neck using a straight edge or specialized tool. Make minor truss rod adjustments if necessary to maintain the proper neck relief.
- Retest and fine-tune: After each adjustment, retune your bass guitar and retest the playability. Continue to make small adjustments as needed until you achieve the desired balance of playability, tone, and string clearance.
Remember that adjusting the bass action is an iterative process. It may take several rounds of testing and small adjustments to achieve the perfect setup. Take your time and trust your ears and fingers to guide you towards the right adjustments.
If at any point you feel uncomfortable or unsure about making further adjustments, it’s always a good idea to seek guidance from a professional guitar technician or luthier who can provide expert advice and assistance.
Regularly test and evaluate your bass action to ensure it continues to meet your playing needs. As you gain more experience and refine your playing style, you may find it beneficial to fine-tune and make small adjustments to the action to accommodate your evolving preferences.
Conclusion
Setting the right bass action is crucial for achieving optimal playability and tone on your bass guitar. By considering factors such as playing style, string gauge, musical genre, neck relief, and personal preference, you can find the ideal balance that suits your needs.
Start by understanding what bass action is and how it affects your playing experience. Take the time to measure and assess the current action on your bass guitar, making note of any adjustments needed. Remember that the recommended range provides a helpful starting point, but your personal preference should ultimately guide your decisions.
Follow a step-by-step process to set up your bass action, including checking neck relief, adjusting the bridge saddles, and fine-tuning the playability. Test your bass action thoroughly and make further adjustments as needed to achieve the desired balance of playability, tone, and string clearance.
It’s important to remember that setting up bass action is not a one-time task. Regularly test and evaluate your bass action, making small adjustments as your playing style evolves or your preferences change. Seek professional assistance when needed, especially if you are not confident in making certain adjustments on your own.
By taking the time and effort to properly set up your bass action, you can enhance your playing experience, improve tone and clarity, and unlock new possibilities in your bass playing journey. Enjoy the process and let your personalized bass action bring out the best in your playing.