Home>Instruments>Bass>How To Intonate Bass

Bass
How To Intonate Bass
Published: November 28, 2023
Learn how to intonate your bass guitar for perfect tuning and playing. Find step-by-step instructions and helpful tips to improve your bass's sound.
(Many of the links in this article redirect to a specific reviewed product. Your purchase of these products through affiliate links helps to generate commission for AudioLover.com, at no extra cost. Learn more)
Table of Contents
Introduction
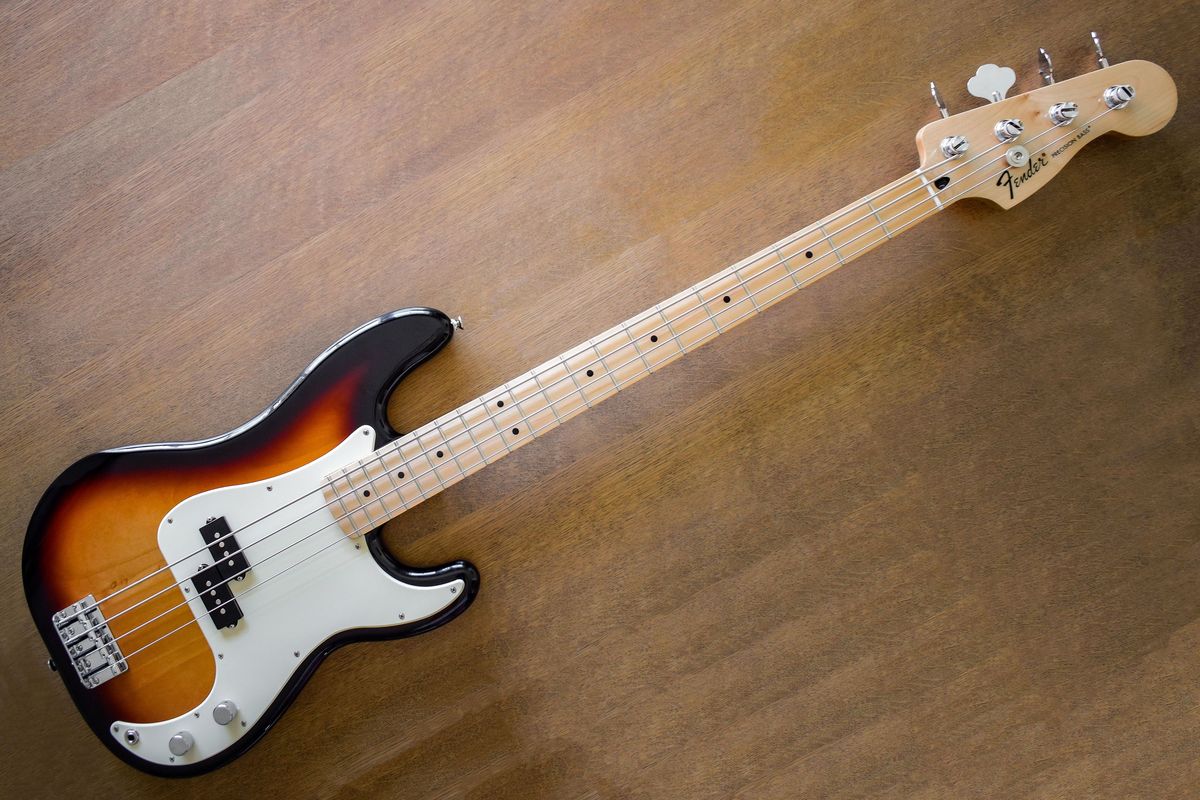
Welcome to the world of bass guitars! As a bass player, you know that achieving a well-balanced and accurate sound is crucial for your instrument. One of the key factors in achieving this is proper intonation. Intonation refers to the accurate pitch of each note played on the bass, and ensuring that the instrument is properly intonated is essential for a great sound.
Intonation issues can arise when the string length is not properly adjusted, leading to certain notes not being in tune with the rest of the instrument. This can create a dissonant and unpleasant sound, affecting the overall harmony of your playing.
But fear not – intonating your bass doesn’t have to be a daunting task. With the right tools, knowledge, and a bit of patience, you can easily intonate your bass guitar and achieve a balanced and accurate sound.
In this guide, we will break down the steps for intonating your bass guitar, from understanding the concept of intonation to fine-tuning the string length and troubleshooting common issues. By the end, you’ll have a solid understanding of how to intonate your bass and enhance your playing experience.
So, grab your bass, tune up, and let’s dive into the world of bass intonation!
Understanding Bass Intonation
Before we dive into the process of intonating your bass guitar, let’s first understand the concept of intonation.
Intonation refers to the accuracy of pitch in each note played on the bass guitar. When a note is played, it should be in tune or in pitch with the rest of the instrument. This is crucial for producing a harmonious sound and ensuring that your bass blends well with other instruments in an ensemble.
On a bass guitar, intonation is primarily affected by the length of the strings. Each string has a specific length from the nut to the bridge saddle. If the string length is not set correctly, you may find that certain notes are sharp or flat compared to others.
Generally, the octave (12th fret) is used as a reference point for intonation. When the 12th fret is played, it should produce a pitch that is exactly one octave higher than the open string. If the pitch is too high or too low, it indicates that the string length needs adjustment.
It’s important to note that intonation can be affected by factors such as string gauge, string height, and the overall setup of your bass. It is recommended to have a properly adjusted bridge, nut, and neck relief before working on intonation.
To accurately intonate your bass, you’ll need a few tools and equipment. These include:
- Electronic tuner
- Screwdriver or Allen wrench (depending on your bass)
- Tape measure or ruler
Having these tools on hand will make the intonation process much easier and ensure that you achieve the desired results.
Now that we have a basic understanding of bass intonation and the necessary tools, let’s move on to the step-by-step guide for intonating your bass guitar.
Tools and Equipment Needed
To intonate your bass guitar, you’ll need a few essential tools and equipment. Having these items on hand will make the process smoother and more efficient. Here’s a rundown of what you’ll need:
- Electronic Tuner: An accurate electronic tuner is essential for intonating your bass. It will help you determine if your strings are in tune and if any adjustments need to be made.
- Screwdriver or Allen Wrench: Depending on the type of bridge on your bass, you may need a screwdriver or Allen wrench to adjust the saddle position. This will allow you to fine-tune the string length and achieve proper intonation.
- Tape Measure or Ruler: A tape measure or ruler is necessary to measure the string length accurately. This measurement will help you determine if the strings are the correct length and if any adjustments are needed.
- String Action Gauge: While not essential, a string action gauge can be helpful in measuring the string height. This can ensure that the strings are properly aligned with the fretboard and not causing any unwanted buzzing or playability issues.
- Optional: Capo: A capo can be useful when adjusting the truss rod. It allows you to simulate the tension of the strings at a different position on the neck, making it easier to make precise adjustments.
Having these tools readily available will make the intonation process much smoother and reduce any potential frustration. It’s always a good idea to check that your tools are in good working condition before starting the intonation process.
Remember, precision is key when it comes to intonating your bass. So, take your time, use the right tools, and follow the step-by-step guide that we will provide to ensure accurate intonation of your instrument.
Step-by-Step Guide to Intonating Bass
Now that you have a good understanding of bass intonation and have the necessary tools, let’s dive into the step-by-step guide to intonating your bass guitar:
- Tune Up: Begin by tuning your bass guitar using an electronic tuner. Make sure all strings are in tune before proceeding with the intonation process.
- Adjust the Bridge: Start with the E string (the thickest string) and locate the saddle on the bridge. Using a screwdriver or Allen wrench, adjust the saddle position to move it closer to or farther away from the nut until it is in the correct position. Refer to your tuner and play the 12th fret on the E string. If the pitch is sharp or flat, make fine adjustments to the saddle position until the open string and 12th fret produce the same pitch.
- Fine-tune the String Length: Once the E string is properly intonated, repeat the process for the remaining strings. Adjust the saddle position for each string, using the same method as described in step 2. Focus on achieving uniform intonation across all strings, ensuring that the 12th fret produces the same pitch as the open string.
- Check and Adjust the Nut: In addition to the bridge saddle adjustments, the nut can also affect intonation. Check the slots on the nut to ensure they are properly aligned for each string. If any of the slots are too high or too low, it can cause intonation issues. Consider consulting a professional guitar technician to address any nut-related intonation concerns.
- Testing and Refining the Intonation: After adjusting the bridge and nut, play each string at different positions on the neck to ensure consistent and accurate pitch. Pay attention to any inconsistencies or noticeable differences in pitch. If any issues persist, revisit the bridge adjustments and fine-tune the string length until you achieve optimal intonation across all strings and fret positions.
Remember, intonating your bass guitar requires attention to detail and a patient approach. Take your time to make precise adjustments and test the intonation at different positions on the neck. It’s normal to make small adjustments multiple times until you achieve the desired results.
By following this step-by-step guide, you’ll be able to intonate your bass guitar and enjoy a well-balanced and accurate sound. Now, let’s move on to specific adjustments for the bridge and nut in the next sections.
Adjusting the Bridge
One of the key steps in intonating your bass guitar is adjusting the bridge. The bridge saddle position determines the string length, which directly affects the intonation. Here’s how you can adjust the bridge saddle position:
- Evaluate the Current Intonation: Before making any adjustments, evaluate the current intonation by checking the pitch at the 12th fret compared to the open string. If the pitch is sharp, the saddle needs to be moved towards the bridge. If the pitch is flat, the saddle needs to be moved away from the bridge.
- Locate the Bridge Saddle: On most bass guitars, the bridge saddle is adjustable. It can be moved back and forth to adjust the string length. Use a screwdriver or Allen wrench to loosen any screws or bolts that hold the saddle in place.
- Move the Saddle: Once the saddle is loose, carefully slide it towards the bridge to shorten the string length or away from the bridge to lengthen the string length. Make small adjustments at a time to achieve precise intonation.
- Test the Intonation: After each adjustment, tune the affected string and check the pitch at the 12th fret. Repeat the process of moving the saddle and testing the intonation until the pitch at the 12th fret matches the open string.
- Secure the Saddle: Once you have achieved the desired intonation, securely tighten the screws or bolts that hold the saddle in place. Make sure it is stable and properly aligned to maintain the adjusted position.
Keep in mind that each string may require different adjustments to achieve proper intonation. Experiment with small movements and test the pitch until you find the ideal position for each string. Take your time and be patient throughout the process to achieve accurate and balanced intonation.
With the bridge properly adjusted, you’ll have a solid foundation for excellent intonation. Next, let’s move on to fine-tuning the string length to ensure precise intonation across all strings on your bass guitar.
Fine-tuning the String Length
Once you have adjusted the bridge to achieve a rough intonation, it’s time to fine-tune the string length to ensure accurate pitch across all frets. Follow these steps to fine-tune the string length:
- Check the Open String Pitch: Start by ensuring that each string is properly tuned to its open pitch. Use an electronic tuner to accurately tune each string.
- Play the 12th Fret: Next, play the 12th fret on each string. Pay attention to whether the pitch is sharp or flat compared to the open string. Remember, the goal is to have both the open string and the 12th fret produce the same pitch.
- Adjust the Bridge Saddle: To fine-tune the string length, make slight adjustments to the bridge saddle position. If the pitch is sharp at the 12th fret, move the saddle slightly away from the bridge to lengthen the string length. If the pitch is flat, move the saddle slightly towards the bridge to shorten the string length.
- Re-tune and Re-test: After each adjustment, re-tune the string and test the intonation again by playing the 12th fret. Continue making small adjustments and testing until the pitch at the 12th fret matches the open string.
- Repeat for Each String: Repeat this process for each string on your bass guitar. Remember that each string may require different adjustments to achieve proper intonation. Take your time and be patient during this process to ensure accurate pitch across all strings on your instrument.
Keep in mind that intonation can be affected by factors like string gauge, action height, and neck relief. If you have made significant adjustments to the bridge saddle position and are still experiencing intonation issues, it may be helpful to consult a professional guitar technician for further adjustments or evaluation.
By fine-tuning the string length, you are bringing your bass guitar one step closer to achieving accurate intonation. Next, let’s move on to checking and adjusting the nut, which can also play a role in the overall intonation of your instrument.
Checking and Adjusting the Nut
The nut of your bass guitar plays a crucial role in maintaining proper intonation. It ensures that the strings have the correct height and spacing at the headstock end of the neck. Here’s how you can check and adjust the nut for optimal intonation:
- Evaluate the Nut Slots: Begin by inspecting the nut slots to ensure that they are properly aligned and the correct size for each string. Look for any signs of wear, damage, or misalignment that could affect intonation.
- Check the String Height: Use a ruler or string action gauge to measure the height of each string at the nut. The strings should have a consistent and appropriate height above the first fret. If any of the strings are too high or too low, adjustment may be necessary.
- Make Careful Adjustments: If a string is too high at the nut, carefully file down the slot using a nut file. Take off a small amount of material at a time and test the string height frequently to avoid removing too much material. If a string is too low, using a nut shim or seeking the assistance of a professional technician may be necessary.
- Ensure Proper Slot Width: It’s also important to verify that the nut slots are appropriately sized for each string. The strings should fit snugly into their respective slots without binding or excess space. If a slot is too narrow, use a nut file to widen it slightly. If it’s too wide, consider replacing the nut or consulting a professional.
- Re-tune and Re-test: After making any alterations to the nut, re-tune the bass guitar and re-test the intonation by playing notes at various positions on the neck. Listen for consistent pitch and adjust further if needed.
It’s important to note that working on the nut requires precision and care. If you don’t have experience or feel uncertain about making adjustments yourself, it’s best to seek the assistance of a professional guitar technician. They can ensure that the nut is properly adjusted and that your bass guitar maintains accurate intonation.
With a properly adjusted nut, you’ll have taken another important step towards achieving precise intonation on your bass. Now, let’s move on to testing and refining the intonation to fine-tune your instrument’s overall pitch accuracy.
Testing and Refining the Intonation
After making adjustments to the bridge and nut, it’s time to test and refine the intonation of your bass guitar. This step ensures that each note played on the instrument is in tune across different fret positions. Here’s how you can test and refine the intonation:
- Tune Up: Begin by tuning your bass guitar using an electronic tuner. It’s important to start with accurately tuned strings before testing the intonation.
- Play Notes at Different Fret Positions: Starting with the open string, play each note at various fret positions on each string. Pay close attention to the pitch and listen for any noticeable inconsistencies or deviations from the desired pitch.
- Compare Pitch: Compare the pitch of each fretted note to the open string. If the fretted note is sharp or flat compared to the open string, adjustments to the bridge or nut may be needed to refine the intonation.
- Make Fine Adjustments: If a particular fretted note consistently deviates from the desired pitch, make slight adjustments to the bridge saddle position to refine the intonation. Move the saddle slightly closer to or farther away from the nut, re-tune the string, and retest the intonation.
- Re-test and Repeat: After each adjustment, re-test the intonation by playing notes at different fret positions. Continue making small adjustments as needed until you achieve accurate pitch across the entire fretboard.
Remember, intonation can be affected by different factors, such as string gauge, action height, and individual playing style. It’s important to find the balance that works best for your specific bass guitar and playing preferences.
Be patient during this process, as it may take some time to fine-tune the intonation to perfection. Make small adjustments and test the pitch consistently to ensure optimal intonation across the entire range of your bass guitar.
If you encounter any issues or are unsure about making further adjustments, don’t hesitate to seek the assistance of a professional guitar technician. They can provide valuable expertise and ensure that your bass guitar has accurate and balanced intonation.
With refined intonation, you’ll be able to enjoy a harmonious and well-balanced sound every time you play your bass guitar. Now, let’s address some common issues that you may encounter during the intonation process and how to troubleshoot them.
Troubleshooting Common Intonation Issues
While intonating your bass guitar, you may encounter some common issues that can affect the accuracy of the instrument’s pitch. Here are a few common intonation issues and potential solutions:
- Inconsistency Across Strings: If you notice that the intonation is inconsistent between strings, start by checking the string action and height. Uneven string height can cause variation in intonation. Adjust the bridge saddle height for each string to achieve a consistent string action.
- Inconsistent Intonation at Different Fret Positions: If the intonation varies at different fret positions on the same string, it may be a sign of a high or low spot on the fretboard. This could require a full setup or fret leveling by a professional technician to ensure accurate pitch across all frets.
- Fret Buzz or String Rattle: Buzzing or rattling sounds when playing specific notes can impact intonation. Check for any issues with the nut slots, neck relief, or fret height. Adjustments may be necessary, such as filing or leveling the frets or adjusting the truss rod.
- Stretched or Worn Strings: Old or worn-out strings can affect intonation. Replace your strings regularly to maintain accurate pitch. Additionally, stretching new strings thoroughly before intonating can help stabilize the tuning and improve intonation.
- Severe Intonation Issues: If you’re experiencing significant intonation issues that seem difficult to resolve, it’s best to consult a professional guitar technician. They have the expertise and specialized tools to diagnose and address more complex intonation problems.
Remember, intonation is a dynamic aspect of your bass guitar’s setup that can be influenced by various factors. Regular maintenance, adjustments, and awareness of these common intonation issues can help you keep your bass sounding its best.
Once you have resolved any intonation issues and achieved accurate pitch across your bass guitar, you’ll be rewarded with a harmonious and balanced sound that enhances your playing experience.
With that, you have now gained a comprehensive understanding of how to intonate your bass guitar. By following the step-by-step guide, adjusting the bridge and nut, and refining the intonation, you can achieve precise pitch and enjoy optimal performance from your instrument.
So, go ahead and put your newfound knowledge into practice. Tune up your bass, make the necessary adjustments, and let your fingers glide along the perfectly intonated fretboard. Happy playing!
Conclusion
Intonating your bass guitar is a vital step in achieving a well-balanced, accurate, and harmonious sound. By understanding the concept of intonation, having the right tools and equipment, and following a step-by-step guide, you can master the process of adjusting your bass guitar’s intonation.
Throughout this guide, we’ve covered the importance of intonation, the tools needed for the job, and detailed instructions on adjusting the bridge, fine-tuning the string length, checking and adjusting the nut, and troubleshooting common intonation issues.
Remember that intonation is a dynamic aspect of your bass guitar’s setup. It may require periodic adjustments due to factors like string gauge, player technique, or environmental conditions. Regularly checking and maintaining the intonation will help ensure that your bass guitar produces accurate pitch and blends well with other instruments.
If you encounter challenges or are unsure about making adjustments yourself, it’s always a good idea to seek the guidance of a professional guitar technician. They have the expertise and knowledge to fix more complex intonation issues and provide a comprehensive setup for your bass guitar.
With accurate intonation, your bass guitar will come to life, allowing you to express yourself with clarity and musicality. So, take the time to invest in intonating your bass guitar properly, and reap the rewards of a well-tuned instrument.
Now that you have the knowledge and understanding of bass intonation, it’s time to apply it to your own bass guitar. Grab your instrument, follow the steps outlined in this guide, and embark on the journey of achieving perfect intonation. Play with confidence, knowing that your bass guitar is optimized for accurate pitch and exceptional sound.
Enjoy the process, explore the capabilities of your instrument, and let the beautifully intonated bass guitar be your musical companion as you create captivating basslines and groove to the rhythm. Happy playing!

