Home>Instruments>Bass>How To Clean Bass Strings
Bass
How To Clean Bass Strings
Published: November 28, 2023
Learn how to effectively clean your bass strings and extend their lifespan. Discover the best tips and techniques for maintaining your bass guitar.
(Many of the links in this article redirect to a specific reviewed product. Your purchase of these products through affiliate links helps to generate commission for AudioLover.com, at no extra cost. Learn more)
Table of Contents
Introduction
Welcome to our comprehensive guide on how to clean bass strings. As an avid bass player, you know that maintaining your instrument is crucial for optimal performance and longevity. While most players focus on cleaning the body and fretboard of their bass, the strings often get overlooked. However, cleaning your bass strings is just as important as cleaning the rest of your instrument. In fact, regularly cleaning your bass strings can help extend their lifespan, improve tone, and ensure a smoother playing experience.
Over time, bass strings accumulate dirt, oil, sweat, and other residue from your fingers and the surrounding environment. This buildup not only affects the tone and playability but can also cause corrosion and premature wear. By cleaning your bass strings regularly, you can remove this buildup, maintain their brightness, and prolong their life.
In this article, we will provide step-by-step instructions on how to effectively clean bass strings. We will also share valuable tips and tricks to help you maintain clean strings for optimal performance. So, let’s dive in and learn how to revitalize your bass strings!
Why Clean Bass Strings?
Cleaning your bass strings is not just a matter of aesthetics; it plays a crucial role in ensuring optimal performance and longevity of your instrument. Here are a few reasons why cleaning bass strings is important:
- Improved Tone: Over time, bass strings accumulate dirt, oil, and sweat from your hands, which can dampen their tone and affect your sound quality. Cleaning the strings removes this buildup, ensuring a brighter and more vibrant tone.
- Extended Lifespan: Regular cleaning prevents the accumulation of dirt and grime that can cause strings to deteriorate faster. By removing these particles, you can prolong the lifespan of your bass strings and save money on frequent replacements.
- Better Playability: Dirty strings can feel sticky and sluggish, making it harder to execute techniques like slides and bends with precision. Cleaning your bass strings restores their smoothness, allowing for effortless playability and improved finger glide.
- Prevention of Corrosion: The accumulation of sweat and moisture on bass strings can lead to rust and corrosion, especially in humid environments. Regular cleaning removes these corrosive substances, safeguarding your strings from damage and preserving their integrity.
- Health and Hygiene: Sweat and oil from your hands can transfer bacteria and germs onto your bass strings. Regularly cleaning your strings helps maintain good hygiene and reduces the risk of infection or illness.
By taking the time to clean your bass strings, you not only enhance their performance but also ensure a more enjoyable playing experience. Now that we understand why it’s important to keep our strings clean, let’s move on to the tools and materials you’ll need for the cleaning process.
Tools and Materials Needed
Before you begin cleaning your bass strings, it’s important to gather the necessary tools and materials. Here’s what you’ll need:
- Clean Cloth: A soft, lint-free cloth is essential for wiping down the strings and removing dirt and grime. Avoid using rough fabrics or paper towels, as they can scratch the strings.
- String Cleaner or Cleaning Solution: There are various products available specifically designed to clean bass strings. These solutions are formulated to remove dirt, grease, and residue effectively. Alternatively, you can create your own cleaning solution by mixing a small amount of mild dish soap or guitar cleaner with warm water.
- Small Bowl or Container: You’ll need a container to hold the cleaning solution. A small bowl or shallow dish should suffice. Ensure it’s large enough to dip the cloth or strings into.
- String Cleaning Tool: While not essential, a string cleaning tool can make the cleaning process more efficient. These tools are designed to fit between the strings and scrub away dirt and debris. They often come with microfiber pads that effectively clean the strings.
- Tuning Peg Winder: If you plan on removing all the strings for thorough cleaning, a tuning peg winder can save you time and effort when restringing your bass.
- Optional: Guitar Polish or Wax: If you want to give your bass strings an extra shine, you can use guitar polish or wax. These products help protect the strings and add a sleek finish. However, be cautious not to apply them directly to the fretboard or other parts of the bass, as they may cause damage.
Once you have all the necessary tools and materials ready, you can move on to the step-by-step process of cleaning your bass strings, which we will cover in the next section.
Step 1: Removing the Strings
Before you can start cleaning your bass strings, you’ll need to remove them from your instrument. Removing the strings allows for easier access and thorough cleaning. Here’s how to do it:
- Prepare your workspace: Find a clean and well-lit area to work on. It’s a good idea to lay down a soft cloth or towel to prevent any damage to your bass.
- Loosen the tension: Start by loosening the tension in each string. Use a tuning peg winder to turn the tuning pegs counterclockwise and lower the pitch of the strings. This will make it easier to remove them without causing any unnecessary strain.
- Remove the bridge end: Once the tension is released, you can begin removing the strings. Start with the bridge end of the bass. This is usually done by unhooking the loop or unclamping the ball end from the bridge. Carefully pull the string out of the bridge, making sure not to scratch or damage the bass in the process.
- Remove the tuning peg end: After removing the bridge end, move to the headstock of the bass. Unwind the string from the tuning peg by turning the peg counterclockwise. Once the string is loose, you can simply pull it out from the tuning peg.
- Repeat for all strings: Repeat steps 3-4 for each string until you have removed all of them from your bass. It’s recommended to remove all the strings simultaneously to ensure consistent cleaning.
- Organize the strings: To avoid confusion later on, you can organize the strings in the order you removed them. You can use string envelopes or simply label them to remember their original placement. This will make restringing easier and ensure proper tension and intonation.
Once all the strings have been removed, you’re ready to move onto the next step: preparing the cleaning solution.
Step 2: Preparing the Cleaning Solution
Now that you have removed the strings from your bass, it’s time to prepare the cleaning solution. This solution will help remove dirt, oil, and grime from your bass strings effectively. Here’s how to prepare it:
- Gather the materials: Ensure that you have a clean bowl or container, a soft cloth, and the cleaning solution. The cleaning solution can be a specialized string cleaner or a mixture of mild dish soap or guitar cleaner with warm water.
- Fill the bowl with warm water: Fill the bowl or container with warm water. The water should not be too hot, as it can damage the strings. Lukewarm water is recommended.
- Add the cleaning solution: If you are using a specialized string cleaner, follow the manufacturer’s instructions for dilution. If you are making your own cleaning solution, add a small amount of mild dish soap or guitar cleaner to the warm water. Be sure not to use too much as it can leave a residue on the strings.
- Mix the solution: Use a spoon or your finger to gently mix the cleaning solution in the water. Make sure it is well combined.
- Test the solution: Before proceeding, you can test the cleaning solution on a small, inconspicuous part of the string to ensure it does not cause any damage or discoloration. If it appears safe, you can proceed to the next step.
With the cleaning solution prepared, you’re now ready to move on to the next step: cleaning the bass strings.
Step 3: Cleaning the Strings
Now that you have your cleaning solution ready, it’s time to clean your bass strings. This step will help remove dirt, oils, and residue that have accumulated on the strings. Follow these instructions to effectively clean your strings:
- Immerse the cloth in the cleaning solution: Take your clean cloth and dip it into the prepared cleaning solution. Make sure the cloth is damp but not soaking wet. Excess liquid can cause damage to your bass or make the cleaning process messy.
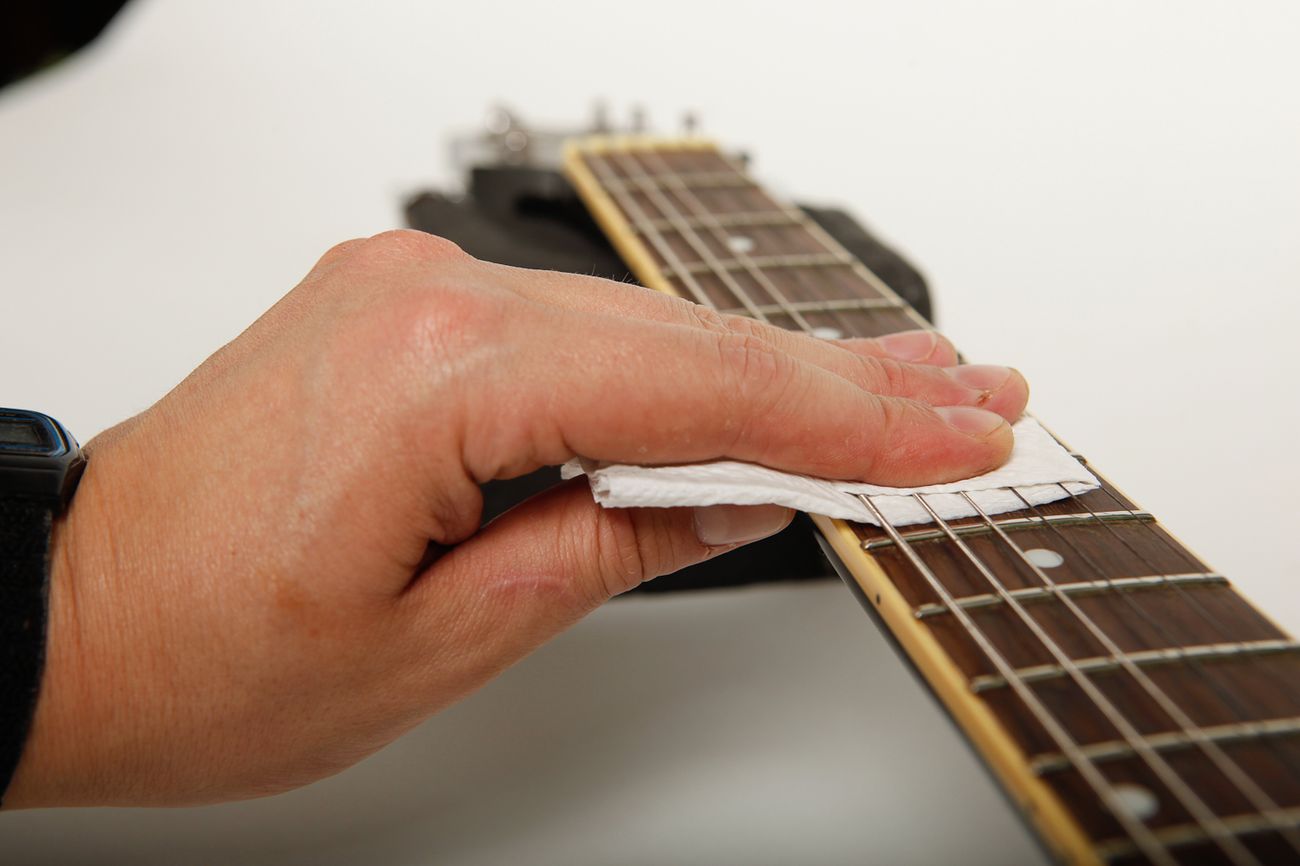
- Gently wipe the strings: With the damp cloth, start wiping each string individually. Hold the string firmly between your fingers and slide the cloth up and down the entire length of the string. Apply gentle pressure to remove any dirt and residue. Pay close attention to both sides of the string, as well as the areas near the frets and bridge where more dirt may accumulate.
- Repeat for all strings: Continue cleaning each string individually until you have wiped all of them. Remember to rinse and wring out the cloth periodically to remove any buildup of dirt and residue.
- Focus on stubborn areas: If you encounter stubborn dirt or grime, you can apply a bit more pressure or use a string cleaning tool to scrub the affected areas. This will help dislodge any sticky residue or stubborn debris.
- Change the cloth if necessary: If you notice that the cloth has become too dirty or saturated with grime, switch to a fresh, clean cloth. This will ensure that you are effectively cleaning the strings without transferring dirt back onto them.
Once you have cleaned all the strings, you can move on to the next step: drying the strings.
Step 4: Drying the Strings
After cleaning the bass strings, it’s important to ensure that they are thoroughly dried before restringing your instrument. Here’s how to effectively dry the strings:
- Use a dry cloth: Take a clean, dry cloth and gently wipe each string to remove any excess moisture. It’s essential to be thorough to prevent any leftover moisture from causing corrosion or rust.
- Individual string drying: If you want to ensure that each string is completely dry, you can use a separate cloth for each string. This allows you to give individual attention to each string and ensure thorough drying.
- Air drying: To further expedite the drying process, you can hang or lay the strings flat in a well-ventilated area. This allows the strings to air dry naturally and ensures that any remaining moisture evaporates completely.
- Patience is key: It’s important to be patient and allow the strings sufficient time to dry. Rushing the process by using heat or exposing the strings to direct sunlight can damage them. Give the strings at least an hour or two to dry completely.
- Inspect for moisture: Before restringing your bass, make sure to inspect each string for any signs of moisture. If you notice any dampness, repeat the drying process until the strings are completely dry.
By ensuring that your bass strings are thoroughly dried, you reduce the risk of moisture-related damage and ensure a longer lifespan for your strings. With the strings dried, you’re ready to move on to the final step: reinstalling the strings.
Step 5: Reinstalling the Strings
Now that you’ve cleaned and dried the bass strings, it’s time to restring your instrument. Follow these steps to properly reinstall the strings:
- Begin with the bridge end: Start by inserting the bridge end of the string back into the corresponding slot on the bridge. If your bass has a bridge with ball ends, make sure to secure the string properly in place. If your bass has a bridge with loops, ensure that the string is securely hooked or clamped.
- Guide the string through the nut: After securing the bridge end, guide the string through the nut, ensuring that it sits in the appropriate groove. Be careful not to twist or kink the string as you thread it through.
- Wind the string around the tuning peg: Hold the string taut and begin winding it around the corresponding tuning peg. Make sure to turn the peg clockwise to tighten the string. Leave enough slack so that you can wrap the string around the peg a few times for stability.
- Tune the string to pitch: Using a tuner, start tightening the string slowly, carefully bringing it to the desired pitch. Tune the string gradually to avoid placing too much tension on it all at once, which could cause it to break.
- Repeat for all strings: Repeat steps 1-4 for each string, one at a time, ensuring that they are properly secured at the bridge, nut, and tuning pegs.
- Stretch and retune the strings: After installing all the strings, gently stretch each one by pulling it away from the fretboard. This helps to settle the strings and improves their stability. Retune the strings as necessary until they hold their pitch.
Once you have successfully reinstalled and tuned all the strings, you can confidently start playing your bass with clean and refreshed strings. Congratulations on completing the process of cleaning and restringing your bass!
Before we conclude, let’s explore some additional tips and tricks for maintaining clean bass strings.
Tips and Tricks for Maintaining Clean Bass Strings
Now that you have gone through the process of cleaning and restringing your bass strings, it’s important to maintain their cleanliness and preserve their performance. Here are some tips and tricks to help you keep your bass strings clean:
- Wash and dry your hands before playing: Before you pick up your bass, make it a habit to wash and dry your hands thoroughly. This helps to remove oils and debris from your hands, reducing the amount of dirt that accumulates on the strings during play.
- Use a clean cloth to wipe down the strings after playing: After each playing session, take a clean cloth and wipe down the strings. This helps remove any sweat or oils that may have transferred from your fingers and prevents buildup over time.
- Avoid touching the strings with sticky or oily hands: Try to avoid playing the bass when your hands are sticky or oily, as this can transfer residue to the strings. If necessary, wipe your hands with a clean cloth before playing.
- Keep your bass in a clean and dry environment: Moisture and humidity can contribute to the buildup of dirt and grime on your bass strings. Store your instrument in a clean and dry environment to minimize the risk of corrosion and maintain string cleanliness.
- Clean your bass strings regularly: Make it a routine to clean your bass strings regularly, depending on your playing frequency. Cleaning them every few weeks or at least once a month can help prevent excessive buildup and maintain their tone and playability.
- Consider using coated strings: Coated bass strings have a protective layer that helps to repel dirt, oil, and sweat. They can maintain their tone and playability for a longer period between cleanings. Consider trying out different brands and types of coated strings to find the ones that suit your preferences and playing style.
- Protect your bass with a cloth or cover: When you’re not playing your bass, cover it with a cloth or use a protective case to keep dust and debris away. This can minimize the amount of cleaning required and help maintain the cleanliness of your strings.
By following these tips, you can keep your bass strings clean, prolong their lifespan, and ensure a consistent and enjoyable playing experience. Now that you have all the knowledge and techniques for maintaining clean bass strings, go ahead and rock on!
Before we wrap up, let’s summarize what we’ve covered in this guide.
Conclusion
Cleaning your bass strings is an essential part of maintaining your instrument’s performance and longevity. By regularly cleaning your strings, you can improve tone, extend their lifespan, and enhance playability. With the step-by-step instructions provided in this guide, you now have the knowledge and techniques to effectively clean your bass strings.
We discussed the importance of cleaning bass strings, including how it improves tone, extends their lifespan, and ensures better playability. We also covered the necessary tools and materials needed for the cleaning process, such as a clean cloth, string cleaner or cleaning solution, a small bowl or container, a string cleaning tool, and a tuning peg winder.
The step-by-step process included removing the strings, preparing the cleaning solution, cleaning the strings, drying them thoroughly, and restringing the bass. Each step was outlined to ensure a comprehensive and systematic approach to cleaning your bass strings.
Furthermore, we provided helpful tips and tricks for maintaining clean bass strings, such as washing and drying your hands before playing, wiping down the strings after each session, avoiding touching the strings with sticky or oily hands, keeping your bass in a clean and dry environment, and considering the use of coated strings.
Remember, maintaining clean bass strings not only improves the tone and playability of your instrument but also prolongs their lifespan. By incorporating regular cleaning into your bass maintenance routine, you can enjoy a refreshed sound and a smoother playing experience.
So, grab your clean cloth, gather your tools, and give your bass strings the attention they deserve. Your instrument will thank you with a vibrant and lasting sound!