Home>Instruments>Bass>How To Sidechain Kick And Bass

Bass
How To Sidechain Kick And Bass
Modified: January 22, 2024
Learn how to sidechain your kick and bass for a powerful and balanced mix. Master the technique to enhance your basslines and achieve professional-sounding productions.
(Many of the links in this article redirect to a specific reviewed product. Your purchase of these products through affiliate links helps to generate commission for AudioLover.com, at no extra cost. Learn more)
Table of Contents
- Introduction
- What is Sidechaining?
- The Importance of Sidechaining Kick and Bass
- Step-by-Step Guide to Sidechaining Kick and Bass
- Setting Up the Sidechain Compression
- Adjusting the Attack and Release Settings
- Fine-tuning the Threshold and Ratio
- Tweaking the Sidechain EQ
- Testing and Adjusting the Sidechain Effect
- Conclusion
Introduction
Welcome to the world of bass and kick sidechain compression, a technique widely used in music production to achieve a clean and balanced mix. If you are a producer or an aspiring musician, understanding how to sidechain your kick and bass is crucial for creating a powerful and impactful sound.
Sidechain compression is a process that involves using a dynamic processing plugin, such as a compressor, to control the level of one audio signal based on the level of another. In the context of kick and bass, sidechaining allows the kick drum to cut through the mix by temporarily reducing the volume of the bass whenever the kick hits. This creates a rhythmic “pumping” effect that enhances the separation between the two elements.
The relationship between the kick and bass is fundamental in any music genre that relies heavily on low-frequency content, such as electronic dance music (EDM), hip-hop, and pop. When these two elements collide, they can create muddiness and conflict, resulting in a weak and imbalanced mix.
Properly sidechaining the kick and bass helps to solve this problem by ensuring that both elements have their space in the mix. The kick drum remains punchy and defined, while the bass maintains its presence without overwhelming the other frequencies.
In this article, we will provide a step-by-step guide on how to sidechain your kick and bass effectively. We will explore the key settings and techniques needed to achieve a clean and tight mix. So, let’s dive in and unleash the full potential of your kick and bass combination!
What is Sidechaining?
Sidechaining is a production technique that allows one audio signal to control the level or effect of another audio signal. In the context of music production, sidechain compression is the most common application of sidechaining. It involves using a dynamic processing plugin, typically a compressor, to attenuate the volume of one sound source (the “trigger”) based on the level of another sound source (the “key”).
The basic principle behind sidechain compression is simple: when the key signal crosses a certain threshold, the trigger signal’s volume is reduced. This creates a pumping or “ducking” effect, where the trigger signal is pushed back or temporarily attenuated to make room for the key signal.
In the case of sidechaining the kick and bass, the kick drum is usually the key signal, and the bass is the trigger signal. When the kick drum hits, it triggers the sidechain compression, causing the bass to temporarily decrease in volume. This creates a rhythmic pulsation, allowing the kick to cut through the mix without clashing or muddying the low frequencies.
Sidechaining is especially useful in genres where the kick and bass are prominent, such as EDM, house, and techno. It helps to create a tight and well-defined mix by preventing frequency masking and maintaining separation between the kick and bass elements.
Aside from kick and bass sidechaining, there are various creative uses of sidechain compression in music production. For example, sidechaining can be applied to create a “pumping” effect on pads, synths, or vocals, adding a rhythmic dynamic to the mix. It can also be used to shape the volume envelope of a sound or to enhance the groove of a track.
Overall, sidechaining is a powerful technique that allows producers to shape the dynamics and interactions between different elements in a mix. By understanding and mastering sidechain compression, you can achieve a professional and polished sound in your music production.
The Importance of Sidechaining Kick and Bass
When it comes to producing music, achieving a tight and balanced mix is essential. One of the most critical elements to consider is the relationship between the kick drum and the bass. These two elements form the foundation of many music genres, and if not properly managed, they can create a muddy and cluttered mix.
That’s where sidechaining the kick and bass becomes crucial. By implementing sidechain compression, you can ensure that the kick drum and bass work together harmoniously, allowing each element to shine in its own space.
Here are a few reasons why sidechaining kick and bass is essential:
- Preserving Punch and Impact: The kick drum is responsible for providing the necessary punch and impact in a track. However, when the bass is playing at the same time as the kick, it can drown out the kick’s impact. By sidechaining the bass, the kick drum can cut through the mix and retain its power, giving the track the desired drive and energy.
- Preventing Muddiness: The low-end frequency range is delicate and can easily become congested when multiple low-frequency elements are competing for space. When the kick and bass clash, they can create a muddy and unclear mix, compromising the overall balance. Sidechaining the bass allows it to momentarily step back in volume, giving the kick drum the necessary space to be heard clearly.
- Improving Definition and Separation: Sidechaining helps to improve the definition and separation between the kick and bass. By reducing the bass’s volume whenever the kick hits, the two elements have more distinct and defined roles in the mix. This distinction allows for a clearer and more cohesive sound, making the track more enjoyable and professional-sounding.
- Enhancing Rhythm and Groove: Sidechain compression creates a rhythmic “pumping” effect, which can enhance the overall groove of a track. This rhythmic pulsation adds movement and energy, making the music more engaging for the listener. The kick and bass work in tandem to create this pulsating effect, elevating the track’s rhythmic qualities.
Ultimately, sidechaining kick and bass is essential for achieving a balanced and professional mix. By appropriately managing the relationship between these two elements, you can preserve the impact of the kick drum, prevent muddiness, improve definition and separation, and enhance the overall rhythm and groove of your music.
Step-by-Step Guide to Sidechaining Kick and Bass
Now that we understand the importance of sidechaining kick and bass, let’s dive into the step-by-step process of implementing this technique. Follow these guidelines to achieve a clean and balanced mix:
- Route the Kick and Bass: Start by creating separate tracks for the kick and bass in your DAW (Digital Audio Workstation). This allows you to have full control over the processing of each element.
- Insert a Compressor Plugin: On the bass track, insert a compressor plugin. This will be the plugin that controls the sidechain compression effect. Most DAWs come with a stock compressor, but you can also use third-party plugins for more advanced features.
- Select the Kick as the Sidechain Input: In the compressor plugin, look for the sidechain input option and select the kick drum track as the key signal. This tells the compressor to respond to the level of the kick when applying sidechain compression on the bass.
- Set the Attack and Release Times: Adjust the attack and release times of the compressor to determine how quickly it reacts to the kick drum. The attack time controls how fast the compressor kicks in when the kick hits, while the release time determines how long the compression effect lasts. Experiment with different settings to find the best balance for your mix.
- Adjust the Threshold and Ratio: Set the threshold and ratio controls on the compressor to determine when and how much the bass gets compressed. The threshold determines the level at which the compression is applied, while the ratio controls the amount of compression that is applied. Start with conservative settings and fine-tune them based on how the kick and bass interact.
- Tweak the Sidechain EQ: In some cases, you might want to shape the sidechain compression effect further by applying EQ to the sidechain input. This allows you to emphasize or attenuate specific frequencies in the kick drum that trigger the compression. Experiment with EQ settings to achieve the desired impact and clarity.
- Test and Adjust: Play your track and listen carefully to the interaction between the kick and bass. Pay attention to the balance, punch, and clarity of the mix. If needed, go back and make adjustments to the attack and release times, threshold, ratio, or EQ settings until you achieve the desired result.
Remember, sidechaining kick and bass is both an art and a science. It takes time and experimentation to find the perfect balance for your mix. Trust your ears and don’t be afraid to adjust the settings until you achieve the desired outcome.
By following this step-by-step guide, you can effectively implement sidechain compression on your kick and bass, achieving a clean and professional mix that allows both elements to shine in their own space.
Setting Up the Sidechain Compression
Now that you understand the process, it’s time to dive deeper into setting up the sidechain compression for your kick and bass. Follow these steps to configure the sidechain compression effect:
- Open the Compressor Plugin: Insert a compressor plugin on the bass track in your DAW. This can be a stock compressor plugin or a third-party option.
- Enable Sidechain: Look for the sidechain or SC button on the compressor plugin and enable it. This activates the sidechain functionality, allowing the compressor to respond to the kick drum’s level.
- Assign the Kick as the Sidechain Source: Locate the sidechain input dropdown or menu and select the track that contains your kick drum as the sidechain source. This establishes the connection between the kick drum and the compression effect on the bass track.
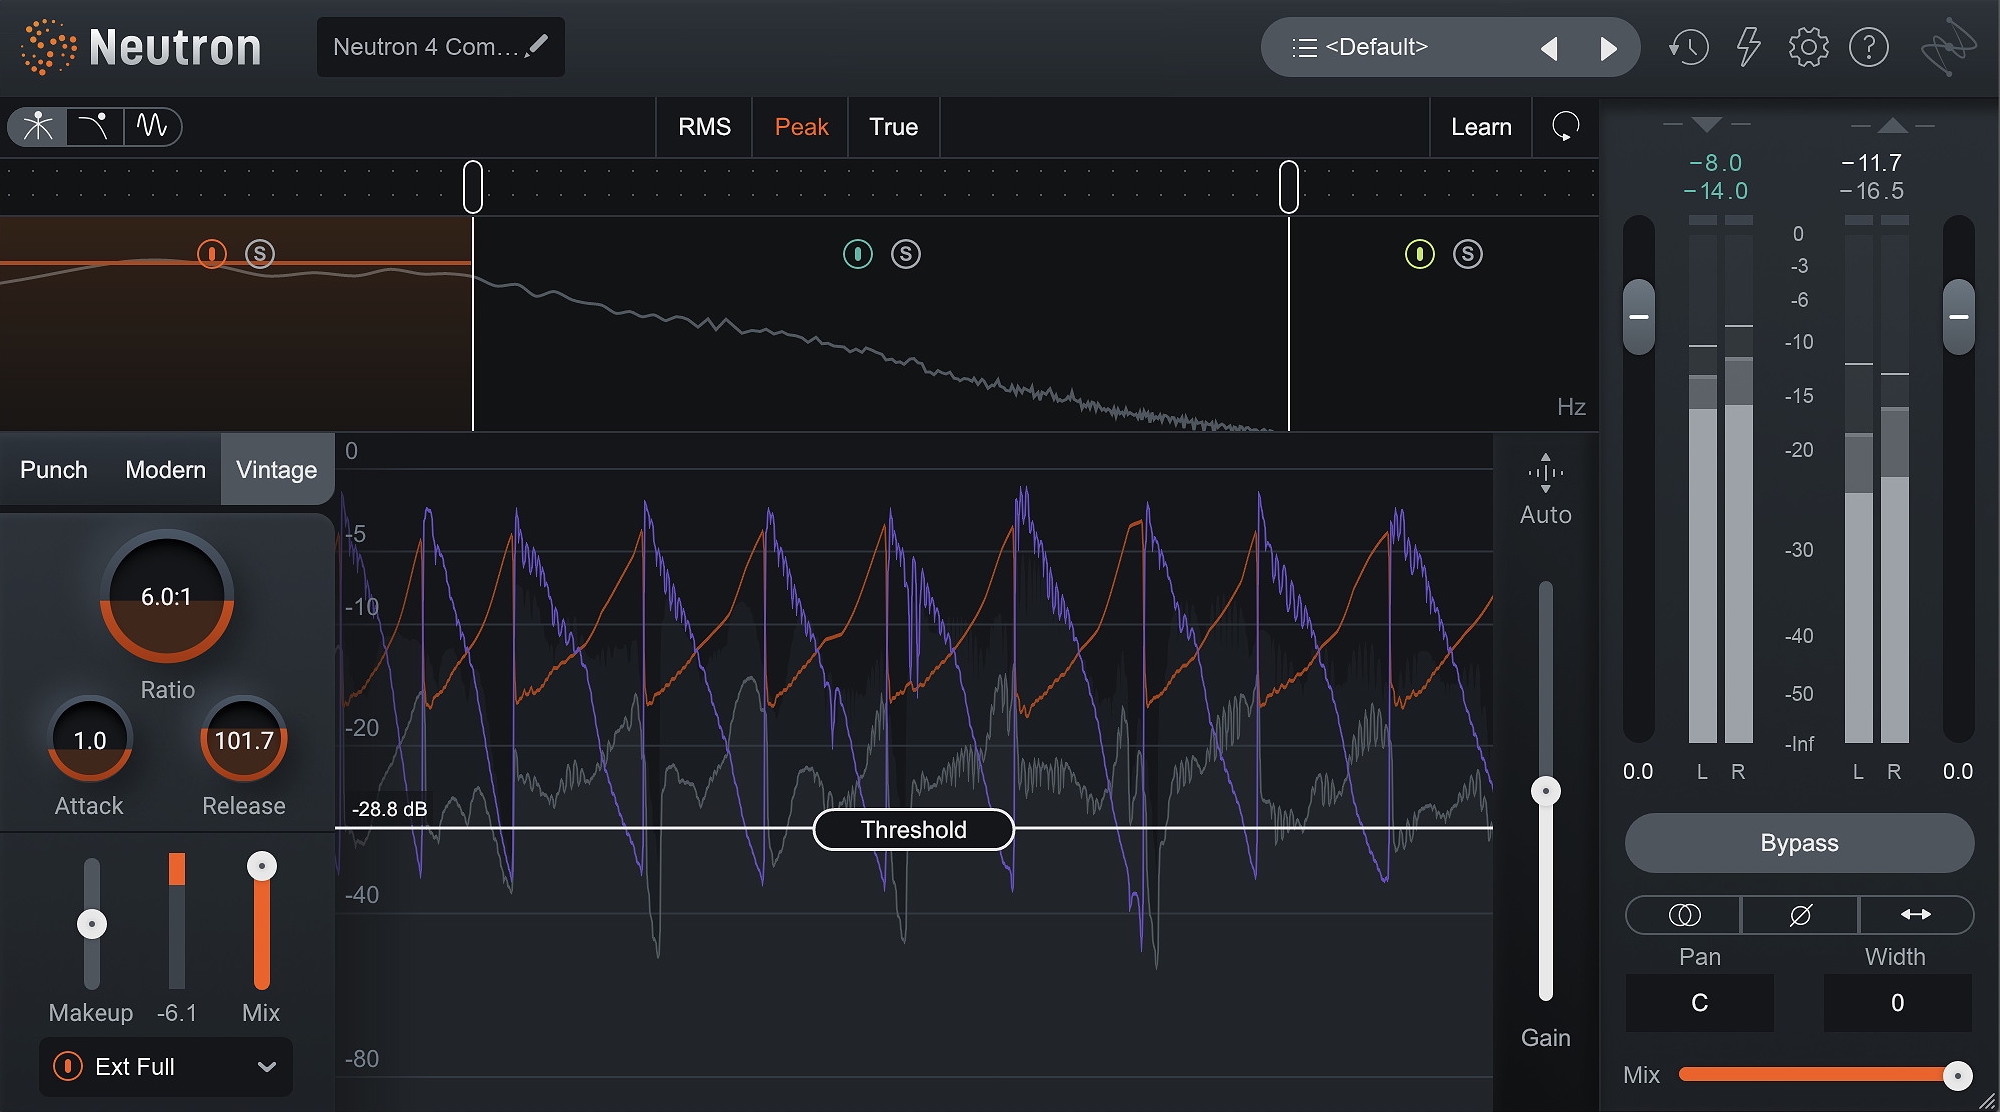
- Adjust the Threshold: Set the threshold parameter on the compressor to determine the level at which the sidechain compression will be triggered. As the kick drum’s level exceeds the threshold, the compression effect on the bass will be activated.
- Choose the Ratio: The ratio controls the amount of compression that will be applied to the bass when the kick drum exceeds the threshold. Start with a moderate ratio, such as 4:1, and adjust it based on the balance between the kick and bass that you want to achieve.
- Set the Attack and Release Times: The attack time determines how quickly the compression effect kicks in when the kick drum hits, while the release time determines how long the compression lasts. Adjust these parameters to achieve the desired “pumping” effect and balance between your kick and bass.
- Use a Sidechain EQ (optional): If needed, you can apply an equalizer with sidechain functionality to shape the triggering frequencies. This allows you to emphasize or attenuate specific frequency content in the kick drum, leading to more precise sidechain compression. Experiment with EQ settings to find the sweet spot.
- Adjust the Makeup Gain: Depending on how much compression you apply, the volume of the bass may be affected. To compensate for any reduction in volume, use the makeup gain control on the compressor to boost the overall level of the bass back to its original volume.
- Test and Refine: Now it’s time to play your track and listen carefully to the interaction between the kick and bass. Make any necessary adjustments to the threshold, ratio, attack and release times, or EQ settings to achieve the desired balance and clarity in your mix.
Remember to trust your ears and make adjustments based on the specific characteristics of your kick and bass elements. There is no one-size-fits-all approach, and experimentation is key to finding the perfect settings for your mix.
By carefully setting up the sidechain compression, you can achieve a clean and dynamic mix where the kick and bass work together harmoniously, allowing each element to shine and contribute to the overall groove and impact of your music.
Adjusting the Attack and Release Settings
The attack and release settings play a crucial role in shaping the sidechain compression effect on your kick and bass. By properly adjusting these parameters, you can achieve the desired “pumping” effect and balance between the two elements. Follow these steps to fine-tune the attack and release settings:
- What is Attack Time? The attack time determines how quickly the compressor responds to the kick drum’s transient or initial hit. A faster attack time means that the compression will kick in immediately when the kick hits, while a slower attack time allows the initial transient to pass through before compression is applied to the bass.
- Understanding Release Time: The release time controls how long the compression effect lasts after the kick drum’s transient. A shorter release time means that the compression will quickly release or stop after the kick drum’s initial hit, allowing the bass to return to its original volume. A longer release time creates a sustained compression effect, resulting in a more pronounced “pumping” effect.
- Creating a Smooth Envelope: To achieve a natural and smooth sidechain effect, it’s important to find the right balance between the attack and release times. A fast attack time and shorter release time can create a punchy and defined kick sound, while a slower attack time and longer release time can lead to a more sustained and pumping effect.
- Experimenting with Different Settings: Start with moderate attack and release times, such as 10 ms for attack and 50 ms for release, and play your track to assess the impact on the kick and bass relationship. Gradually adjust the attack and release times, listening closely to how the sidechain effect interacts with the rhythm and groove of the music.
- Matching the Track’s Tempo: Consider the tempo and overall feel of your track when adjusting the attack and release settings. Faster tempos may require shorter attack times to maintain the punch, while slower tempos may benefit from longer release times to enhance the pumping effect. Continuously experiment and fine-tune the settings until you find the best fit for your specific track.
- Being Mindful of Artistic Intent: In addition to technical considerations, it’s important to consider the artistic intent of your music. The attack and release settings can greatly impact the overall vibe and energy of a track. Play around with different settings to achieve the desired artistic expression and mood that aligns with your creative vision.
Remember that there is no one-size-fits-all approach to adjusting the attack and release settings. Each track and musical genre may require different settings to achieve the desired effect. Trust your ears and rely on trial and error to find the optimal attack and release times that bring out the best in your kick and bass combination.
By mastering the art of adjusting the attack and release settings, you can fine-tune the sidechain compression effect to ensure a balanced and dynamic mix that enhances the rhythmic elements of your music.
Fine-tuning the Threshold and Ratio
After setting up the sidechain compression and adjusting the attack and release settings, the next step is to fine-tune the threshold and ratio parameters. These controls play a crucial role in determining when and how much compression is applied to the bass when the kick drum hits. Follow these steps to find the perfect balance:
- Understanding the Threshold: The threshold sets the level at which the sidechain compression is activated. When the kick drum’s level exceeds the threshold, the compression effect is triggered on the bass. A lower threshold means that more of the kick’s energy will trigger the compression, while a higher threshold requires a stronger kick signal to activate the compression.
- Choosing the Right Ratio: The ratio controls the amount of compression that is applied when the kick drum exceeds the threshold. For example, a 4:1 ratio means that for every 4 dB the kick exceeds the threshold, the bass will be reduced by 1 dB. Higher ratios, such as 8:1 or higher, result in more aggressive compression, while lower ratios, like 2:1 or 3:1, provide gentler compression.
- Starting with Conservative Settings: Begin by setting the threshold and ratio at conservative levels. This means starting with a higher threshold and a lower ratio. This approach helps to ensure that the compression effect is not too overpowering or unnatural. Remember, subtlety is often key when it comes to sidechain compression.
- Listening to the Balance: Play your track and carefully listen to how the kick and bass interact. Pay attention to the balance between the two elements, as well as the overall groove and impact of the music. If the bass is still overpowering the kick, lower the threshold to trigger more compression. Conversely, if the compression effect is too noticeable and impeding the natural flow of the mix, raise the threshold to reduce the amount of compression.
- Adjusting the Ratio for Dynamics: Fine-tune the ratio to achieve the desired dynamic relationship between the kick and bass. A higher ratio will result in more noticeable compression, enhancing the pulsating “pumping” effect. However, be mindful not to overdo it, as excessive compression can lead to an unnatural sound. Conversely, a lower ratio provides a more subtle and transparent compression effect.
- Iterative Adjustments: It’s important to make iterative adjustments to the threshold and ratio parameters. Continuously listen to the mix and make small tweaks until you achieve the desired balance and dynamic relationship between the kick and bass. Be patient and trust your ears throughout this process.
Remember that the threshold and ratio settings can vary depending on the specific characteristics of your kick and bass, as well as the style and genre of your music. Experimentation and careful listening are key to finding the optimal settings for your mix.
By fine-tuning the threshold and ratio in your sidechain compression, you can strike the perfect balance between the kick and bass, ensuring clarity, impact, and a tight rhythmic groove in your music.
Tweaking the Sidechain EQ
In addition to setting the threshold and ratio, another important aspect to consider when sidechaining kick and bass is the use of EQ to shape the sidechain compression effect. Applying EQ to the sidechain input allows you to emphasize or attenuate specific frequencies in the kick drum that trigger the compression. Here’s how you can tweak the sidechain EQ:
- Enable Sidechain EQ: Check if your compressor plugin has a built-in sidechain EQ feature. If not, you can insert a separate EQ plugin before the compressor on the bass track.
- Analyze the Kick Drum: Solo the kick drum track and pay attention to its frequency content. Identify the frequencies that contribute to the kick’s attack, punch, and low-end energy. These frequencies will serve as the focus when tweaking the sidechain EQ.
- Shape the EQ Curve: Use the EQ controls to shape the sidechain EQ curve. Typically, you might want to emphasize the attack or transient frequencies of the kick drum, while attenuating or cutting the frequencies that clash with the bass. This helps to create a more precise and focused sidechain compression effect.
- Experiment with Filter Types: Try different filter types, such as high-pass, low-pass, or band-pass filters, to sculpt the sidechain EQ. High-pass filters can remove low-frequency content in the sidechain input, resulting in a more defined and tight sidechain effect. Low-pass filters can help to smooth out the sidechain compression, while band-pass filters allow you to target specific frequency ranges with precision.
- Refine the EQ Settings: Play your track and listen to the interaction between the kick and bass. Fine-tune the sidechain EQ settings to achieve the desired impact and clarity. Be mindful not to over-EQ, as excessive shaping can lead to unnatural results. Aim for a subtle and transparent shaping that enhances the relationship between the kick and bass.
- Continuously A/B Test: Compare the sound with and without the sidechain EQ, using A/B testing to assess the difference. This allows you to make informed decisions about the effectiveness of the sidechain EQ and whether any further adjustments are needed.
Keep in mind that the sidechain EQ should complement and enhance the relationship between the kick and bass. The goal is to create separation and clarity while maintaining a natural and cohesive sound. The specific EQ settings will depend on the characteristics of your kick drum and the conflicting frequencies with the bass.
By tweaking the sidechain EQ, you can fine-tune the sidechain compression effect and achieve a more precise and focused mix, allowing the kick and bass to work together harmoniously while avoiding frequency clashes.
Testing and Adjusting the Sidechain Effect
Once you have set up the sidechain compression, adjusted the attack and release settings, fine-tuned the threshold and ratio, and tweaked the sidechain EQ, it’s time to put the effect to the test and make any necessary adjustments. Here’s how to test and adjust your sidechain effect:
- Play the Track: Start by playing your track and listen to the interaction between the kick and bass. Pay attention to the balance, clarity, and overall groove of the mix.
- Focus on the Kick and Bass Relationship: In particular, closely monitor the relationship between the kick and bass. Is the kick drum cutting through the mix? Is the bass maintaining its presence without overpowering the other elements?
- Assess the Pumping Effect: Listen for the desired pumping effect created by the sidechain compression. Does it enhance the rhythmic energy of the track without sounding too exaggerated or unnatural?
- Make Iterative Adjustments: If you notice any issues or areas that need improvement, go back to the respective settings and make small adjustments one at a time. This could involve tweaking the attack and release times, adjusting the threshold and ratio, or revisiting the sidechain EQ.
- Refine the Compressor Settings: Pay close attention to how the compressor is affecting the sound. You may need to further adjust the attack and release times to fine-tune the relationship between the kick and bass. Experiment with different settings until you achieve the desired balance and dynamics.
- Listen with Fresh Ears: It’s important to take breaks and listen to your mix with fresh ears periodically. This allows you to maintain objectivity and make more accurate assessments of the sidechain effect. Sometimes, stepping away from the project for a while can reveal areas that need improvement and inspire new ideas.
- Continuously Test and Adjust: Test the changes you made and assess the impact they have on the overall mix. You may need to iterate the process multiple times to achieve the desired results. Be patient, as finding the perfect balance can take time.
Remember, testing and adjusting is an ongoing process. Trust your ears and rely on your judgment to make informed decisions about the effectiveness of the sidechain effect. Keep in mind the genre and style of your music, as it may influence the desired impact and feel of the sidechain compression.
By continuously testing and adjusting the sidechain effect, you can fine-tune the relationship between the kick and bass, ensuring a cohesive and dynamic mix that allows both elements to shine in their respective roles.
Conclusion
Sidechaining kick and bass is a crucial technique in music production, allowing you to achieve a clean, balanced, and impactful mix. By implementing sidechain compression, you can maintain the punch and definition of the kick drum while preserving the presence and clarity of the bass.
In this comprehensive guide, we explored the step-by-step process of sidechaining kick and bass, from setting up the sidechain compression to fine-tuning the attack and release settings, adjusting the threshold and ratio, tweaking the sidechain EQ, and testing and adjusting the sidechain effect.
Through careful consideration of these steps and iterations, you can create a cohesive and energetic mix where the kick and bass work together harmoniously. The kick drum can cut through the mix, providing impact and groove, while the bass maintains its presence and supports the overall low-end foundation of the track.
Remember to trust your ears and rely on experimentation to find the perfect settings for your specific track and genre. Each mix presents unique challenges and opportunities, and it’s through practice and careful listening that you’ll develop your own signature sound.
By mastering the art of sidechaining kick and bass, you can take your music productions to new heights, delivering professional and powerful mixes that captivate listeners and move them on a visceral level. So, embrace the power of sidechain compression and enjoy the journey of crafting compelling, impactful, and rhythmically tight music!

