Home>Instruments>Brass Instruments>How To Make Brass Instruments Sound Better On Microphones
Brass Instruments
How To Make Brass Instruments Sound Better On Microphones
Modified: January 22, 2024
Improve the sound quality of brass instruments on microphones with these expert tips and techniques. Enhance the tonal characteristics of your brass instruments for a polished and professional recording.
(Many of the links in this article redirect to a specific reviewed product. Your purchase of these products through affiliate links helps to generate commission for AudioLover.com, at no extra cost. Learn more)
Table of Contents
Introduction
Welcome to this comprehensive guide on how to make brass instruments sound better on microphones. Whether you are a musician, sound engineer, or simply a brass instrument enthusiast, understanding the techniques to enhance the sound quality of brass instruments when recording is essential. Brass instruments such as trumpets, trombones, and saxophones produce powerful and vibrant tones that can captivate any listener. However, capturing that same energy and richness through a microphone can be challenging.
Recording brass instruments can present unique obstacles due to their dynamic range, projection, and potential for feedback. In this article, we will explore various strategies and techniques to overcome these challenges and achieve the best possible sound quality when recording brass instruments.
From preparing the instrument and positioning the microphone correctly to adjusting microphone settings and implementing playing techniques, we will cover all the crucial aspects. We will also delve into post-production techniques that can further enhance the recorded sound and troubleshoot common issues that may arise during the recording process.
It is important to note that every brass instrument is unique and may require slightly different approaches, but the fundamental principles outlined in this guide can be applied to all brass instruments.
So, whether you are recording a brass section for a symphony orchestra, capturing the intimate sound of a jazz soloist, or simply recording your own performances or practice sessions, this guide will equip you with the knowledge and techniques to make your brass instruments sound their best on microphones.
Understanding the Challenges
Recording brass instruments presents unique challenges compared to other instruments due to their distinctive characteristics. It’s important to understand these challenges to effectively address them and achieve optimal sound quality.
One significant challenge is the dynamic range of brass instruments. They can produce both soft, delicate passages and powerful, high-volume notes. Capturing the full dynamic range without distortion or clipping requires careful microphone selection and positioning.
Another challenge stems from brass instruments’ projection. They are designed to project sound in a specific direction, which can cause irregular frequency response when recorded. Proper microphone positioning is crucial to capture the true sound of the instrument without excessive emphasis on certain frequencies.
Furthermore, brass instruments can be prone to feedback. The strong resonances and harmonics they produce can easily cause feedback issues when amplified through microphones. Understanding how to control and minimize feedback is essential for a successful recording.
Lastly, brass instruments can have unique tonal characteristics and harmonic content. Each instrument, whether it’s a trumpet, trombone, or saxophone, has its own timbre and nuances. It’s crucial to capture and preserve these distinctive qualities during recording, while still achieving a balanced and natural sound.
By understanding these challenges, we can focus on implementing the right techniques and strategies to overcome them and enhance the sound quality of brass instruments when recording.
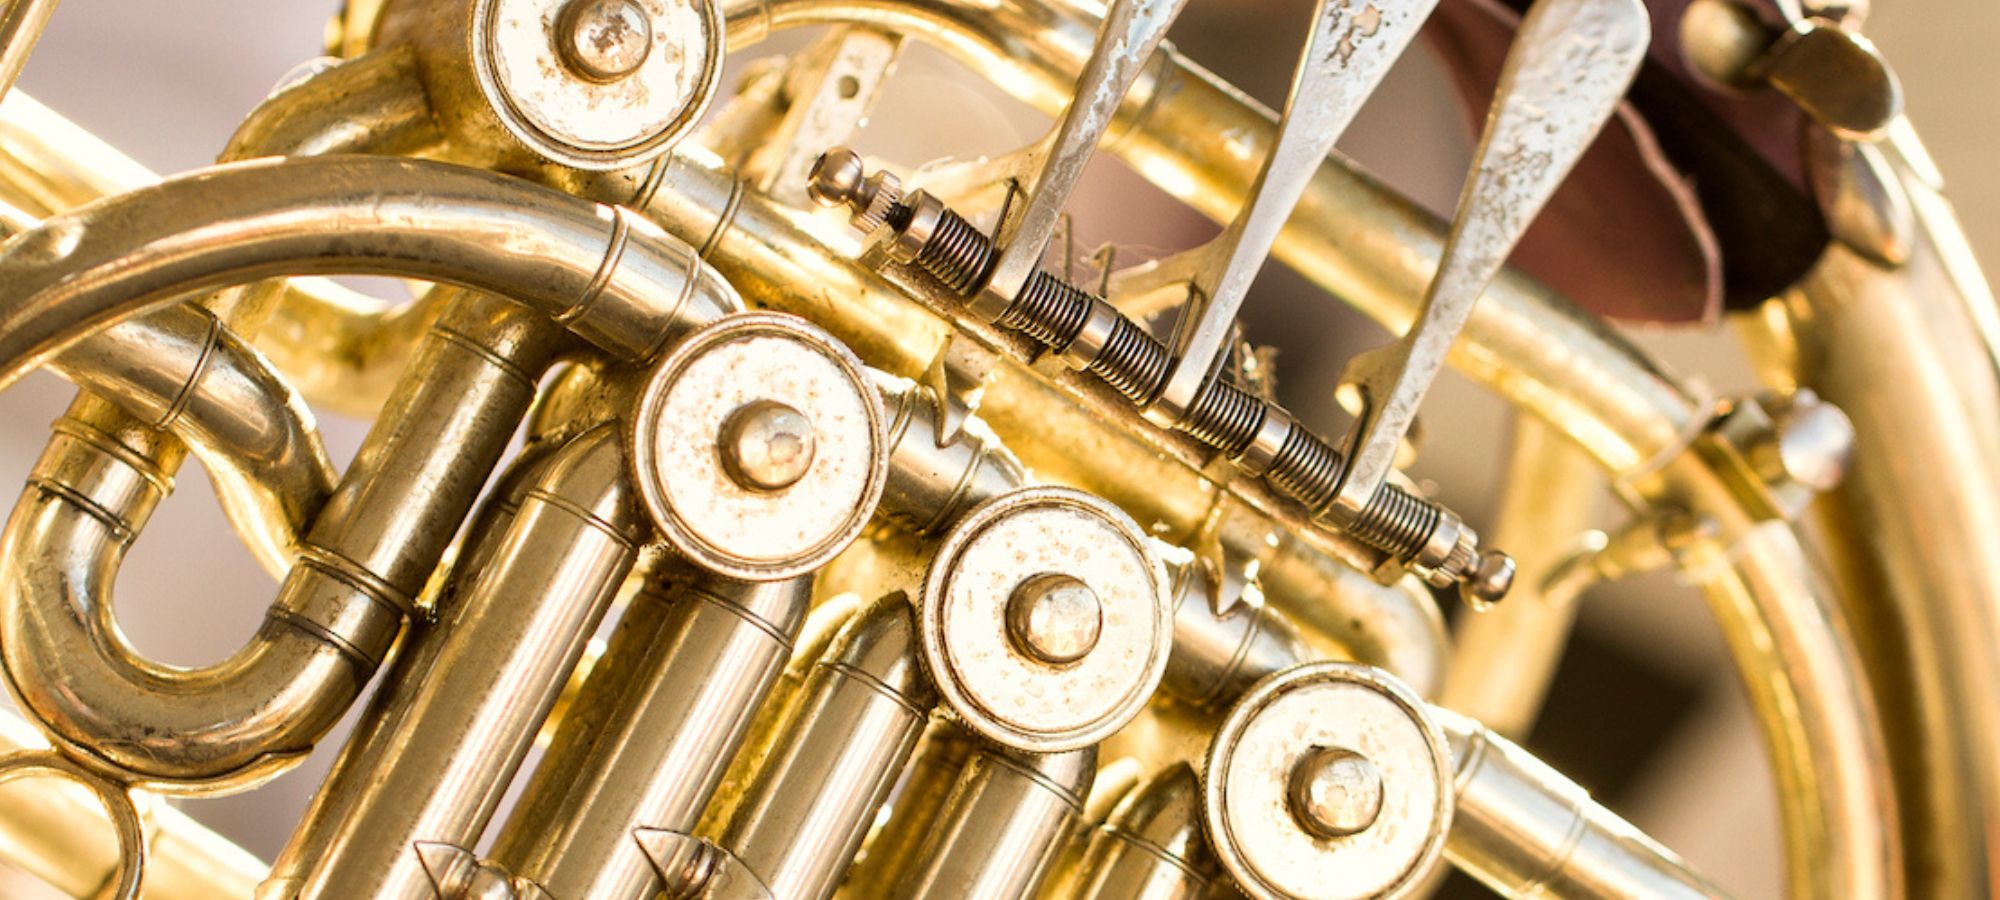
Preparing the Instrument
Before recording brass instruments, it’s essential to ensure that the instrument is in optimal condition. Proper maintenance and preparation can significantly contribute to the overall sound quality. Here are some key steps to prepare the instrument:
- Clean and lubricate: Clean the instrument thoroughly to remove any dirt, debris, or residue that could affect the sound quality. Use appropriate cleaning products and lubricants to maintain smooth movement of valves, slides, and keys.
- Tune the instrument: Ensure that the instrument is properly tuned before recording. Use a reliable tuner to adjust the pitch and intonation as needed. This will help achieve a more accurate and harmonious sound.
- Check for leaks: Inspect the instrument for any air leaks or loose parts that could affect the sound. Pay close attention to valve casings, slide assemblies, and solder joints. Repair or replace any damaged components as necessary.
- Replace worn-out parts: Replace worn-out or damaged parts, such as valve springs, cork pads, or felt bumpers. These small components can have a significant impact on the instrument’s playability and sound quality.
- Warm up the instrument: Before recording, spend some time playing the instrument to warm it up. This allows the brass to reach its optimal temperature and ensures a more consistent tone throughout the recording session.
By properly preparing the instrument, you can ensure that it is in its best possible condition to produce a clear and vibrant sound. Take the time to maintain and care for your brass instrument to achieve optimal results during recording.
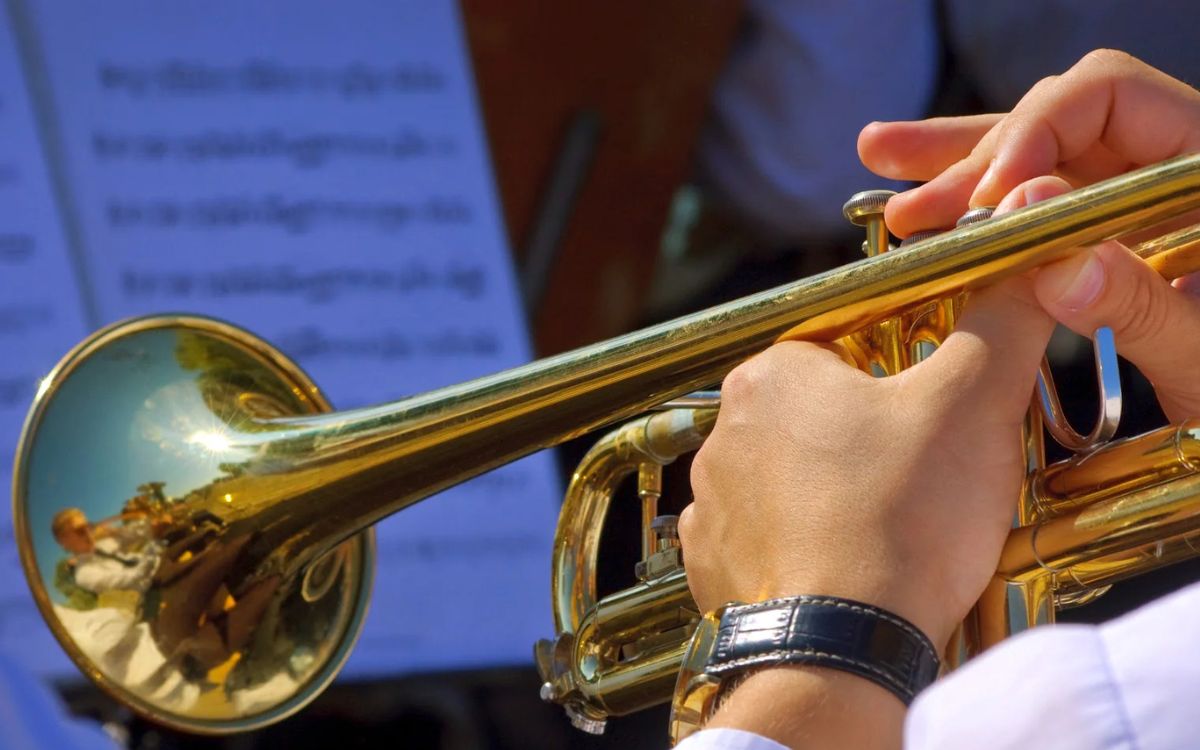
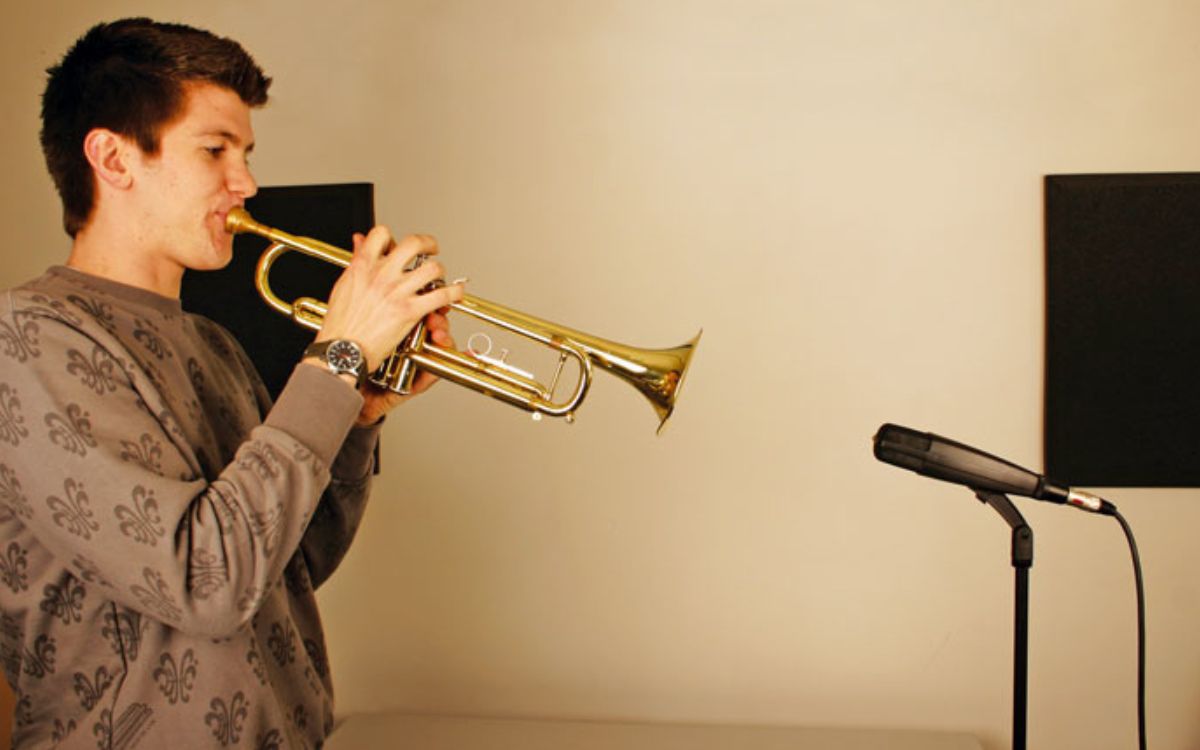
Positioning the Microphone
The placement of the microphone is crucial in capturing the true essence and sound of the brass instrument. Here are some important factors to consider when positioning the microphone:
- Distance: The distance between the microphone and the instrument can greatly affect the recorded sound. For a balanced and natural sound, start with a moderate distance of about 1 to 3 feet away from the instrument. Adjust the distance as needed to achieve the desired sound and balance.
- Angle: The angle of the microphone relative to the instrument can impact the frequency response and overall tonal characteristics. Experiment with different angles to find the sweet spot that captures the desired sound. Placing the microphone slightly off-axis can help minimize unwanted breath noise and other artifacts.
- Placement: Depending on the specific brass instrument, there are optimal microphone placements to consider. For a trumpet or saxophone, positioning the microphone slightly above and in front of the bell can capture the best balance of sound. For a trombone, placing the microphone near the slide or slightly below the bell can yield excellent results.
- Room acoustics: Take the room acoustics into account when positioning the microphone. Different rooms have varying sound reflections and reverberation characteristics, which can impact the recorded sound. Experiment with microphone placement and listen for any unwanted room resonances or echoes.
- Stereo techniques: If recording multiple brass instruments or a brass section, consider using stereo microphone techniques to capture a wider and more immersive sound. This can include techniques such as spaced pair, XY, ORTF, or Blumlein. Experiment with different stereo techniques to find the one that suits the musical context and desired sound.
Remember to listen attentively while adjusting the microphone position to ensure that you are capturing the best sound. It’s also worth experimenting with different microphone types to find the one that complements the brass instrument’s unique tonal qualities.
By strategically positioning the microphone, you can capture the nuances and expressiveness of the brass instrument, resulting in a rich and accurate recording. Take the time to find the optimal microphone placement for each specific instrument and musical context to achieve the best results.
Adjusting Microphone Settings
Once the microphone is properly positioned, adjusting its settings is essential to capture the best possible sound quality. Here are some key microphone settings to consider when recording brass instruments:
- Gain/Preamp: Set the microphone’s gain or preamp level appropriately to ensure a good signal-to-noise ratio. Avoid setting the gain too high, as it can introduce unwanted noise and distortion. Monitor the input levels to prevent clipping and adjust accordingly.
- EQ: Proper equalization can help enhance the tonal characteristics of the brass instrument. Experiment with gentle boosts or cuts in the low, mid, and high-frequency ranges to find the desired tonal balance. Be mindful of not over-processing the sound, as it can lead to an unnatural or harsh tone.
- Compression: Apply compression if necessary to control the dynamic range of the brass instrument. Brass instruments can have wide variations in volume, and compression helps to even out the levels and ensure a more consistent and controlled sound. Use a gentle ratio and adjust the threshold and attack/release settings to retain the natural dynamics of the instrument.
- Polar patterns: Many microphones offer different polar patterns, such as cardioid, omnidirectional, or figure-8. Selecting the appropriate polar pattern can help to minimize unwanted ambient noise or bleed from other instruments. In most cases, a cardioid pattern is suitable for recording brass instruments, as it focuses on capturing sound from the front while rejecting sound from the sides and rear.
- Room ambience: Depending on the desired sonic character, you may want to capture some of the room ambience when recording brass instruments. Adjust the microphone’s sensitivity or add a room microphone to capture the natural reverberation and spaciousness of the recording environment.
Remember to listen critically and make adjustments accordingly. It may take some experimentation to achieve the desired sound, but paying attention to these microphone settings will help you capture the true essence and character of the brass instrument during recording.
Additionally, it is important to reference the sound through high-quality headphones or studio monitors to ensure accurate monitoring and make informed decisions about the microphone settings.
By carefully adjusting the microphone settings, you can sculpt the sound and capture the unique qualities of the brass instrument, resulting in a professional and polished recording.
Playing Techniques
In addition to microphone placement and settings, understanding and implementing appropriate playing techniques can greatly enhance the sound quality when recording brass instruments. Here are some key playing techniques to consider:
- Dynamic control: Brass instruments are capable of a wide dynamic range. Encourage the musician to utilize proper breath control and embouchure technique to achieve a balanced and controlled sound. This will help maintain a steady volume level and avoid sudden jumps in dynamics during recording.
- Articulation: Different articulation techniques, such as legato, staccato, and accenting, can significantly influence the overall sound and musical expression. Work with the musician to ensure precise and consistent articulation, which will contribute to a more polished and coherent recording.
- Expression and phrasing: Brass instruments are known for their expressiveness and ability to shape melodies. Encourage the musician to convey emotional expression and musical phrasing through subtle changes in tone color, dynamics, and timing. This will add depth and personality to the recorded performance.
- Muting: Experiment with different types of mutes to achieve a variety of tonal colors and textures. Mutes can alter the timbre and character of the brass instrument, offering unique sonic possibilities for a recording. Ensure that the musician is proficient in using mutes and incorporate them strategically where appropriate.
- Vibrato and glissandi: Vibrato and glissandi techniques add richness and expressiveness to the sound of brass instruments. Work with the musician to explore the appropriate use of vibrato and glissandi in relation to the musical context, ensuring they are integrated tastefully and enhance the overall musicality of the recording.
Collaborating with the musician during the recording process is crucial to achieving the desired performance and sound quality. Discussing and rehearsing these playing techniques beforehand will ensure a more refined and captivating recording.
Remember, the goal is to capture a natural and expressive performance that showcases the unique qualities of the brass instrument. Encourage the musician to explore different musical interpretations while maintaining a cohesive and balanced sound.
By incorporating these playing techniques, you can elevate the recorded sound and bring out the true potential of the brass instrument.
Controlling Feedback
When working with brass instruments and microphones, feedback can be a common and disruptive issue. Feedback occurs when the sound from the speaker or amplifier is picked up by the microphone, resulting in a high-pitched and often uncontrollable squeal. Here are some techniques to help you control feedback when recording brass instruments:
- Positioning: Proper microphone positioning is crucial for minimizing feedback. Experiment with different microphone angles and distances to find the optimal position that minimizes the chances of feedback. Sometimes, simply moving the microphone slightly can make a significant difference.
- Monitor placement: Ensure that the monitors or speakers are not positioned too close to the microphone. Feedback can occur when the sound from the speakers directly enters the microphone. Adjust the placement of the monitors or use headphones for monitoring during recording to prevent feedback issues.
- Monitor system EQ: Use equalization on the monitor system to reduce the potential for feedback. Cut frequencies that are prone to feedback, such as the frequencies around the resonant notes of the brass instrument. This can help to create a more stable monitoring environment and reduce the chances of feedback occurring during recording.
- Monitor levels: Keep the monitor levels at a reasonable volume to avoid excessive gain. High monitor levels can increase the risk of feedback. Encourage the musician to focus on playing and listening to the instrument rather than relying solely on the monitors.
- Feedback suppressors: Consider using feedback suppressor devices or plugins to automatically detect and suppress feedback frequencies. These tools can be effective in mitigating feedback issues, especially in live performance situations. However, be cautious when using them, as they may affect the overall sound quality if not properly adjusted.
Remember, preventing feedback is a combination of finding the right microphone position, setting appropriate monitor levels, and managing the overall sound system. It may require some trial and error to determine the best approach for controlling feedback in your specific recording environment.
By implementing these techniques and staying vigilant during the recording process, you can minimize feedback and ensure a smoother recording experience, allowing the brass instrument to shine without unwanted distractions.
Post-production Techniques
After recording brass instruments, post-production techniques can be employed to further enhance the sound and achieve a polished final product. Here are some post-production techniques to consider:
- Editing and cleanup: Use audio editing software to trim and align the recorded tracks, ensuring precise timing and eliminating any unwanted noises or breath sounds. Additionally, you can use noise reduction tools to minimize background noise and improve the overall clarity of the recording.
- Equalization (EQ): Apply EQ to enhance the tonal balance and shape the sound of the brass instruments. Use gentle boosts or cuts in specific frequency ranges to bring out the desired characteristics and remove any harsh or muffled frequencies. Be mindful of maintaining a natural and balanced sound throughout the process.
- Compression: Utilize compression during post-production to further control the dynamic range of the brass instruments. This can help bring out nuances in the performance and ensure a consistent and controlled sound. Adjust the compression settings to retain the instrument’s natural dynamics and avoid over-processing.
- Reverb and ambience: Adding a touch of reverb or ambience can enhance the spaciousness and depth of the brass instrument recordings. Experiment with different reverb settings or utilize convolution reverbs to replicate the acoustics of specific environments. Be careful not to overdo it, as excessive reverb can diminish the clarity and definition of the brass instruments.
- Stereo imaging: If recording in stereo or utilizing stereo microphone techniques, consider adjusting the stereo imaging during post-production. This can help to create a wider and more immersive soundstage, providing a more realistic listening experience. Pan individual tracks or apply stereo width enhancement techniques to enhance the spatial characteristics of the recording.
When applying post-production techniques, it’s important to have a well-calibrated monitoring system and critically listen to the changes being made. Make incremental adjustments and frequently reference the original recorded sound to ensure that the modifications complement and enhance the natural qualities of the brass instruments rather than detract from them.
Remember that post-production techniques should be used as tools to refine and enhance the recordings, not to fix fundamental flaws. A balanced and skillful approach to post-production can elevate the sound of the brass instruments and transform a good recording into a professional and engaging final product.
Troubleshooting Tips
During the process of recording brass instruments, various issues may arise that require troubleshooting. Here are some common problems and tips to address them:
- Excessive breath noise: Brass instruments can produce noticeable breath noise, especially during quiet passages. To minimize this issue, encourage the musician to control their breath flow and use proper embouchure techniques. Additionally, positioning the microphone slightly off-axis or using a pop filter can help reduce prominent breath sounds in the recording.
- Clip distortion: If the recorded sound becomes distorted or clipped, adjust the microphone’s gain or preamp level to prevent overloading. Ensure that the input levels are within a suitable range, and if necessary, ask the musician to play with reduced intensity or distance from the microphone. In post-production, try using a clip gain plugin to decrease the level of the clipped sections.
- Inconsistent volume levels: Brass instruments can have varying volume levels, resulting in imbalanced recordings. Encourage the musician to maintain a steady distance from the microphone and consistently control their dynamic range. In post-production, use compression to even out the levels and ensure a more consistent recording.
- Unwanted room reflections: If the room has excessive reflections or reverberations that negatively impact the recorded sound, consider using acoustic treatment and sound-absorbing materials to minimize these reflections. Place baffles or acoustic panels strategically around the recording area to reduce unwanted room resonances and create a more controlled recording environment.
- Unintended resonance: Sometimes, certain frequencies can resonate and produce unwanted vibrations in brass instruments. Experiment with microphone placement and angles to minimize these resonances. Additionally, using a high-pass filter during recording or post-production can help mitigate low-frequency resonances that can muddy the sound.
It’s important to address these issues promptly to ensure a successful recording. Communicating with the musician and actively listening during the recording process can help identify and resolve problems early on.
Keep in mind that troubleshooting may require a combination of techniques and adjustments, and it may take some experimentation to find the best solutions for your specific recording setup and environment.
By being proactive and attentive, you can overcome these challenges and achieve a clean, balanced, and high-quality recording of brass instruments.
Conclusion
Recording brass instruments can be a rewarding yet challenging endeavor. By understanding the unique characteristics of brass instruments and employing the techniques outlined in this comprehensive guide, you can capture their true essence and achieve remarkable sound quality when recording. From preparing the instrument and positioning the microphone correctly to adjusting microphone settings and implementing playing techniques, each step plays a vital role in creating a captivating recording.
Remember to listen attentively, communicate effectively with the musician, and approach the recording process with creativity and a keen ear. Troubleshoot and address any issues that may arise promptly, ensuring a smooth and enjoyable recording experience.
Post-production techniques such as editing, equalization, and compression can further refine and enhance the recorded sound, while troubleshooting tips can assist in resolving common problems that may occur during the recording process.
As you embark on your journey of recording brass instruments, remember that patience, experimentation, and collaboration are key. Each instrument has its own unique qualities, and capturing the nuances, expressiveness, and power of brass instruments requires a combination of technical expertise and artistic interpretation.
By following the guidelines outlined in this guide, you can elevate the sound of brass instruments on microphones and create professional and engaging recordings that showcase the beauty and versatility of these remarkable instruments.
Now, armed with this knowledge, go forth and capture the rich, vibrant, and awe-inspiring sound of brass instruments with confidence and creativity.