Home>Instruments>Guitar>How To Finish A Guitar Neck
Guitar
How To Finish A Guitar Neck
Published: February 12, 2024
Learn how to expertly finish a guitar neck with our step-by-step guide. Discover the best techniques and products for a flawless result. Perfect for guitar enthusiasts and luthiers alike.
(Many of the links in this article redirect to a specific reviewed product. Your purchase of these products through affiliate links helps to generate commission for AudioLover.com, at no extra cost. Learn more)
Table of Contents
Introduction
So, you've got a guitar with a neck that's seen better days. Whether it's dinged, scratched, or just worn from years of playing, giving the neck a fresh finish can breathe new life into your instrument. Not only does a refinished neck look great, but it can also make playing more comfortable and enjoyable.
Refinishing a guitar neck may seem like a daunting task, but with the right tools, materials, and know-how, it's a project that's well within reach for any guitarist. In this guide, we'll walk through the step-by-step process of finishing a guitar neck, from removing the old finish to applying a new one and adding the final touches.
Before diving into the process, it's important to note that patience and attention to detail are key. Taking your time and following each step carefully will help ensure a professional-looking result. Additionally, working in a well-ventilated area and using proper safety gear, such as a respirator mask and protective eyewear, is crucial when dealing with finishing products.
Now, let's gather our materials and get ready to revitalize that guitar neck!
Tools and Materials Needed
Before embarking on the journey of refinishing a guitar neck, it’s essential to gather all the necessary tools and materials. Here’s a comprehensive list to ensure you’re well-prepared for the task:
Tools:
- Screwdriver or Allen wrench (to remove the neck from the guitar, if necessary)
- Masking tape or painter's tape
- Sandpaper of varying grits (e.g., 220, 320, 400, 600) or sanding sponges
- Tack cloth or lint-free cloths
- Respirator mask
- Protective eyewear
- Work gloves
- Small paintbrushes or foam brushes
- Stir sticks or mixing tools
- Rubber gloves (for working with certain finishing products)
- Spray gun or aerosol canister (for applying certain finishes)
- Workbench or sturdy table with clamps
Materials:
- Finish remover or stripping agent
- Wood filler (if there are any dents or imperfections to be filled)
- Wood stain or dye (if a colored finish is desired)
- Clear finish (e.g., lacquer, polyurethane, or tung oil)
- Mineral spirits or denatured alcohol (for cleaning)
- Masking paper or plastic sheeting (to protect surrounding areas from overspray)
- Old newspapers or disposable drop cloths
- Well-ventilated workspace or outdoor area
Gathering these tools and materials will set the stage for a successful guitar neck refinishing project. With everything in hand, you’ll be ready to tackle the next steps with confidence.
Removing the Old Finish
Before applying a new finish to the guitar neck, it’s crucial to remove the existing finish thoroughly. This process requires careful attention to detail and the use of appropriate tools and products. Here’s a step-by-step guide to effectively remove the old finish:
Step 1: Prepare the Work Area
Begin by setting up your work area in a well-ventilated space, preferably outdoors or in a workshop with proper ventilation. Cover the surrounding area with masking paper or plastic sheeting to protect it from any potential splatter or overspray.
Step 2: Remove the Neck (If Necessary)
In some cases, it may be easier to remove the neck from the guitar body before refinishing. Use a screwdriver or Allen wrench to detach the neck, following the manufacturer’s instructions for your specific guitar model.
Step 3: Apply Finish Remover
Using a brush or cloth, apply a suitable finish remover or stripping agent to the neck. Be sure to choose a product that is safe for use on the type of finish you’re removing (e.g., nitrocellulose lacquer, polyurethane, etc.). Follow the manufacturer’s instructions regarding application and dwell time.
Step 4: Remove the Old Finish
After the finish remover has had time to work, use a scraper or a coarse, non-metallic abrasive pad to gently remove the softened finish. Take care not to damage the wood beneath the finish. Depending on the thickness and type of the old finish, this process may need to be repeated multiple times until the neck is free of the old coating.
Step 5: Clean the Surface
Once the old finish has been removed, use a clean cloth dampened with mineral spirits or denatured alcohol to wipe down the neck and remove any remaining residue. This step is crucial to ensure that the new finish adheres properly to the wood surface.
By following these steps, you’ll effectively strip the old finish from the guitar neck, setting the stage for the next phases of the refinishing process. With the old finish removed, the neck is now ready for the next steps in the transformation process.
Sanding and Smoothing the Neck
Once the old finish has been removed from the guitar neck, the next crucial step in the refinishing process is to sand and smooth the wood surface. This phase not only prepares the neck for the new finish but also ensures a sleek and professional final result. Here’s a detailed guide on how to sand and smooth the neck effectively:
Step 1: Evaluate the Surface
Begin by inspecting the neck to identify any imperfections, scratches, or dents that may need attention. If there are noticeable dings or dents, consider using a suitable wood filler to level the surface before sanding.
Step 2: Start with Coarse Grit Sandpaper
Using sandpaper with a coarse grit (e.g., 220), begin sanding the neck in the direction of the wood grain. This initial sanding step helps to smooth out any rough areas and remove uneven surfaces left from the finish removal process.
Step 3: Progress to Finer Grits
Gradually progress to sandpaper with finer grits (e.g., 320, 400, and 600) to further refine the surface and achieve a smooth texture. Each successive grit helps to remove the scratches left by the previous grit, resulting in a progressively finer finish.
Step 4: Sanding Technique
Maintain a consistent sanding motion, applying even pressure and keeping the sandpaper flat against the neck. Be mindful of the neck’s contours and take care to sand evenly across the entire surface, including the sides and headstock.
Step 5: Smooth the Fretboard
If the fretboard is part of the refinishing process, take care to sand it gently to remove any old finish and smooth the wood surface. Use masking tape to protect the frets and ensure that only the fretboard is sanded.
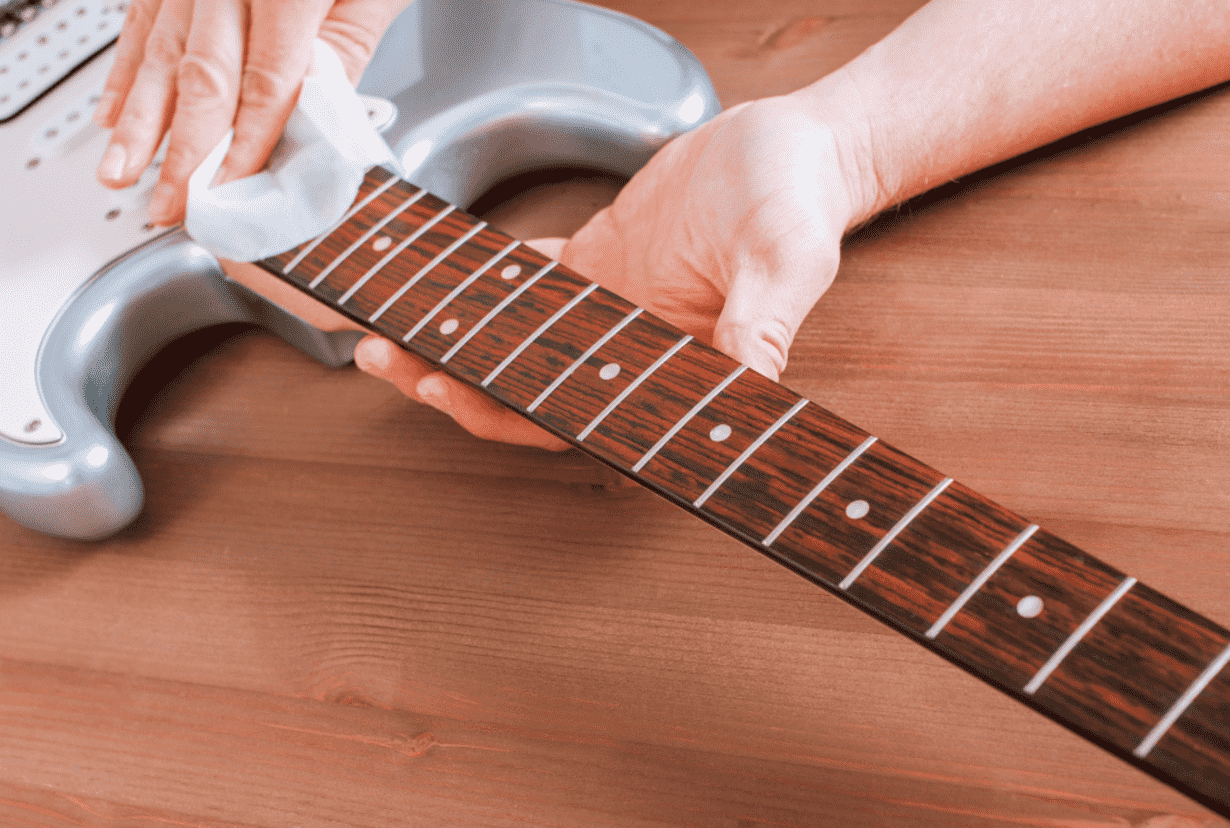
Step 6: Clean the Surface
After sanding with the finest grit, use a tack cloth or a lint-free cloth to remove any sanding dust from the neck. This step prepares the surface for the application of the new finish.
By diligently following these steps, you’ll effectively sand and smooth the guitar neck, setting the stage for the application of the new finish. The meticulous attention to detail during this phase contributes to a professional and polished outcome, ensuring that the neck looks and feels rejuvenated.
Applying the New Finish
With the guitar neck meticulously prepared through the removal of the old finish and the sanding process, it’s now time to apply the new finish. This phase of the refinishing project is where the neck truly begins to transform, taking on a fresh and revitalized appearance. Here’s a comprehensive guide on how to effectively apply the new finish to the guitar neck:
Step 1: Choose the Right Finish
Select a suitable finish for the guitar neck, considering factors such as desired aesthetics, durability, and the type of wood. Common options include nitrocellulose lacquer, polyurethane, and tung oil, each offering distinct characteristics in terms of appearance and feel.
Step 2: Prepare the Workspace
Set up your workspace for applying the finish, ensuring a clean, well-ventilated area free from dust and debris. Use masking paper or plastic sheeting to protect the surrounding area from overspray or drips.
Step 3: Apply the First Coat
Using a small paintbrush, foam brush, or spray gun, apply the first coat of the chosen finish to the neck. Work methodically, applying the finish evenly in the direction of the wood grain. Take care to avoid drips or pooling of the finish, maintaining a consistent application across the entire surface.
Step 4: Allow for Drying and Curing
Follow the manufacturer’s guidelines regarding drying and curing times for the specific finish being used. It’s crucial to allow each coat to dry thoroughly before applying subsequent coats, ensuring a smooth and flawless finish.
Step 5: Sanding Between Coats
For certain finishes, such as lacquer, sanding between coats may be necessary to achieve a glass-like smoothness. Use fine-grit sandpaper (e.g., 600) to lightly sand the neck between coats, creating a surface that’s ready for the next application of finish.
Step 6: Apply Additional Coats
Continue applying additional coats of finish, allowing each coat to dry and sanding between coats as needed. The number of coats required may vary depending on the desired level of build and the specific characteristics of the chosen finish.
By meticulously following these steps, you’ll effectively apply the new finish to the guitar neck, transforming it into a stunning focal point of the instrument. The careful application of the finish contributes to the overall aesthetics and feel of the neck, ensuring a professional and enduring result.
Final Touches and Maintenance Tips
As the process of refinishing the guitar neck nears completion, attention to final touches and maintenance tips is essential to ensure a polished and enduring outcome. Here’s a comprehensive guide to the concluding steps and valuable maintenance tips for the newly refinished guitar neck:
Step 1: Reassemble the Guitar
If the neck was removed from the guitar body during the refinishing process, carefully reattach it following the manufacturer’s guidelines. Ensure a snug and secure fit, and make any necessary adjustments to the instrument’s setup as needed.
Step 2: Polish and Buff
Once the final coat of finish has cured, consider polishing and buffing the neck to enhance its luster and smoothness. Using a suitable polishing compound and a soft cloth, gently buff the neck to achieve a glossy and refined appearance.
Step 3: Conditioning the Fretboard
If the fretboard is part of the refinishing process, consider conditioning it with a suitable fretboard oil or conditioner. This helps to nourish the wood, maintain its integrity, and enhance its visual appeal.
Step 4: Settle and Play
Allow the newly refinished neck to settle and acclimate to its environment before rigorous playing. This allows the finish to fully cure and ensures long-term stability and durability.
Maintenance Tips:
- Regularly clean the neck with a soft, lint-free cloth to remove fingerprints, sweat, and debris.
- Use a suitable guitar polish to maintain the luster and protect the finish from wear and tear.
- Monitor the neck for any signs of wear or damage, addressing any issues promptly to preserve the finish and the wood beneath it.
- Store the guitar in a stable environment with moderate humidity to prevent adverse effects on the finish and the wood.
By attending to these final touches and implementing proactive maintenance practices, you’ll ensure that the newly refinished guitar neck maintains its beauty, integrity, and playability for years to come. With proper care and attention, the neck will continue to be a source of pride and joy, enhancing the overall playing experience and visual appeal of the instrument.